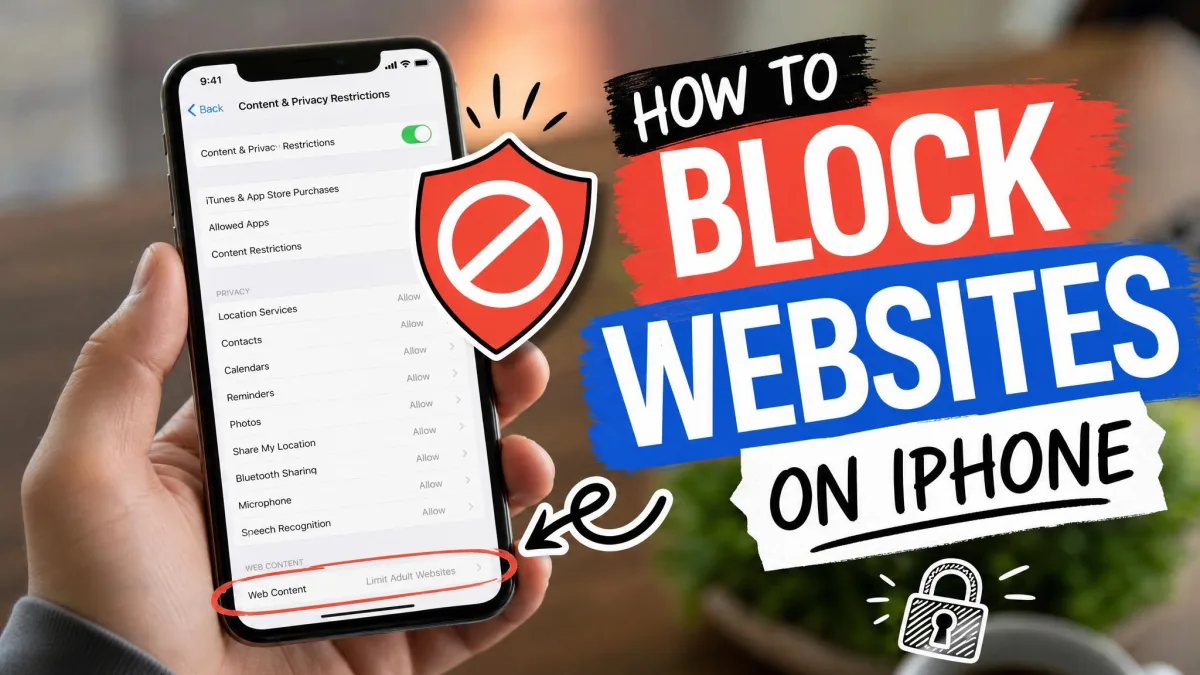
Safari has no button that says "block this site," so most people open the browser, hunt through its settings, and come up empty. The control you want is not in Safari at all. It sits in Screen Time, under Content & Privacy Restrictions, and it works the same way on iPhone, iPad, and Mac once you know where to look.
This guide walks through every reliable method, from the two-minute Screen Time block to DNS filtering that covers a whole house. Each one has a different reach and a different weak spot, and we say plainly which is which.
The Fastest Way to Block a Website on Safari
If you only need one site gone and you are holding the device, use Screen Time's Never Allow list.
- Open Settings and tap Screen Time.
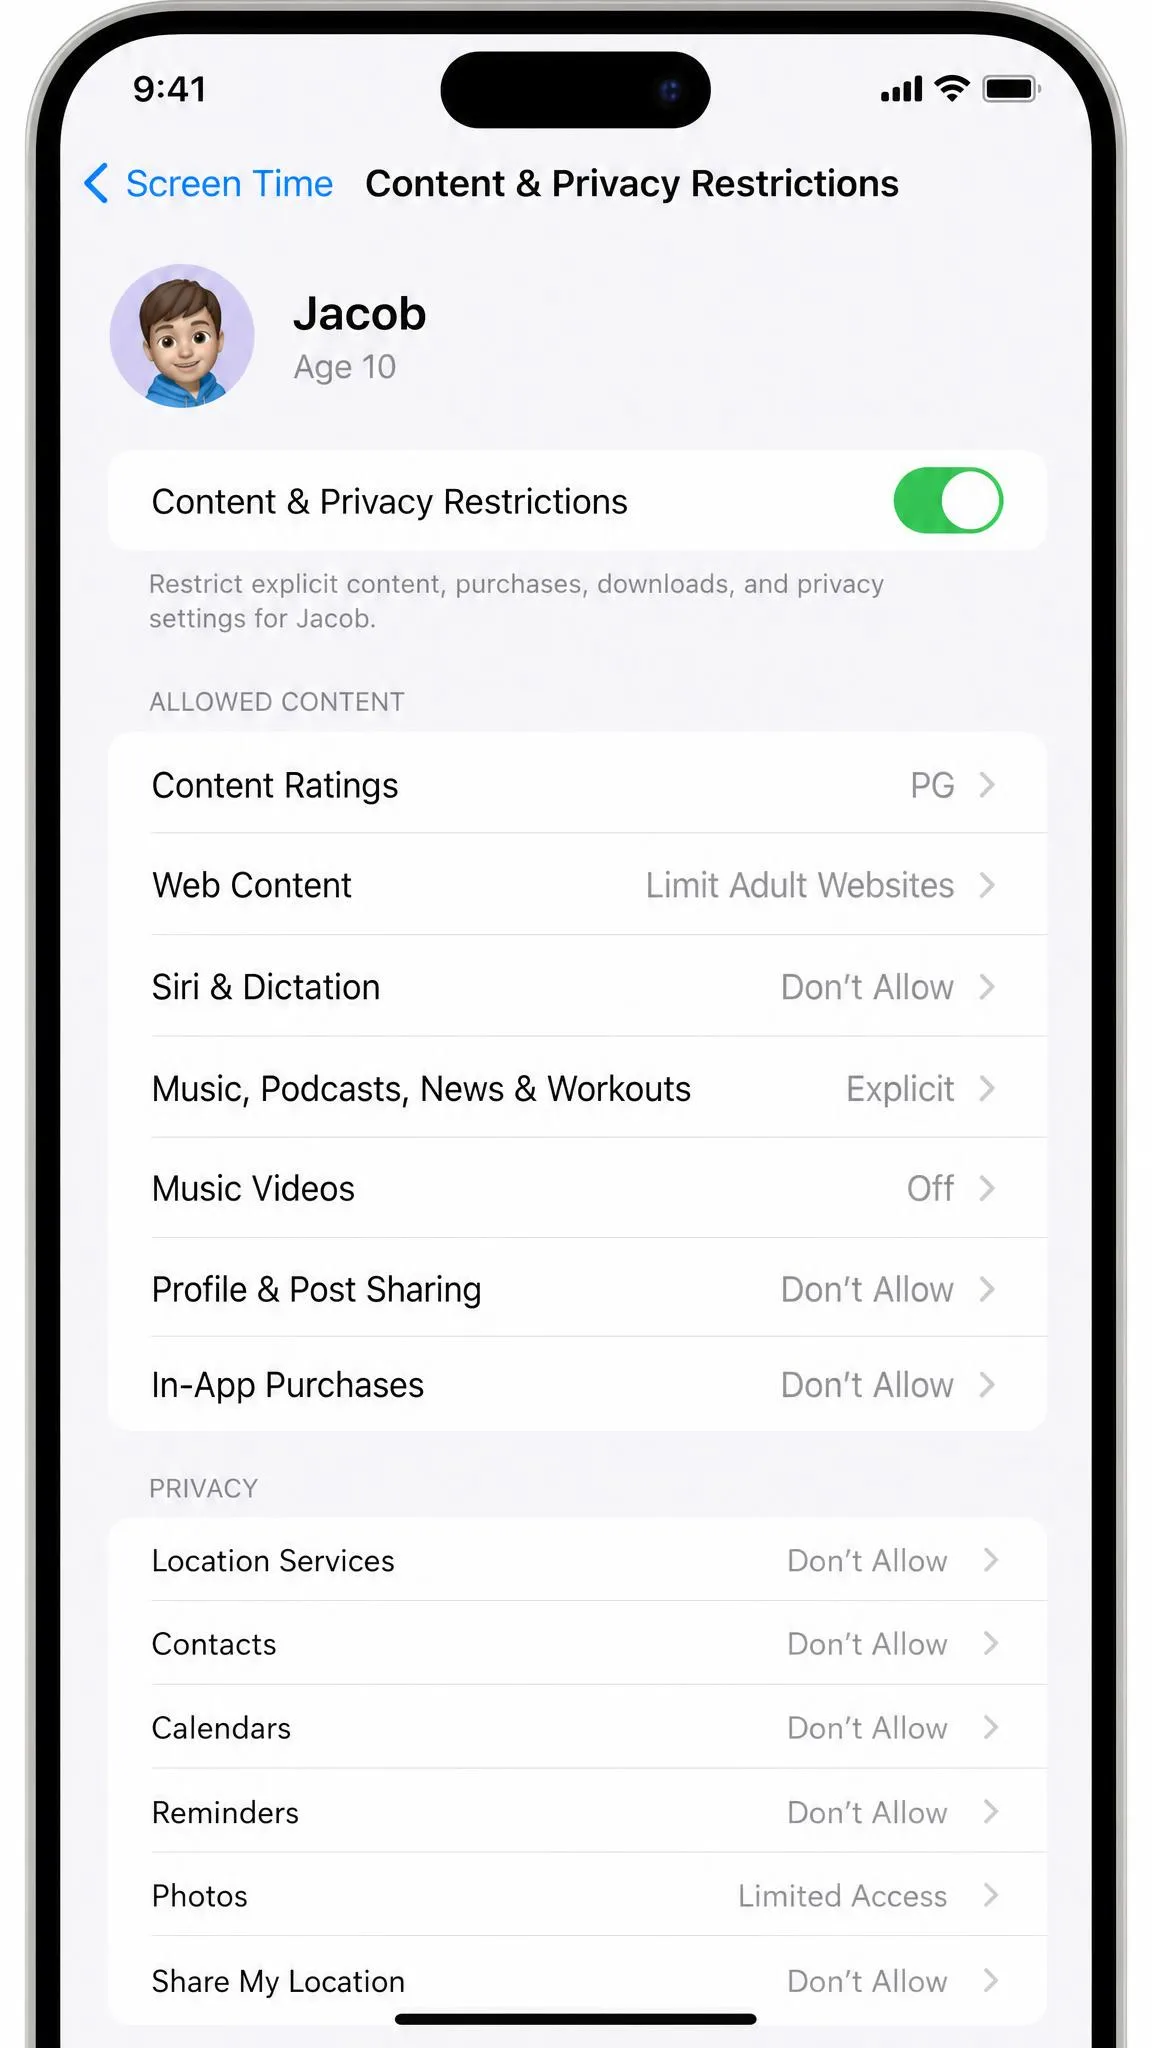
- Tap Content & Privacy Restrictions and turn the switch on.
- Tap App Store, Media, Web, & Games, then tap Web Content.
- Choose Limit Adult Websites.
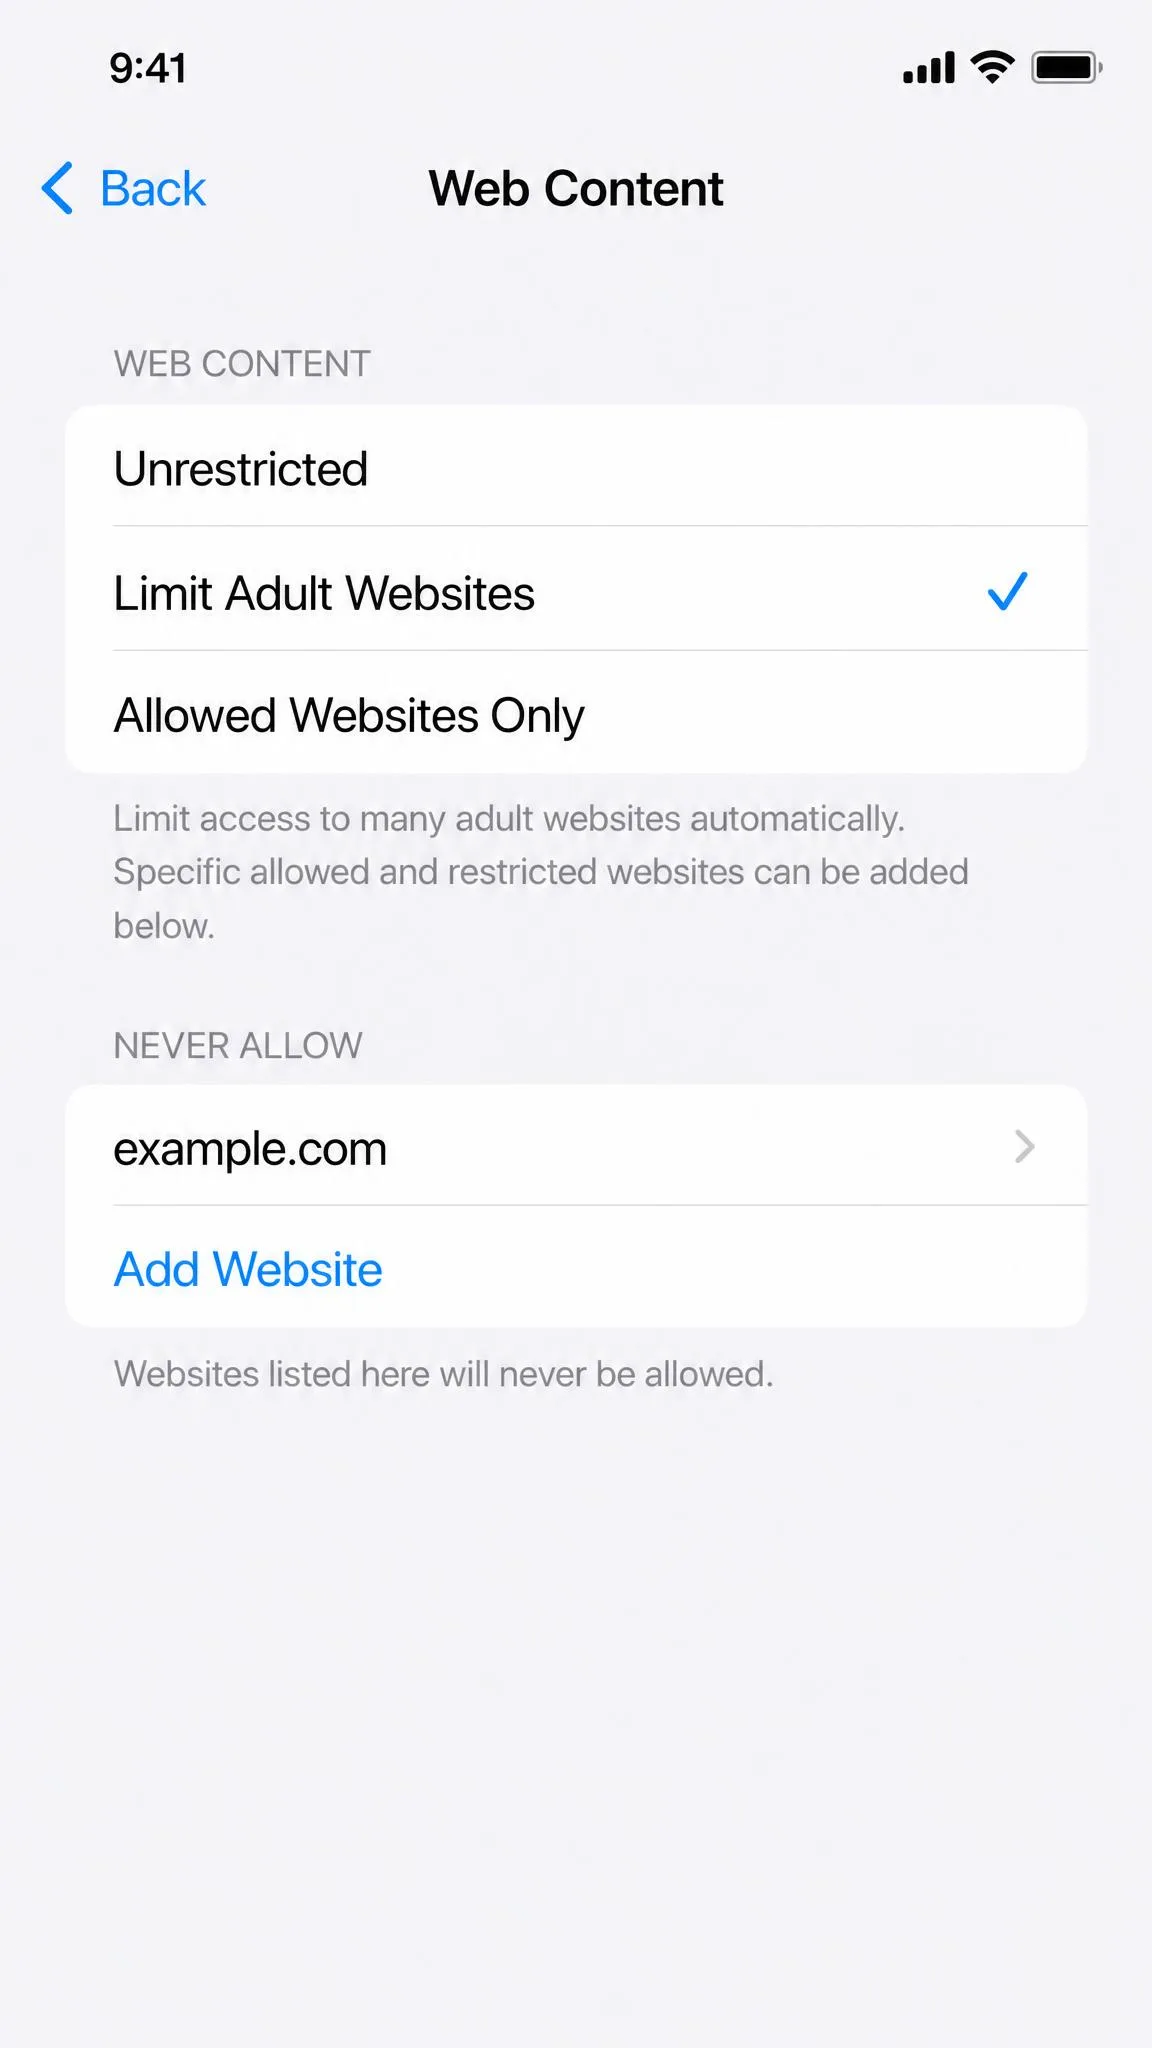
- Under Never Allow, tap Add Website and type the address, for example www.example.com.
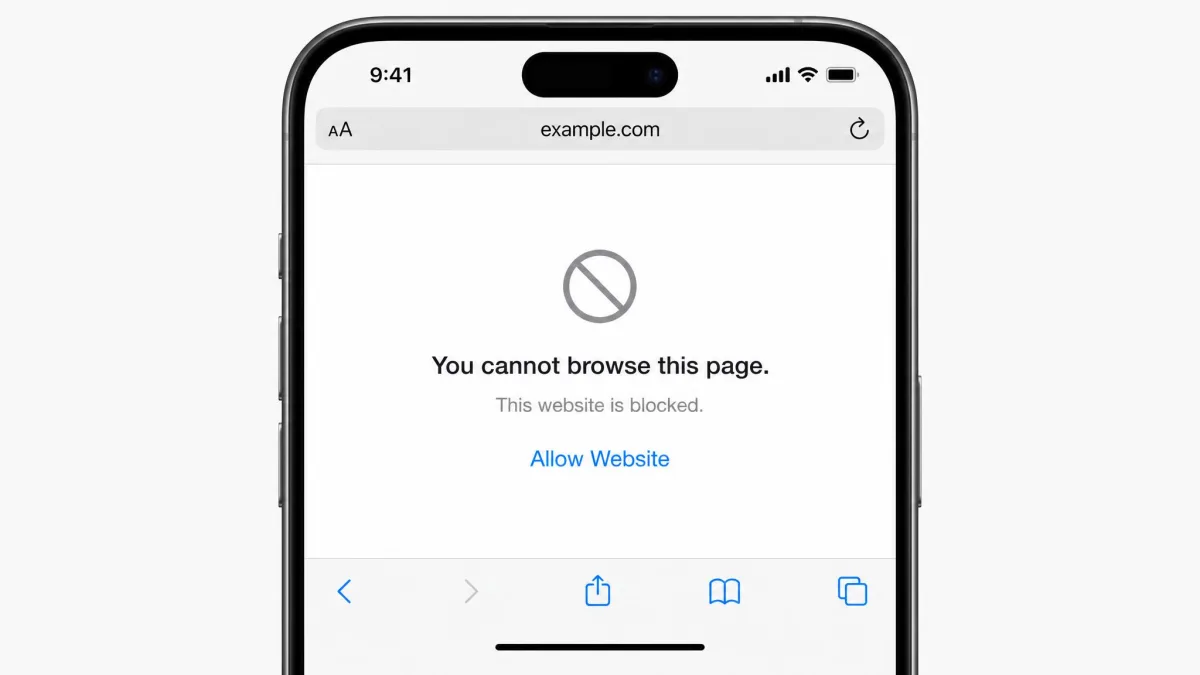
The block applies the moment you leave the screen. Open Safari and load the site, and you get a "You cannot browse this page" notice with an option to allow it, which is exactly why the next step matters.
Set a Screen Time passcode before you consider the job done, and make it different from the code that unlocks the device. Without that, anyone can walk back into Settings and switch the whole thing off.
How to Block Websites on Safari on iPhone and iPad
Everything on iOS and iPadOS runs through Screen Time, and the same menu path handles single-site blocks, adult-content filtering, and strict allow lists. Apple's current iPhone guide covers iOS 26, and the layout has been stable across recent releases.
Turn On Screen Time and Set a Passcode
The passcode is what turns a suggestion into a control, so set it first.
- Open Settings, tap Screen Time, and turn Screen Time on if it is not already running.
- Tap Lock Screen Time Settings and enter a four-digit code.
- Enter the code again to confirm.
- Sign in with your Apple Account when prompted, so the code can be recovered later.
- Go back to Screen Time and open Content & Privacy Restrictions.
That Apple Account step is easy to skip and expensive to skip. Recovering a forgotten Screen Time passcode only works when an Apple Account was attached as the recovery method, and without one the fallback is erasing the device and setting it up again. The recovery link appears under Change Screen Time Passcode as Forgot Passcode?, though a code set before iOS 13.4 and never changed since may not offer it.
App limits and downtime sit alongside these web restrictions in the same Screen Time menu; our guide to set up parental controls on iPhone covers them.
Block Specific Websites (Blacklist)
A block list is the right tool when you have a short, known list of sites to shut out: one social network, one game portal, one shopping site that keeps eating an evening.
- In Content & Privacy Restrictions, tap App Store, Media, Web, & Games.
- Tap Web Content.
- Select Limit Adult Websites.
- Scroll to Never Allow and tap Add Website.
- Type the full domain and tap Done.
Repeat for each site you want to add. In our experience this stops being practical past a handful of entries, because you add them one at a time and there is no way to block a whole category in a single move. If your list is growing, DNS filtering further down this guide is the better fit.
The mirror of that list is Always Allow, which forces a site through even when the adult filter would otherwise catch it.
Allow Only Approved Websites (Whitelist)
The third Web Content mode inverts the logic. Instead of naming what to block, you name what to permit, and everything else fails to load.
- Open Settings > Screen Time > Content & Privacy Restrictions and tap App Store, Media, Web, & Games.
- Tap Web Content.
- Select Only Approved Websites, labelled Allowed Websites Only in some releases.
- Review the default list of child-friendly sites Apple supplies.
- Tap Add Website, then enter a title and URL for each site you want permitted.
This is the strictest option Apple gives you, and it works. It also cuts into everyday schoolwork, because anything not on the list simply will not open. We would reserve it for young children's devices and rethink it once homework starts arriving from the web.
Limit Adult Websites Automatically
Limit Adult Websites is the middle setting and the one most parents want. It does not read a list you supply. Apple maintains its own set of known adult domains and pairs it with on-device detection, so it filters sites you have never heard of.
Set it exactly as above: Web Content, then Limit Adult Websites. There is nothing further to configure, and it takes effect immediately.
Be clear-eyed about what it delivers. Plenty of explicit sites still get through, because new adult domains and mirror URLs appear faster than any maintained list updates. It is a strong first layer and a poor last one. Pairing it with a filtering DNS service, covered below, closes most of the gap. If your goal is broader than Safari alone, our guide to block adult sites on all devices covers the same job across phones, tablets, and computers.
Turning on any Web Content setting other than Unrestricted removes the Private Browsing option from Safari altogether. The tab bar simply stops offering it, which closes the most obvious bypass without any extra work from you.
How to Block Websites on Safari on Mac
macOS gives you three routes: the same Screen Time controls in a desktop wrapper, a hosts file edit for people comfortable in Terminal, and Safari extensions.
Using Screen Time on macOS
Apple's Content and Privacy Restrictions guide covers macOS Tahoe 26, with older versions selectable from the same page.
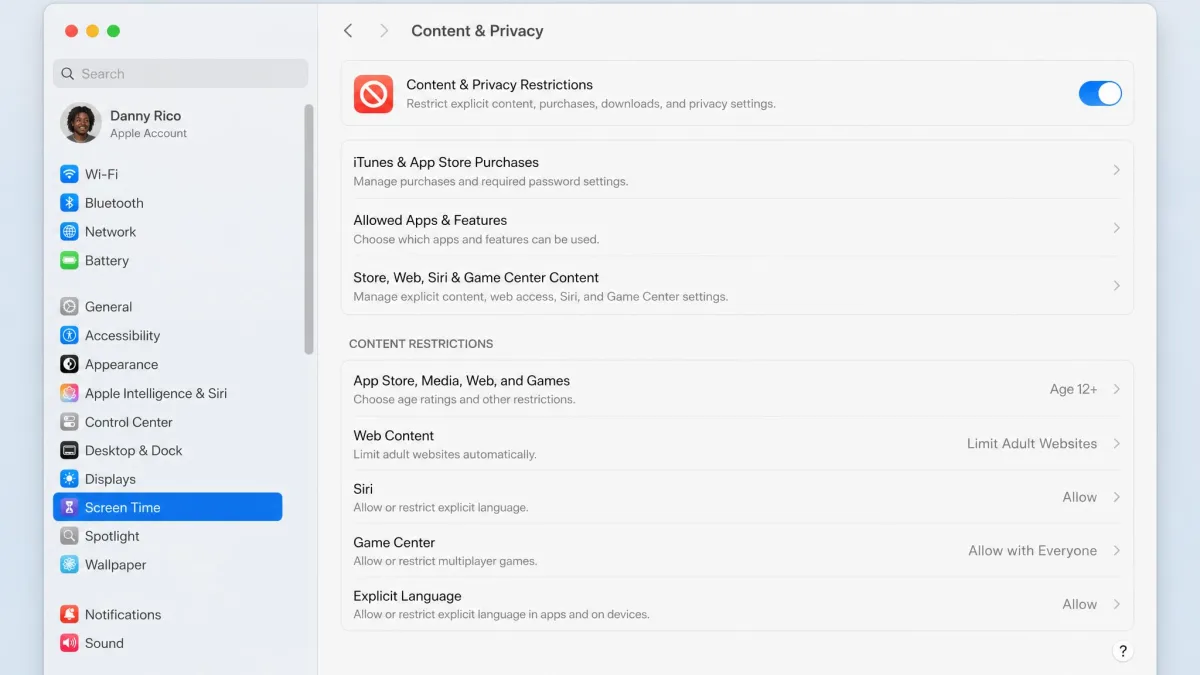
- Open the Apple menu and click System Settings.
- Click Screen Time in the sidebar.
- Click Content & Privacy and turn it on.
- Click App Store, Media, Web, & Games.
- Open the web content row and choose Limit Adult Websites or Only Approved Websites.
- Click Customize, then use the add button to enter the domains you want restricted or allowed.
The row that holds the web setting reads Access to Web Content on the machines we have used, though the exact label shifts between macOS releases, so the wording on screen may differ slightly from Apple's current guide. The three modes underneath are the same three you get on iPhone.
Editing the Hosts File in Terminal
The hosts file is a plain text file macOS checks before it asks a DNS server for an address. Point a domain at your own machine and the browser never reaches the real site. It applies to every browser on the Mac, not just Safari.
Open Terminal from Applications > Utilities, then:
- Type sudo nano /etc/hosts and press Return.
- Enter your administrator password when prompted.
- Use the arrow keys to move to the end of the file.
- Add a line for each site: 127.0.0.1 www.example.com.
- Add a second line without the www prefix so both forms are covered.
- Press Control-O then Return to save, and Control-X to quit.
- Flush the DNS cache with sudo dscacheutil -flushcache && sudo killall -HUP mDNSResponder.
That last command is not optional. A hosts edit often looks like it failed until the cache is flushed, because Safari keeps serving the address it already had. If the site still loads after a flush, quit Safari completely and reopen it.
Editing /etc/hosts changes how the whole system resolves names, and a bad line causes problems that are hard to trace back to this file weeks later. Copy the file first with sudo cp /etc/hosts /etc/hosts.backup so you can put it back. Keep the list under about 1000 entries too, since a very long hosts file slows the Mac down noticeably.
Two limits are worth naming. The hosts file exists on macOS only and has no iPhone or iPad equivalent, so it does nothing for a family iPad. And any account with admin rights can reopen the file and delete your lines, so it only holds on a Mac where the person being blocked is a standard user.
Using a Safari Content Blocker Extension
If Terminal is not your idea of a good afternoon, an extension does similar work with a normal interface. Commonly used options include 1Blocker, BlockSite, Freedom, One Sec, SelfControl, 1Focus, and Cold Turkey.
- Open the App Store on your Mac and search for the blocker you want.
- Download and install it, then open the app once to complete setup.
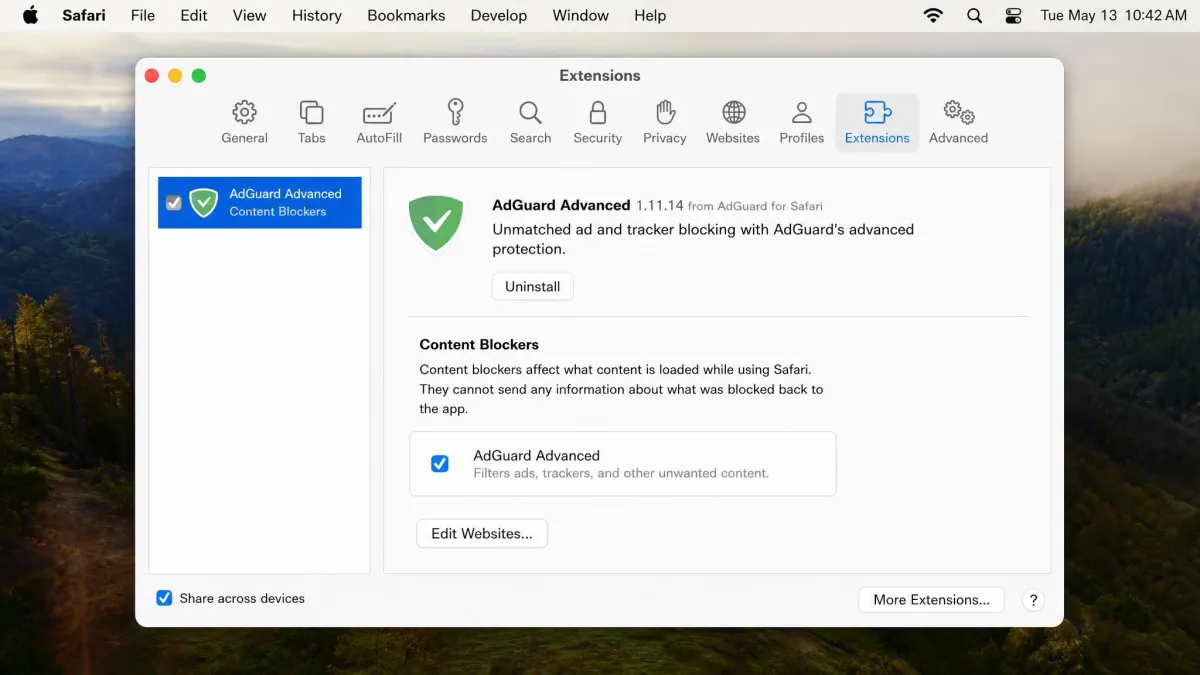
- Open Safari > Settings > Extensions.
- Tick the box next to the extension to enable it.
- Click Edit Websites and grant the permissions the extension needs.
- Return to the app and add the domains you want blocked.
Check the private-window permission while you are in that Extensions panel. Safari extensions frequently need a separate toggle before they run in Private Browsing, and an extension that is off in private windows is a block with an open side door.
The catch with extensions is scope. They cover one browser on one device, they can be disabled by anyone who can open Safari's settings, and desktop-class focus tools such as Cold Turkey have no iPhone or iPad version. Free tiers also cap how many locks you can create.
How to Block Websites on Safari Without Screen Time
Screen Time controls one Apple Account's devices. If you want a block that reaches a smart TV, a games console, a guest laptop, and a child's phone at the same time, you need to work a layer lower.
DNS-Level Filtering
Every time Safari opens a site, it asks a DNS server to turn the name into an address. Point the device at a filtering resolver and blocked domains never resolve.
Cloudflare for Families is the simplest place to start. Use 1.1.1.3 and 1.0.0.3 for malware plus adult-content blocking, or 1.1.1.2 and 1.0.0.2 for malware only. On IPv6 the family resolver is 2606:4700:4700::1113. A filtered domain comes back as 0.0.0.0 rather than the real address, so the page just fails to load. There is no account to create and no software to install.
OpenDNS FamilyShield is an equally free alternative with adult filtering already switched on: 208.67.222.123 and 208.67.220.123. For more control, NextDNS adds category filtering, per-device profiles, SafeSearch enforcement, scheduling, and query logs. Its free plan covers 300,000 queries a month across unlimited devices, and Pro is $1.99 per month or $19.90 a year for unlimited queries.
To set it on an iPhone:
- Open Settings > Wi-Fi.
- Tap the i button beside your network.
- Tap Configure DNS and switch from Automatic to Manual.
- Delete the existing servers, then tap Add Server.
- Enter each address in turn and tap Save.
On a Mac, the same change lives in System Settings > Network > Wi-Fi > Details > DNS.
The trade-off is repetition. You change DNS per network on both iPhone and Mac, so every new Wi-Fi network needs the change made again unless you handle it at the router instead.
Router-Level Blocking for Every Device
Setting the filtering DNS on your router pushes it to every device that joins the Wi-Fi, including hardware with no parental controls of its own.
- Find your router's address, usually printed on the underside of the unit.
- Type that address into Safari and sign in to the admin page.
- Look for Internet, WAN, or DHCP settings.
- Replace the DNS servers your provider supplied with the filtering pair you chose.
- Save, reboot the router, and reconnect one device to test.
Many routers also carry their own site-blocking list and scheduling, which is worth checking before you go further. If you want to cut a specific device off entirely rather than filter it, you can also block a device at the router.
Router filtering has one hole you should plan around: it stops applying the moment a phone leaves the network for cellular data. Pair it with Screen Time on the phone itself and that gap closes.
Which Method Should You Use?
| Method | Devices covered | Difficulty | Bypass resistance | Best for |
|---|---|---|---|---|
| Screen Time | iPhone, iPad, Mac | Easy | Low to medium (passcode) | Parents and quick single-site blocks |
| Hosts file | Mac only | Advanced (Terminal) | Medium (admin can edit it back) | Focus blocks on a personal Mac |
| Safari extension | Per browser, per device | Easy | Low (can be disabled) | Self-imposed distraction control |
| DNS filtering | Per device or whole network | Moderate | Medium to high | Whole-family adult-content filtering |
| Router blocking | Every device on the Wi-Fi | Moderate | Medium (fails on cellular) | Guests, TVs, and consoles |
Read the table as a set of overlapping coverages rather than a shortlist. No single row is strong in every column: the methods that reach the most devices are the ones that lapse when a phone leaves the Wi-Fi, and the method that travels with the phone is the one a known passcode undoes. Layering works because the weak spots sit in different places, so a gap in one row is covered by another.
Why Block Websites in Safari
Which of those rows you lean on depends on why you are blocking in the first place, and three reasons come up again and again.
The first is children. The open web is not sorted by age, and a filtered Safari gives a parent some peace of mind without taking the device away. Screen Time is the right starting point, precisely because it is passcode-protected.
The second is focus, where the goal is friction rather than security. An extension or a hosts entry is enough, because you are only trying to slow yourself down.
The third is security. Blocking known phishing and malware domains protects everyone on the network, and DNS filtering does that automatically.
Blocking for Kids: Family Sharing, Syncing, and MDM
When the reason is children, the setup gets easier once you stop configuring each device by hand. Family Sharing is what turns per-device fiddling into one set of rules. Set your household up as a family group, and you can open Screen Time for a child's account from your own iPhone, adjust Web Content remotely, and see what changed without borrowing their device.
Two behaviours are worth knowing. With Share Across Devices enabled, restrictions on one Apple Account apply everywhere that account is signed in, so a block you set on an iPad shows up on the child's Mac. And in iOS 26 and iPadOS 26 and later, a child can request an exception to a restriction, which arrives as a notification you approve or decline. That is a genuine improvement over the old routine of handing over the passcode and hoping.
For schools and businesses, mobile device management does the same job at scale. An MDM profile pushes web content restrictions to every enrolled device and locks users out of changing them. Some family parental control apps use the same profile mechanism, which is why they enforce rules Screen Time alone cannot.
Blocking Websites on Other Browsers and Devices
A Safari block does nothing about Chrome, and installing another browser is the first workaround anyone tries. Screen Time helps here, since Content & Privacy Restrictions can stop new app downloads entirely, but the tidier fix is to block at the DNS or router layer where the browser does not matter.
If you need browser-specific or platform-specific steps, we have separate walkthroughs for how to block websites on Chrome and how to block websites on Android. Our device-level guides cover how to block websites on iPhone and blocking websites on iPad in more detail, and there are focused guides to block adult websites permanently and block inappropriate websites on any phone.
Why Your Block Isn't Working (Troubleshooting)
The Site Still Opens
Start with the address itself. example.com and www.example.com are different entries as far as the Never Allow list is concerned, so add both. Mobile subdomains such as m.example.com need their own line too.
On a Mac, an unflushed DNS cache is the usual culprit after a hosts edit. Run the flush command, quit Safari fully with Command-Q, and try again.
If the site opens on a phone but not on the home laptop, check which network the phone is actually on, and see the comparison table above for what each method covers.
Private Browsing and Incognito
Private tabs do not slip past Screen Time. Selecting any Web Content mode other than Unrestricted removes the Private Browsing option from Safari entirely, so the button people expect to find is not there at all.
Extensions are the exception. They frequently need a separate permission before they run in private windows, so open Safari > Settings > Extensions and confirm private browsing is allowed for the blocker you installed.
Someone Keeps Bypassing the Block
Screen Time is easy to switch off again. Anyone who learns or guesses the passcode can lift every restriction in seconds, which makes it a deterrent rather than an enforcement mechanism. The fix is boring and effective: choose a passcode that is not the device unlock code, not a birthday, and not one you type in front of anyone.
Watch for the other routes as well. Deleting and reinstalling Safari, changing the device date, downloading a second browser, or using a VPN to route around a DNS filter all defeat a single-layer setup. Blocking app installs inside Content & Privacy Restrictions closes most of them.
If the Screen Time passcode is guessed or reset, every restriction you configured disappears at once, and nothing notifies you. Check the settings occasionally rather than assuming they are still in place.
Frequently Asked Questions
How do I block a specific website on Safari?
How do I block websites on Safari without Screen Time?
Can I permanently block a website on iPhone?
How do I block adult websites on Safari?
Do blocked sites still open inside apps that have their own browser?
Does the block survive a restore or a move to a new iPhone?
Should I manage the restrictions from my own phone or from theirs?
Can I block websites for every device on my Wi-Fi?
The Bottom Line
Blocking a website in Safari is straightforward once you stop looking inside Safari. Screen Time handles it on every Apple device, and the passcode you set decides whether the block survives contact with a curious teenager.
Pick the method that matches your reach. One device and one site: Screen Time. Your own Mac and your own focus: the hosts file or an extension. A whole household: filtering DNS at the router, with Screen Time layered on top for the phones that leave the house.
Then check it a month later. Blocks drift, passcodes get shared, and a five-minute review is the difference between a control that works and one you only assume works.