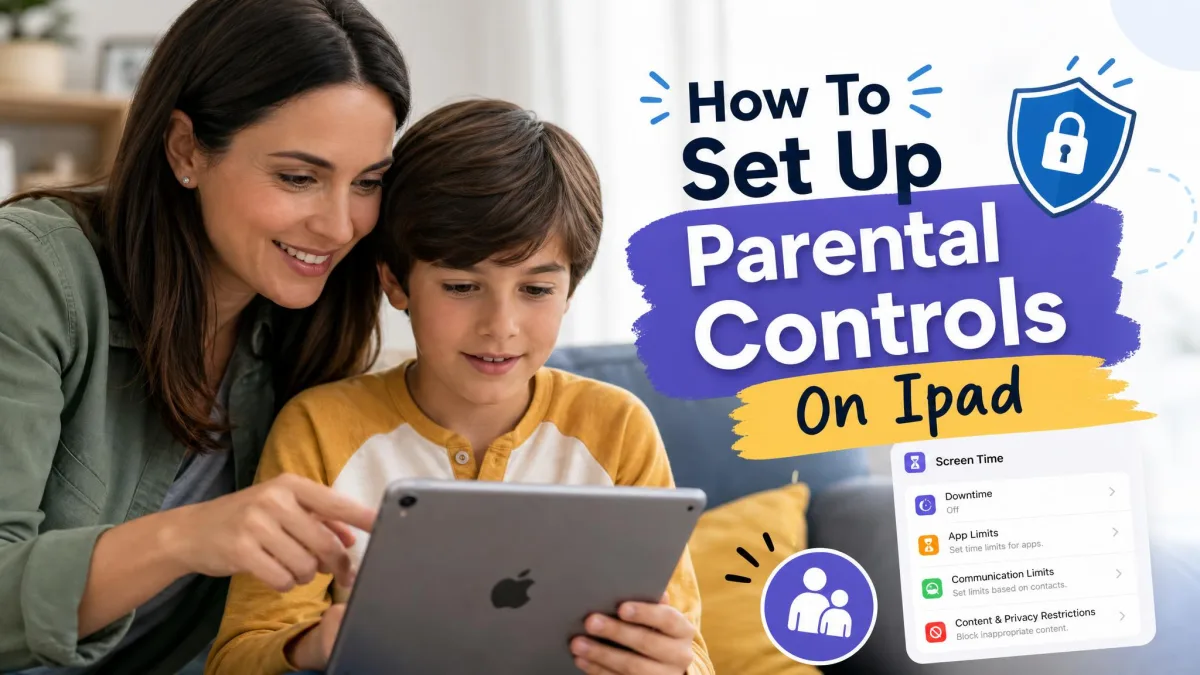
You hand the iPad to your child for a cartoon, or you sit down to work and lose an hour to one site you keep reopening. Either way, the fix is already on the device. Your iPad has a free, built-in way to block websites, and there are a few more options if that one is not strict enough.
This guide covers six methods, from Apple's own Screen Time controls to DNS filtering and school-managed profiles. The first method is the one most people need, so it gets a full step-by-step walkthrough.
Quick answer: the fastest way to block a website on iPad
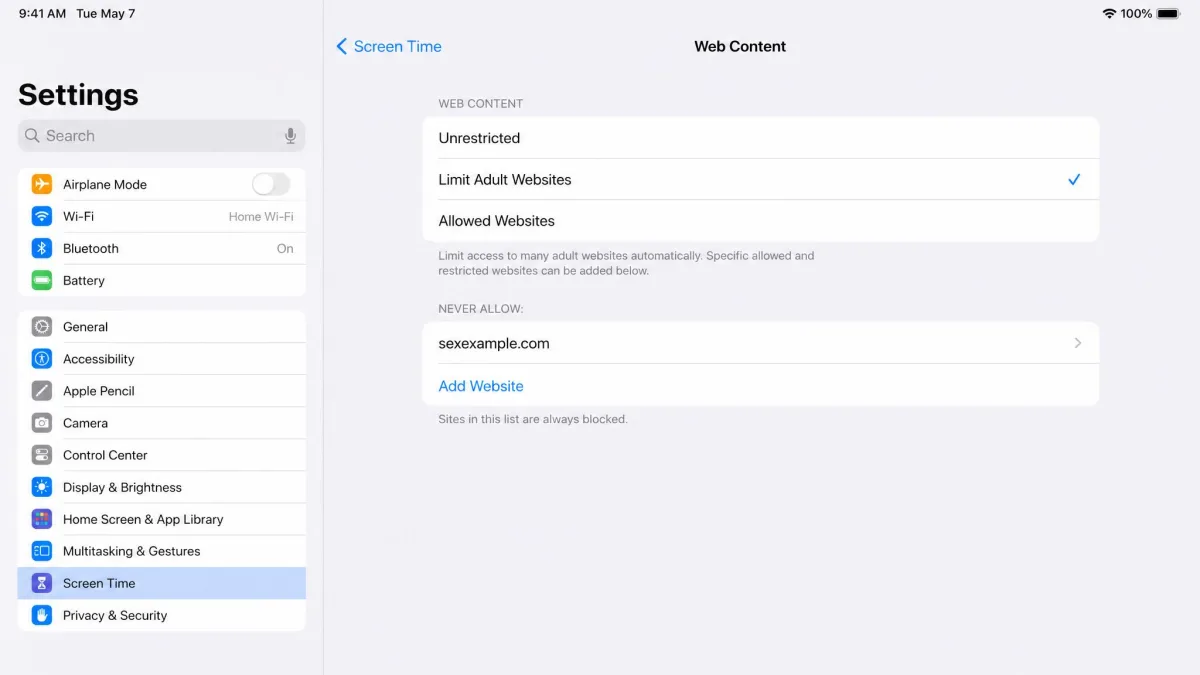
Open Settings, tap Screen Time, then turn on Content & Privacy Restrictions. Tap Content Restrictions, tap Web Content, and select Limit Adult Websites. Under Never Allow, tap Add Website and enter the full address of the site you want blocked. Set a Screen Time passcode so the change stays in place.
That sequence handles most cases. The rest of this guide explains what to do when it is not enough.
What you need before you start
You need the iPad itself, a few minutes, and a four-digit code you are willing to remember. If you are setting this up for a child, decide up front whether you want broad adult-content filtering or a short list of named sites, because the two live under different settings.
Have the exact web address ready. A partial address fails silently on this screen: type the full domain or the site keeps opening with no error and no warning that anything went wrong.
You will also be asked for a recovery Apple ID when you create the Screen Time passcode. Enter one. It is the difference between a forgotten code being a two-minute reset and an erase-the-iPad problem.
Method 1: Block specific websites with Screen Time
This is the method to use when you have a handful of sites in mind. Apple's iPad User Guide documents the same controls, and everything here is free with iPadOS.
Step 1: Open Settings and tap Screen Time
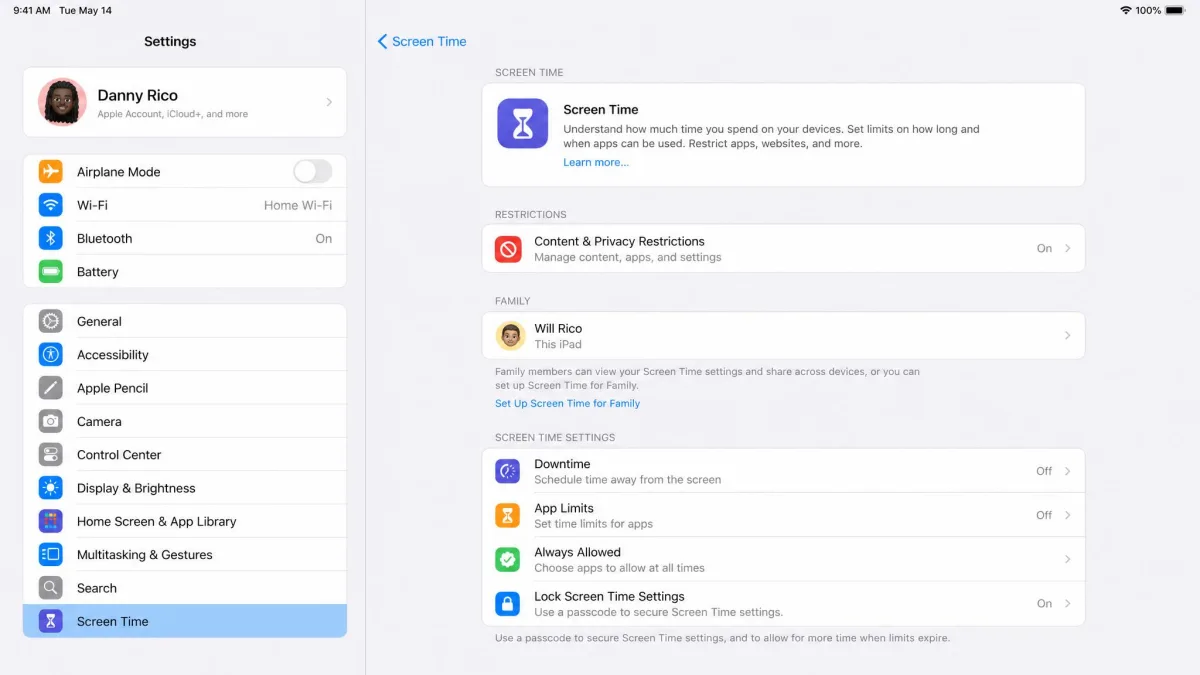
Open the Settings app on the iPad and tap Screen Time in the left column. If you have never used it, tap Turn On Screen Time and follow the short setup prompts. Choose whether this iPad is yours or your child's when asked, because that choice decides which options appear later.
Step 2: Turn on Content & Privacy Restrictions
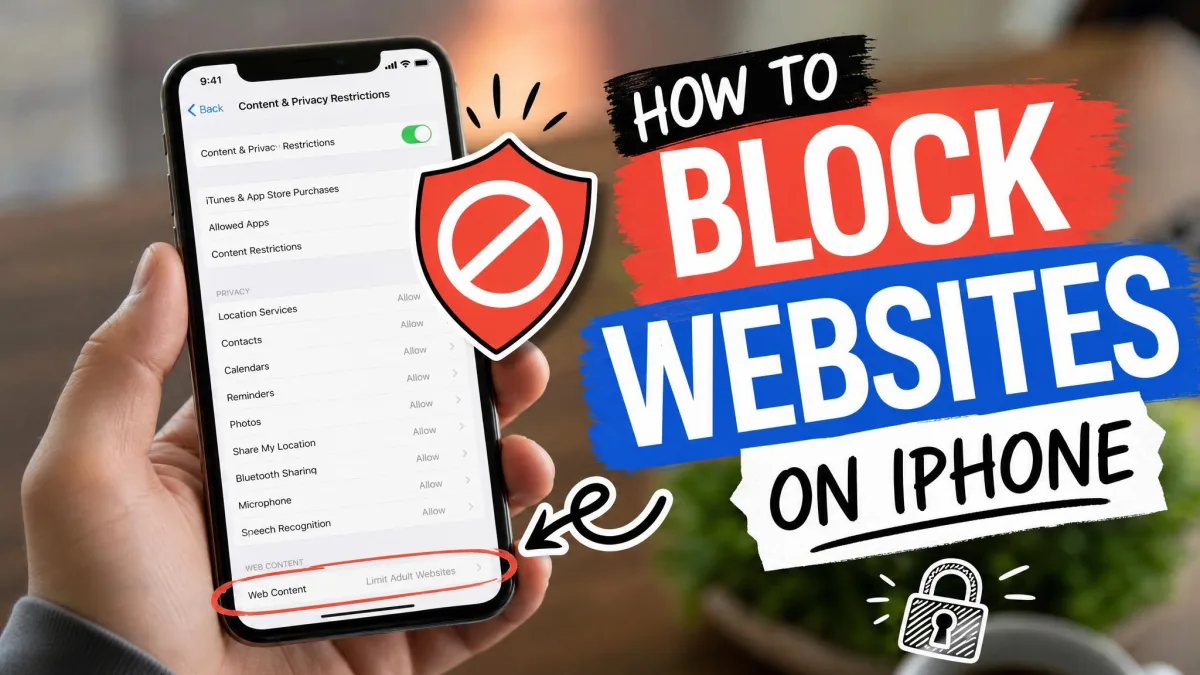
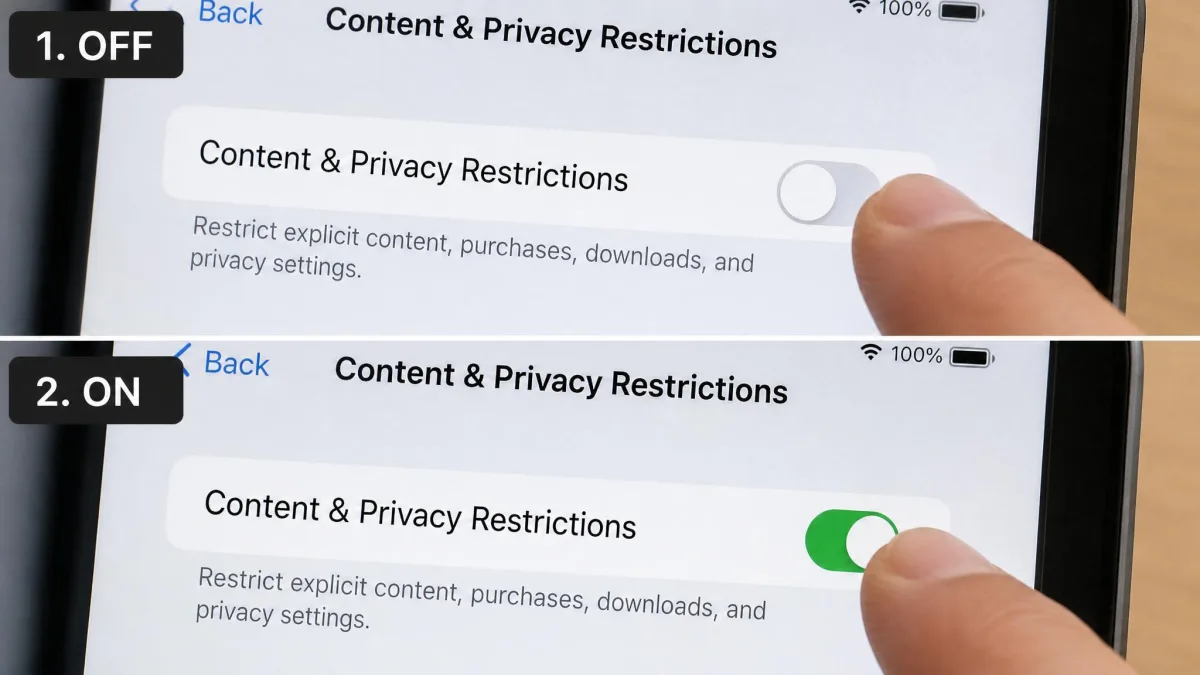
Tap Content & Privacy Restrictions and switch the toggle at the top to on. Everything below it stays greyed out until you do this, which is the single most common reason people think the settings are missing.
Step 3: Open Content Restrictions and tap Web Content
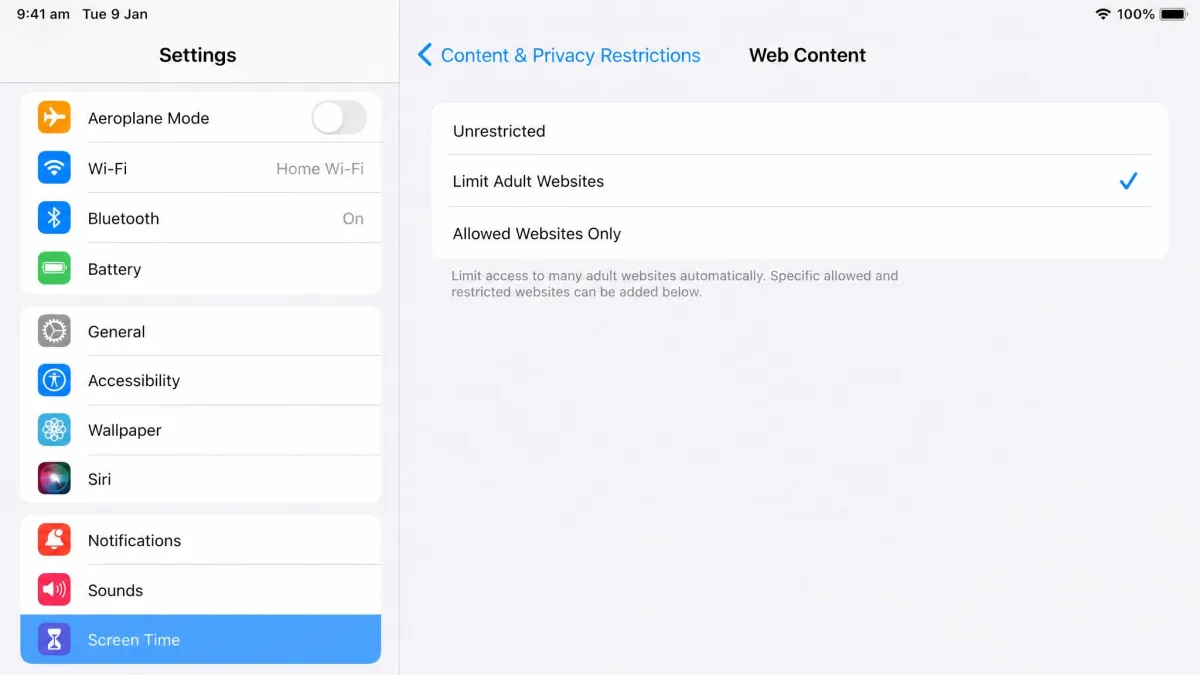
Tap Content Restrictions, then scroll down and tap Web Content.
The middle menu is labelled Content Restrictions on older iPadOS releases and App Store, Media, Web & Games on current ones, so the wording you see depends on your iPadOS version. Both routes land on the same Web Content screen.
Step 4: Choose Limit Adult Websites
Web Content offers 3 modes: Unrestricted, Limit Adult Websites, and Allowed Websites Only, which some iPadOS versions label Only Approved Websites. Tap Limit Adult Websites. Two lists appear underneath, one for sites you always want available and one for sites you never want opened.
Step 5: Add the site under Never Allow
Tap Add Website beneath Never Allow and enter the full address of the site. Repeat for each site you want gone. The Always Allow list above it does the opposite job, and you will want it: the automatic filter over-blocks, catching ordinary sites with nothing explicit on them, and adding them to Always Allow is the fix.
Type the address exactly as it appears in the browser bar, including the domain ending. Shortened or partial entries are accepted by the field and then quietly do nothing.
Step 6: Test the block in Safari and other browsers
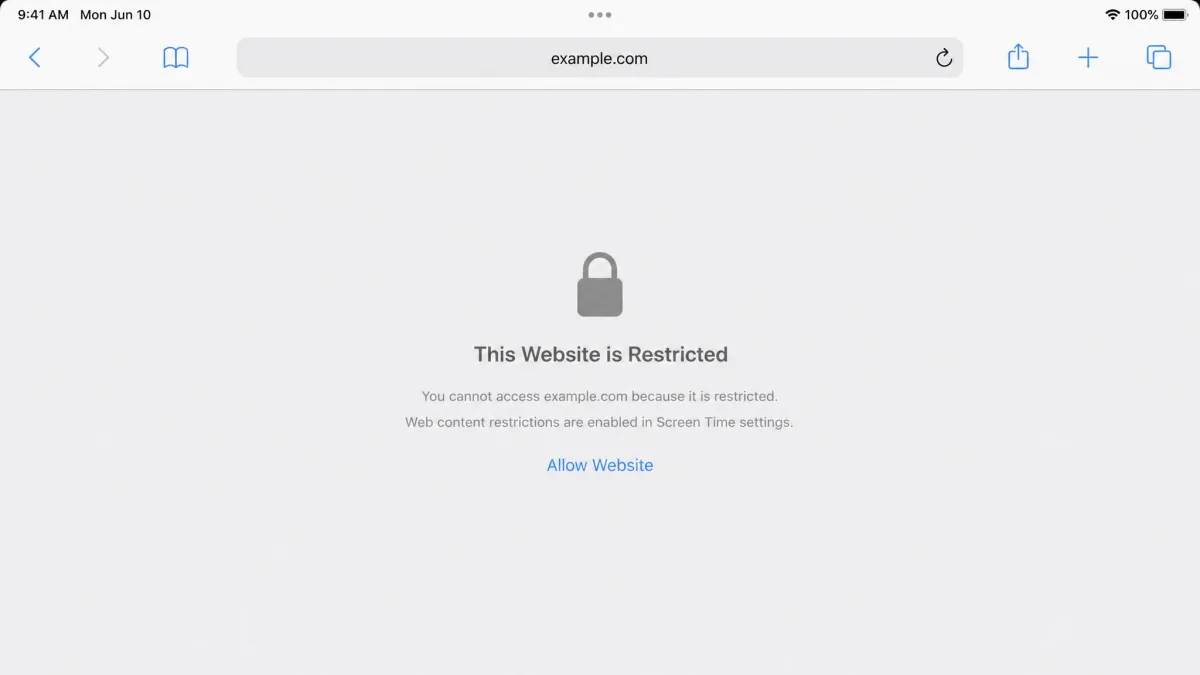
Open Safari and try the address. You should see a message saying the site is restricted, with an option to allow it that asks for the Screen Time passcode. Then try the same address in Chrome or any other browser installed on the iPad. It should be blocked there too, because the Web Content filter sits below the browser at the system level.
Method 2: Block all adult websites automatically
If your goal is broad coverage rather than named sites, Limit Adult Websites on its own does most of the work. Apple maintains a list of known adult sites and pairs it with on-device classification, so you do not have to name anything.
Know its limit before you rely on it. Newly registered domains and mirror sites slip through, and explicit sites can still load with the filter switched on. Treat it as a strong first layer, not a sealed door, and add the sites it misses to Never Allow as you find them. Method 4 is the usual follow-up when the built-in list keeps disappointing you.
Method 3: Allow only approved websites (strict mode for young kids)
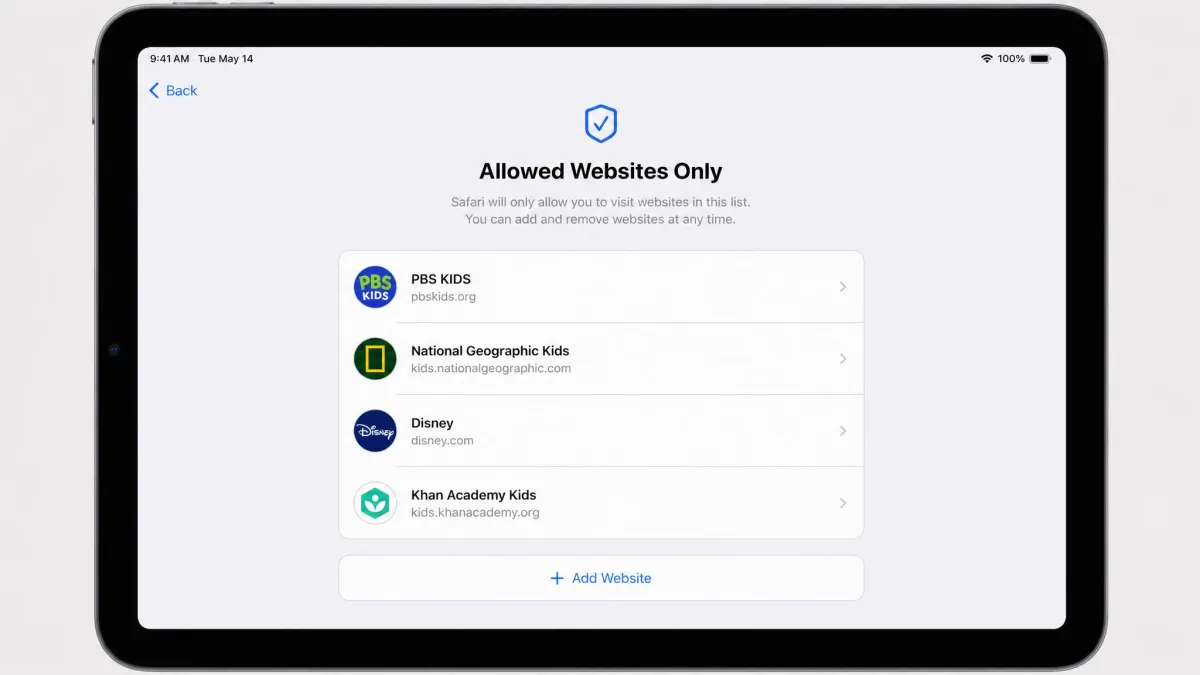
Allowed Websites Only inverts the whole thing. Every site is blocked except the ones on your list, which makes it the strictest of the three modes and the only one that genuinely holds for a young child.
To use it, go back to Web Content and select Allowed Websites Only. Apple preloads a short set of child-friendly sites, and you add your own with Add Website. The cost is curation: you build the list by hand, and you field requests every time something legitimate is missing. For a five-year-old that trade is worth it. For a teenager it is unworkable.
The pattern we see again and again is parents starting on the automatic adult filter, hitting the sites it misses, and only then switching to an allowlist. If your child is young, start at the strict end and loosen it later.
Filtering is one part of a family media plan rather than the whole of it, which matches what these settings can actually do. Screen Time blocks the sites you name and the categories Apple recognises; the conversation about why they are blocked still has to happen somewhere else.
Method 4: Block websites without Screen Time (DNS filtering and your router)
DNS filtering works one layer down from the iPad. Instead of the device deciding what to load, the name server you point at refuses to resolve blocked domains, and it catches the domains Apple's list misses.
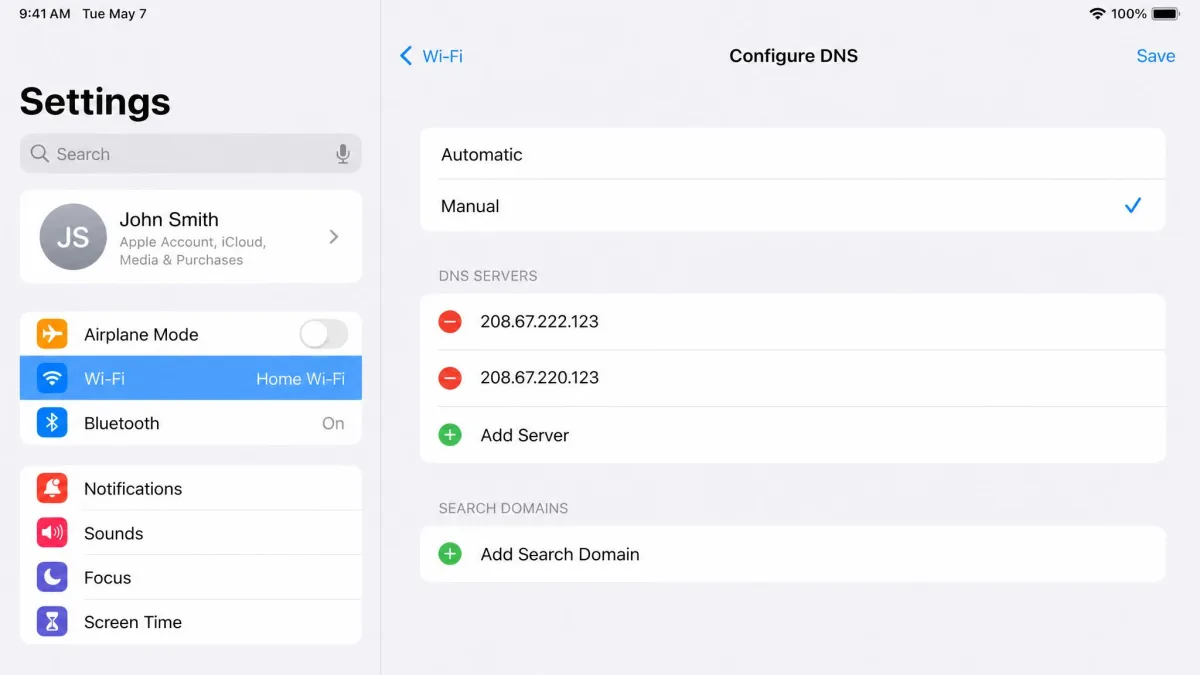
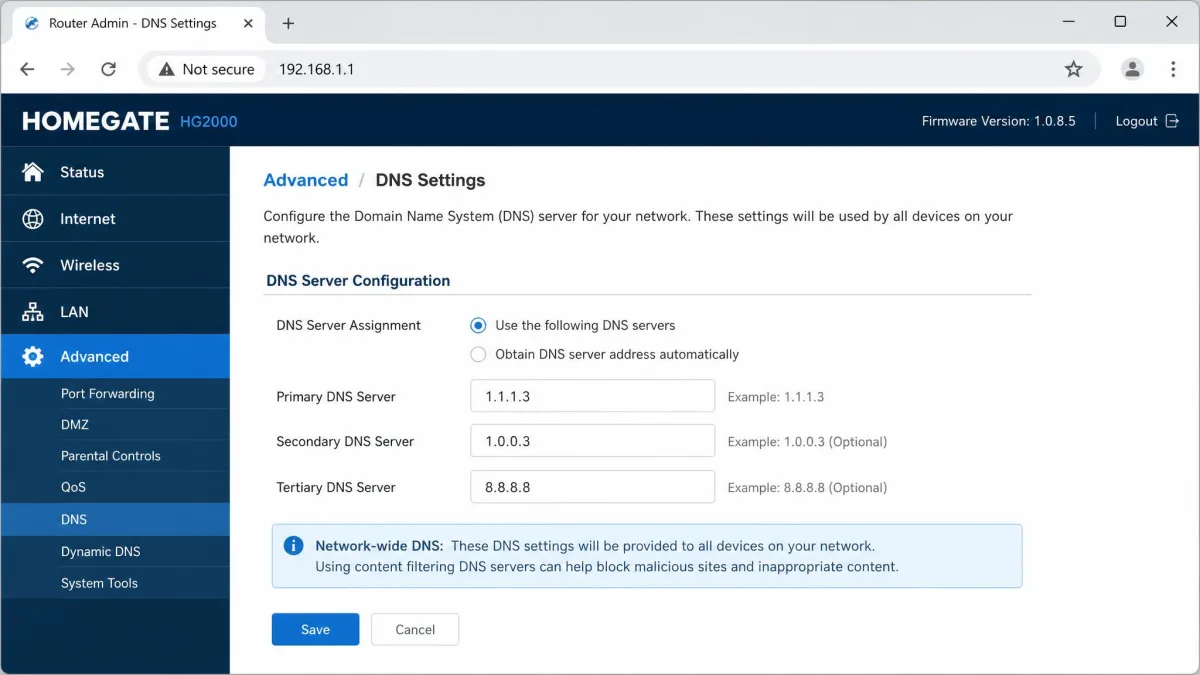
OpenDNS FamilyShield is the usual free choice. Set the primary DNS to 208.67.222.222 and the secondary to 208.67.220.220, and adult-content blocking and phishing protection are on by default. OpenDNS Home is free and adds customizable filtering. Cloudflare's family resolver, 1.1.1.3, blocks malware and adult content and is equally free.
You can apply either on the iPad or at the router. On the iPad, open Settings, tap Wi-Fi, tap the information button beside your network, tap Configure DNS, switch to Manual and enter the addresses. At the router, sign in to the admin panel, typically at 192.168.1.1, and set the same addresses there so every device on the network is covered, including tablets, consoles and TVs.
A DNS change made on the iPad applies only to that one Wi-Fi network. The filter lapses the moment the device joins a different network or drops to cellular, so set it at the router if you want it to hold.
Method 5: Third-party website blockers and parental control apps
Third-party blockers add scheduling, cross-device sync and reporting that Screen Time does not offer. Freedom is the best known: it has a free tier with basic blocking, and Premium costs $8.99 per month, $3.33 per month billed annually, or $99.50 as a one-time lifetime license, with a 7-day free trial. Premium is what adds scheduled sessions, recurring blocks, locked mode and unlimited sessions across Mac, Windows, iOS, Android and Chromebook.
One thing to understand before you pay: iOS and iPadOS blockers build on Apple's Screen Time API rather than their own filtering layer, so their blocking ceiling is the same as Screen Time's. What you are buying is the scheduling, the reporting and the cross-device reach, not stronger filtering. Browser extensions and standalone focus apps are also easier to switch off than a passcode-locked system restriction, which matters more for a child's iPad than for your own.
Method 6: Managed and school iPads (MDM configuration profiles)
If the iPad came from a school or an employer, it is supervised through an MDM configuration profile. Web filtering is pushed centrally from the management console, and the Screen Time menus are greyed out or missing entirely for the user.
That is by design, and it is also the hardest setup to bypass, because the user cannot remove the profile. If you are a parent looking at a school iPad and cannot find the settings described above, the block list is not yours to change: the school's IT contact owns it. Pricing varies by vendor and per seat, so there is no single figure worth quoting here.
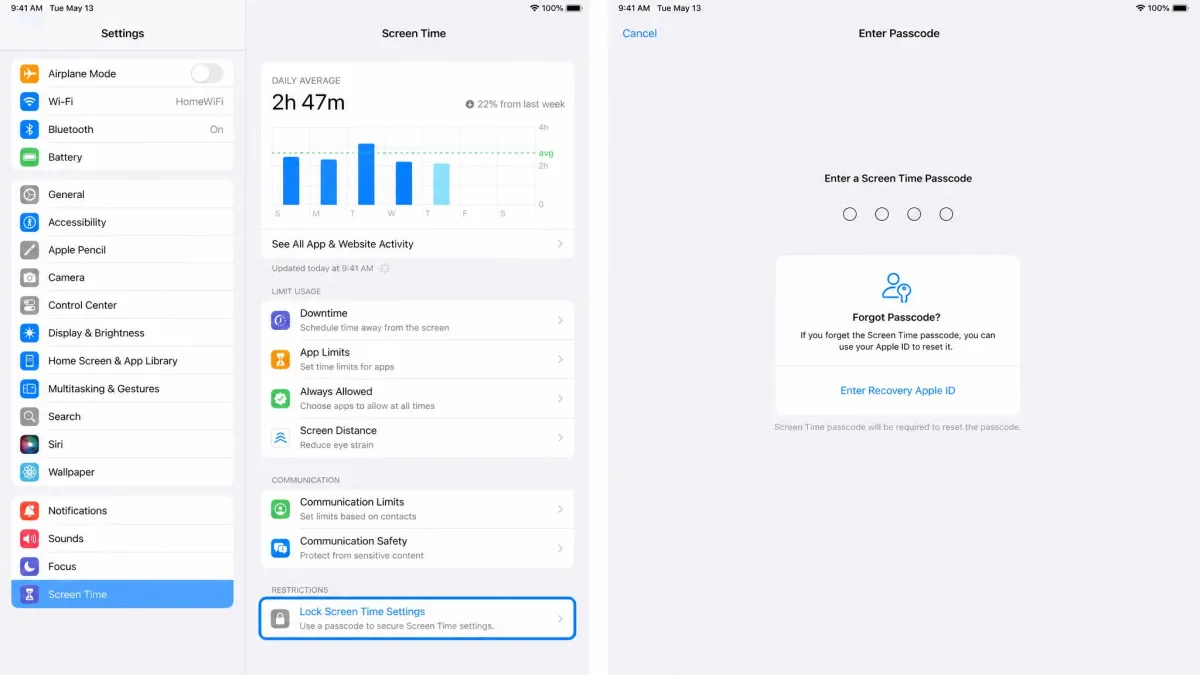
Set a Screen Time passcode so the block can't be undone
Skipping the passcode is the most common setup mistake we see. Restrictions without one can be switched off from Settings in seconds by anyone holding the iPad, which makes the whole exercise decorative.
In Screen Time, tap Lock Screen Time Settings and enter a 4-digit code. It is separate from the device unlock passcode, and it should be a different number: reusing the unlock code defeats the point, because a child who can unlock the iPad already knows it. When iPadOS asks for a recovery Apple ID, supply one: without it, a forgotten passcode means erasing the iPad.
Without a Screen Time passcode, your child can turn Content & Privacy Restrictions off in seconds and turn them back on before you look. The passcode is what makes the block stay in place.
Blocking a child's iPad remotely with Family Sharing
If the iPad is in your Family Sharing group and set up as a child's device, you can reach its Screen Time settings from your own iPhone or iPad instead of borrowing theirs. On the parent device, open Settings, tap Screen Time, then tap the child's name under Family. From there, tap Content & Privacy Restrictions, entering the Screen Time passcode if you are asked for it, and open Web Content. Apple's documentation describes the same path, and some versions route you through Settings and then Family instead; both entry points land on the same child settings screen, so use whichever one your iPad shows.
What you get there is the menu you would see on the child's own iPad: the same Unrestricted, Limit Adult Websites and Allowed Websites Only options, and the same Never Allow and Always Allow lists. The advantage is that changes land without a handover, which avoids the negotiation that comes with taking the device away. One prerequisite is worth checking first, though. Remote control only works when the child has a child Apple Account inside your Family Sharing group, and without one the parent device shows no Family section at all.
How to unblock a website later
Removing a block uses the same screen. Open Settings, tap Screen Time, enter the passcode, then tap Content & Privacy Restrictions, Content Restrictions and Web Content. Swipe left on the entry under Never Allow and tap Delete.
If the site was caught by the automatic filter rather than by you, deleting nothing will help. Add it to Always Allow instead, which whitelists it while leaving the rest of the filter on. To lift everything at once, set Web Content back to Unrestricted.
Limits of iPad website blocking (and how kids get around them)
Two limits matter most. The automatic adult filter misses newly registered and mirror domains, so explicit sites can still load with it enabled. And anything set with the passcode can be reversed with the passcode, so the code itself is the real perimeter.
The realistic bypass an older child finds is a VPN app, or a switch to cellular or a neighbour's Wi-Fi. That defeats router-level and DNS filtering rather than Screen Time, which is a good argument for running both layers. Installing Chrome or another browser does not get around Screen Time, because the filter sits below the browser. Private Browsing is less clear-cut and has been reported as still available after restrictions are turned on, so test it yourself rather than assuming.
Troubleshooting: the site still opens after I blocked it
Work through these in order.
- Check the address. A partial or misspelled entry is accepted and then does nothing. Re-enter the full domain.
- Confirm the master toggle. Content & Privacy Restrictions must be on, not just Web Content configured.
- Toggle restrictions off and on. Entries added to Never Allow sometimes stop taking effect after an iPadOS update, with the site loading as though Web Content were set to Unrestricted. Closing Safari, restarting the iPad and updating iPadOS do not always fix it. Switching Content & Privacy Restrictions off and back on is the more reliable reset.
- Try the site in a second browser. If it is blocked in Safari but not elsewhere, the restriction did not apply and needs the reset above.
- Add a DNS filter. If the site is adult content that the automatic list has simply never seen, Method 4 catches what the list misses.
Some iPads also refuse to add or delete entries in the allowed and blocked lists at all. If nothing you type sticks, the toggle reset is the first thing to try before anything more drastic.
Which method should you use?
| Method | Cost | Covers all browsers | Blocks specific URLs | Hard to bypass | Best for |
|---|---|---|---|---|---|
| $0 | Yes | Yes | With a 4-digit passcode | Blocking a handful of named sites | |
| $0 | Yes | Partly, list is automatic | With a 4-digit passcode | Broad adult-content coverage | |
| $0 | Yes | Yes, by inversion | Yes | Young children | |
| $0 | Yes, network-wide | Router-dependent | Defeated by VPN or another network | Whole-home coverage | |
| $8.99/mo or $99.50 lifetime | Yes, via Screen Time API | Yes | Uninstallable unless supervised | Adults blocking distractions | |
| Varies by vendor | Yes | Yes | Yes, user cannot remove | School and work iPads |
For one or two named sites, Screen Time alone is enough. For a young child, use the allowlist. For a household, pair Screen Time with a filtering DNS at the router so the two layers cover each other's gaps.
Frequently Asked Questions
Does blocking a website on iPad work in all browsers?
Can I block one site without blocking all adult content?
How do I unblock a site later?
Do I need a Screen Time passcode?
What if the site still opens after I blocked it?
How do I block sites on my child's iPad remotely?
Can kids get around Screen Time?
Bottom line
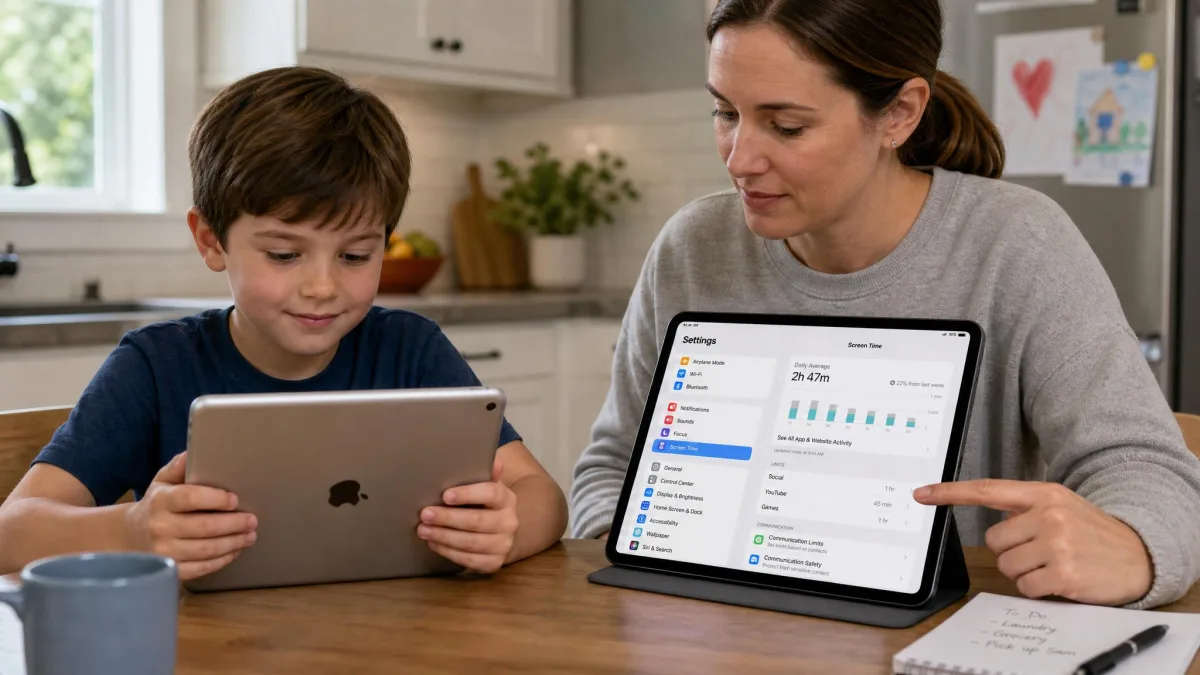
Screen Time is the right starting point for almost everyone: it is free, it covers every browser on the iPad, and it takes a few taps. Add the passcode, or none of it holds. If the automatic adult filter keeps missing sites, put a filtering DNS behind it at the router and you have covered both the device and the network for safer browsing.