A VPN, or virtual private network, is a service that routes your internet traffic through an encrypted tunnel between your device and a remote server. That tunnel hides your real IP address and keeps your online activity private from your network, your internet provider, and anyone snooping on public Wi-Fi. Setting one up sounds technical, but for most people it takes about five minutes.
This guide walks through every way to do it. We cover the easy app-based method on Windows, Mac, iPhone, and Android, the manual setup built into each operating system, and how to install a VPN on your router so every device at home is covered at once. We also help you choose a provider, a server, and a protocol, then fix the setup problems that trip people up.
We test VPNs the way most people actually use them: install the app, connect, and check that it works before trusting it. In our testing, the smoothest route is almost always the provider's own app, so that is where we start. Everything below is written so you can follow along on the device in front of you.
What a VPN Is and How It Works
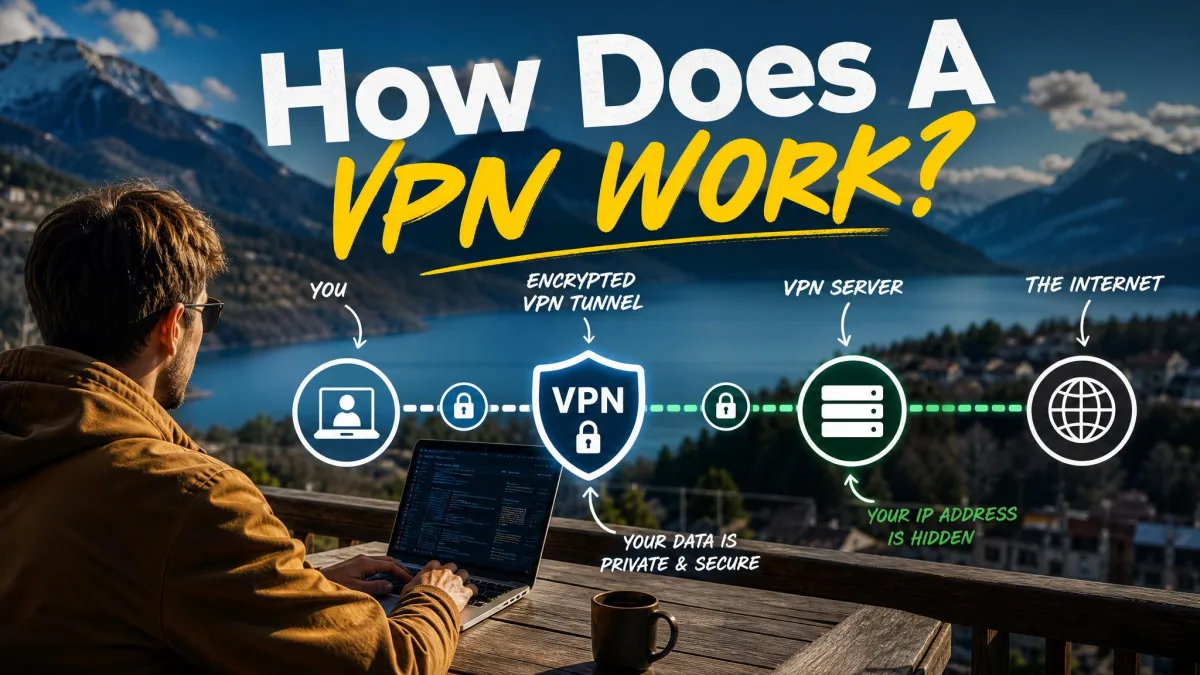
A VPN creates a private, encrypted connection over a public network. When you turn it on, your device connects to a VPN server run by your provider, and all your internet traffic flows through that encrypted tunnel first. Websites and services then see the server's IP address instead of your own.
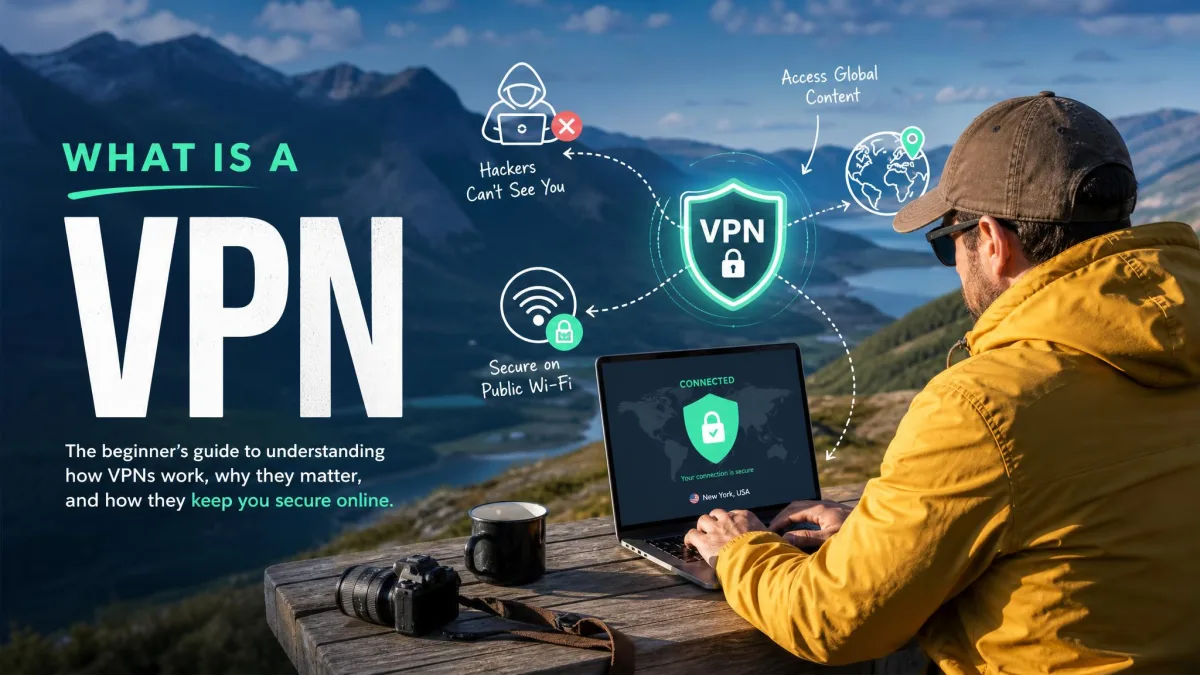
That does two useful things. It scrambles your data so no one on your local network can read it, which matters on public Wi-Fi at a cafe or airport. It also masks your location, so you can access content and services as if you were sitting where the server is.
The encryption is the core of it. Modern VPN protocols wrap your data in strong ciphers that are effectively impossible to crack in transit. The trade-off is speed: routing traffic through an extra server and encrypting it adds a little overhead, so a VPN always slows your connection somewhat. In our testing that slowdown is usually small on a nearby server and much more noticeable on a distant one.
A VPN is not a complete privacy shield. It hides your traffic from your network and your internet provider, but the VPN company itself can see your connection, which is why choosing a trustworthy provider with a no-logs policy matters. It also does not replace antivirus software or safe browsing habits.
A VPN protects data in transit between your device and the VPN server. It does not encrypt files stored on your device, and it does not stop you from logging into an account that identifies you. Think of it as a private tunnel, not an invisibility cloak.
Before You Start: What You Need
You need three things before you set up a VPN, and none of them takes long to sort out.
First, a VPN service. You can use a free VPN, but free plans usually cap your data, limit your server choices, and run slower. For anything beyond occasional light use, a paid provider is worth it. Most quality paid VPNs run roughly a few dollars a month on a longer plan, with month-to-month options costing more.
Second, an account. When you choose a provider, you sign up on their website, create an account, and pick a plan. Keep your login details handy, because you will enter them in the app or in the manual configuration.
Third, the device you want to protect. A VPN can run on a Windows PC, a Mac, an iPhone or iPad, an Android phone, and many routers. Decide whether you want to protect one device with an app or your whole network with a router setup. Most people start with a single device and add more later.
Set up the app on your busiest device first, usually your laptop or phone. Once you are comfortable with how connecting and switching servers works, adding the same account to your other devices takes a couple of minutes each.
How to Set Up a VPN Using the Provider's App (Easiest)
The app method is the one we recommend for almost everyone. You sign up, download the provider's app, log in, and connect. There is no server address to type and no protocol to configure by hand, because the app handles all of it. Installing the app is about as simple as installing any other piece of software, and it needs no manual server entry.
The broad flow is the same on every platform: sign up and create an account, download the official app from the right store, open it, sign in with your account, then select a server and connect. Below are the specifics for each operating system.
On Windows
Go to your provider's website and sign in, then download the Windows app. Many providers link straight to it after you create your account, and some are also listed in the Microsoft Store.
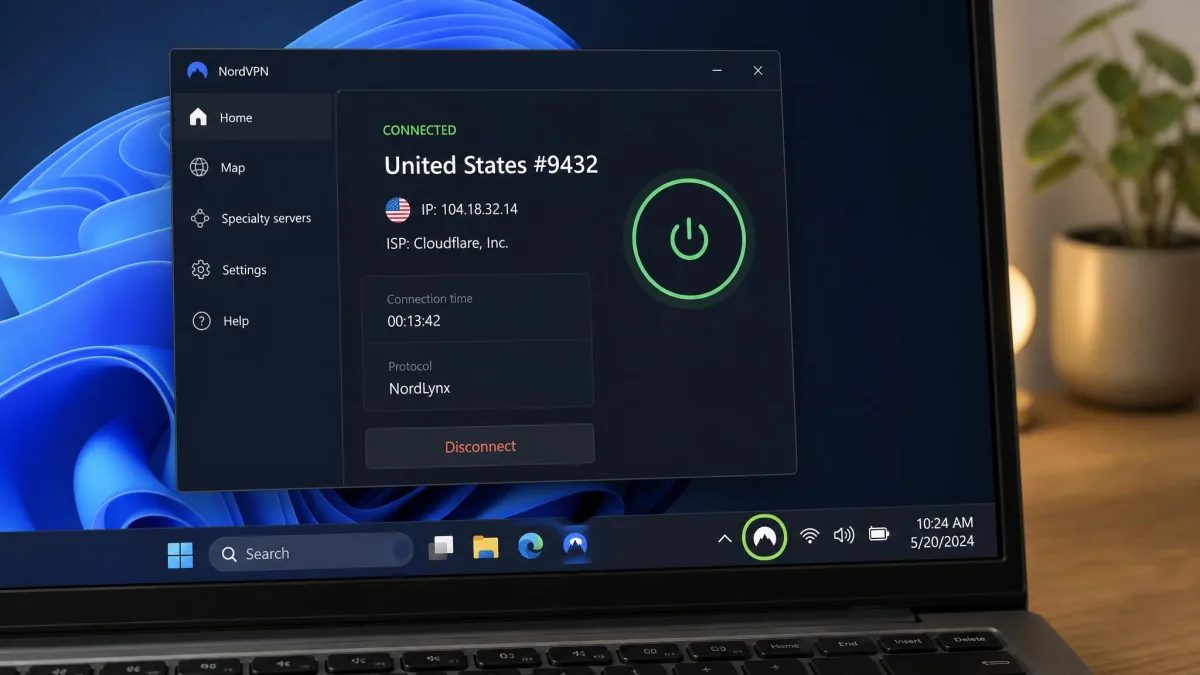
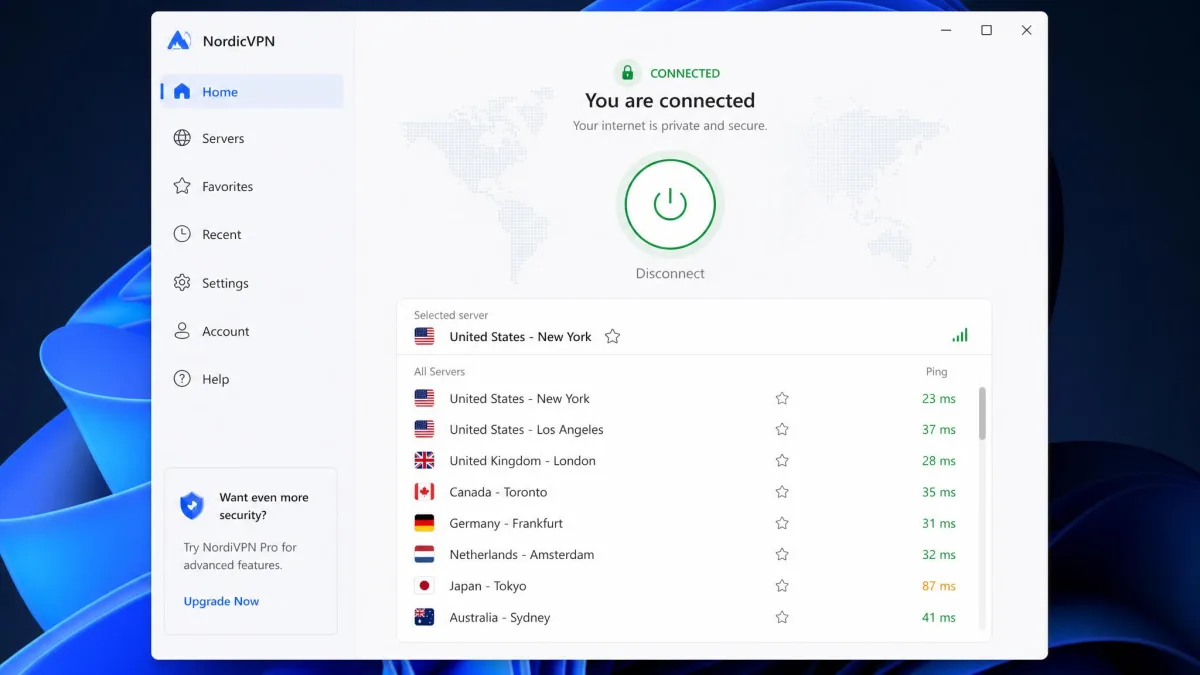
Run the installer and follow the prompts. When it finishes, open the app and sign in with your VPN account email and password. Choose a server from the list, usually one close to you for the best speed, and click the connect button. Within a few seconds the app shows a "Connected" status, and you are protected.
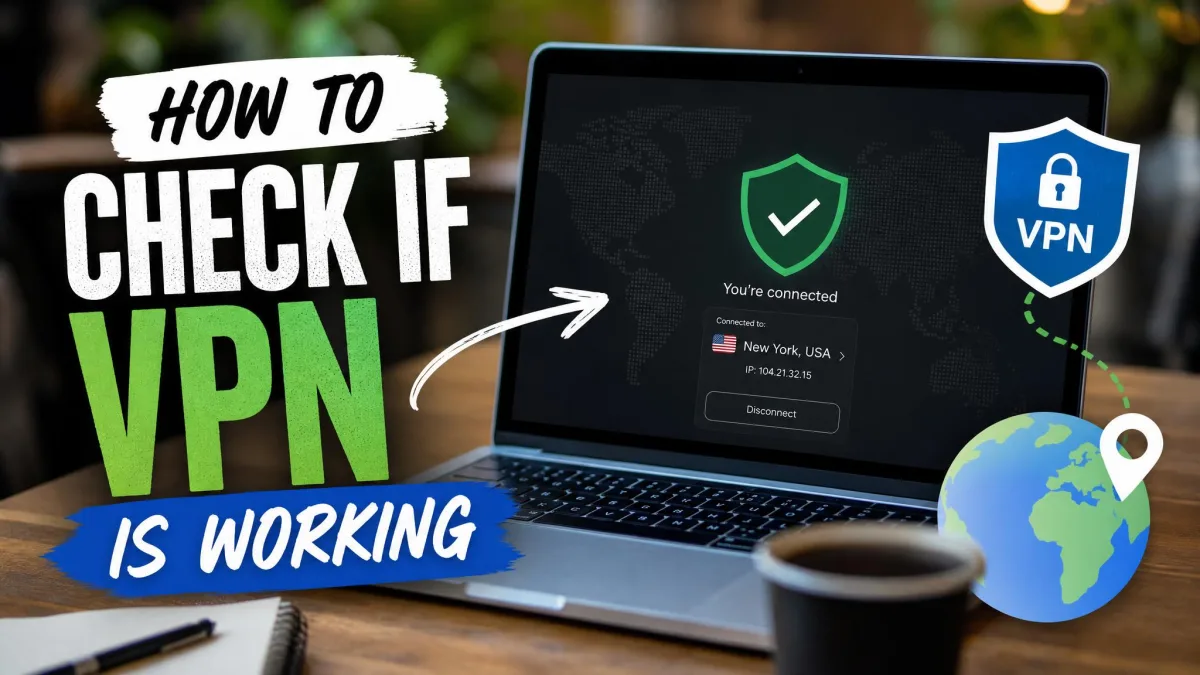
To confirm it worked, check that the app reports an active connection and that your new IP address is shown. You can leave the VPN running in the background and disconnect whenever you want from the same screen.
On Mac
Sign in to your provider's website on your Mac and download the macOS app, or install it from the Mac App Store if the provider offers it there. Open the downloaded file and drag the app into your Applications folder if prompted.
Launch the app and log in with your account. macOS may ask you to allow the app to add VPN configurations; approve that so the app can manage the connection. Then pick a server and click connect. The menu bar shows the VPN status, and you can connect or switch servers from there without opening the full window.
On iPhone & iPad
Open the App Store, search for your provider by name, and install the official app. Check the developer name matches your provider so you do not install a copycat.
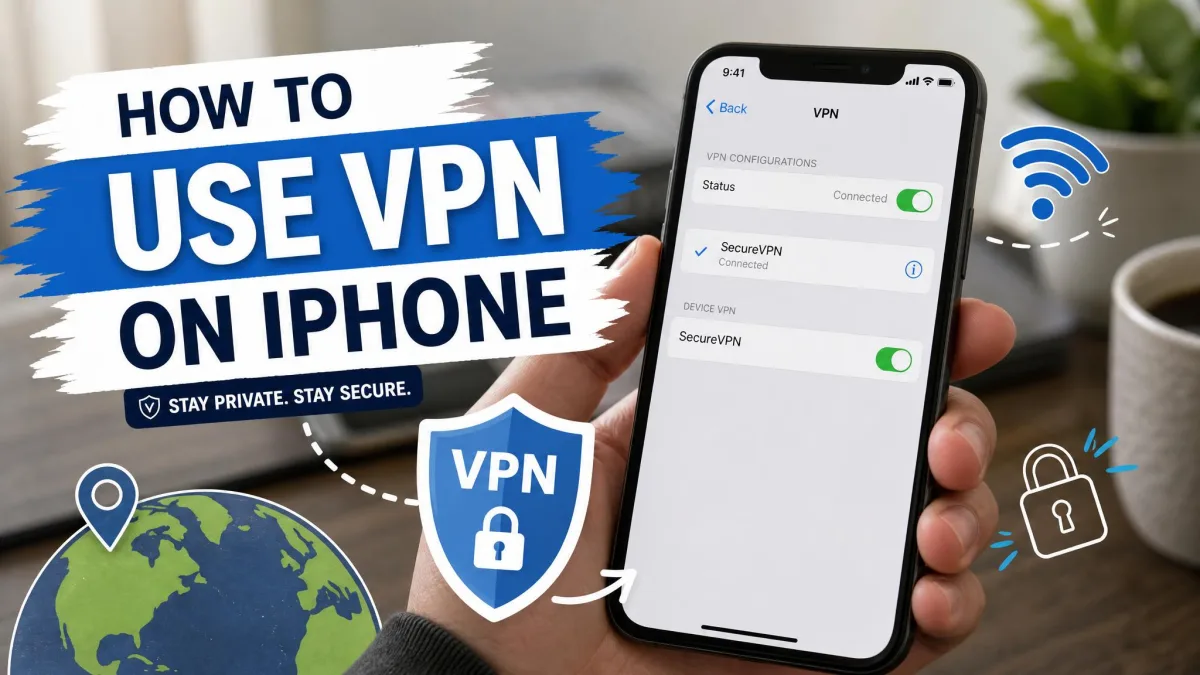
Open the app and sign in. The first time you connect, iOS asks for permission to add a VPN configuration, and you confirm with Face ID, Touch ID, or your passcode. After that, choose a server and tap connect. A small "VPN" badge appears in your status bar whenever the tunnel is active. The setup is identical on iPad.
On Android
Open the Google Play Store, search for your provider, and install the app. As with iOS, confirm the developer is your actual provider before installing.
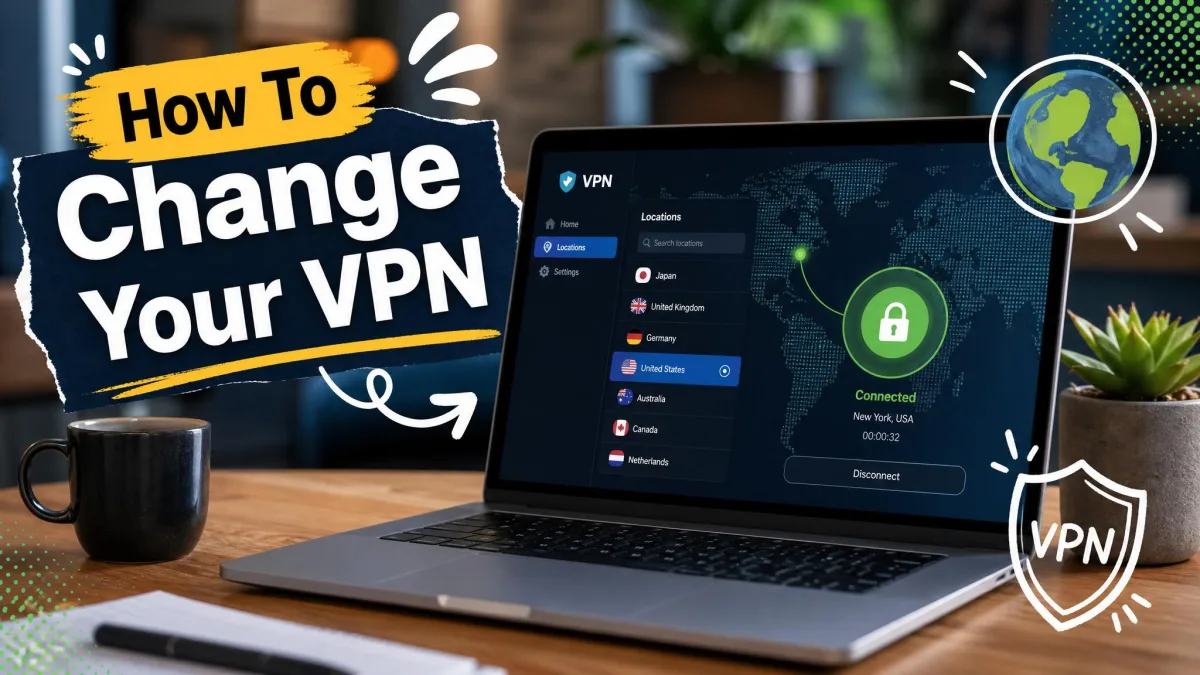
Open the app, sign in, and tap connect. Android shows a connection request the first time, asking you to allow the VPN; accept it. A key icon appears in the status bar while the VPN is on. To switch locations, open the app, select a different server, and connect again.
Most apps have a "quick connect" button that picks the fastest nearby server for you. Use it for everyday privacy, and only choose a specific country when you need to appear to be in that location.
How to Set Up a VPN Manually
Every major operating system has VPN settings built in, so you can create a connection without the provider's app. Manual setup gives you more control, and it is useful when your provider offers no app for your platform or when you want to use a specific protocol.
The trade-off is effort and reliability. Manual configuration takes roughly 12 to 19 steps depending on the platform, and it is more error-prone. In our testing, manual setup is where most friction shows up: a mistyped server address or the wrong VPN type is the usual reason a connection silently fails. Before you start, log in to your provider's account area and find their manual setup details, which include server addresses, your VPN username and password, and the supported protocols.
Manual VPN credentials are often different from your normal account login. Many providers generate a separate service username and password for manual connections. Copy them exactly, because a single wrong character stops the connection from working.
Windows
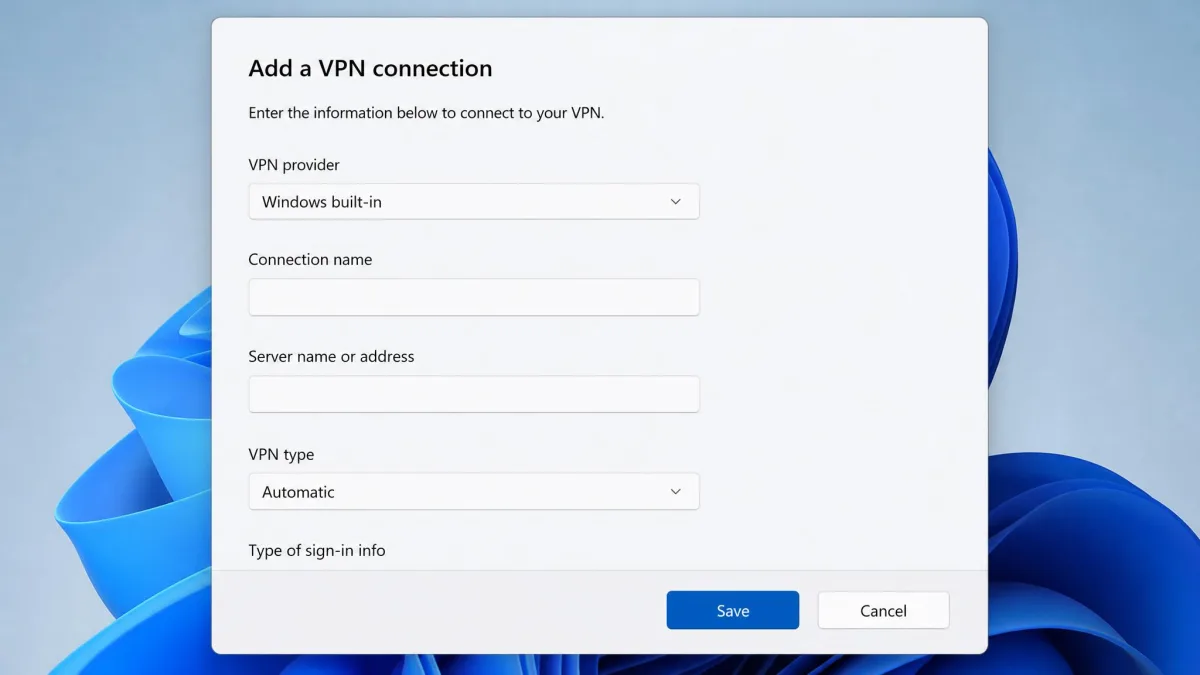
On Windows 11, open Settings → Network & internet → VPN → Add VPN. For VPN provider, choose "Windows (built-in)". Then fill in the connection name, the server name or address from your provider, the VPN type (the protocol), and the type of sign-in info, which is usually a username and password. Save it, then connect from the same VPN page.
On Windows 10, the path is Start → Settings → Network & Internet → VPN → Add a VPN connection, and the fields are the same. When the tunnel is up, Windows shows "Connected" on the settings page and a blue shield icon in the taskbar. If you are still on Windows 10, note that Microsoft ended support for it on October 14, 2025, so consider upgrading for continued security updates. Microsoft also publishes its own walkthrough for connecting to a VPN in Windows if you want the official reference.
macOS
On a Mac, go to the Apple menu → System Settings → Network. Click the Action pop-up menu, choose Add VPN Configuration, and select the protocol type. macOS built-in VPN supports L2TP over IPSec, Cisco IPSec, and IKEv2, so pick the one your provider lists. Enter the server address, your account name, password, and authentication method, then set any DNS or proxy options your provider specifies. Click Create to save the configuration, then connect.
Apple's guide to set up a VPN connection on Mac covers the same steps with screenshots if you get stuck on a field.
iPhone & Android
On an iPhone, open Settings and look under General for VPN and device management, then choose Add VPN Configuration. Select the type, then enter the description, server, and your account details. Some providers require importing a certificate or configuration profile before the manual connection will work, so download that from your provider first if they supply one.
On Android, open Settings and find the VPN section, usually under Network & internet, then add a new VPN profile. The exact path varies by manufacturer, so if you cannot find it, search "VPN" in your phone's settings. Enter the name, type, server address, and your credentials, save, then tap the profile to connect. Because the manual path differs across Android versions and brands, follow your provider's device-specific instructions when the wording does not match.
How to Set Up a VPN on Your Router
Installing a VPN on your router protects every device on your network at once, including ones that cannot run a VPN app, like smart TVs and game consoles. Anything that connects through the router gets the encrypted tunnel automatically. This is the most advanced option, and it depends entirely on your router's firmware.
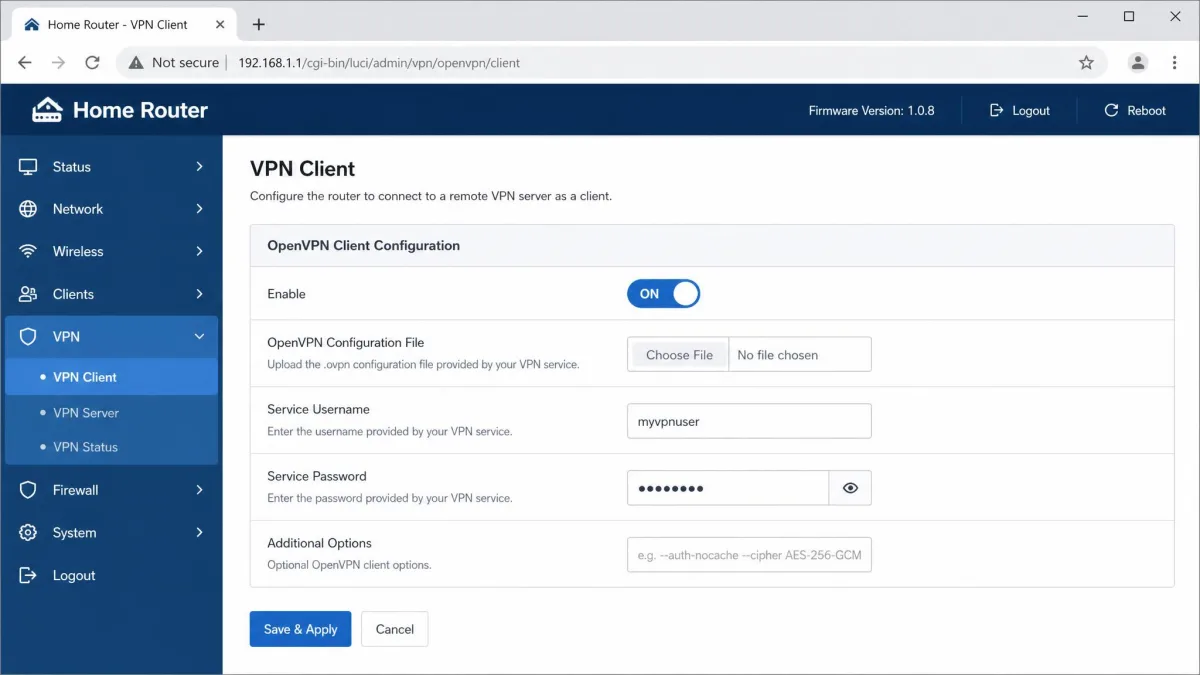
Router VPN support is firmware-specific. Custom firmware like DD-WRT, Tomato, and OpenWRT supports VPN connections, and some manufacturers build it into their stock firmware. First, check whether your router already supports a VPN client. If it does not, you may be able to flash compatible firmware, though that carries some risk and can void a warranty.
The general steps are similar across routers. Log in to the router admin panel in your browser, find the VPN client section, and enter the configuration your provider gives you, which usually means uploading an OpenVPN or WireGuard config file and your credentials. Save and connect, then confirm your devices show the VPN server's location.
Because the exact screens differ so much between models, the reliable move is to follow your provider's dedicated router guide for your firmware. Good providers publish step-by-step instructions per router type.
A router VPN routes all traffic through one server location, which slows every device and can break services that expect your real location, like some banking or local streaming. Many people prefer app-based setup on individual devices so they can turn the VPN off easily when they need to.
How to Choose a VPN (Provider, Server & Protocol)
Choosing well matters more than any setup step, because a VPN sees your traffic. Look for a provider with a clear, audited no-logs policy, servers in the locations you need, strong modern protocols, and a good record on speed.
Jurisdiction is worth a thought too. Providers based in countries that are part of the Five Eyes alliance can, in theory, be compelled to share data, though a genuine no-logs provider has little to hand over. Weigh that against the provider's track record and independent audits rather than treating location alone as decisive.
Price is a factor but rarely the deciding one. Most quality paid VPNs land in a similar range, and the cheapest per-month rates come from committing to a longer plan.

Choosing the Right Server
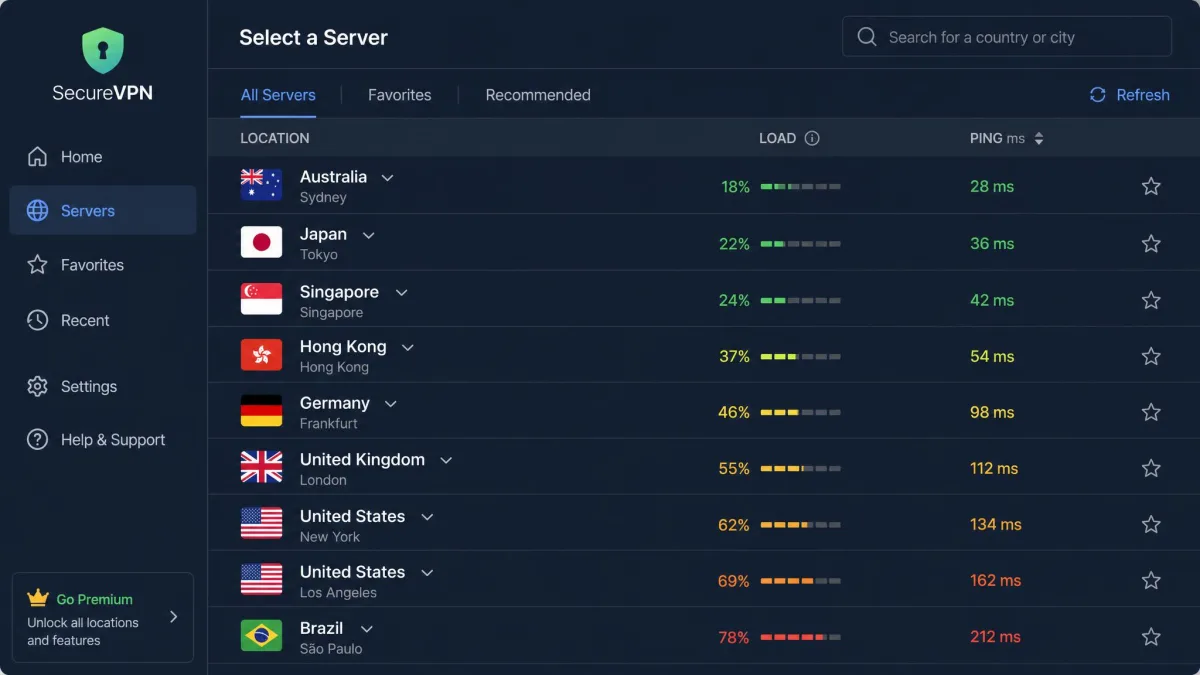
For everyday privacy and the best speed, connect to a server geographically close to you. Choosing a nearby server cuts the speed penalty, while distant servers feel sluggish. Your provider's app usually shows a load or ping figure for each server, and a lightly loaded, nearby one gives the smoothest experience.
Choose a server in a specific country only when you have a reason to, such as accessing a service that is available there. Expect the connection to feel slower the farther that server is from you.
Choosing a VPN Protocol
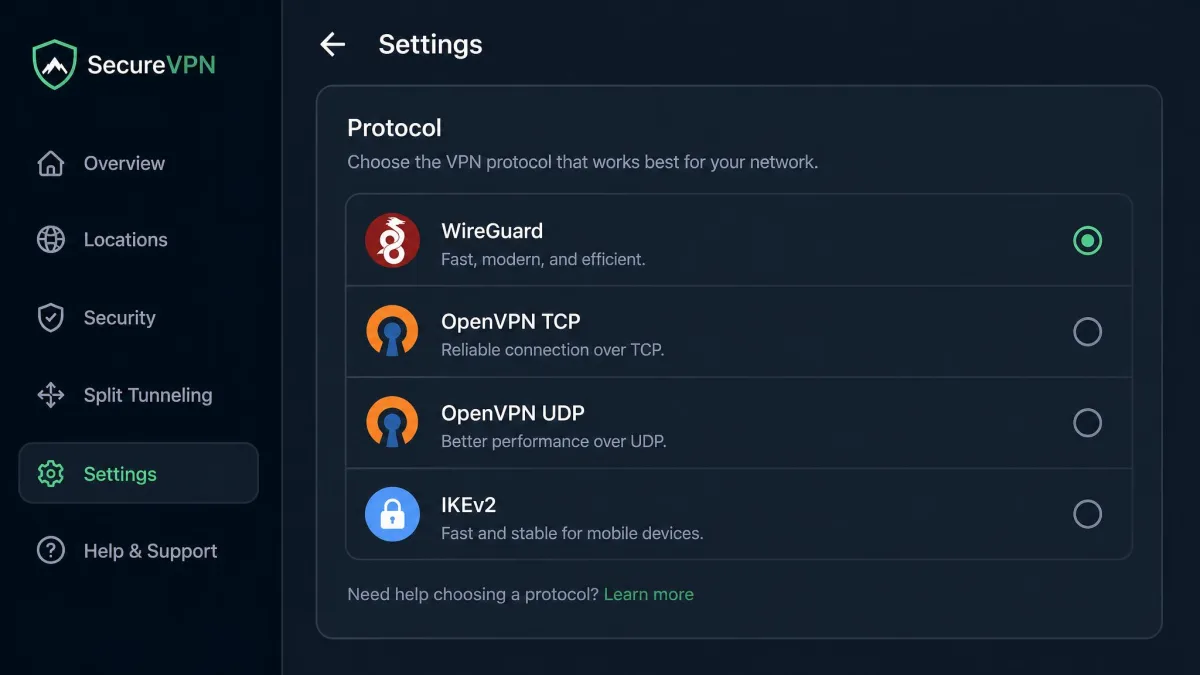
The protocol is the method your VPN uses to build the tunnel, and it affects both speed and security. Most apps let you pick one in settings, and the right default is easy.
WireGuard is the modern choice. It uses ChaCha20 encryption, has undergone formal mathematical verification, and its streamlined codebase gives high speeds. In our testing it connects noticeably faster and adds less latency than OpenVPN in daily use, which makes it a sensible default when the app offers it.
OpenVPN is the trusted workhorse. It supports AES-256-GCM encryption with Perfect Forward Secrecy and is widely vetted, though it carries more overhead and typically runs somewhat slower than WireGuard. It is also the most flexible: OpenVPN over TCP on port 443 is the fallback that tends to get through when a restrictive network blocks other VPN traffic.
IKEv2/IPSec is lightweight and handles roaming between Wi-Fi and cellular well, which is why it is a favorite on mobile. PPTP, by contrast, is outdated and insecure; its authentication can be cracked with publicly available tools, so avoid it where privacy matters.
If you are not sure which protocol to pick, choose WireGuard for the best mix of speed and security. Switch to OpenVPN over TCP 443 only if a network is blocking your connection.
Free vs Paid VPNs: What to Know
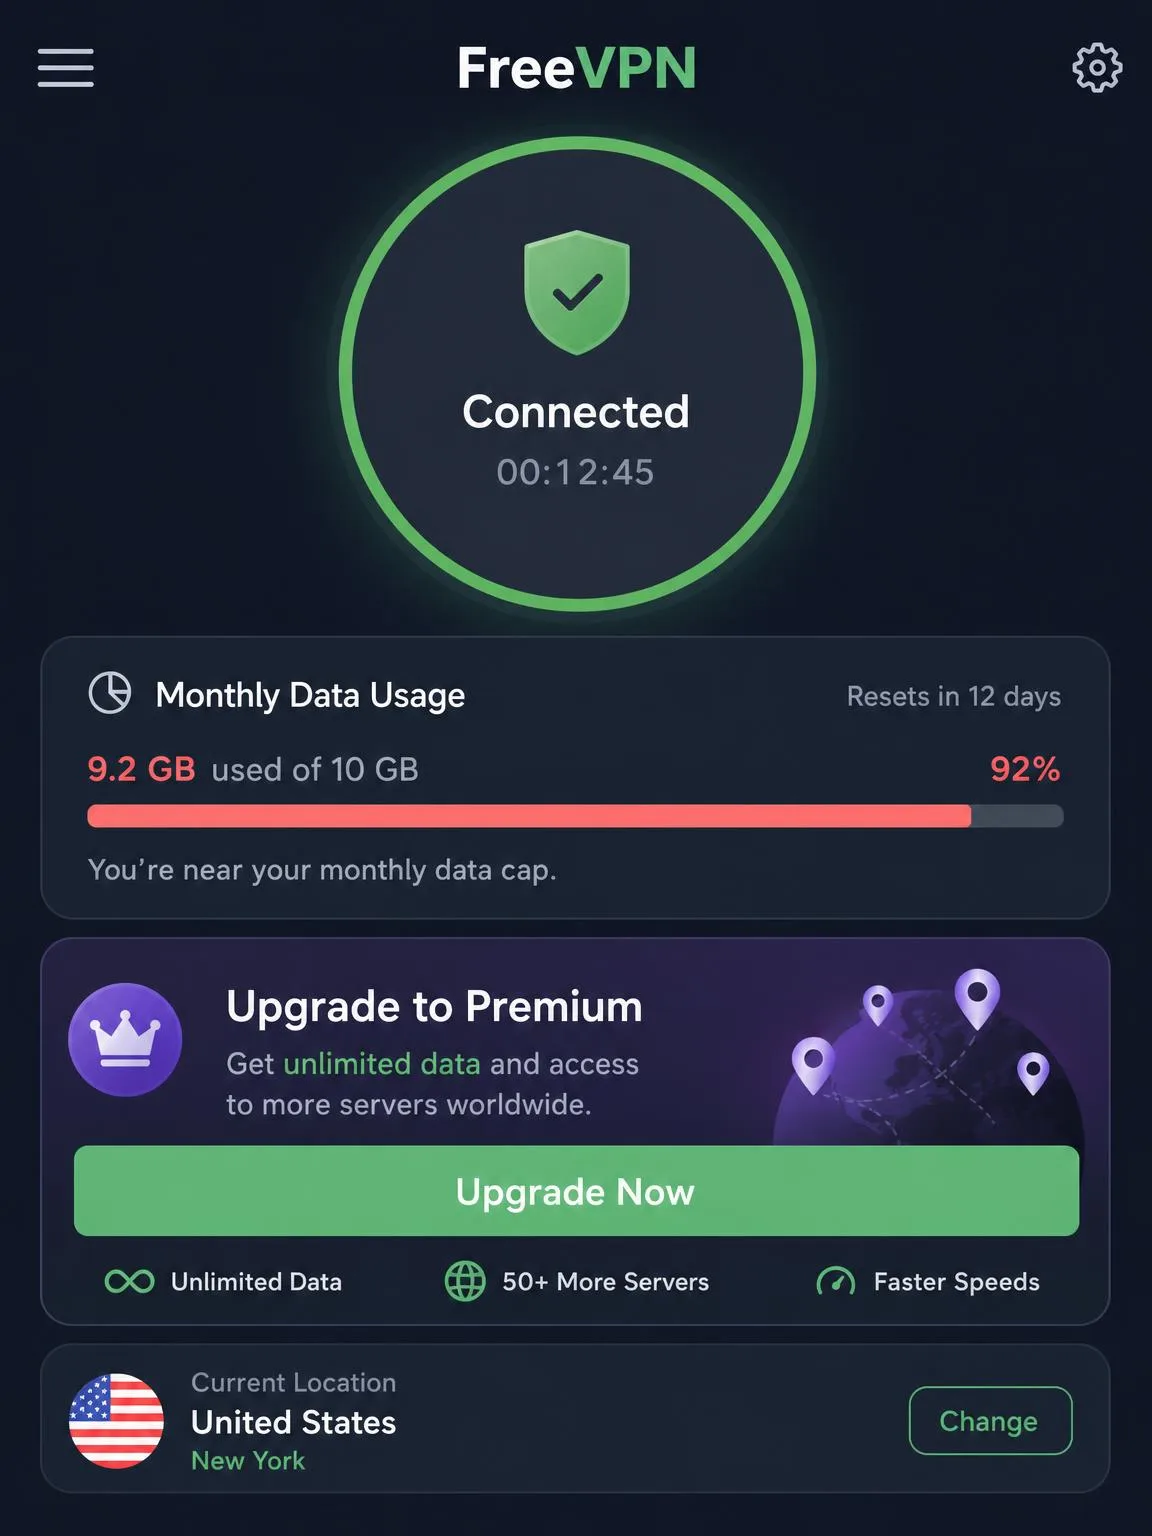
A free VPN is fine for occasional, low-stakes use, but it comes with real limits. Free plans typically impose data caps, offer fewer server options, and run slower. Some free providers also monetize in ways that undercut the whole point of a VPN, so stick to reputable names.
Paid VPNs remove those limits and add features like more servers, faster protocols, and a kill switch. For regular use, streaming, or anything privacy-sensitive, the modest monthly cost is worth it.
Pros
- Free VPNs cost nothing and are quick to try for light, occasional use
- Paid VPNs remove data caps and give you far more servers and locations
- Paid plans are faster and add features like a kill switch and split tunneling
Cons
- Free plans cap your data, limit servers, and run slower
- Some free providers monetize your data, which defeats the purpose
- Paid VPNs cost money, though longer plans lower the per-month price
Troubleshooting Common VPN Setup Issues
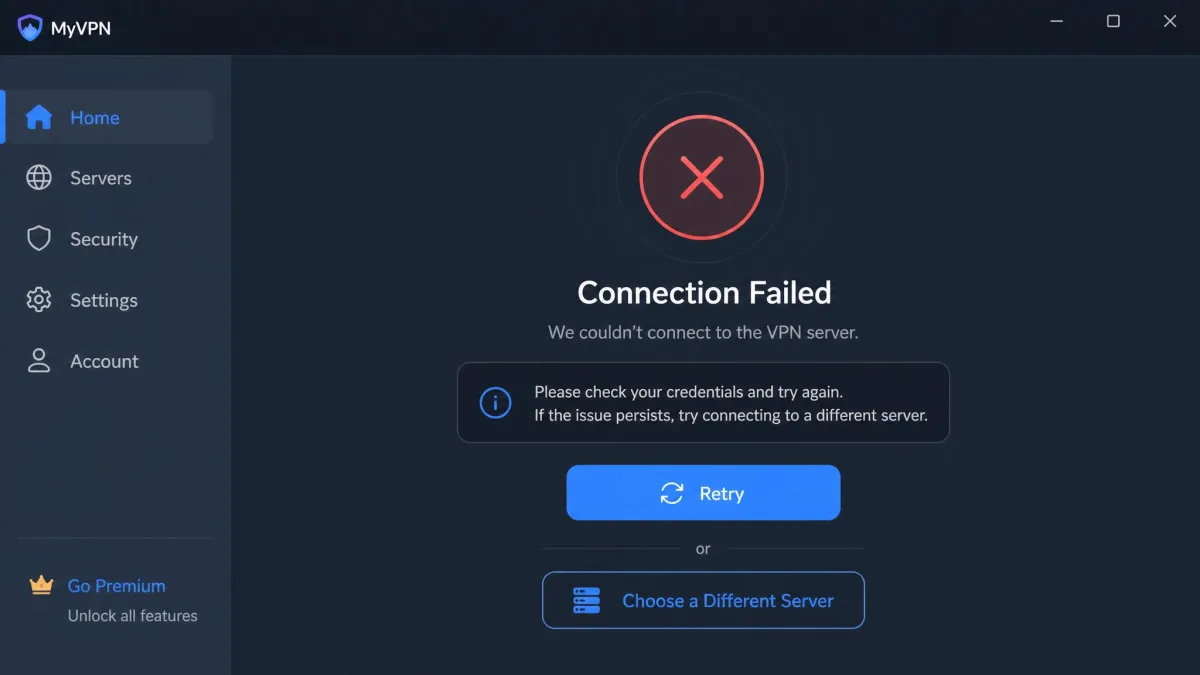
Most setup problems have simple fixes. Here is how we work through the common ones.
If the connection fails right away, check your credentials first. Manual setups often use a separate service username and password, and a mistyped server address or the wrong VPN type is the most common reason a connection silently fails. Re-enter the details carefully.
If you connect but have no internet, try a different server, since a single server can be down or overloaded. Switching protocols also helps; move to OpenVPN over TCP 443 if your network is blocking other traffic. Restarting the app or your device clears many transient glitches.
If your connection is slow, connect to a closer server. A VPN measurably slows your connection, and the drop is larger the farther away the chosen server is, so distance is usually the culprit. Switching to WireGuard often recovers speed too.
If websites still see your real location, you may have a DNS or IP leak. Confirm the app shows an active connection and the new IP, and enable any leak protection or kill switch your provider offers.
After any setup, it is worth confirming the VPN actually works. Check that your app reports "Connected" and that a quick IP lookup shows the server's location, not your own, before you rely on it for anything private.
Frequently Asked Questions
Why should I use a VPN?
Can I use a free VPN?
Do I have to set up a VPN manually?
Is using a VPN legal and safe?
Does a VPN slow my connection?
Final Thoughts
Setting up a VPN is far simpler than it looks. For most people the app method is all you need: sign up, install the official app, log in, and connect, and you are protected in about five minutes. Manual setup and router installs are there when you want more control or whole-network coverage, and now you know how to do both.
The choices that matter most are the provider, the server, and the protocol. Pick a trustworthy audited provider, connect to a nearby server for speed, and use WireGuard as your default. Do that, confirm the connection is live, and your traffic travels through a private, encrypted tunnel every time you go online.