A VPN, or virtual private network, is a service that encrypts your internet traffic and routes it through a remote server, so your data travels through a private tunnel instead of the open network. Getting a VPN means picking a service you trust, creating an account, and installing an app on the devices you want to protect. That is the short version, and for most people it really is that simple.
We test VPNs the way you actually use them: we install the app, sign in, connect, and check for real-world speed loss and DNS leaks before we recommend anything. This guide walks you through the whole process on Windows, Mac, iPhone, iPad, Android, and even your router, so you can be online and secure in a few minutes.
The goal is a setup that is private, fast, and reliable. We will cover what a VPN does, how to choose one, how to install it on each device, and how to fix the connection problems that trip people up. By the end you will know exactly what to download, what to select, and what to skip.
We have set up VPNs on Windows, Mac, iOS, Android, and consumer routers, and we run leak and speed checks on every service before it earns a recommendation. The steps below are the ones we follow ourselves.
What Is a VPN and How Does It Work?
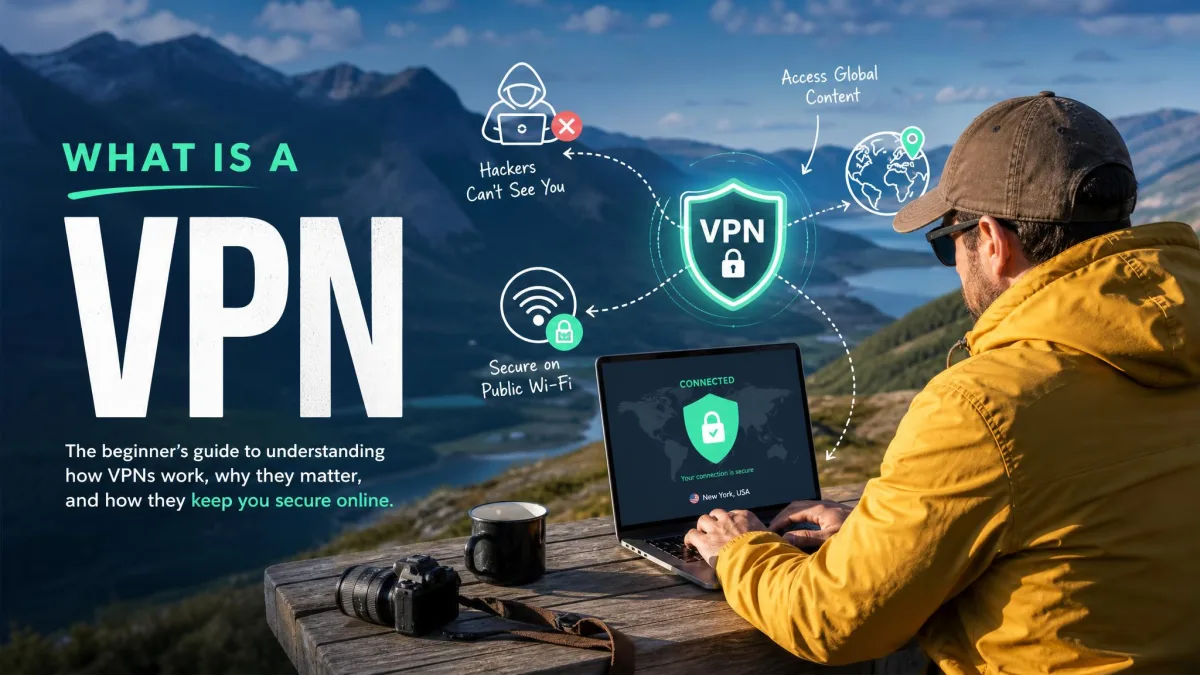
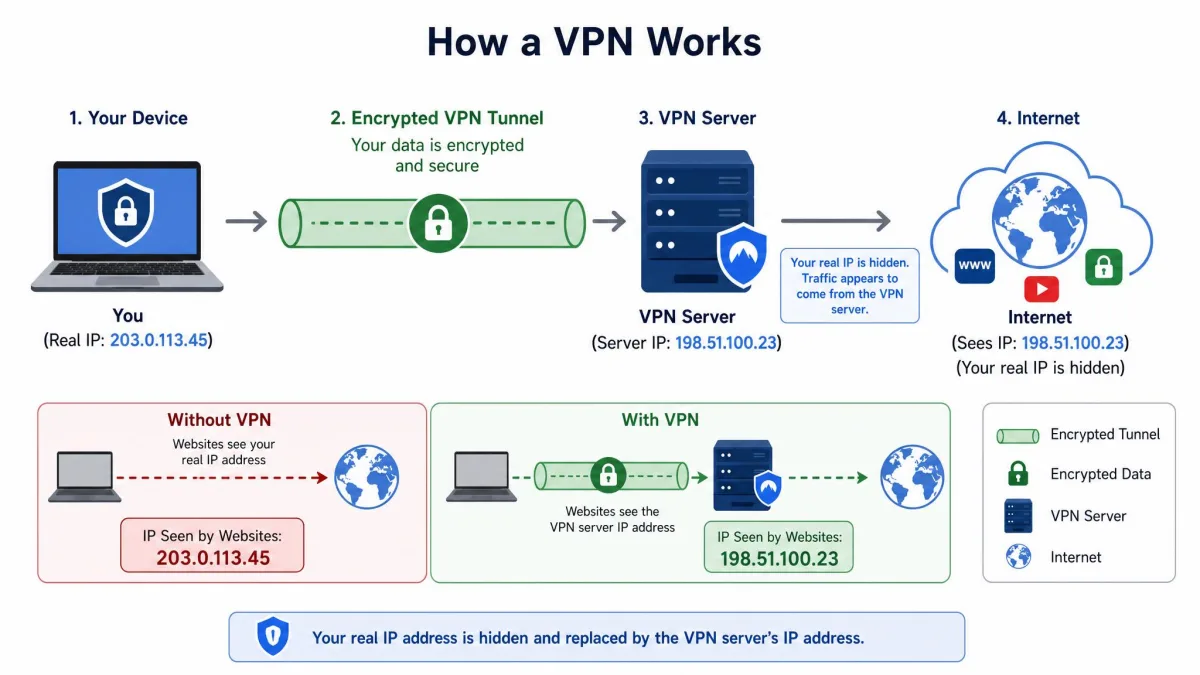
A VPN creates an encrypted connection between your device and a server run by the VPN service. Once that tunnel is open, your internet traffic flows through it, and anyone watching the network sees scrambled data instead of the sites you visit. Your device also borrows the server's IP address, which hides your real location.
Think of it as a sealed envelope for everything you send online. Your internet provider, the coffee shop Wi-Fi, and most snoops on the same network can tell that you are connected to a VPN, but they cannot read what is inside. That is the core of how a VPN keeps you private and secure.
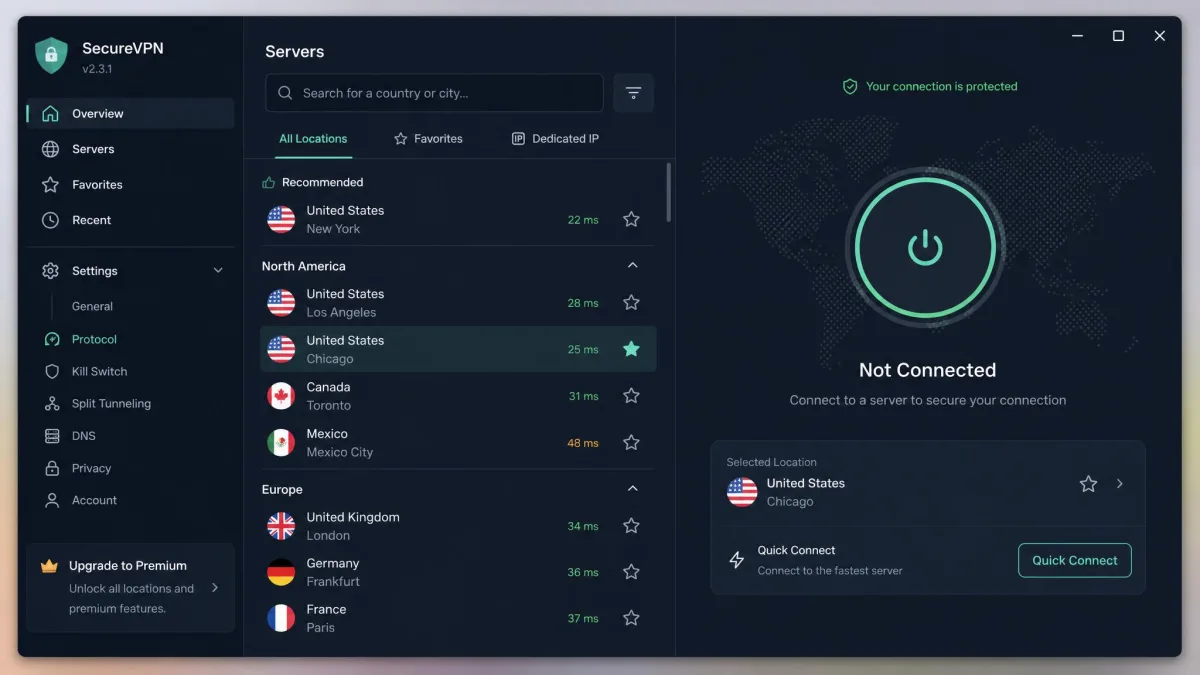
Modern VPN apps do more than encrypt. They let you choose a server location, switch protocols, block ads and trackers, and cut your connection automatically if the tunnel fails. These features are why an app from a good service beats a bare manual connection for most people.
What a VPN Hides (and What It Cannot Protect)
A VPN hides your browsing activity from your internet provider, masks your IP address from the websites you visit, and protects data you send over public Wi-Fi. It is one of the simplest ways to stay safe online when you are away from your home network.
What a VPN does not do is make you anonymous. If you sign in to an account, that service still knows who you are. A VPN also will not stop malware, block phishing emails on its own, or hide activity from a site you are logged into. It protects the connection, not your habits.
It is also worth knowing that your VPN provider can see your traffic in theory, which is why a no-logs policy matters so much. A service that keeps no activity logs has nothing to hand over even if it is asked. We treat an audited no-logs policy as a baseline requirement, not a bonus. For jurisdiction-conscious users, it is worth checking whether a provider sits inside the Five Eyes alliance of data-sharing countries.
Before You Start: Choosing the Right VPN
Before you download anything, decide what you need the VPN for. Privacy on public networks, streaming content from another country, and securing a whole household are different jobs, and the right service depends on which one matters most to you. A little thought here saves you from switching apps later.
The good news is that the best services on the market cover all of these needs well. What you are really choosing between is price, speed, and the extra features that make daily use smooth. Get those three right and the rest tends to follow.
Almost every reputable VPN offers a money-back guarantee, so you can install it, run your own speed and streaming tests, and get a refund if it does not fit. NordVPN, ExpressVPN, and Surfshark all include a 30-day money-back guarantee.
Free vs. Paid VPNs: Which Should You Get?
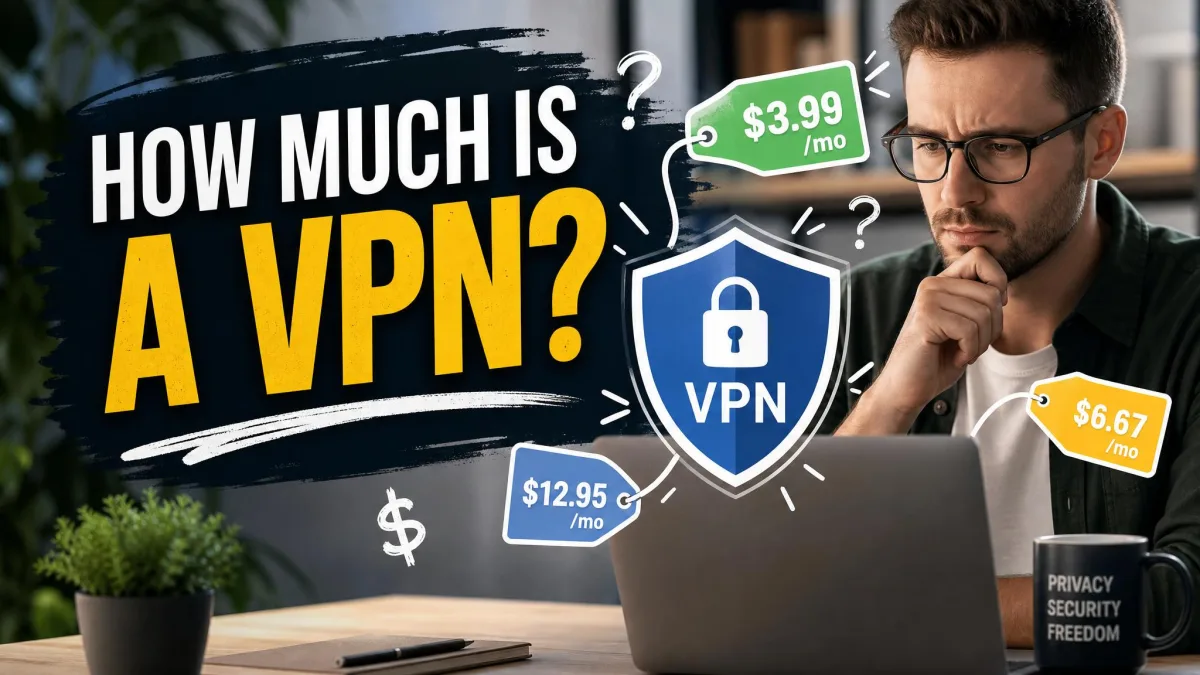
A paid VPN buys you faster servers, more locations, and a business model that does not depend on selling your data. Reputable paid services typically cost about $2 to $5 per month on a multi-year plan, or roughly $10 to $15 per month if you pay month to month. For most people that is the right choice.
Free VPNs are tempting, but many of them come with real costs. In our experience and in independent testing, a large share of free apps run far slower, cap your data, or make money in ways that undermine the privacy you signed up for. Free VPNs in testing ran roughly 30% to 70% slower than paid options because of congested servers and bandwidth caps.
There is one safe free route: a reputable provider's own free tier. Proton VPN's free plan, for example, has no data limit and no time limit, shows no ads, and keeps no activity logs. It is limited to one device and a small set of countries, but it is a genuinely safe way to try a VPN without paying.
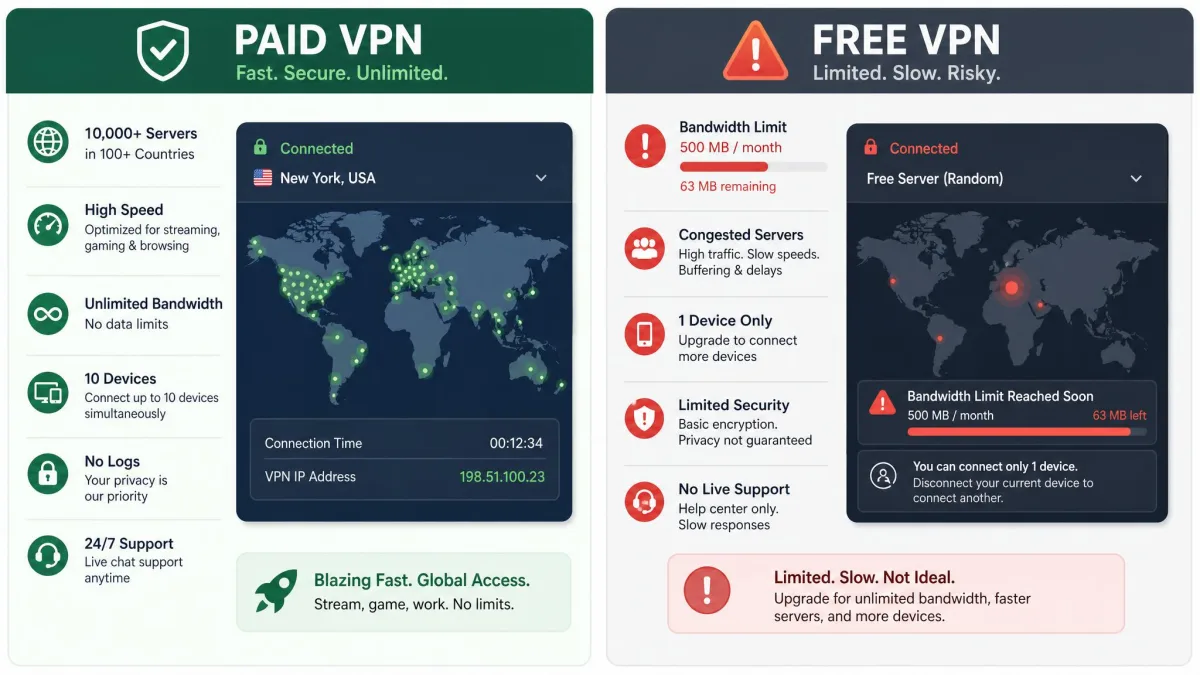
Avoid unknown free VPN apps from the app store. Many request permissions with no legitimate VPN purpose and bundle trackers, and independent testing found the large majority of free Android VPN apps leaked identifiable data through DNS, IPv6, or WebRTC leaks. A free app that behaves like spyware is worse than no VPN at all. The FTC consumer privacy guidance is a good reminder of what shady apps do with your data.
What to Look For in a VPN (Privacy, Speed, Features, Price)
Privacy comes first. Look for an audited no-logs policy, strong encryption, and leak protection for DNS, IPv6, and WebRTC. These are the features that decide whether your data actually stays private when you connect.
Speed is next, and it depends on server count and protocol support. A service with many nearby servers and modern protocols like WireGuard will feel almost as fast as your normal connection. Then come the conveniences: a kill switch, split tunneling, and enough simultaneous device connections for your household. Surfshark, for instance, allows unlimited simultaneous device connections on all plans.
Price ties it together. Compare the multi-year rate against the monthly rate, and remember that intro deals renew higher after the first term. We always check the renewal price, not just the headline promo, before committing.
How to Get and Set Up a VPN on Windows
Windows is the most common place people start, and you have two paths: install the provider's app, or set up a connection manually using the built-in client. The app is what we recommend for almost everyone, because it is faster and harder to get wrong.
To use the app, sign up for a service on its website, download the Windows installer, and run it. Open the app, sign in with your account, and click connect. The app picks a fast nearby server by default, and you are protected within a minute or two. From there you can choose a different server or turn on the kill switch in settings.
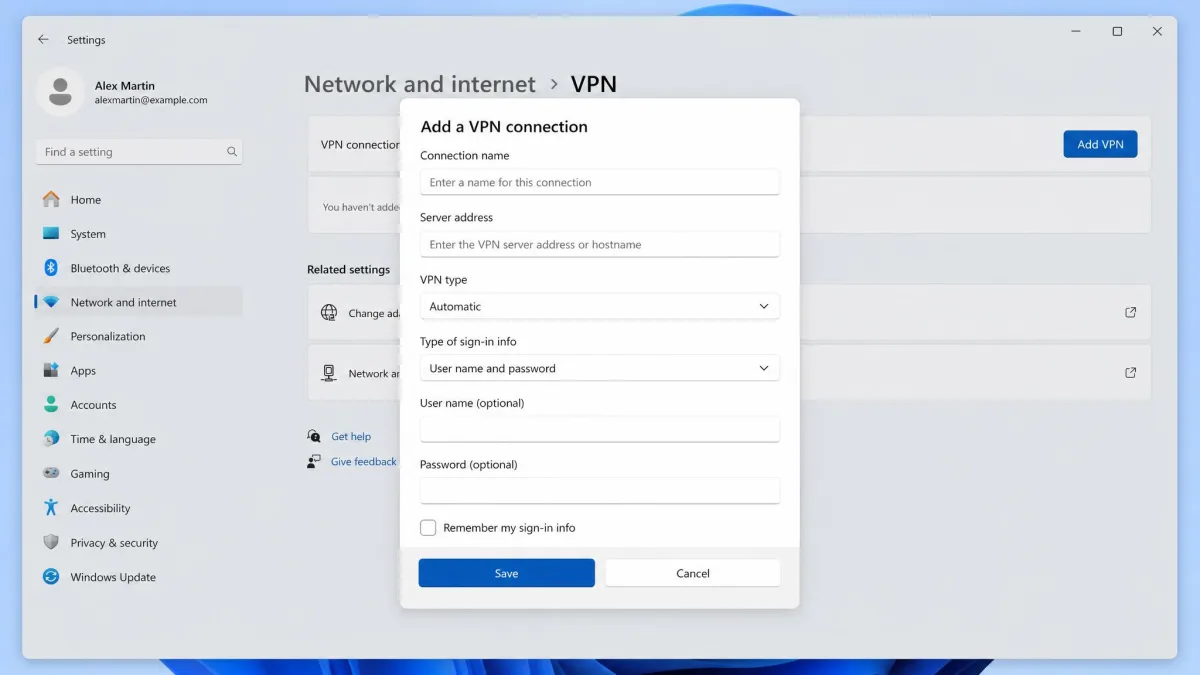
If you would rather use the connection built into Windows, you can add it by hand. Go to Settings, then Network & internet, then VPN, and select Add VPN. You will need to enter a few details from your provider.
A manual Windows VPN profile needs the VPN provider set to Windows built-in, a connection name you choose, the server name or address, the VPN type or protocol, and your sign-in info. After you save it, connect from the taskbar network icon by selecting VPN and toggling it on, or open Settings, then VPN, and click Connect.
The manual route is handy when your provider gives you a specific server to enter, but it will not include a kill switch or leak protection on its own. If privacy is the point, the provider's app is the safer default.
How to Get and Set Up a VPN on Mac
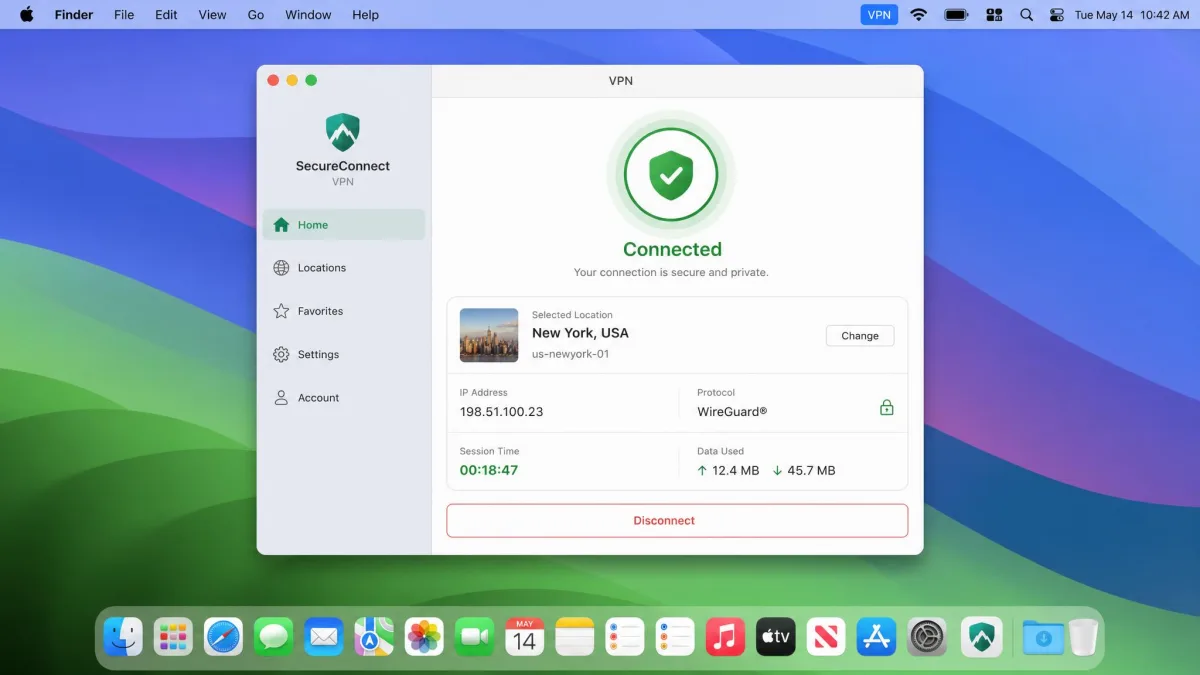
On a Mac the flow mirrors Windows. Create your account, download the macOS app from the provider's site or the Mac App Store, and install it. Open the app, sign in, and connect. The first time you connect, macOS asks you to allow a VPN configuration, so approve that prompt and you are set.
We prefer the provider's app on Mac because it keeps WireGuard support, the kill switch, and automatic server selection in one place. Once it is running, connecting is a single click, and the app remembers your last server.
If you need a manual setup, you can add a VPN configuration under System Settings, then Network, then VPN. You enter the server address, protocol, and credentials your provider supplies. As on Windows, this built-in route works but skips the extra privacy features, so save it for cases where you have no other option.
How to Get and Set Up a VPN on iPhone & iPad
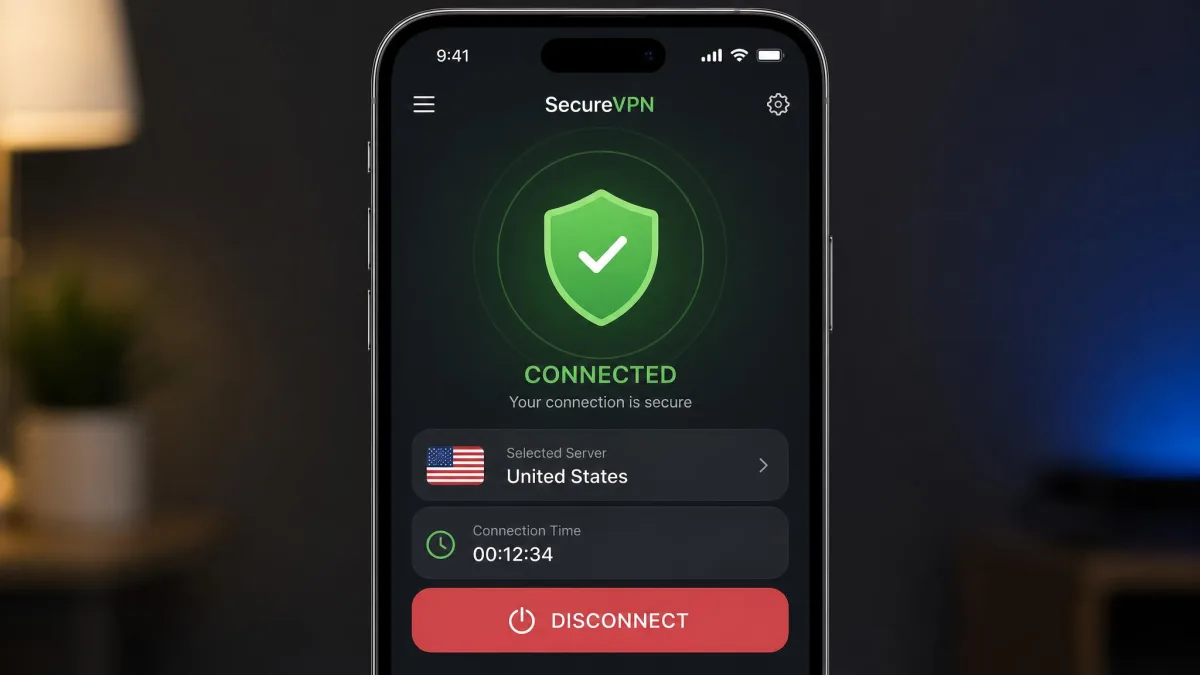
Getting a VPN on iOS is the smoothest setup of all. Download your provider's app from the App Store, open it, and sign in with the account you created. Tap connect, approve the one-time prompt that lets the app add a VPN configuration, and iOS handles the rest.
Because Apple exposes VPN controls to well-built apps, you get the kill switch, protocol choice, and auto-connect on untrusted Wi-Fi without touching Settings. This is why we tell iPhone and iPad users to skip manual profiles entirely. Installing a VPN app and connecting for the first time usually takes only a few minutes: download, sign in, tap connect.
Turn on the option to connect automatically on unknown networks. That way your phone protects itself the moment it joins café or airport Wi-Fi, without you needing to remember.
How to Get and Set Up a VPN on Android
Android setup is nearly identical to iOS. Install the provider's app from the Google Play Store, open it, and sign in. The first time you tap connect, Android shows a connection request dialog, so accept it and the VPN comes online. After that, one tap connects and disconnects.
Stick to the official app from a service you trust here more than anywhere else. Android has the widest range of free VPN apps, and it is also where the most data leaks and shady permissions show up. A reputable provider's app avoids all of that and keeps the kill switch and leak protection in place.
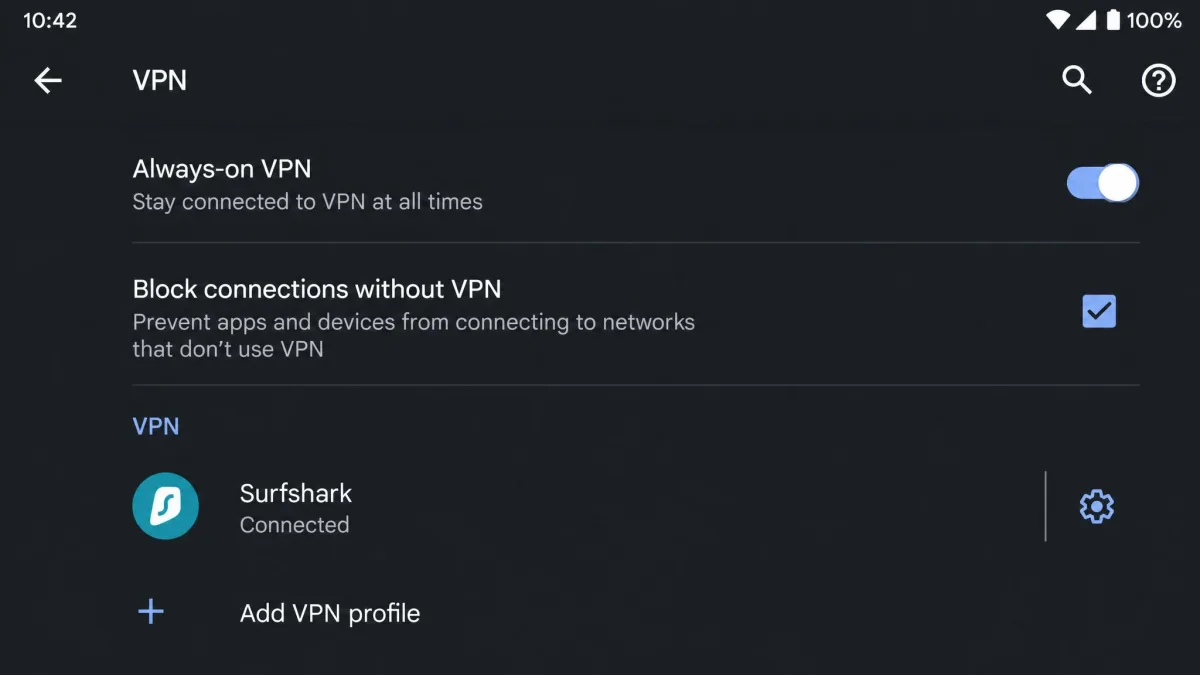
One nice touch on Android is the always-on VPN setting in the system network menu, which forces all traffic through the VPN and blocks connections when it is off. We turn it on for a device that should never touch the internet without protection.
How to Set Up a VPN on a Router (Advanced)
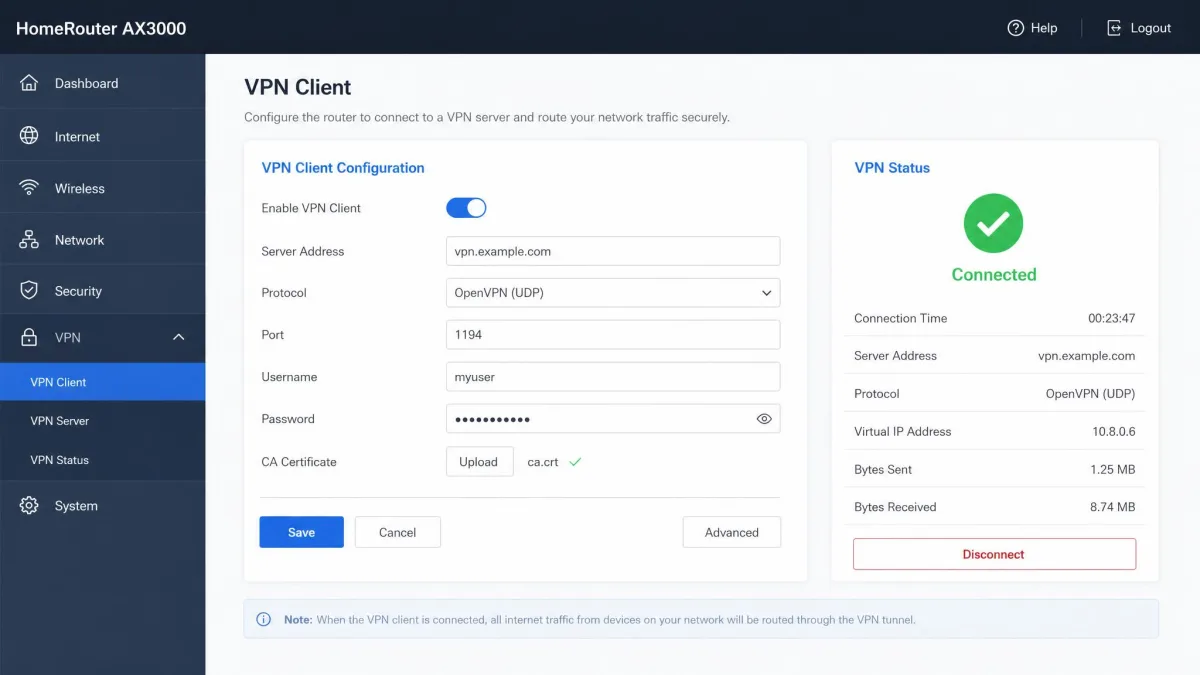
Setting up a VPN on your router protects every device on your network at once, including smart TVs, consoles, and gadgets that have no VPN app of their own. It is the most powerful option and also the most involved, so it is worth doing only once you are comfortable with the basics.
The process depends on your router. First, check that your router supports VPN client connections, or install compatible firmware such as DD-WRT or a provider's own router firmware. Then log in to the router's admin page, open the VPN client section, and enter the server address, protocol, and credentials from your provider. Many services publish exact router guides with the values to paste in.
Router setup protects every device on the network at once, but it is the most involved to configure and harder to switch servers on. Because the VPN lives on the router, changing your server location usually means logging back into the admin page rather than tapping a button. For that reason we often run a router VPN for the always-protected devices and keep an app on our phone and laptop for flexibility.
A weak or wrongly configured router setup can leak data or slow your whole network. Enter the settings exactly as your provider lists them, and test for DNS leaks afterward before you rely on it.
How to Choose the Right VPN Server and Protocol
Once your VPN is installed, two choices shape how well it performs: which server you connect to, and which protocol it uses. Both are easy to get right once you know what they do.
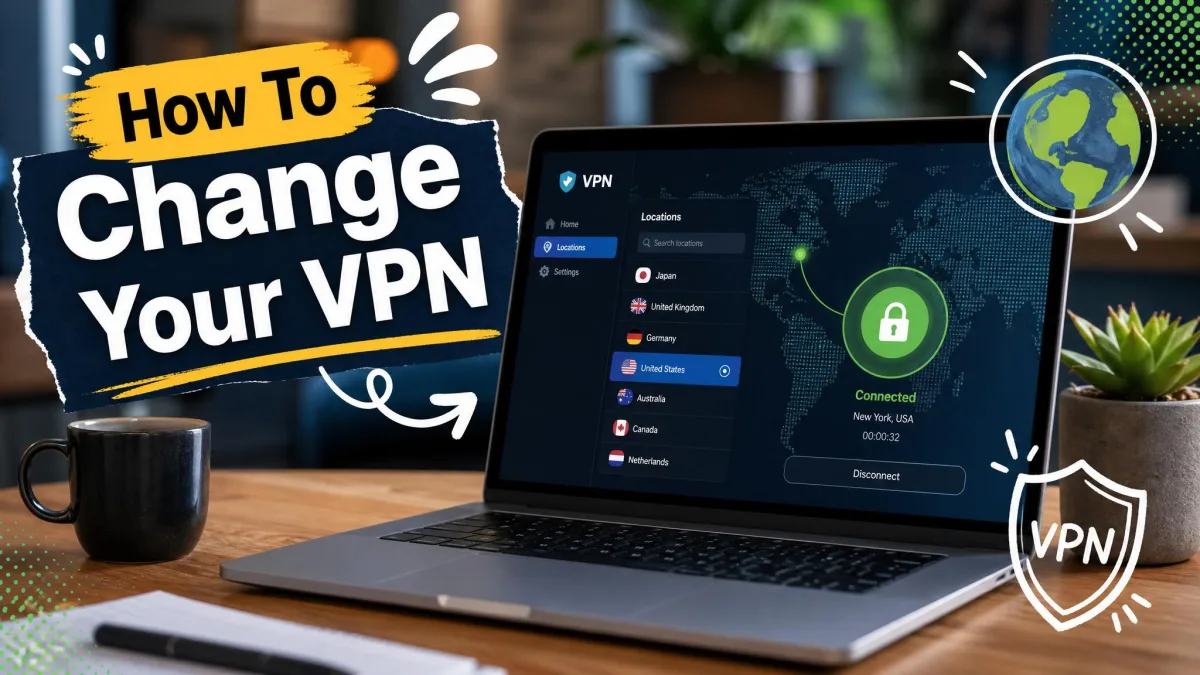
For the server, closer is faster. Choosing a server geographically close to you keeps speeds high, while distant servers add noticeable lag. If you just want privacy, pick the nearest recommended server. If you need content from another country, pick a server there and expect a little more slowdown.
For the protocol, the default is almost always best. Leaving the protocol on the automatic or WireGuard setting gives the best speed for most people, and WireGuard is the fastest mainstream protocol, roughly 15% to 30% faster than OpenVPN. Its codebase is about 4,000 lines, small enough to be fully audited, which is part of why we trust it.
Switch protocols only when you have a reason. OpenVPN's TCP mode on port 443 blends into normal HTTPS traffic, which helps when a network blocks WireGuard's UDP. IKEv2 is the most reliable protocol on mobile, thanks to MOBIKE keeping the connection alive when you switch between Wi-Fi and cellular, though the protocol landscape is shifting toward WireGuard across the board.
Turn on the kill switch during setup. It blocks your traffic if the VPN drops instead of silently exposing your real IP address, which is exactly the moment you would not notice on your own.
VPN Setup Method Comparison (App vs. Manual vs. Router)
The three ways to get a VPN onto your devices trade ease for control. Most people want the app; the manual and router routes exist for specific needs. Here is how they line up.
| Method | Ease | Control | Device support | Best for |
|---|---|---|---|---|
| App (provider app) | Easiest: download, sign in, connect in minutes | Limited to app options, but covers most needs | Per-device app for Windows, Mac, iOS, Android | Most users wanting quick, full-featured protection |
| Manual (built-in client) | Moderate: enter server, protocol, credentials by hand | Fine-grained per-connection control | Any OS with a built-in VPN client | Users needing a specific server or no app |
| Router | Hardest: firmware and config work upfront | Network-wide policy, limited per-device control | Covers every device on the network at once | Whole-home coverage and devices without VPN apps |
The pattern is clear. The provider's app is the easiest route for most people, while manual setup gives more control but is fiddlier and easier to get wrong, and a router covers everything at the cost of flexibility. Start with the app, and reach for the others only when you hit their specific use case.
Troubleshooting Common VPN Connection Issues
Even a clean setup can hiccup. The most common problem is a VPN that will not connect at all, usually because a network blocks its protocol. Switch from WireGuard to OpenVPN TCP on port 443, or try a different server, and the connection almost always comes back.
Slow speeds are the next complaint. If your connection crawls, you are likely on a distant or overloaded server, so choose a closer one and confirm you are on WireGuard. A rushed or misconfigured setup can leak data, break apps, or slow the connection more than it should, so it is worth checking these settings rather than assuming the service is bad.
If certain apps or sites stop working while connected, split tunneling is the fix. It lets you route some traffic outside the VPN, which helps with banking apps and local devices that dislike a foreign IP address. And if you suspect a leak, run a quick DNS leak test online while connected; a good service shows only the VPN server, never your own provider.
When something breaks, disconnect, switch servers, and reconnect before changing any deeper settings. That single step resolves most connection problems we run into.
Frequently Asked Questions
How much does a VPN cost?
Can I get a free VPN safely?
Will a VPN slow my internet speed?
Can I be tracked while using a VPN?
When should I not use a VPN?
Bottom Line
Getting a VPN comes down to three steps: choose a service you trust, create an account, and install the app on each device. For almost everyone, the provider's own app on Windows, Mac, iPhone, iPad, or Android is the fastest and safest route, and it takes only a few minutes to be online and protected.
Choose a nearby server, leave the protocol on WireGuard, and turn on the kill switch, and you will get strong privacy with speed loss you will barely notice. Skip unknown free apps in favor of a paid plan or a reputable free tier like Proton VPN. Save the manual and router setups for when you genuinely need more control or whole-home coverage. Do that, and you will stay safe online without the guesswork.