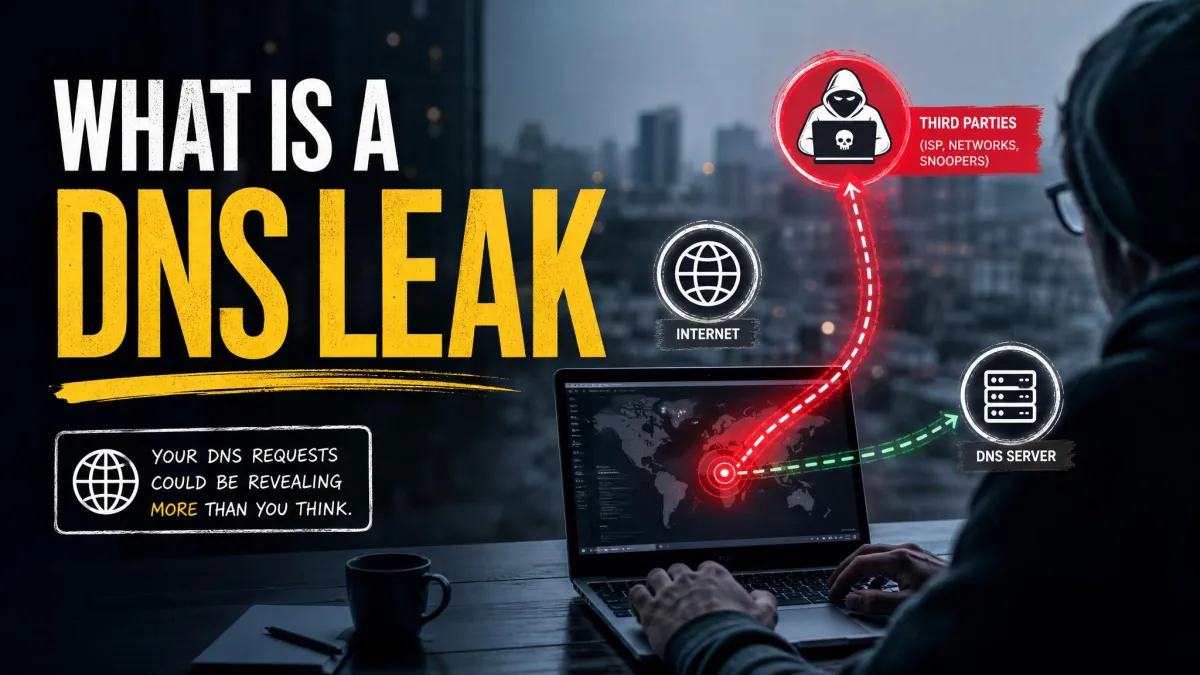
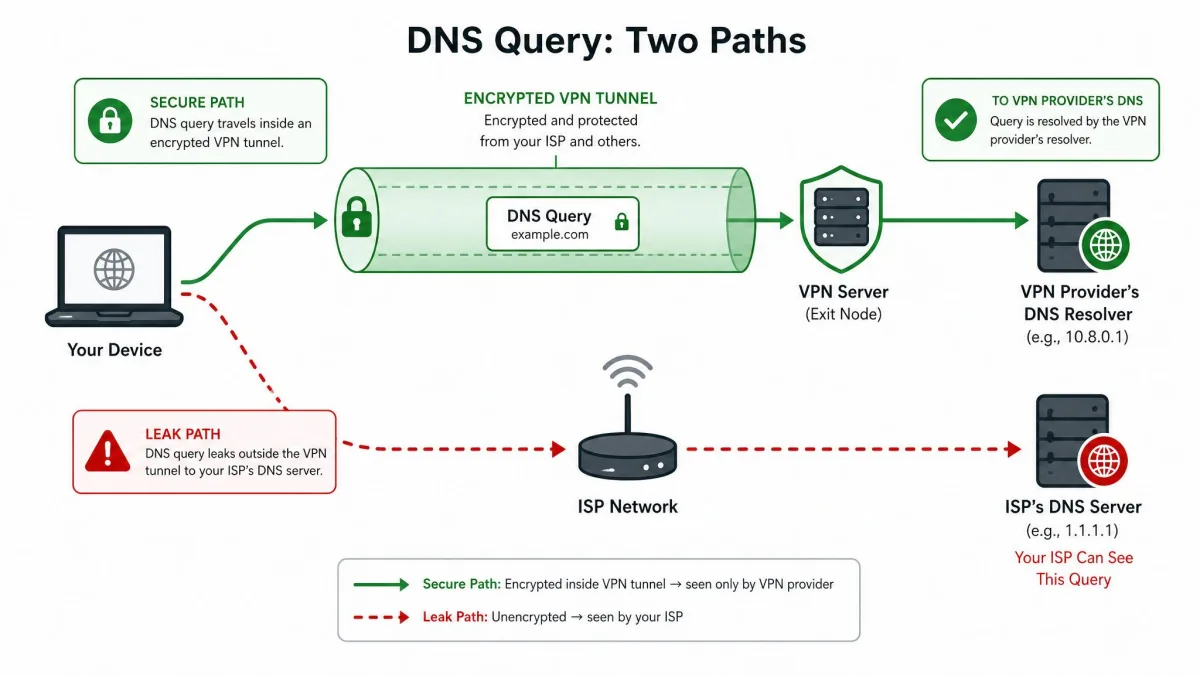
A DNS leak occurs when your DNS requests reach your ISP's DNS server even while a VPN is active, exposing the domains you visit. The encrypted tunnel is supposed to carry every part of your connection, including the lookups that turn a domain name into an IP address. When those lookups escape the tunnel, your ISP can still see the names of the sites you browse.
This matters because most people assume a VPN hides everything. It usually hides your traffic, but a leak quietly routes your DNS requests around the tunnel. The result is a false sense of privacy: your IP address looks protected, yet your browsing history is still visible to your provider.
We tested for leaks the same way we check every VPN before it earns a recommendation, running before-and-after resolver checks on our own machines. This guide explains what a DNS leak is, how DNS works, why leaks happen even with a VPN, how to test for one, and how to prevent it for good.
What Is a DNS Leak? (Definition)
A DNS leak is a security flaw where your DNS requests travel to your ISP's DNS server rather than through your VPN's private tunnel. Your web traffic may still be encrypted, but the record of which domains you looked up is not.
Think of DNS as the address book of the internet. Every time you visit a site, your system asks a DNS server to translate the domain name into a numeric IP address. If that question is sent outside the tunnel, whoever runs the answering server, usually your ISP, learns exactly where you are going.
The leak is dangerous precisely because it is silent. Your connection keeps working, pages load normally, and nothing looks wrong. Only a deliberate test reveals that your DNS requests are exposed.
How DNS Works (Quick Primer)
The Domain Name System is the service that maps human-readable names to machine addresses. When you type a domain, your device does not know where that server lives until DNS tells it. Standard DNS uses UDP, and sometimes TCP, on port 53, and those queries travel in plain text by default.
That plain-text design is the root of the problem. Anyone positioned between you and the DNS server can read the names you request. A VPN is meant to close that gap by carrying DNS inside the same encrypted tunnel as the rest of your traffic.
DNS Resolution Step by Step
Here is what happens the moment you request a website:
- Your device checks its local DNS cache for a recent answer.
- If none exists, it sends a query to a configured DNS resolver, often your ISP's server.
- The resolver finds the matching IP address, working through the DNS hierarchy if needed.
- The address returns to your device, and your browser opens a connection to that server.
With a VPN working correctly, step two is redirected through the tunnel to the VPN provider's own resolver. A DNS leak means step two escapes to your ISP instead.
How a DNS Leak Happens (Even With a VPN)
A VPN does not automatically capture every DNS request. Whether a leak occurs depends on how the client, the operating system, and the network are configured. In our testing, most leaks trace back to a handful of predictable causes rather than a single broken app.
The common thread is that some part of the system decides to send a DNS query outside the tunnel. That decision can come from the VPN client, from the operating system's networking stack, or from the network itself. The four causes below account for the vast majority of leaks we have seen.
Misconfigured or DNS-less VPN
Some VPNs encrypt your traffic but never take control of your DNS settings. When the client does not route lookups through its own resolver, your device keeps using the ISP's DNS server out of habit. The tunnel protects your data, yet every domain request slips out the side.
We have also found that leaks often trace back to human configuration errors on custom DNS or VPN setups rather than a flaw in the VPN app itself. Manually pointing your system at a third-party resolver, then adding a VPN on top, is a reliable way to create a leak.
IPv6 Leaks (Lack of IPv6 Support)
Many VPNs were built for IPv4 and do not fully handle IPv6 traffic. If your network supports IPv6 but your VPN does not, IPv6 DNS requests can bypass the tunnel entirely while your IPv4 traffic stays protected. This is one of the most common leaks on modern home connections.
The fix is straightforward: either use a VPN that routes IPv6 through the tunnel, or disable IPv6 on your device so no request can escape that way.
Windows Smart Multi-Homed Name Resolution (SMHNR) & Teredo
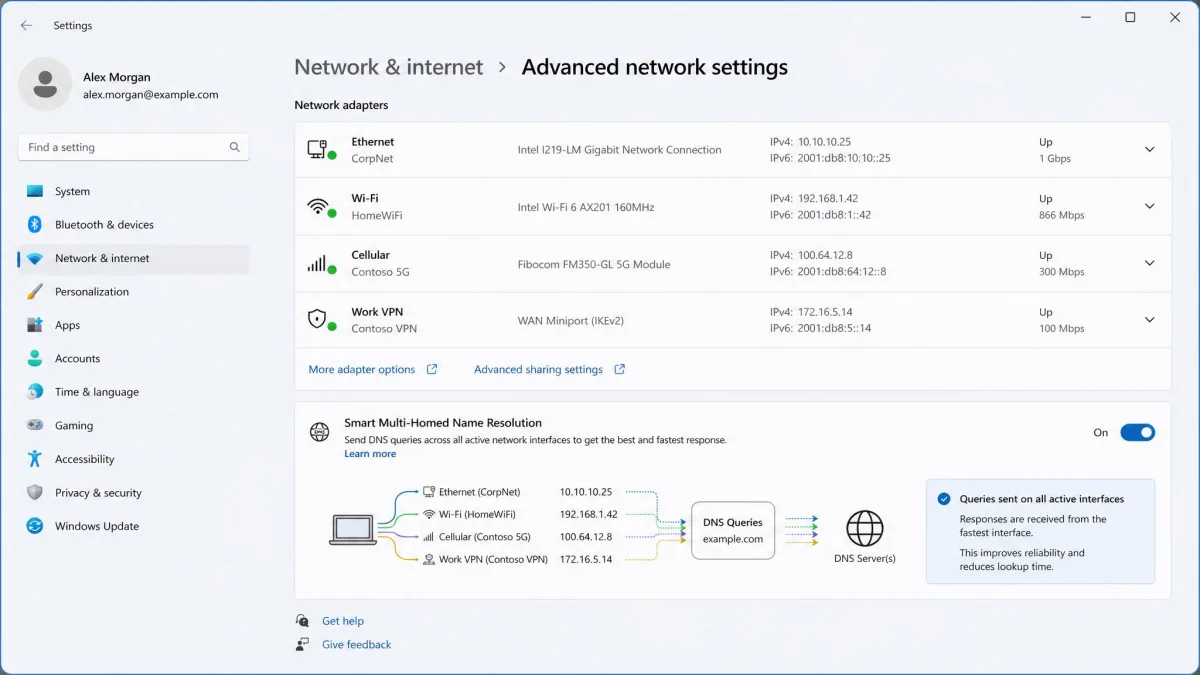
Windows Smart Multi-Homed Name Resolution, introduced in Windows 8, sends DNS requests across all available network interfaces at once and uses whichever answers first. That behavior lets queries bypass the VPN tunnel, because Windows will happily accept a reply from your ISP's resolver even when the VPN is up.
Teredo is a Windows tunneling technology that carries IPv6 traffic over IPv4 networks, and it can act as another path for DNS requests to escape. Both features are worth disabling on Windows when privacy is the priority.
On Windows, SMHNR can cause leaks even with a well-configured VPN. If your leak test still shows ISP servers after connecting, this feature is a likely culprit.
Transparent DNS Proxies
Some ISPs run transparent DNS proxies that intercept any DNS request on port 53 and force it through their own servers, regardless of the resolver you configured. Even if you set a trusted DNS provider, the ISP quietly redirects the query. A VPN that encrypts DNS inside the tunnel defeats this, because the ISP never sees a port 53 request to intercept.
Why DNS Leaks Are Dangerous (Privacy & Security Risks)
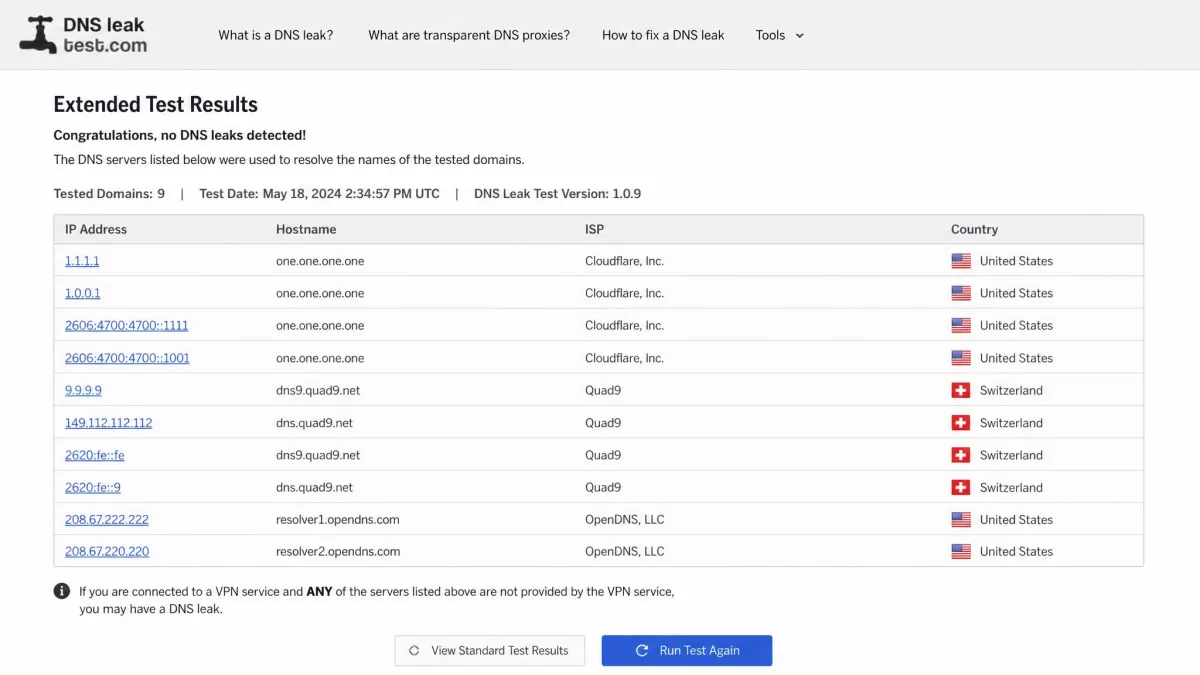
The core risk is simple: a DNS leak exposes your browsing history to your ISP even when you believe a VPN is protecting you. Every domain you visit becomes a record your provider can log, and that record is more revealing than most people expect.
That data has commercial value. An FTC staff report found that many ISPs collect troves of personal data about their users, who in turn have few meaningful ways to opt out. DNS logs feed directly into that picture, tying a list of sites to your account.
The exposure goes beyond marketing. A leaked DNS request can undermine the exact protections you use a VPN for: bypassing censorship, keeping medical or financial research private, or separating your identity from your activity. The scale of the problem is real, too. A 2016 CSIRO study of Android VPN apps found that 84% of the 283 apps it examined leaked DNS requests. A VPN that leaks is worse than no VPN in one way: it convinces you that you are private when you are not.
How to Test for a DNS Leak
Testing takes less than a minute, and it is the only way to know for sure. The fastest hands-on method we use is a before-and-after check: note the DNS servers your connection reports without a VPN, then connect and refresh the test. If the same ISP DNS servers appear both times, the VPN is leaking.
The easiest place to run this is a dedicated leak-test site. Run a DNS leak test at Browser Leaks, which shows the DNS servers currently answering for your connection. For a second opinion, IPLeak checks DNS alongside your IP address and WebRTC exposure in one view.
Running a DNS Leak Test and Reading the Results
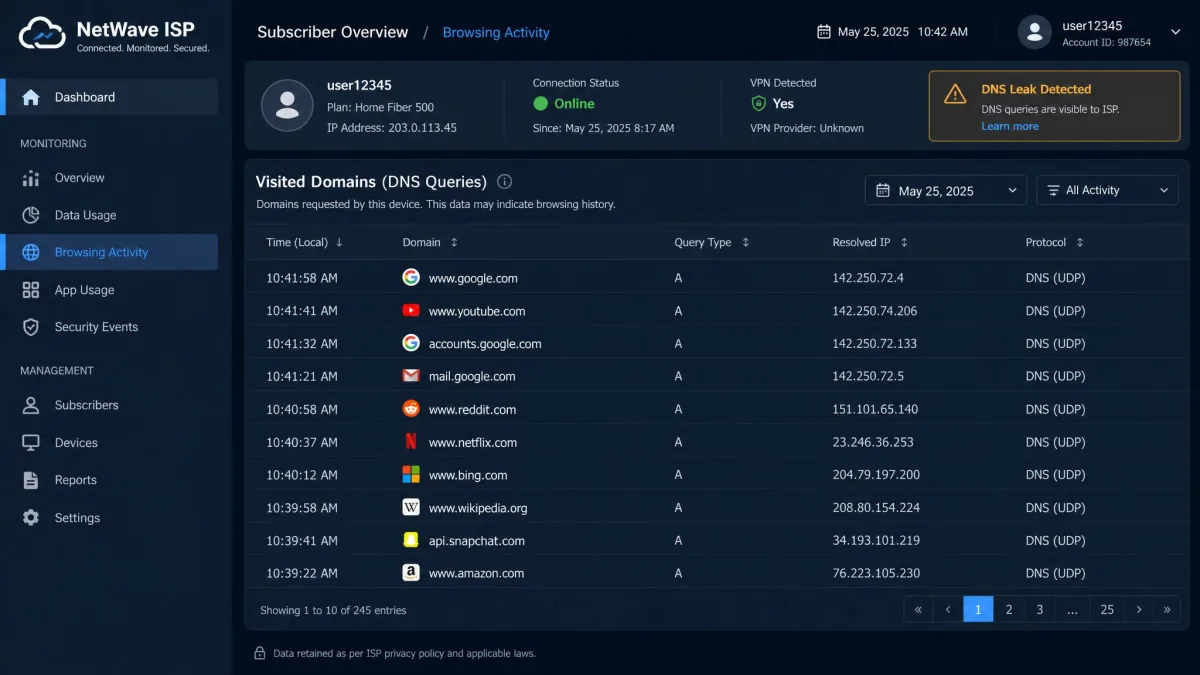
At DNSLeakTest, you have two options. The Standard test runs a single round of 6 queries for a quick check. The Extended test runs 6 rounds of 6 queries, 36 in total, to uncover every DNS server your connection touches. The Extended test takes 10 to 30 seconds longer.
Read the results by looking at the server owner and location. With your VPN connected, the listed servers should belong to your VPN provider or a neutral resolver, not your ISP, and the location should match your VPN server rather than your home city. In our testing, the Standard six-query test can miss leaks that only surface under load, so we run the Extended test whenever privacy needs are high.
For a definitive check, run the test once with the VPN off and once with it on. Recognizing your ISP's name in the connected results is the clearest sign of a leak.
Signs Your DNS May Be Leaking
Beyond a formal test, a few signs hint that your DNS is not fully protected:
- A leak-test site shows your ISP's name or your home city while the VPN is connected.
- Region-locked content still recognizes your real location despite an active tunnel.
- Advanced users can confirm a leak visually in a packet inspector: an encrypted tunnel shows unreadable data, while a leak shows plain, readable DNS queries.
None of these replace a proper DNS leak test, but any one of them is a reason to run one.
How to Prevent and Fix a DNS Leak
Preventing a leak comes down to making sure every DNS request travels inside an encrypted path. The good news is that a well-built VPN handles most of this for you. The steps below move from the single most effective fix to the platform-specific details.
Most fixes fall into three buckets: choose a VPN that controls DNS properly, close the IPv6 gap, and encrypt DNS at the source. Applying even the first one resolves the majority of leaks we encounter.
Choose a VPN With DNS Leak Protection and a Kill Switch
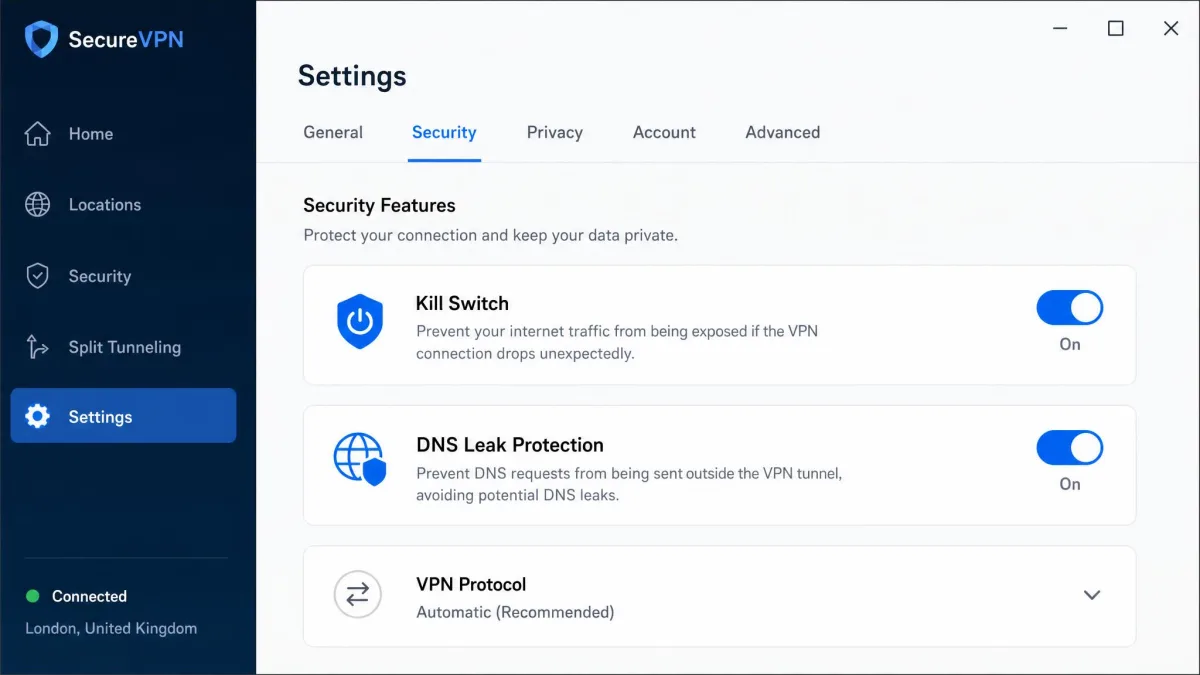
The simplest fix is a VPN that routes DNS through its own resolver and includes DNS leak protection. In our testing, this protection is now built in and mandatory on most modern VPN clients rather than an optional toggle, which is a meaningful improvement over a few years ago.
A kill switch is the essential companion. A VPN connection can drop silently and fall back to the ISP's DNS without anything catching it, and a kill switch blocks all traffic the instant the tunnel fails. That prevents the brief, invisible leak window that occurs during a reconnect.
When choosing a VPN, confirm it offers both private DNS resolution and a kill switch. Our guide to the best VPNs for privacy covers the clients that pass our leak tests.
Disable IPv6 / Confirm IPv6 Coverage
If your VPN does not fully support IPv6, close the gap. Either pick a client that routes IPv6 through the tunnel, or disable IPv6 on your device so no request can escape over it. On Windows, open Settings, go to Network and Internet, open your adapter's properties, and clear the Internet Protocol Version 6 checkbox. On macOS, open Terminal and set the IPv6 configuration to off for your active service.
Confirming coverage is just as valid as disabling. If your VPN advertises full IPv6 support and your leak test comes back clean on both stacks, you can leave IPv6 enabled.
Use Secure DNS (DoH / DoT) or a Trusted Resolver
Encrypted DNS closes the plain-text hole at the source. DNS over TLS (DoT) uses a dedicated port 853, while DNS over HTTPS (DoH) uses port 443 so the queries blend in with ordinary HTTPS web traffic. Either one stops a transparent proxy from reading or redirecting your lookups.
Pairing encrypted DNS with a trusted resolver adds another layer. Here is how the options compare:
| Feature | Standard DNS | DNS over TLS (DoT) | DNS over HTTPS (DoH) |
|---|---|---|---|
| Port | 53 | 853 | 443 |
| Encrypted | No | Yes | Yes |
| Blends with web traffic | No | No | Yes |
Platform Notes (Windows, macOS, iOS, Android, Router, Browser)
Each platform has its own path to fixing a DNS leak:
- Windows: Disable Smart Multi-Homed Name Resolution and Teredo, then set a trusted resolver. Open Settings, go to Network and Internet, and configure your DNS servers manually.
- macOS: Open System Settings, go to Network, select your connection, and enter a trusted DNS server under DNS.
- iOS: Install a VPN or encrypted-DNS profile, then open Settings, tap the VPN or DNS profile, and confirm it is active.
- Android: Open Settings, go to Network and Internet, open Private DNS, and enter a DoT-capable hostname.
- Router: Log in to your router admin page, open the DNS settings, and set a trusted resolver so every device inherits it.
- Browser: Open your browser settings, find the security or privacy section, and enable Secure DNS or DNS over HTTPS.
Setting encrypted DNS on your router protects every device on the network at once, including smart-home gadgets that cannot run a VPN themselves.
DNS Leak vs WebRTC Leak vs IP Leak
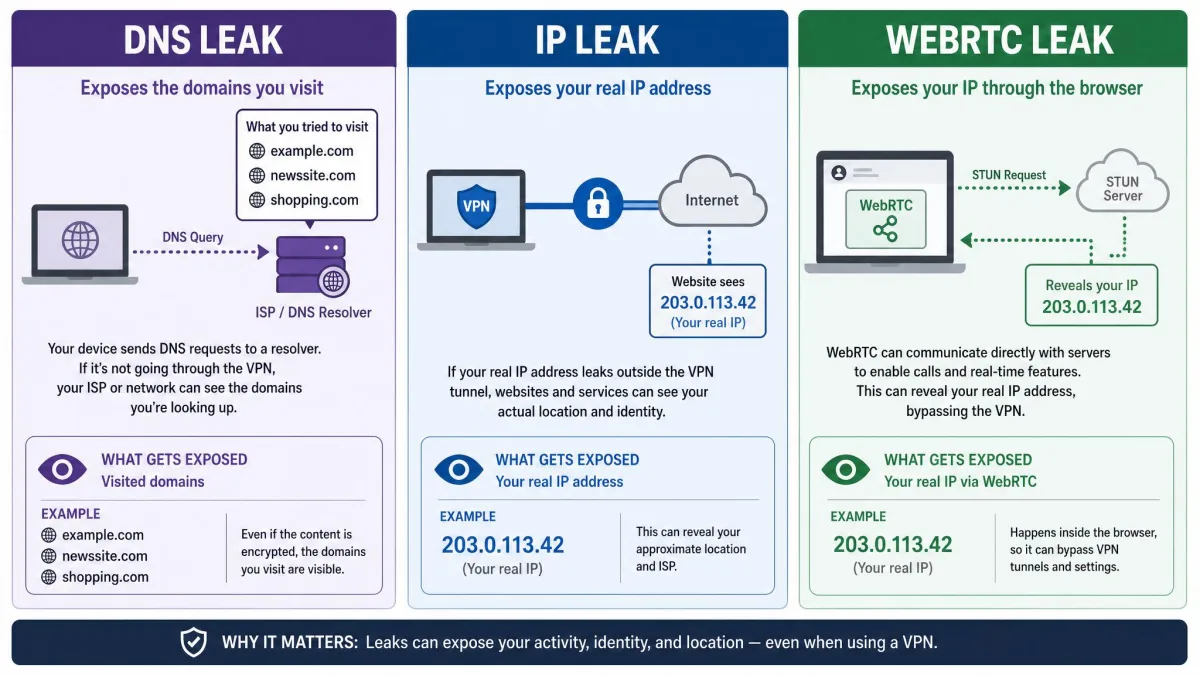
These three leaks are often confused, but they expose different things. A DNS leak reveals the domain names you look up, sending your DNS requests to your ISP. It is about your browsing history, not your address.
An IP leak exposes your real IP address, which points to your approximate location and identifies your connection. This usually happens when a VPN drops or when IPv6 traffic escapes the tunnel. A WebRTC leak is browser-specific: a feature designed for real-time audio and video can reveal your true IP address through the browser even when the VPN is otherwise working.
In short, a DNS leak exposes where you are going, while IP and WebRTC leaks expose who and where you are. A thorough privacy check tests for all three, since a clean DNS result does not guarantee your IP is hidden.
Frequently Asked Questions
What is a DNS leak in simple terms?
Does a VPN always prevent DNS leaks?
Can a DNS leak reveal my identity?
What is the best DNS server for privacy?
Is a DNS leak worse than an IP leak?
Bottom Line
A DNS leak quietly defeats the privacy you expect from a VPN by sending your DNS requests to your ISP instead of through the tunnel. The exposure is invisible during normal use, which is exactly why a deliberate test matters.
The fix is well within reach. Run a before-and-after leak test, choose a VPN with built-in DNS leak protection and a kill switch, close any IPv6 gap, and use encrypted DNS. Do that, and the domains you visit stay inside the tunnel where they belong.