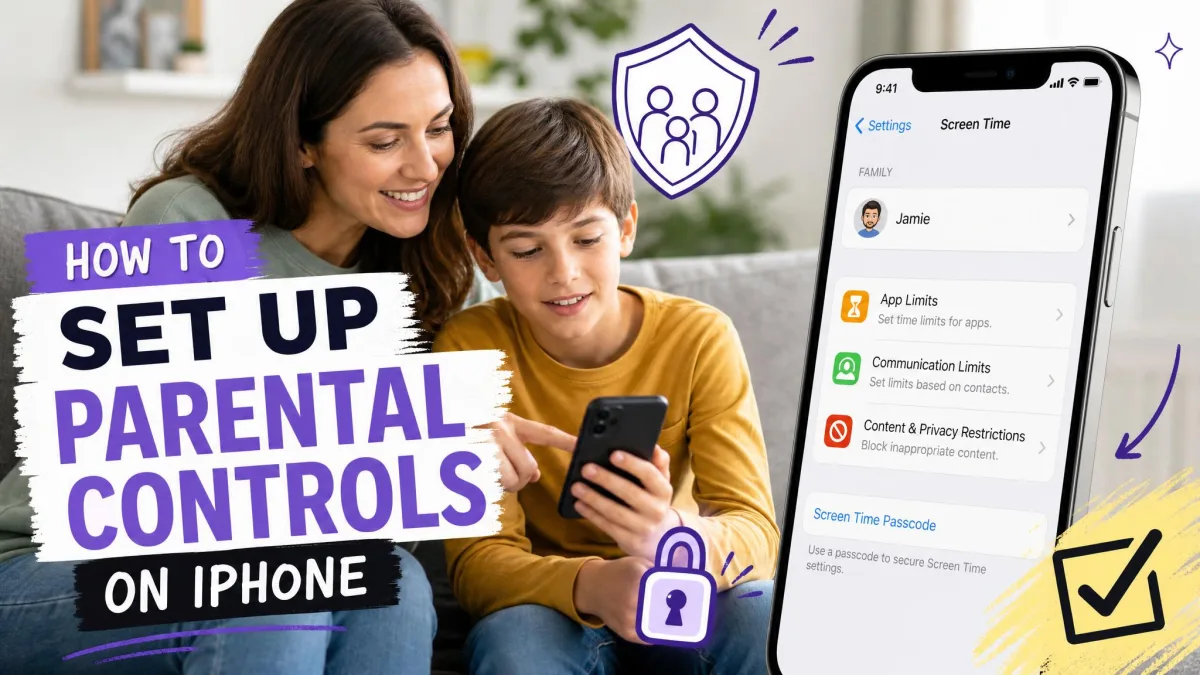
If you're about to hand your child an iPad, a few minutes of setup can block inappropriate content, cap screen time, and stop surprise purchases. Apple's built-in parental controls, Screen Time and Family Sharing, handle all three, and they're part of iPadOS.
We set these controls up on family iPads in our testing and worked through every screen. The tools work well, but the settings sit several menus deep, so the setup deserves a re-check after big iPadOS updates. By the end, you'll be able to schedule Downtime, cap app use by category, filter explicit content and websites, and approve every purchase. Have both devices nearby, because a few settings are best confirmed from the parent's side.
Quick Summary: What iPad Parental Controls Cover
Screen Time is the control center. Turned on for your child's iPad, it provides Downtime for scheduled breaks, App Limits for daily time caps, Content & Privacy Restrictions for content and web filtering, Communication Limits, and Communication Safety, which detects and blurs nudity in Messages. Family Sharing adds the child's Apple Account and Ask to Buy, so purchases need your approval. Screen Time arrived with iOS 12 in 2018 and is built into every current version of iPadOS, with nothing to install and no subscription.
Before You Start: Family Sharing and a Child's Apple ID
The foundation of Apple's parental controls is Family Sharing. A group can include up to six people, and your child gets their own Apple Account that you create and manage. Children under 13 can't create an account themselves; a parent or guardian sets it up through Family Sharing, and the birthdate you enter can't be changed later. Apple's guide for setting up parental controls with Family Sharing covers the same setup.
The reason this matters is simple. Tablets are more common in households with children, per the U.S. Census Bureau, and in 2021 eight in ten U.S. households with children owned one. You can set up Screen Time without Family Sharing, but that path drops remote management and Ask to Buy; the FAQ covers it.
Create a Family Sharing group for your child's iPad
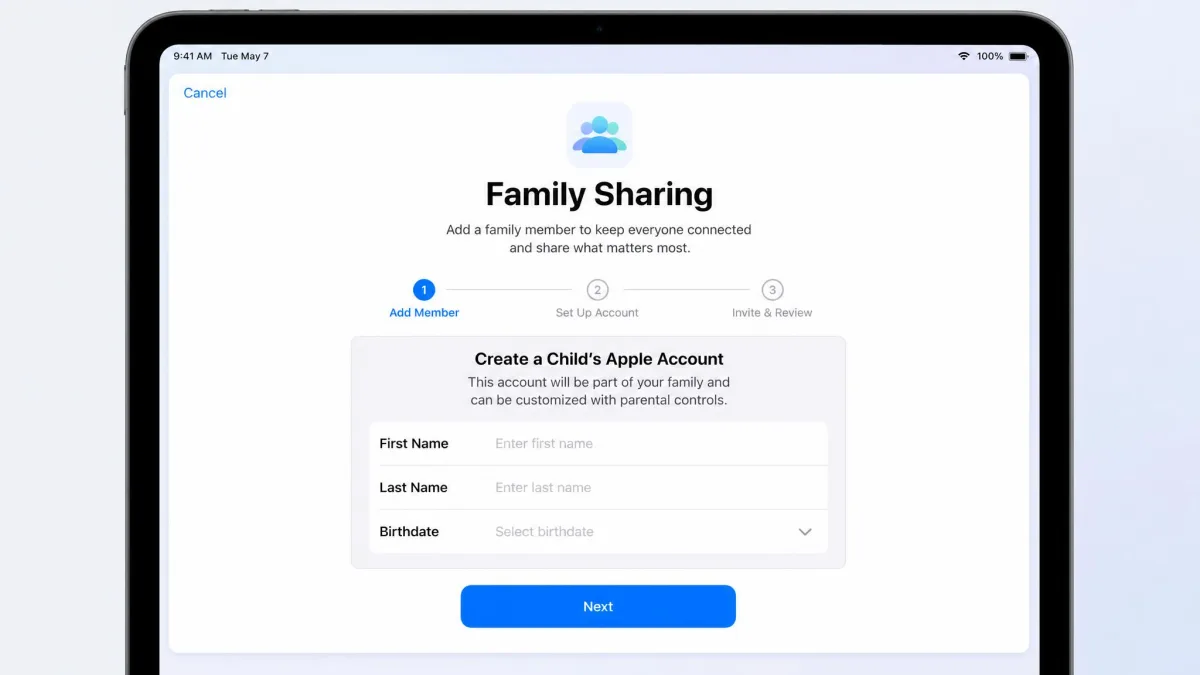
Open the Settings app, tap your name at the top, then tap Family Sharing. Choose Add Member, then Create a Child Account, and follow the prompts to enter your child's name and birthdate. You'll confirm that you're a parent or guardian, and the account joins your group. A vague "account could not be created" error is a known snag here, so if it appears, wait a minute and try again before assuming you did something wrong.
Open Settings and turn on Screen Time
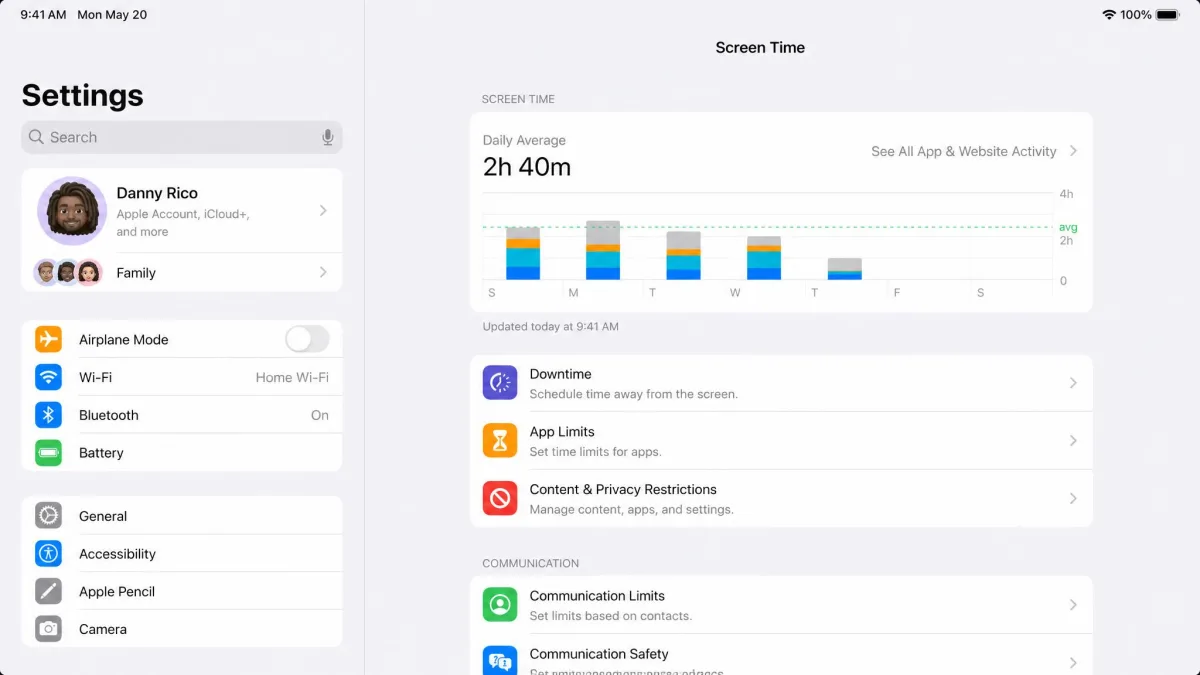
All the controls live in Settings under Screen Time. Open Settings on the child's iPad and tap Screen Time to see the full menu. The actual turning on happens in Step 1, where you'll also create the passcode that protects every limit you set.
How to Set Up Parental Controls on iPad: Step-by-Step
The ten steps below follow the order we recommend. You can pause and come back at any point, and every change is saved as you go.
Step 1: Turn on Screen Time and set it up for your child
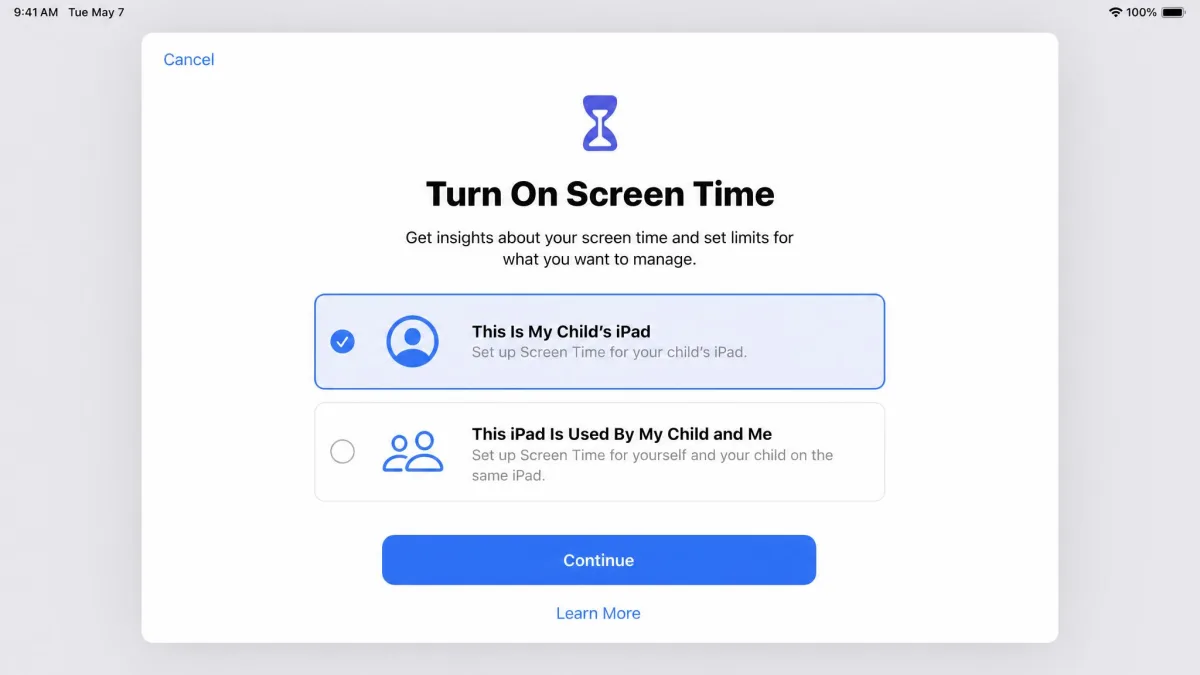
On the child's iPad, open Settings, tap Screen Time, then tap Turn On Screen Time and Continue. Choose This Is My Child's iPad so Apple treats the device as a child's iPad and lets you manage it from your own device. iPadOS offers to walk you through Downtime and App Limits, or you can set them in the steps below. Finish the guided setup and Screen Time is live.
Step 2: Create a Screen Time Passcode
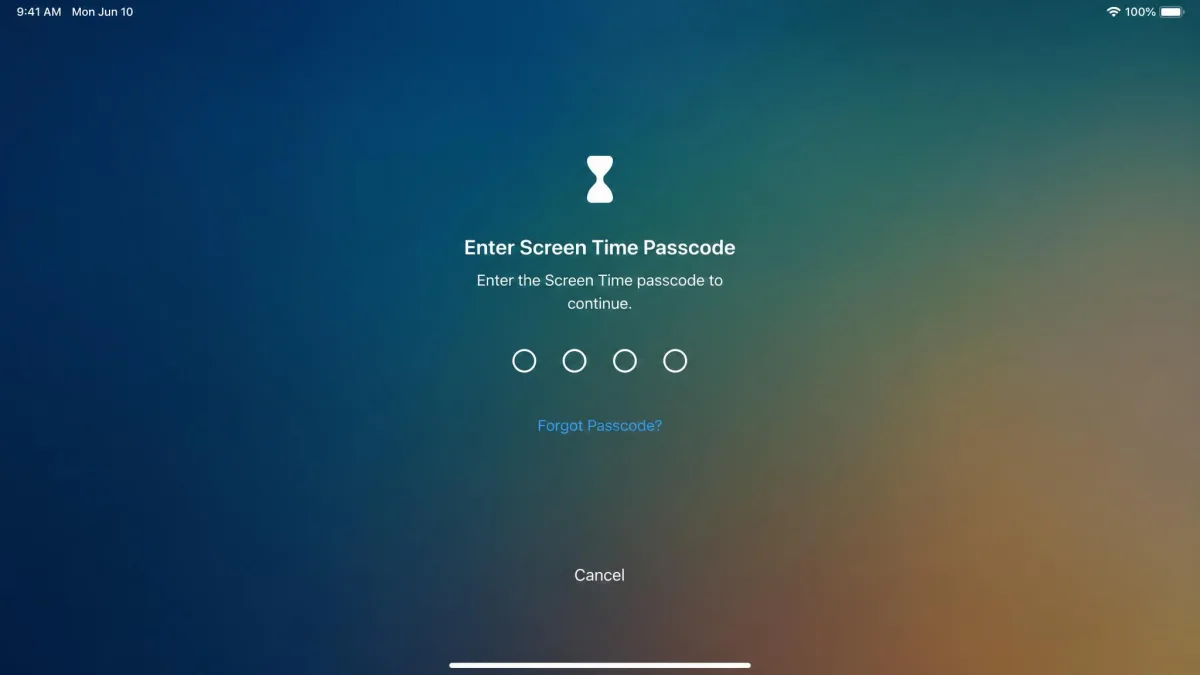
Screen Time uses a four-digit passcode that is separate from the iPad's unlock passcode. This is the linchpin of the whole setup, because anyone who knows it can change Downtime, App Limits, and content restrictions. Keep it away from the child, avoid obvious numbers like birthdays, and don't store it in the Notes app on the same device. Write it down somewhere safe before you continue, because a four-digit passcode is the one part of this setup a determined child can guess.
Step 3: Schedule Downtime for Bedtime and School Hours
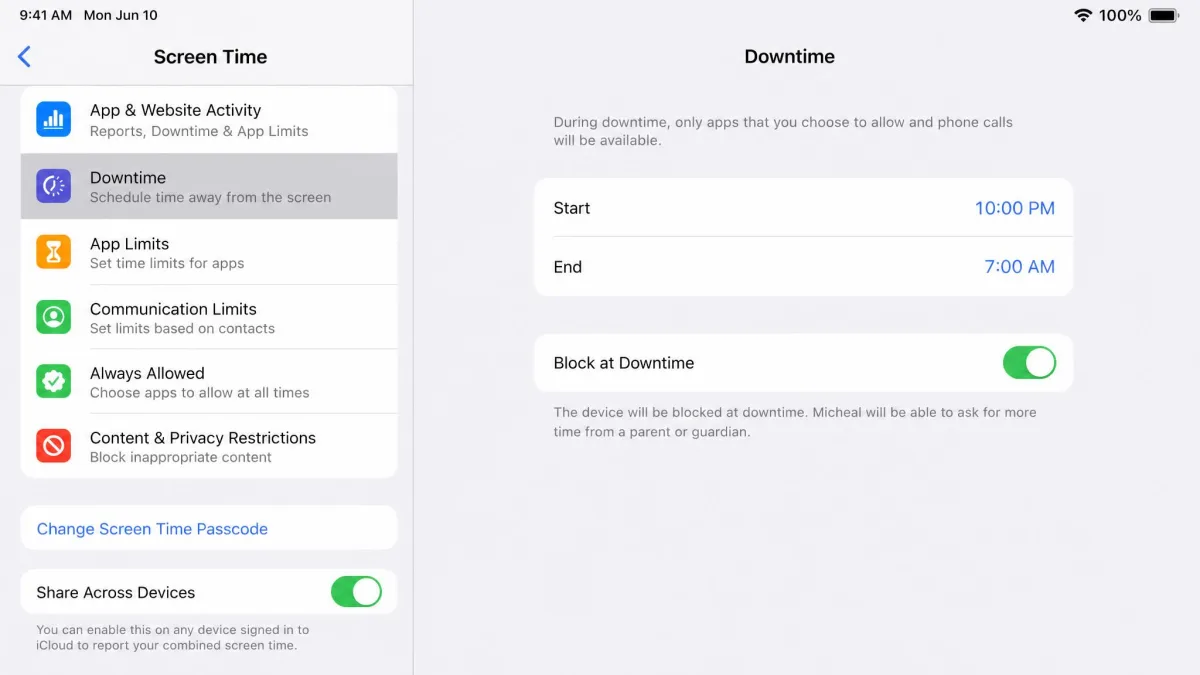
Downtime sets windows when the iPad is off-limits except for the apps you allow. Tap Downtime in Screen Time, turn it on, and set a start and end time. You can use one schedule for every day or customize by day, handy for earlier bedtimes on school nights. During Downtime the home screen dims and most apps are blocked, and anything you don't want locked, such as Messages, goes under Always Allowed. Leave Block at Downtime on so the schedule holds.
Step 4: Set App Limits by Category
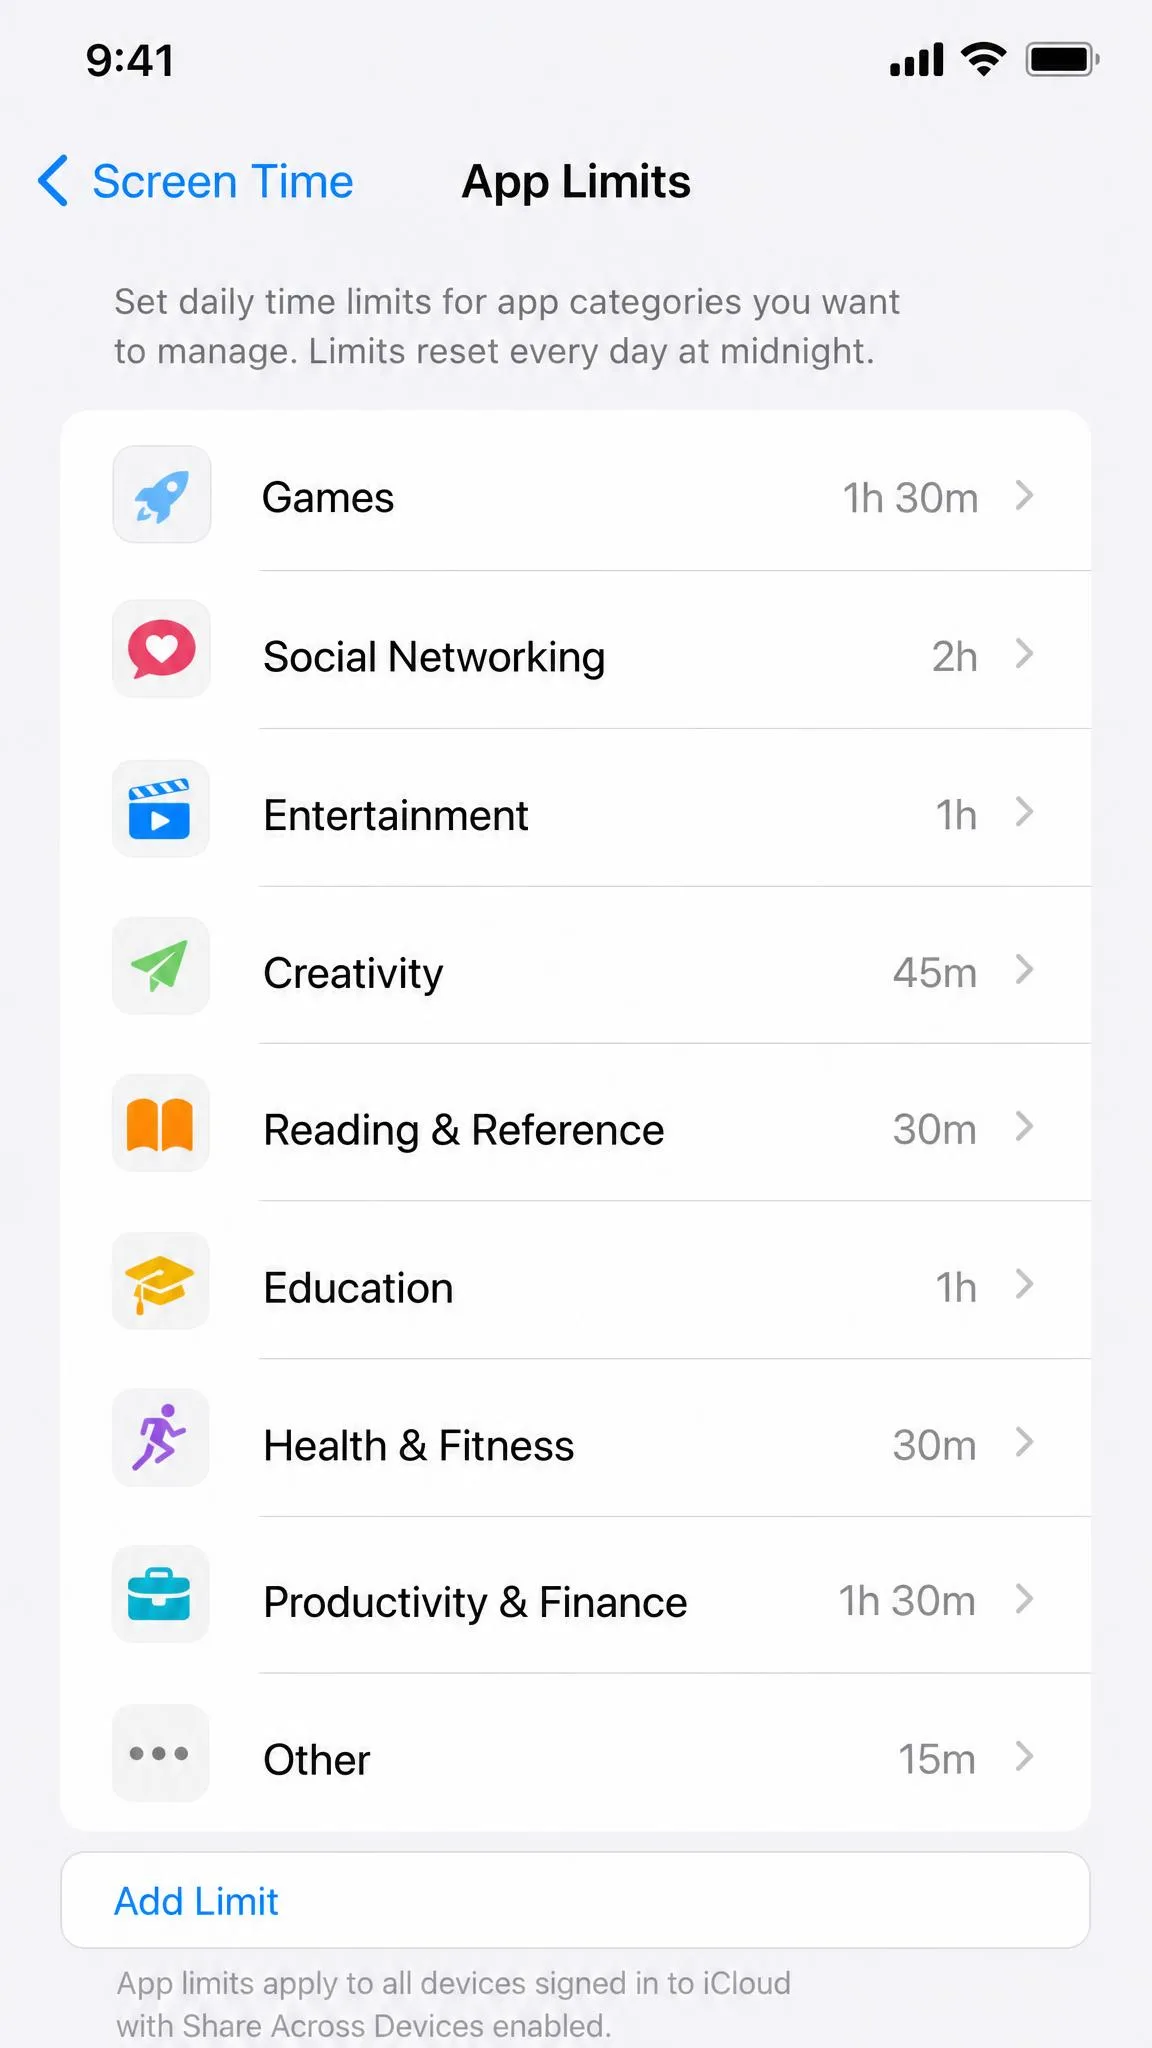
App Limits cap how long a category of apps can be used each day. Tap App Limits in Screen Time, tap Add Limit, and choose categories such as Games, Social Networking, or Entertainment, then set the daily time. You can also limit a single app instead of a whole category. Limits apply per day and can be customized by day, so you can allow more on weekends. When a limit is reached, the app shows a time limit screen the child can't clear.
Step 5: Turn on Content & Privacy Restrictions
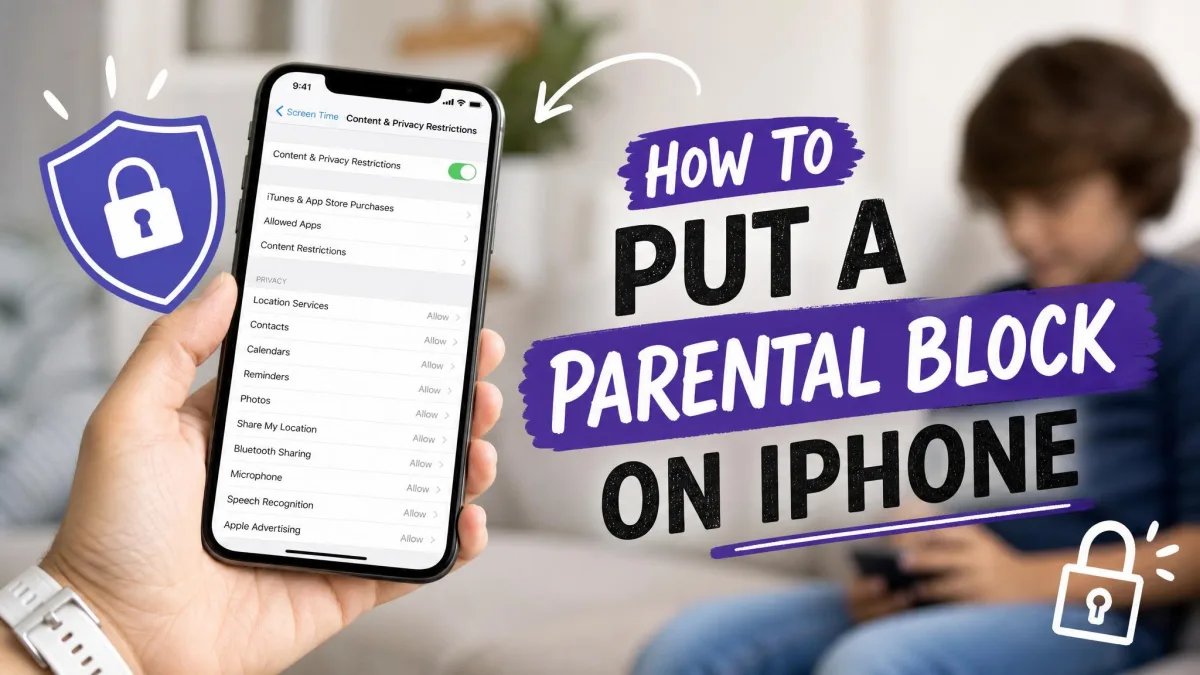
Content & Privacy Restrictions is the master switch for filtering content and protecting settings. Open Screen Time, tap Content & Privacy Restrictions, and turn the switch on. The same screen then controls content ratings, web content, allowed apps and features, and privacy toggles, with every change protected by the Screen Time passcode. Leave it on for the rest of the steps, because the next several sections build on it.
Step 6: Restrict Explicit Content and Content Ratings
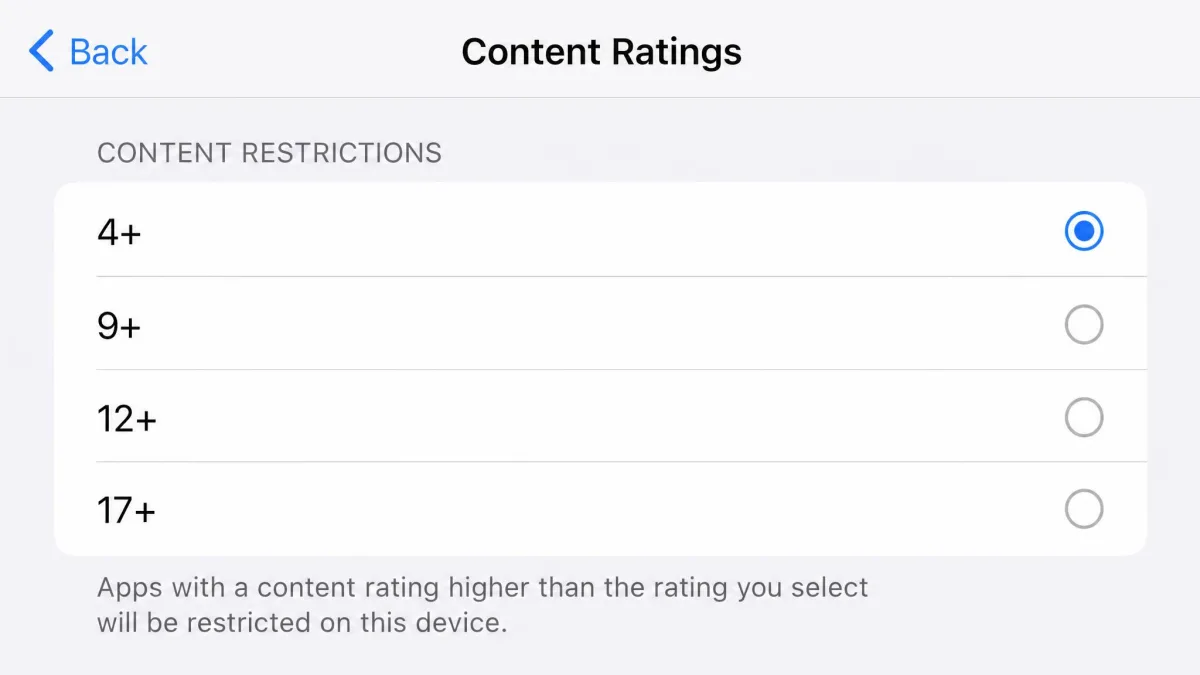
Tap Content Restrictions inside Content & Privacy Restrictions to set the rating filters. App content can be limited to 4+, 9+, 12+, or 17+, which decides which apps appear and can be installed from the App Store. Movies, TV shows, and music have their own ratings, and you can set music and podcasts to Clean to skip explicit tracks. Set the ratings to match your child's age, then scroll on to web content.
Step 7: Block Web Content and Restrict Safari
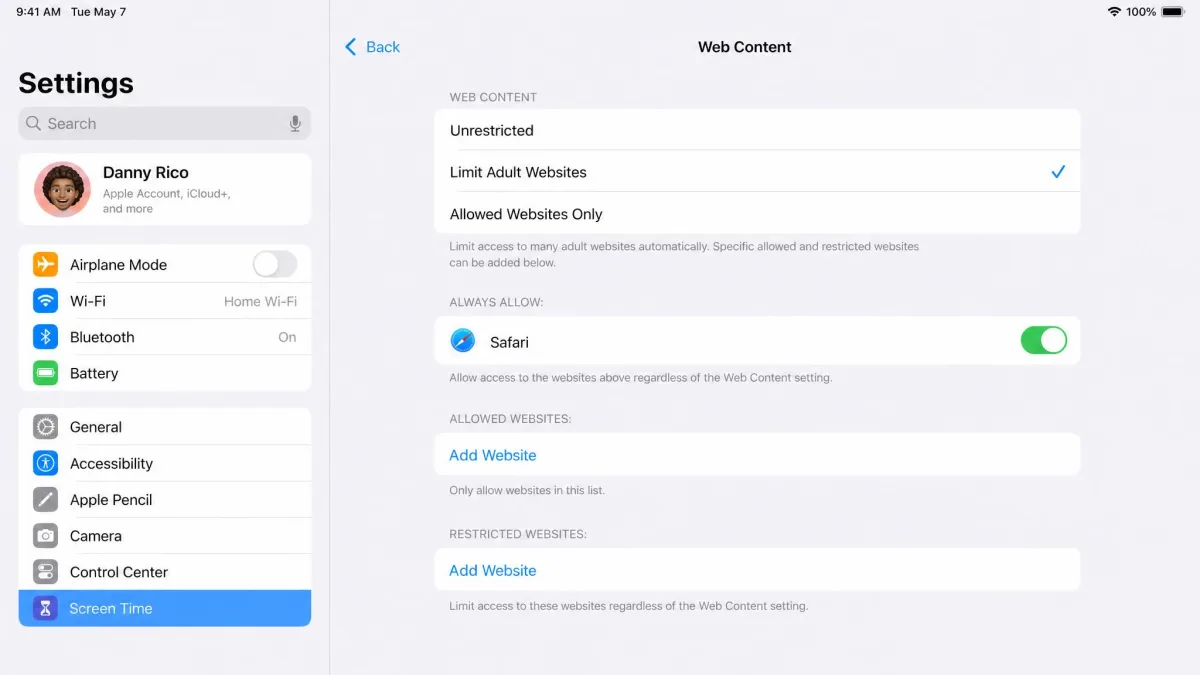
Under Content Restrictions, tap Web Content to choose a browsing level and block websites on the iPad. Limit Adult Websites blocks known adult sites while letting you add approved sites. Allowed Websites Only shows a short, kid-friendly list of sites and nothing else. You can also remove Safari itself under Allowed Apps. Web content is worth pairing with App Limits, because kids who hit a game limit often open the website version of the same service in Safari.
Step 8: Prevent App Store Purchases and Turn On Ask to Buy
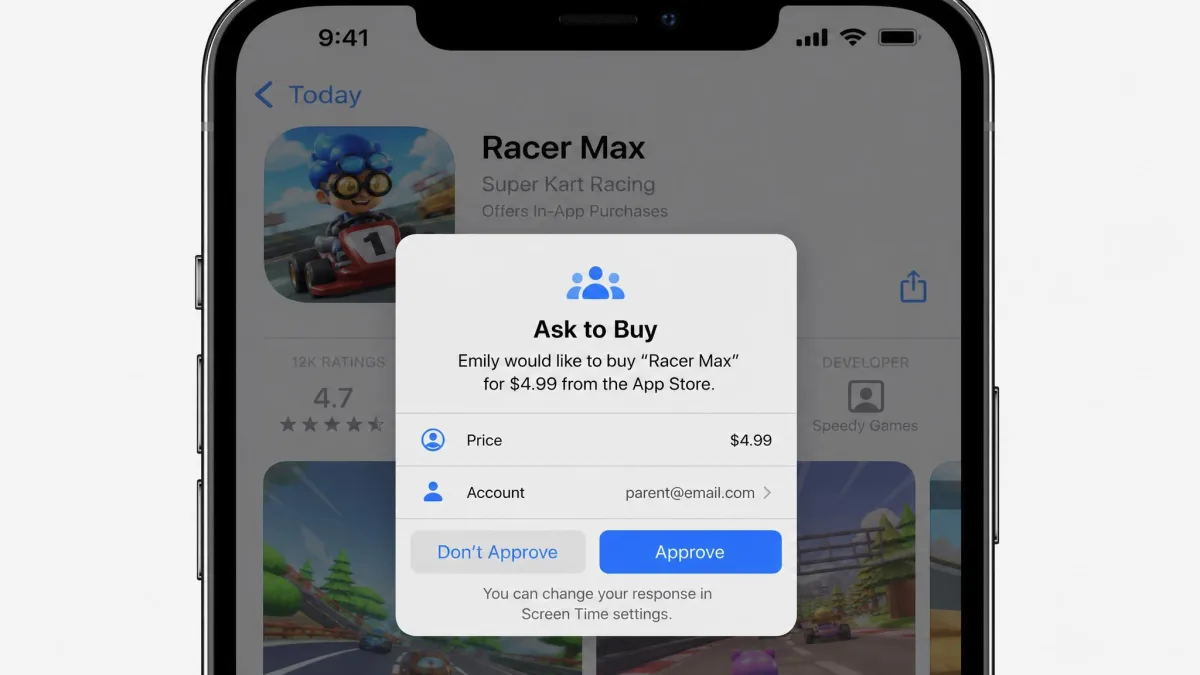
Ask to Buy sends every App Store purchase, in-app purchase, and eligible download to your device for approval. It's part of Family Sharing, and it's turned on automatically for children under 13 in the U.S., where it can't be switched off. For older children, the family organizer opens Settings, taps Family, taps the child's name, then turns on Ask to Buy. App updates and redownloads of owned content don't need approval. In-app purchases are exactly how surprise charges happen, which is why Apple agreed to refund at least $32.5 million in an FTC settlement over kids' in-app purchases. To close both charging paths, set In-app Purchases to Don't Allow under iTunes & App Store Purchases inside Content & Privacy Restrictions.
Step 9: Set Communication Limits
Communication Limits control who your child can contact and who can reach them. Open Screen Time, tap Communication Limits, and choose Everyone, Contacts Only, or Contacts and Groups with at Least One Contact, with a tighter option for Downtime. Communication Safety is the companion feature that detects and blurs nudity in photos and videos sent or received in Messages, working entirely on the device. It's been part of iPadOS since version 15.2. We've seen Communication Limits over-restrict, including blocking a child from calling a parent, so send a quick test message and a test call after you turn it on.
Step 10: Review Privacy Settings and Allowed Changes
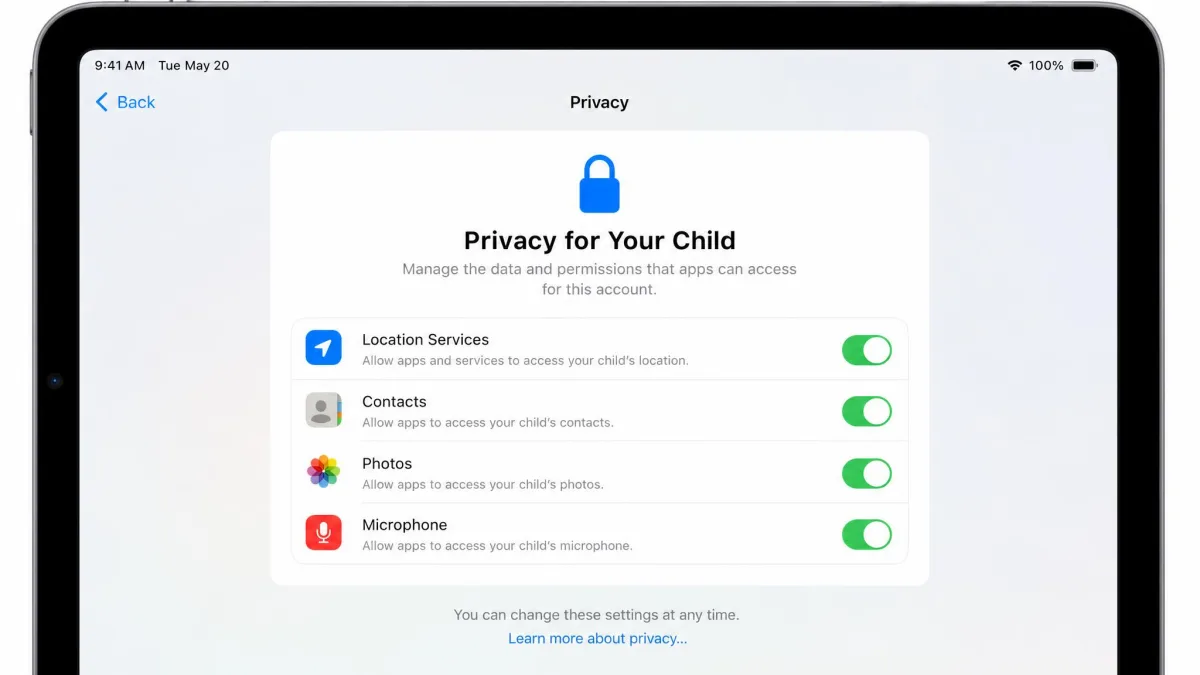
The final step is checking what your child can change. Under Content & Privacy Restrictions, tap Allowed Apps & Features to hide apps like Safari, Mail, or the App Store. Then work through the privacy toggles for Location Services, Contacts, Photos, and Microphone, and set each to Don't Allow unless you need it. The defaults leave most permissions on, even on a child's account, so this is a manual pass. If you manage the child's iPad from your own device, confirm Share Across Devices is on so changes sync.
Extra iPad Parental Control Tools Worth Using
Screen Time covers the essentials, but iPadOS has a few additional tools for specific situations, and third-party apps exist if you want more. On an iPad, every third-party app runs inside Apple's restrictions, so none of them can read your child's messages or see inside apps the way they can on Android.
On an iPad, even the best third-party parental control app can only block apps, filter the web, set time limits, and track location.
Apps like Qustodio and Bark add dashboards, alerts, and location tracking that Screen Time doesn't include. They cost money, typically $5 to $15 a month, and plans change often. On an iPad they lean on extra profiles and sometimes hardware: Bark needs a sync charger or router to monitor an iPad, and Qustodio installs an MDM profile plus a VPN profile with trickier setup than on Android. A child can simply uninstall either app, which defeats the purpose. For most families the built-in tools cover the core needs, so consider a paid app only if you specifically want social-media alerts or location tracking. For families who want cross-device app monitoring and deeper reporting, our roundup of the top parental control apps for iPhone covers the paid third-party options in more detail.
Use Guided Access to Lock an iPad to a Single App
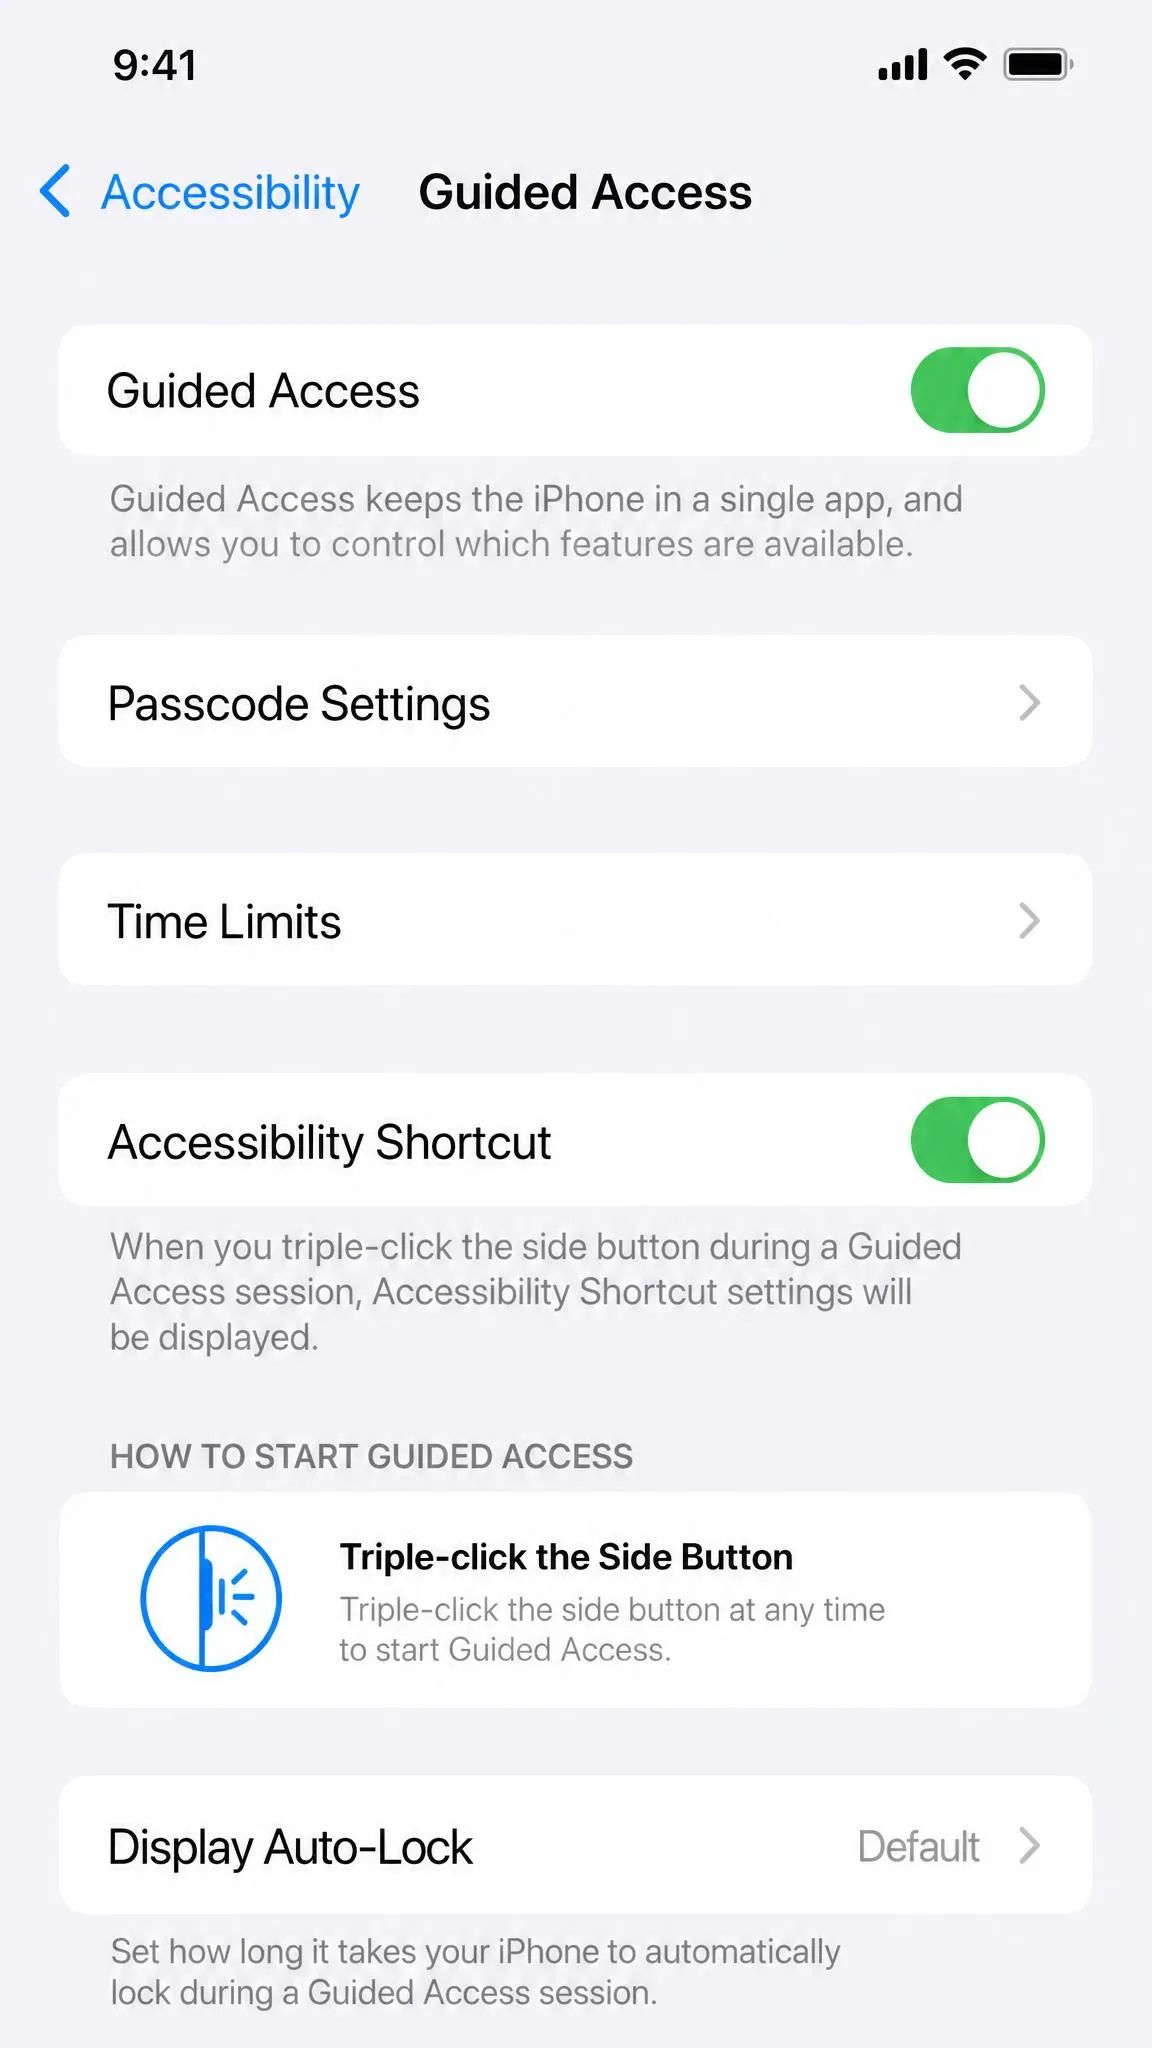
Guided Access locks the iPad to one app, which is perfect for a single task, a quiz, or an app you don't want left. Open Settings, tap Accessibility, tap Guided Access, and turn it on. A triple-click of the side button starts and stops it, and you set a passcode so the child can't end it early.
Hide Apps on the Home Screen
For a downloaded app you want fully locked, you can hide it. On iPadOS 18 and later, touch and hold the app icon, tap Require Face ID or Touch ID, then tap Hide App. The app moves to a Hidden folder in the App Library and needs Face ID or Touch ID to open. For built-in apps like Safari, use Allowed Apps & Features in Screen Time instead.
Manage Game Center, Location, and Other Features
Game Center has its own restrictions under Content & Privacy Restrictions, where you can block multiplayer games and adding friends. Location Services lives under Privacy, and you can set it to Don't Allow for apps that don't need it. The same area covers Contacts, Photos, Microphone, and advertising, so one slow pass through the list closes the gaps a quick setup leaves open.
Tips and Best Practices for iPad Parental Controls
The setup is only as good as the habits around it. Keep the Screen Time passcode secret and out of the child's reach, and check limits after every major iPadOS update, because that's when resets and filter gaps tend to appear. Talk through the rules in a kid-friendly way so the limits feel like an agreement rather than a punishment. Start strict and relax as trust builds, and use Always Allowed for homework and communication apps during Downtime. Set different limits for school days and weekends now, so you won't be adjusting them weekly.
Troubleshooting Common Parental Control Problems
Even a clean setup can hit a snag. Here are the problems that come up most, what's really going on, and what to try.
Settings freezes when you open Screen Time. If the Settings app freezes or closes after a major iPadOS update, this is a known glitch a restart doesn't always clear. Apple's suggested fix is turning Screen Time off and on, restarting, and toggling Share Across Devices. It works for some families and not others, so treat it as a first attempt and keep iPadOS updated.
App Limits turn themselves off. Some families find Downtime and App Limits silently switch off even when the child doesn't know the passcode, and the problem can persist for well over a year. Turn them back on and re-check the schedule.
The time limit screen won't accept your passcode. A common workaround is toggling Share Across Devices off and on to force Screen Time to refresh. It clears the problem for some families, though not all.
Web filters get bypassed. Apple has acknowledged bugs that let kids around Safari web filters for years, with fixes rolling out from iOS 17.5 onward. Kids also sidestep app limits by opening the website version of an app, so pair App Limits with web content restrictions.
The Family screen freezes while you manage a child. Some parents find it easier to open Screen Time, tap Family there, and wait before opening each tab.
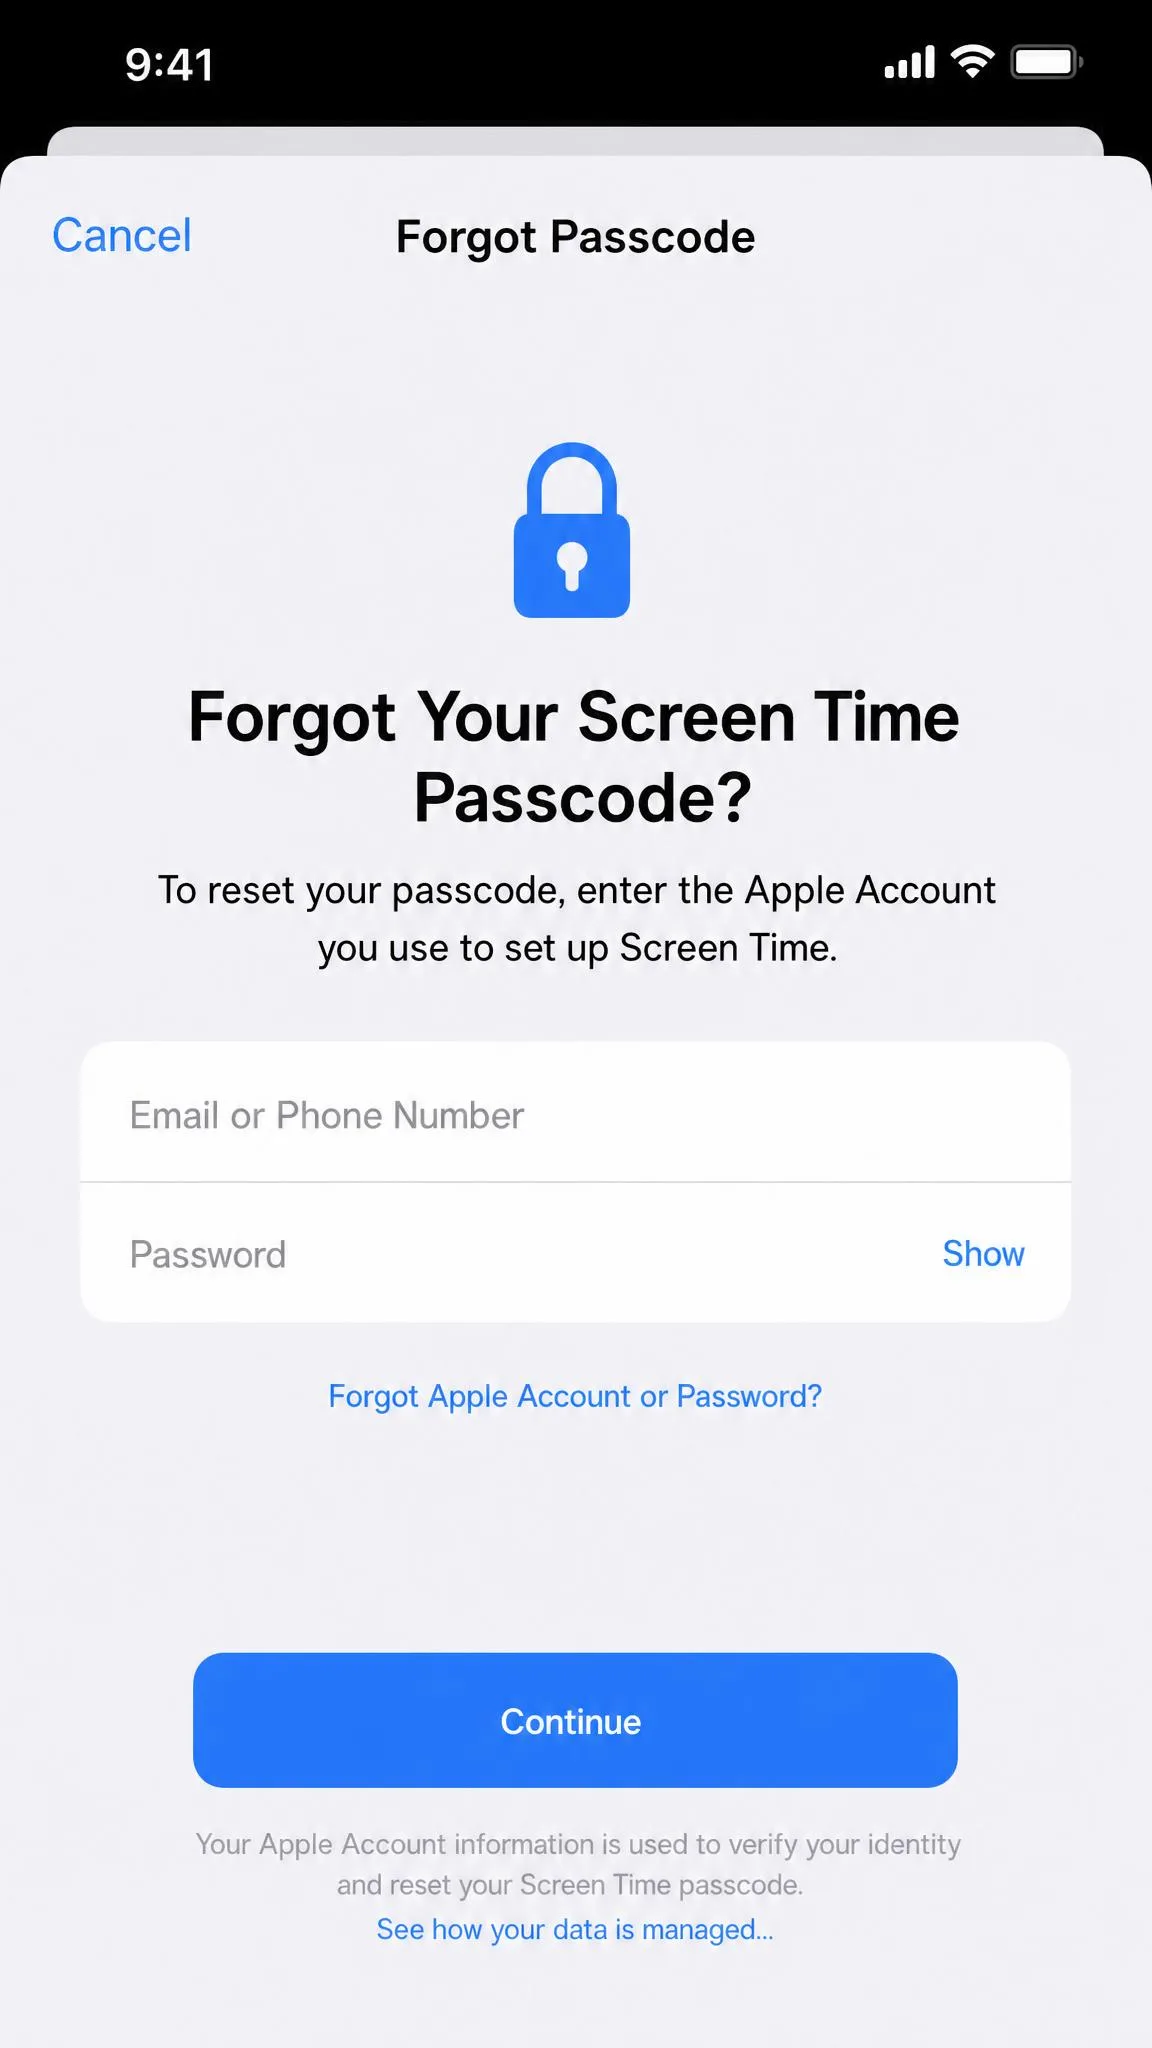
You forgot the Screen Time passcode. Resetting it is possible only when an Apple Account was linked when you created it. Open Settings, tap Screen Time, tap Change Screen Time Passcode twice, then Forgot Passcode, and verify with the Apple Account email and password. Without a linked account, the option isn't available, and clearing the passcode can mean erasing the iPad.
FAQs About iPad Parental Controls
How do I set up parental controls on an iPad?
Can I set parental controls on iPad without Family Sharing?
How do I block specific apps?
How do I stop app purchases and downloads?
What happens if I forget the Screen Time passcode?
Can I restrict YouTube or web content?
How do I change the Screen Time passcode?
The Bottom Line
Apple's built-in parental controls are free, and for most families they cover everything that matters: screen-time caps, content and web filtering, and purchase approval. The ten steps above are the complete path, and the two habits that keep it working are protecting the Screen Time passcode and re-checking limits after major iPadOS updates. Third-party apps like Qustodio and Bark add alerts and location tracking, but on an iPad they can't see inside apps or messages. Start with Screen Time and Family Sharing, test each limit on the child's device, and you'll have a setup that holds up to daily use.