You hand the iPad to your child with one drawing app open, and ninety seconds later they have swiped out of it, opened the App Store and tapped a button that wants your password. Every parent who has handed over a tablet knows that moment. The good news is that iPadOS already has the tools to stop it, and the fastest of them takes about two minutes to set up.
The quick answer: use Guided Access to lock the iPad to a single app for one sitting, and use Screen Time to set daily limits, block content and protect purchases across the whole device. Most families end up using both, because they solve different halves of the problem.
Quick answer: the fastest way to lock an iPad for a child
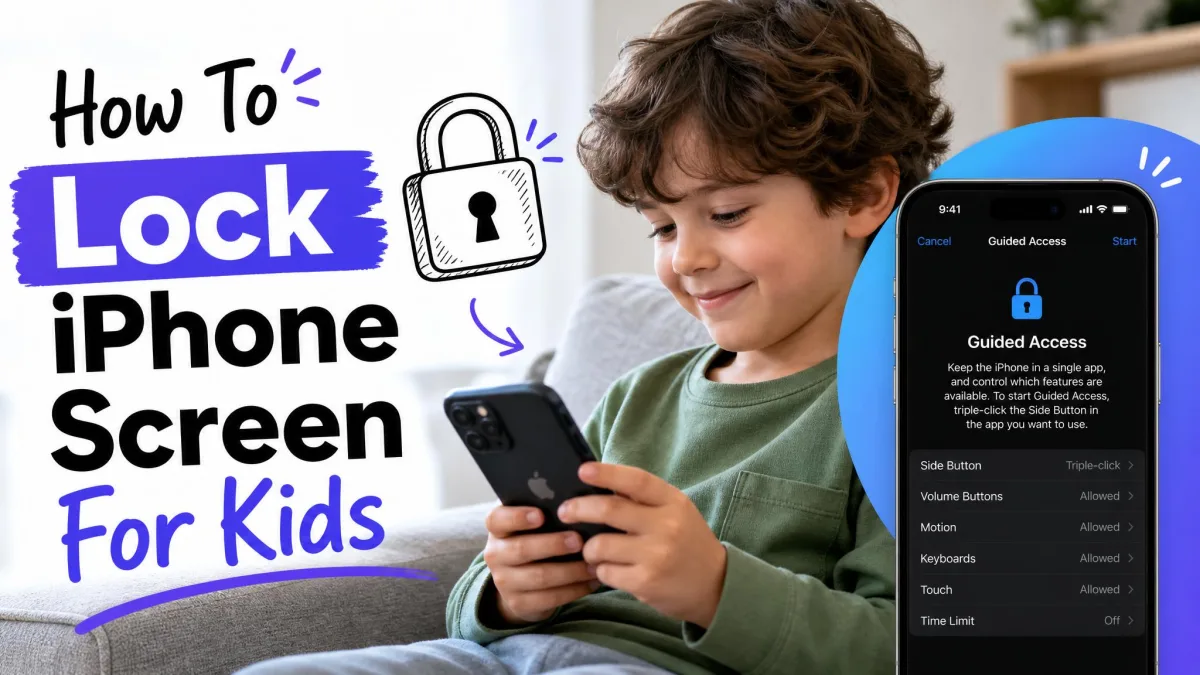
If you are handing over your own iPad right now and just need the child to stay in one app, open Settings, tap Accessibility, then tap Guided Access and turn it on. Set a passcode under Passcode Settings, open the app you want them to use, then triple-click the top or side button and tap Start. The child can now only use that one app until you end the session.
That covers the next twenty minutes. If the iPad belongs to your child and they use it every day, you want Screen Time instead, which we set up further down.
Choose a Guided Access passcode your child has never watched you type. Reusing your device unlock code defeats the whole lock, because they already know it from watching you open the iPad.
What "locking" an iPad actually means for parents
"Locking the screen" means different things depending on what is worrying you: a toddler tapping out of a cartoon and into your email, an eight-year-old spending four hours in a game, or a purchase you did not authorise. Apple splits those problems across three separate systems, and choosing the wrong one is why parents often feel the settings did not work.
Guided Access vs. Screen Time: which one you need
Guided Access is a single-sitting lock. It pins the iPad to one app, disables the buttons, and ends when you say so. Screen Time is an always-on set of rules that follows the child through every app, every day. A Family Sharing child account sits above both, giving the child their own Apple Account with age-appropriate defaults and purchase approvals routed to you.
| Row | Guided Access | Screen Time | Family Sharing child account |
|---|---|---|---|
| What it locks | The iPad to one app for one sitting | Time and content across the whole iPad | The child's whole Apple Account and device |
| Where you turn it on | Settings, Accessibility, Guided Access | Settings, Screen Time | Settings, Family, Add Member |
| How you start it | Triple-click the top or Home button | Always on once configured | Once at account setup |
| Passcode | Guided Access passcode, optional Face ID or Touch ID | 4-digit Screen Time passcode | Organizer's Apple Account |
| Best for | Handing over your own iPad for a short stretch | A child's own iPad, all day | Under 13 kids needing their own account |
| Blocks purchases | No | Yes, via Content & Privacy Restrictions | Yes, plus Ask to Buy approval |
How to lock the iPad to a single app with Guided Access
Guided Access setup is split across two places, and that trips people up. The passcode and biometric choices live in Settings under Accessibility, while the touch, motion and screen-area choices only appear once a session is already running inside the app. Work through the steps in order and the split stops mattering.
Step 1: Turn on Guided Access in Settings
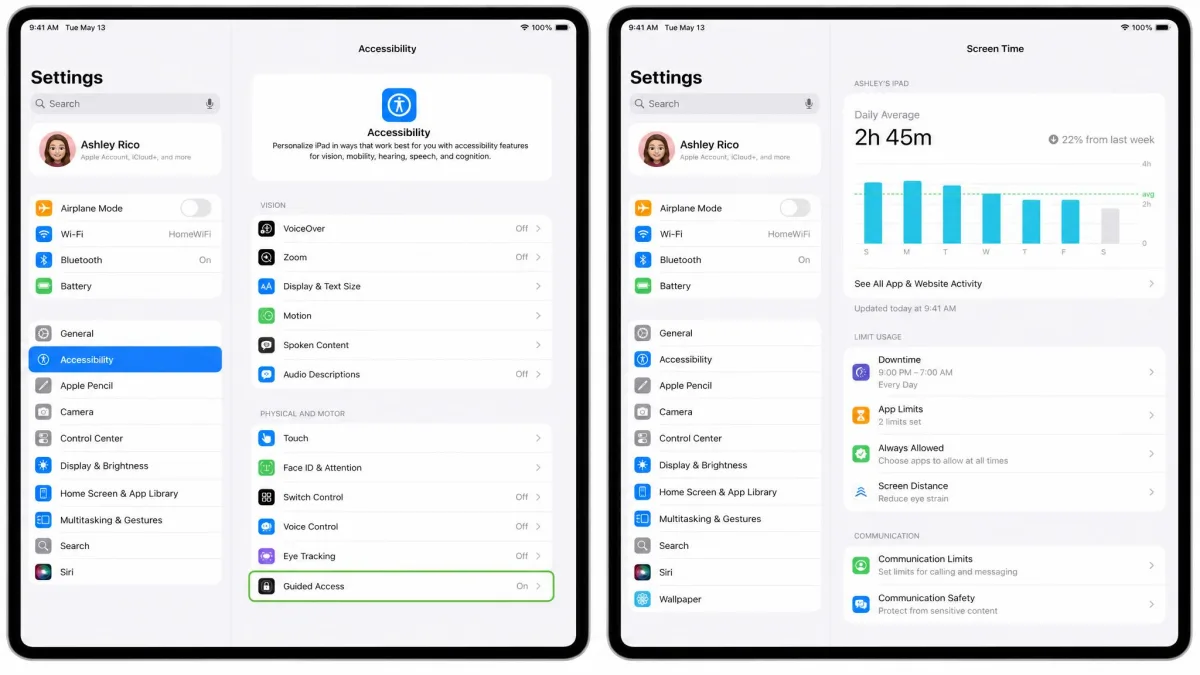
Open Settings, tap Accessibility, scroll to the bottom and tap Guided Access, then toggle it on. Nothing changes on screen yet. You have only made the feature available. Apple documents the same path in its own Guided Access instructions.
Step 2: Set a Guided Access passcode, or use Face ID or Touch ID
Tap Passcode Settings, then Set Guided Access Passcode, and choose a code. On the same screen you can turn on Face ID or Touch ID, which lets you end a session with a triple-click and a glance instead of typing. We keep Face ID on for convenience, but a hand or a case covering the front camera will stop it working, so it is worth checking that before assuming the feature is broken.
Step 3: Open the app your child will use
Leave Settings and open the app you actually want them in. Guided Access locks whatever is on screen when you start it, so get the app to the right place first, for example the right episode or the right worksheet.
Step 4: Triple-click the side or Home button to start
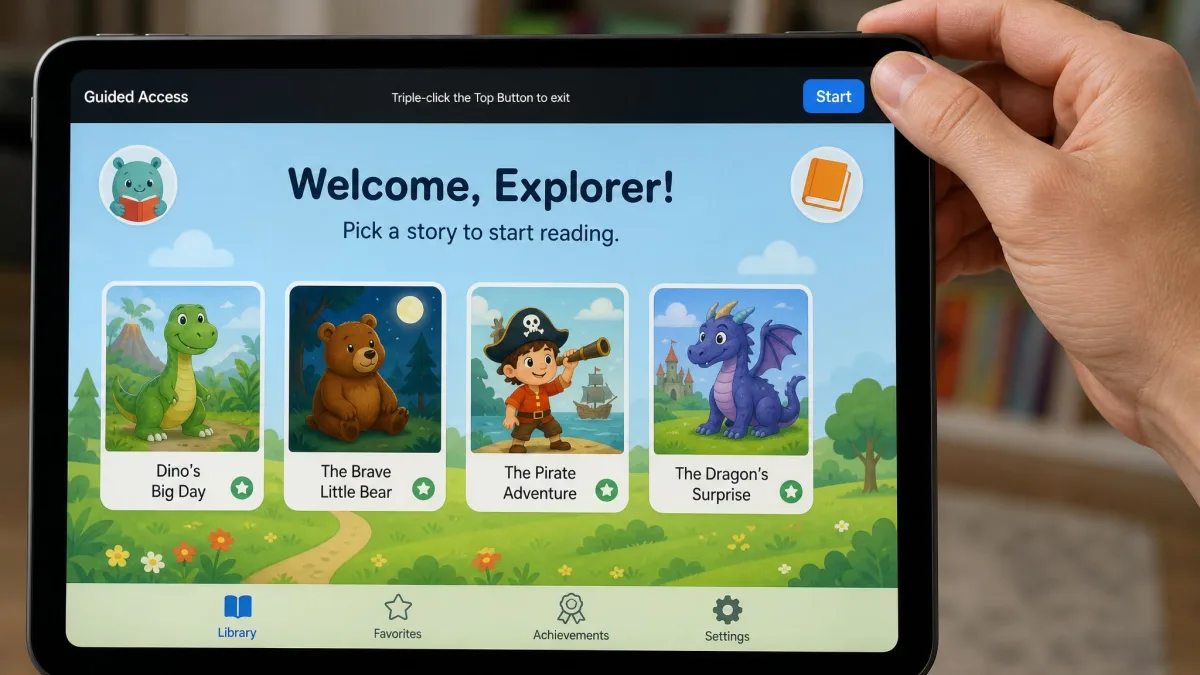
Triple-click the top or side button on a Face ID iPad, or the Home button on an older model, then tap Start in the top right. The triple-click has to be brisk. A slow or uneven triple-press opens the Accessibility Shortcuts panel or does nothing at all, and that is the single most common reason a session appears not to start.
Step 5: Circle any screen areas you want disabled
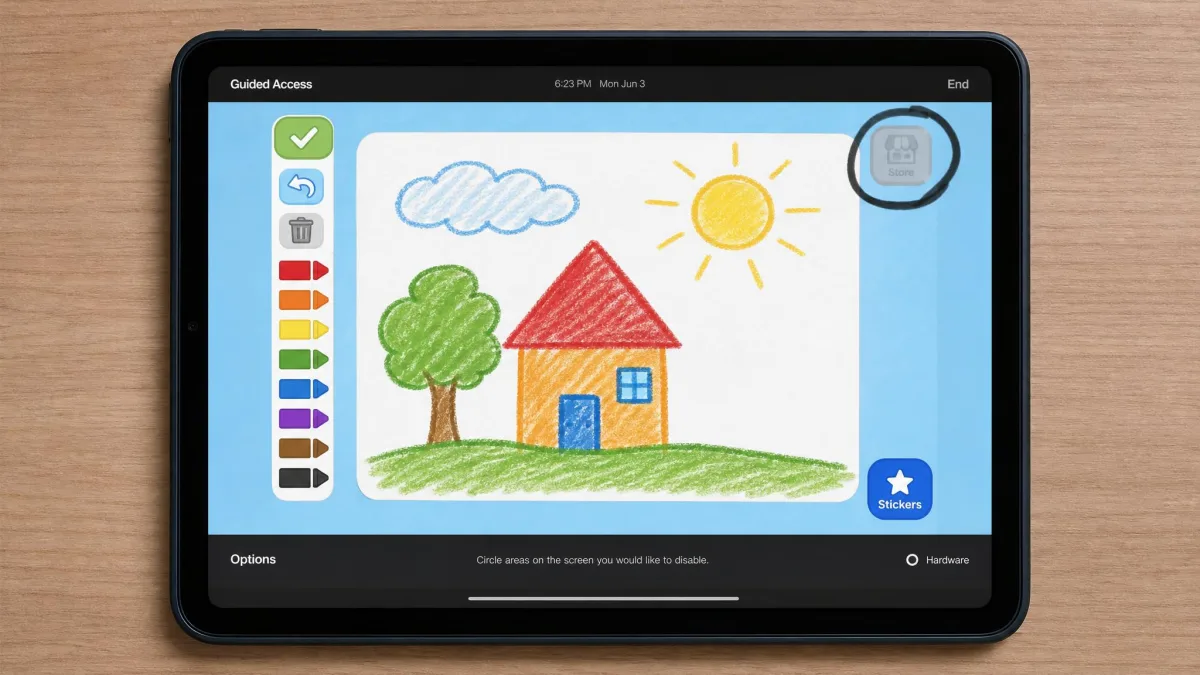
Before you tap Start, you can draw a circle around any part of the screen you want to make untappable, such as an in-app store button, a settings gear or a back arrow. The circled area greys out and ignores taps. Bear in mind that these areas have to be redone for each app, because they do not carry over.
Step 6: End the session and unlock the iPad
Triple-click the same button again and enter your Guided Access passcode, or use Face ID or Touch ID if you turned it on, then tap End. The iPad returns to normal and the buttons come back to life.
Adjust the Guided Access options: volume, rotation, touch and time limits
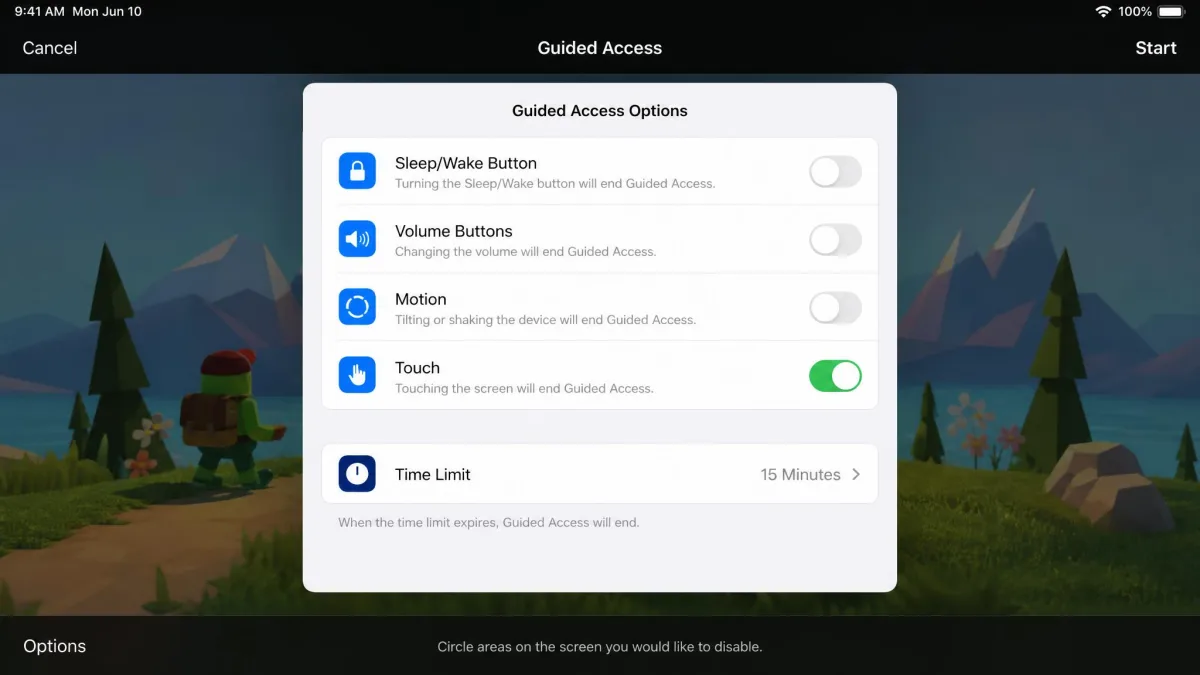
Tap Options in the bottom left before you start a session and you can control the Sleep/Wake button, the Volume buttons, Motion for rotation, Keyboards, Touch and Dictionary Lookup. There is also a Time Limit, and under Time Limits you can pick a Sound and turn on Speak so the remaining minutes are announced out loud before the session ends. That spoken warning is the setting we reach for most with younger kids, because it ends the session for you rather than making you the one who takes the iPad away.
One consequence catches parents out. Guided Access disables the volume and Sleep/Wake buttons along with rotation, so a child cannot mute a loud video mid-session. Set the volume where you want it before you start.
Guided Access is an Accessibility feature rather than a parental control, which is why it sits under Accessibility instead of Screen Time. It works the same way on an iPhone if you want the same lock on a phone.
How to set up Screen Time limits on your child's iPad
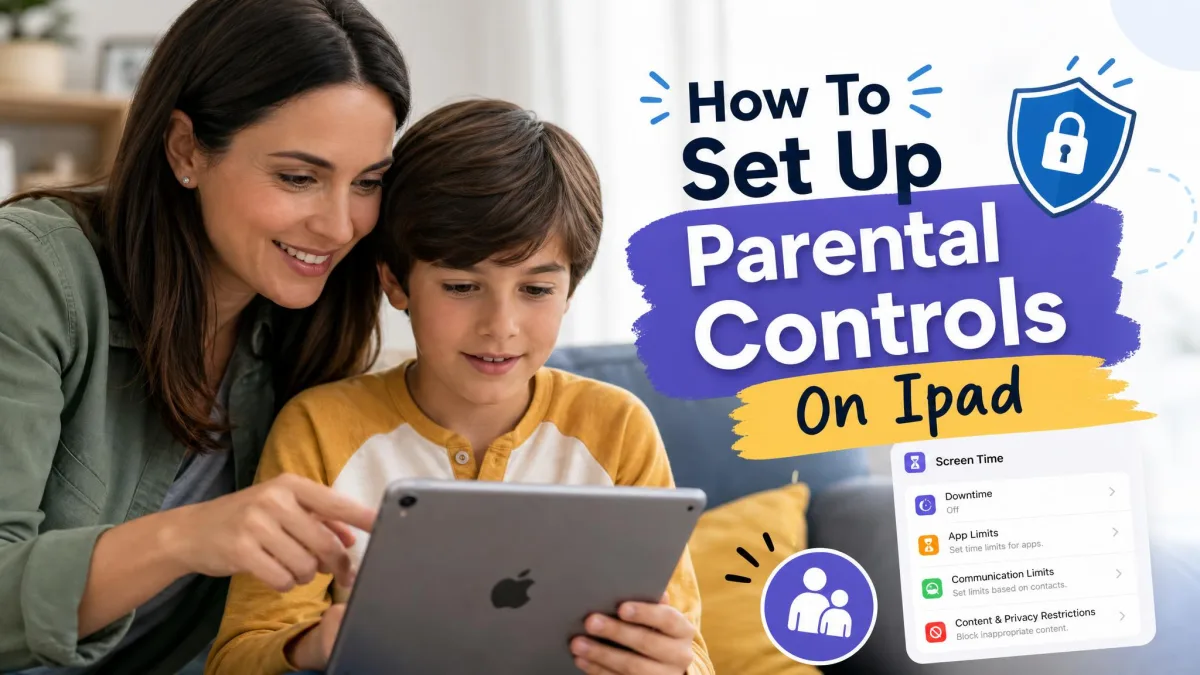
Where Guided Access covers one sitting, Screen Time covers every day. This is the system to use when the iPad is the child's own device.
Step 1: Turn on Screen Time
Open Settings, tap Screen Time, and turn it on. If the iPad belongs to the child, choose the option that marks it as a child's device.
Step 2: Create a Screen Time passcode only you know
Tap Lock Screen Time Settings and set a 4-digit Screen Time passcode. It is separate from the device unlock code, and it must stay separate. Make sure you enter it out of the child's sight, because a passcode typed in front of a child can be captured with a screen recording and replayed later.
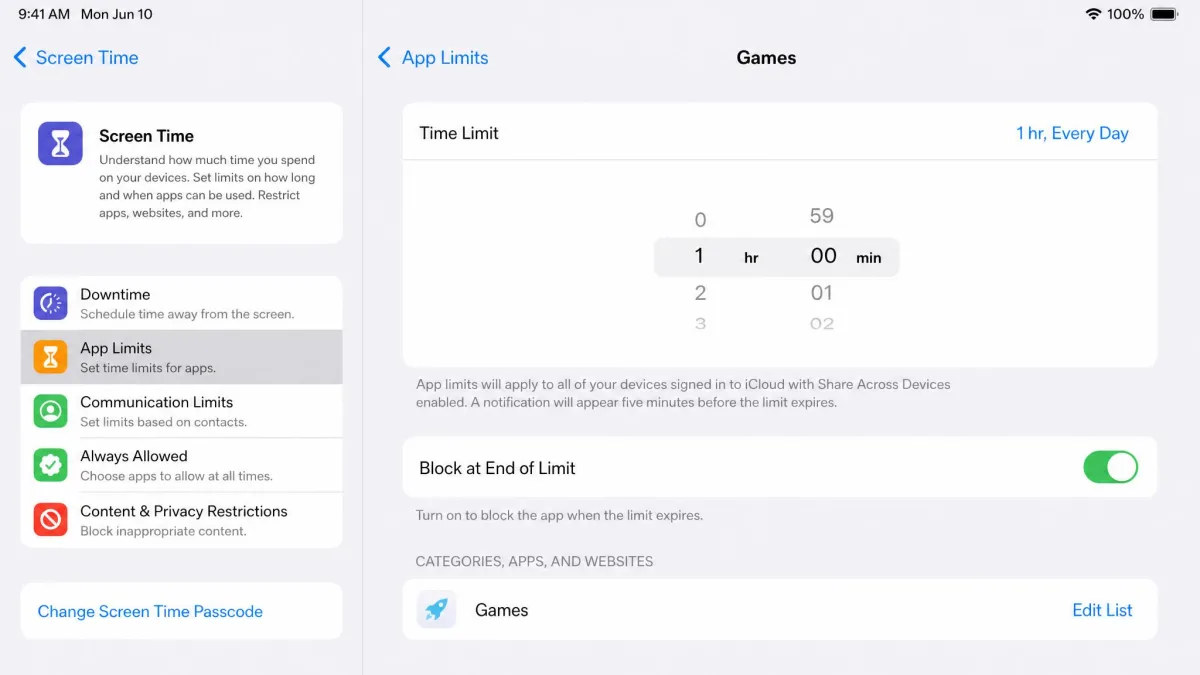
Do not skip the passcode. Several Screen Time controls, including the Block at End of Limit toggle, stay hidden until a Screen Time passcode exists. Without it, a child simply taps Ignore Limit and carries on.
Step 3: Schedule Downtime for bedtime and school hours
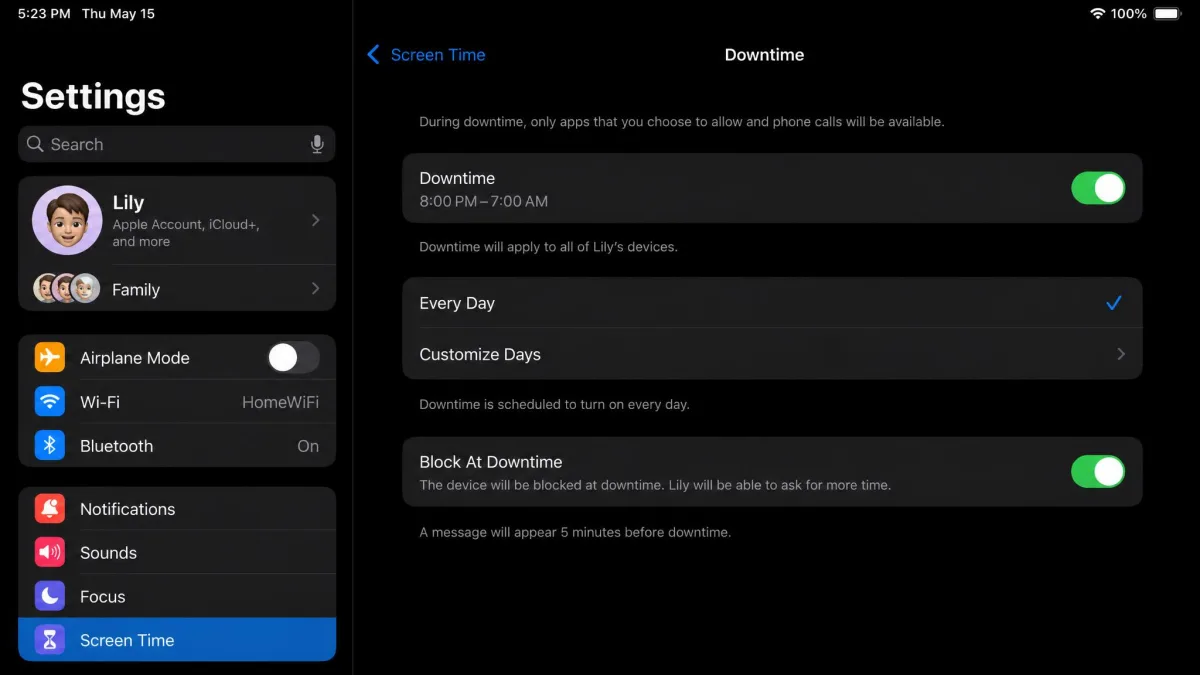
Tap Downtime, turn it on and set the hours. During Downtime, apps and their notifications are blocked on the schedule you choose, and with a passcode set you can decide whether apps are fully blocked or only dimmed. We set one Downtime block for the school day and another from bedtime to breakfast.
Step 4: Set App Limits by category
Tap App Limits, tap Add Limit, and choose a whole category such as Games or Social rather than picking apps one at a time. Set the daily amount, then turn on Block at End of Limit. Limits reset automatically at midnight, and there is no weekly or monthly option, so think in daily terms.
Step 5: Choose Always Allowed apps
Tap Always Allowed and pick the apps that should survive Downtime and limits, typically Phone, Messages and anything the school requires. Everything else stays subject to the rules you just set.
How to block inappropriate content with Content & Privacy Restrictions
Time limits do not filter anything. Content control is a separate switch in the same menu.
Block explicit content and set age ratings
Tap Content & Privacy Restrictions, turn it on, then tap Content Restrictions. Set age ratings for Music, Podcasts, Movies, TV Shows and Apps to match your child, and set Explicit Language to Clean.
Limit web content and allow only specific websites
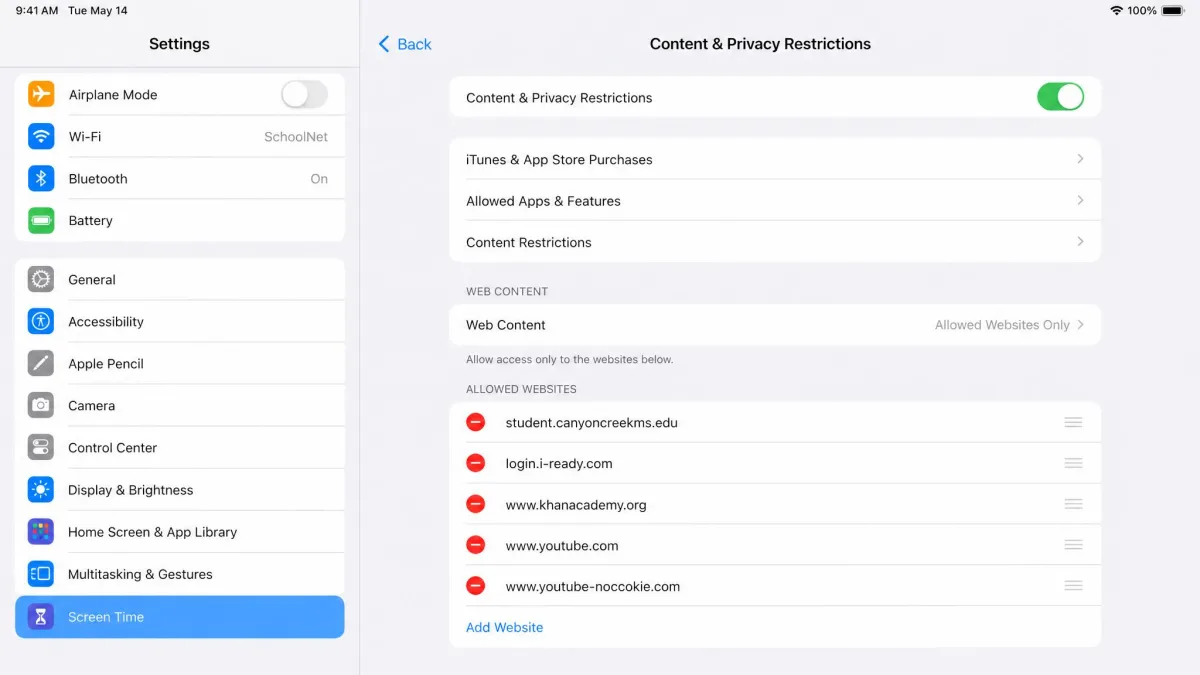
Under Web Content, choose Limit Adult Websites for a broad filter, or Allowed Websites Only for a short approved list. The second option is the right one for younger children, though it needs maintenance as their schoolwork changes.
Prevent App Store purchases and turn on Ask to Buy
Under iTunes & App Store Purchases, set In-app Purchases to Don't Allow and require a password for every purchase. If the child is in your family group, Ask to Buy adds an approval request that lands on your device. It is on by default for children under 13, and the organizer can turn it on for any family member under 18.
Lock privacy and account settings so changes stick
Scroll down to Allow Changes and set Account Changes and Passcode Changes to Don't Allow. Without this, a determined child can undo the restrictions from the other end.
Set up a child account with Family Sharing
A Child Account is required for children under 13 and can be used for anyone up to 18. To manage a child through Family Sharing Screen Time, they must be under 18 and in your family group with their own Apple Account. Open Settings, tap your name, tap Family, then Add Member and create the child account.
The payoff is that age-appropriate defaults apply automatically, purchases route to you for approval, and Screen Time settings sync to the child's iPad from your own device. Apple's guide to customizing iPad for your child walks through the same setup.
Troubleshooting: what to do when it does not work
You forgot the Screen Time or Guided Access passcode
For Screen Time, open Settings, tap Screen Time, tap Change Screen Time Passcode twice, then enter the Apple Account email and password used when the passcode was created. That last part is the whole game. Without those credentials the reset path stops and account recovery is the only route left. For a child managed through Family Sharing, the organizer resets it from their own device under Settings, Screen Time, the child's name, then Manage Screen Time. A forgotten Guided Access passcode has no such reset, so a force restart is the way out.
Your child found a way around the limits
Kids find the gaps, and the gaps are settings-level rather than one broken switch. Deleting an app wipes its Screen Time history, so reinstalling it restarts that app's daily clock at zero. Changing the iPad's time zone to a region several hours behind pushes limits back and buys extra hours. Tapping One More Minute, force-quitting the app and reopening it can be repeated to stretch a blocked app well past its limit, and video already playing can carry on in a picture-in-picture window. YouTube links opened from inside Messages play in the in-message browser and slip past app-level blocks on the YouTube app.
The fixes are to lock Account Changes, block installing and deleting apps under Content & Privacy Restrictions, and use Allowed Websites Only rather than relying on app blocks alone. There is also a short window after the iPad restarts before restrictions re-apply, though the gap varies with the iPad model and how much it has to load at startup, so treat it as a rough window rather than a fixed number.
If a limit refuses to enforce at all, it usually clears after deleting and re-adding the limit, restarting the iPad, or toggling App and Website Activity off and back on.
Guided Access will not start or will not end
If a session will not start, make the triple-click faster and more even. If the iPad is stuck in a session with the triple-click unresponsive, the power and Home buttons are disabled, so a hardware force restart is the only way out. On an iPad with a Home button, hold Home and the power button together for about 15 seconds. On a Face ID iPad, press Volume Up, press Volume Down, then hold the top button.
Choosing settings that fit your child's age
A toddler needs one app and nothing else, which is exactly what Guided Access with a Time Limit does. A primary-schooler needs Downtime, category App Limits and a strict content filter. A teenager needs fewer blocks and more conversation. Set the controls to match where the child actually is, and revisit them each school year. The American Academy of Pediatrics' media guidance is a useful reference point when you are deciding how much daily screen time is age-appropriate in the first place.
Third-party parental control apps can supplement all of this with cross-platform reporting and stronger web filtering, but none replaces the built-in settings. Set up Screen Time first, then decide whether you still have a gap.

Frequently asked questions
What is the fastest way to lock an iPad for a toddler?
Can my child exit Guided Access on their own?
How do I lock the iPad to just YouTube or Netflix?
Does Guided Access stop notifications and calls?
How do I turn the iPad into kid mode permanently?
What if I forget the Screen Time passcode?
Final thoughts
Two minutes of setup covers most of what parents actually worry about. Guided Access handles the handover moment, Screen Time handles the daily rhythm, and Content & Privacy Restrictions handles the things you would rather your child never stumbled into. Set the passcode carefully, keep Account Changes locked, and check the settings again when the school year changes.