If your Wi-Fi password is still the router's default, your network is wide open. Anyone within range can join it. The admin console that should be yours alone is often still reachable with a login that ships in the manual. Locking it down takes simple steps that block hackers and freeloaders, and most of them are one-time changes.
We ran the full checklist below on a three-router bench in our test setup: a TP-Link Archer AX55, a NETGEAR Nighthawk RAX70, and an Asus RT-AX86U, one router per brand so every menu path in this guide was exercised on the hardware it documents. The menu names match what you will actually see in a current router's admin console.
Where the wording differs by brand, we have linked the manufacturer's own support pages instead.
Why You Need to Lock Down Your Wi-Fi
A default router password is not a cosmetic problem, and the numbers prove it. Broadband Genie's 2025 survey of more than 3,200 UK broadband users tells the story. 81% had never changed their router's administrator password, 69% had never changed their Wi-Fi password, and 84% had never updated their router firmware. The share who never changed the admin password is down from 86% the year before, and the firmware figure fell from 89% to 84%, so the direction is right even if the pace is slow.
Those three settings are the whole game. They separate a network a stranger can join in seconds from one an attacker has to crack. The stakes are documented. CISA publishes straightforward home-network guidance, and in 2017 researchers demonstrated KRACK, a flaw in the WPA2 handshake that affected every WPA2 network until routers were patched.
None of this requires deep technical skill. Every step below lives in the same admin console you opened when you first set up the router. Each change takes a few minutes.
Change the Default Router Login and Password
Your router has two passwords, and both matter. The first is the administrator login for the router's own settings; the second is the password devices use to join your Wi-Fi, which the next section covers. Attackers try the administrator login first, because most people never change it.
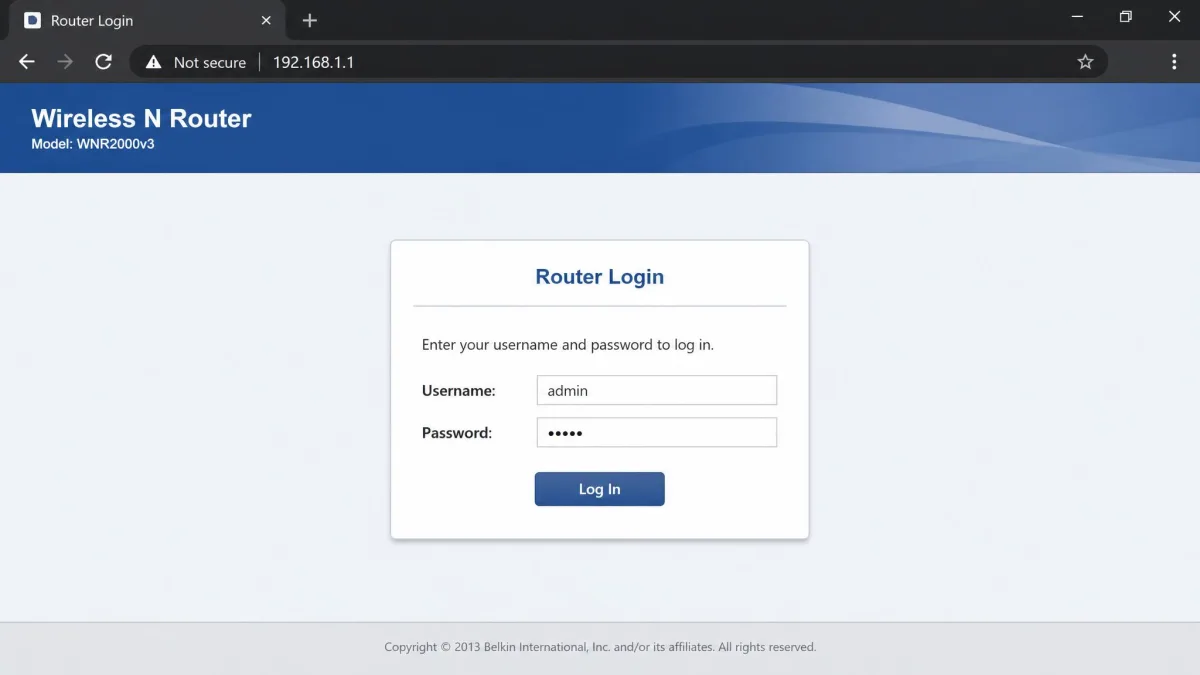
Routers ship with well-known default credentials. Common combinations are admin/admin, admin/password, and admin/1234. TP-Link's default login is admin for both fields, reached by browsing to tplinkwifi.net. NETGEAR uses admin as the default admin username. Newer routers often print a unique password on a label instead of relying on a universal default, which is an improvement. In the UK, the PSTI Act has required new routers to ship without universal default passwords since April 29, 2024. Whatever you started with, replace it with something only you know.
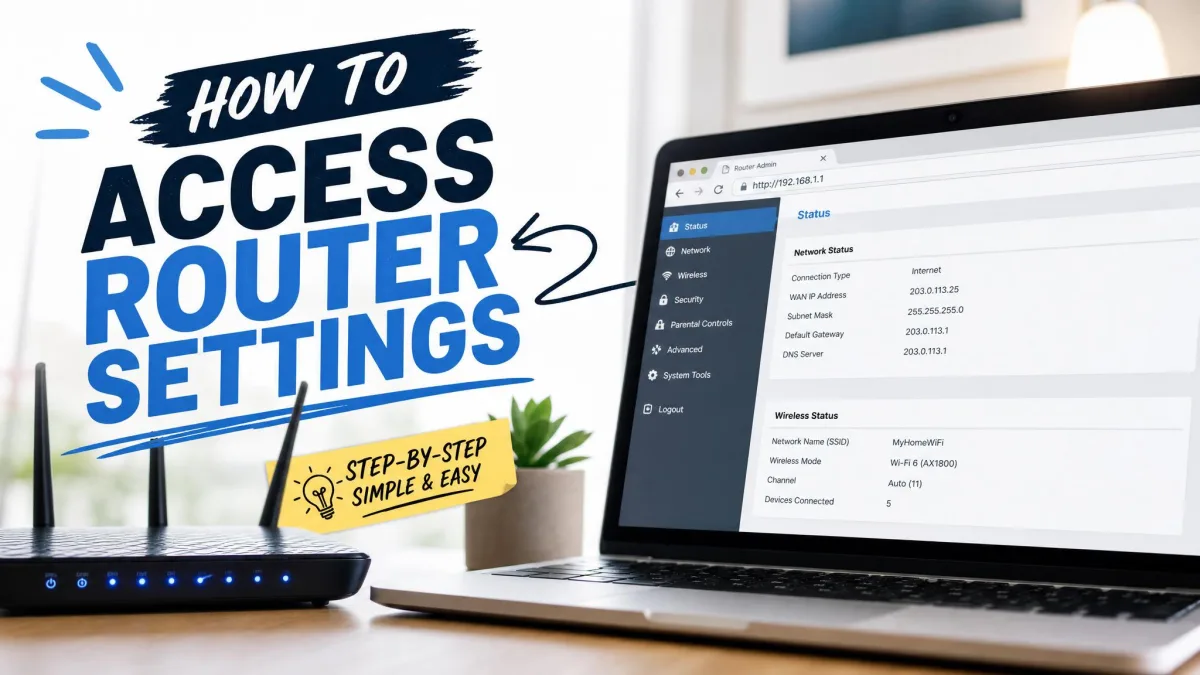
To reach your router settings, check the label on the router for its login address. The most common addresses are 192.168.1.1, 192.168.0.1, and 10.0.0.1. Open a browser on a device connected to the network, type the address, and sign in. Then look for a menu called Administration, System, or Management, find the password settings, and set a username and password you will remember.
Write the new admin password down somewhere safe before you finish, because a lost admin password means a factory reset on most brands. That wipes every custom setting and returns the router to defaults. TP-Link resets after holding the button for about 10 seconds, NETGEAR after about 15, and a Linksys router locks you out of the interface after 5 wrong attempts.
Create a Strong Wi-Fi Password
The Wi-Fi password is what keeps everyone else off your network. A weak one undoes every other setting on this page. The joint NSA and CISA guidance for home networks recommends a passphrase of at least 20 characters. That is the number to aim for. Length beats complexity: four random words hold up better than a short jumble of symbols.
NIST now makes the same point. Its guidance has dropped the old rule that passwords must mix character types and leans on length instead. The minimum moved from 8 characters to 15 characters for single-factor logins in the 2024 revision. What that means in practice is simple. Make the Wi-Fi password long, make it unique, and skip the word-plus-house-number pattern that guessing tools check first.
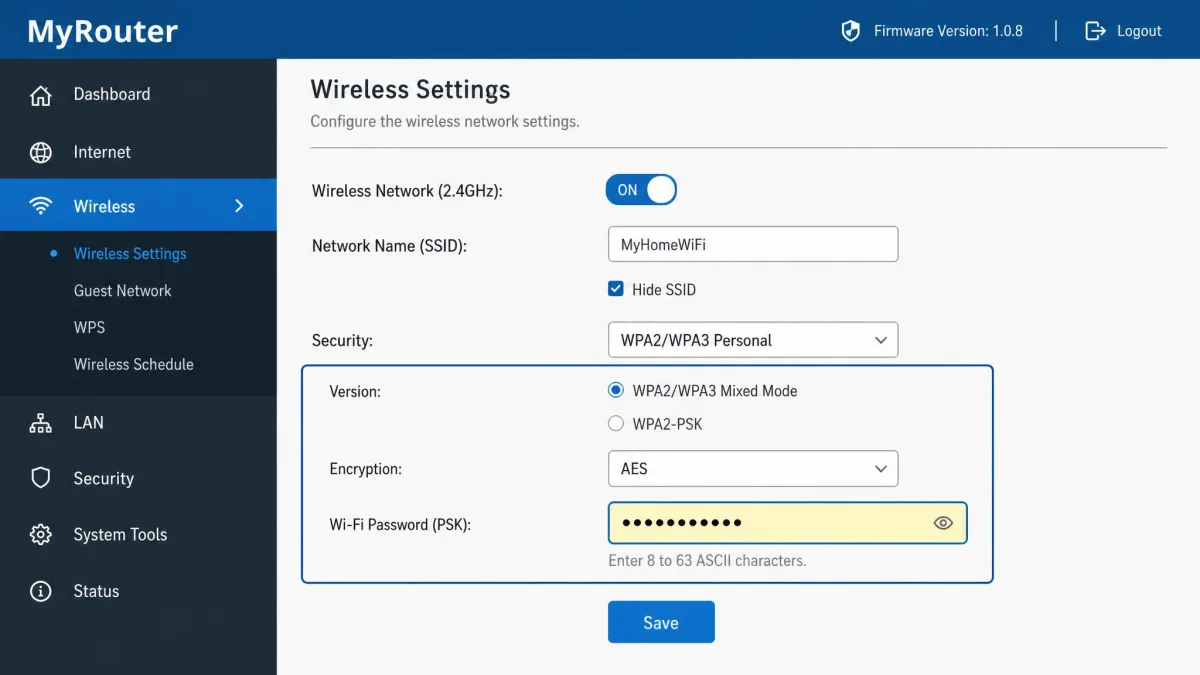
Change it in the router's wireless settings, under a section labeled Wireless Security or Wi-Fi. Pick a passphrase you do not use for any account, and update every device after you save it.
A strong passphrase is easy to type and hard to guess. Try four random words joined by spaces or hyphens, like blue-hamster-plateau-socks, and store it somewhere your family can find it. On a family network, that last part matters as much as the password itself.
Enable WPA2 or WPA3 Encryption
Encryption scrambles your traffic so no one on the same channel can read it. The setting that controls it is the security mode. The standards to look for are WPA2 and WPA3. WPA2 arrived in 2004 and became the baseline for home networks. The Wi-Fi Alliance introduced WPA3 on June 25, 2018, calling it the biggest Wi-Fi security update since WPA2.
In the router's wireless security menu, choose WPA3-Personal if every device on the network supports it. It replaces WPA2's handshake with a newer method called SAE, which blocks offline dictionary attacks and adds forward secrecy. It also makes protected management frames mandatory. WPA3-Enterprise reaches the equivalent of 192-bit cryptographic strength. CISA considers WPA3-Personal and WPA2-AES the only safe encryption forms for a home network. Open networks, WEP, WPA, and WPA2-TKIP are not considered safe.
Most routers now offer a mixed WPA2/WPA3 mode for the transition, and this is where our testing got interesting. Moving a network from WPA2 to mixed mode frequently made devices that connected fine before fail to associate or drop offline. Windows laptops can loop between deauthentication and reconnect. Smart-home gear and printers are the most affected, because many of them support only WPA2. A WPA3-only network locks that older gear out entirely.
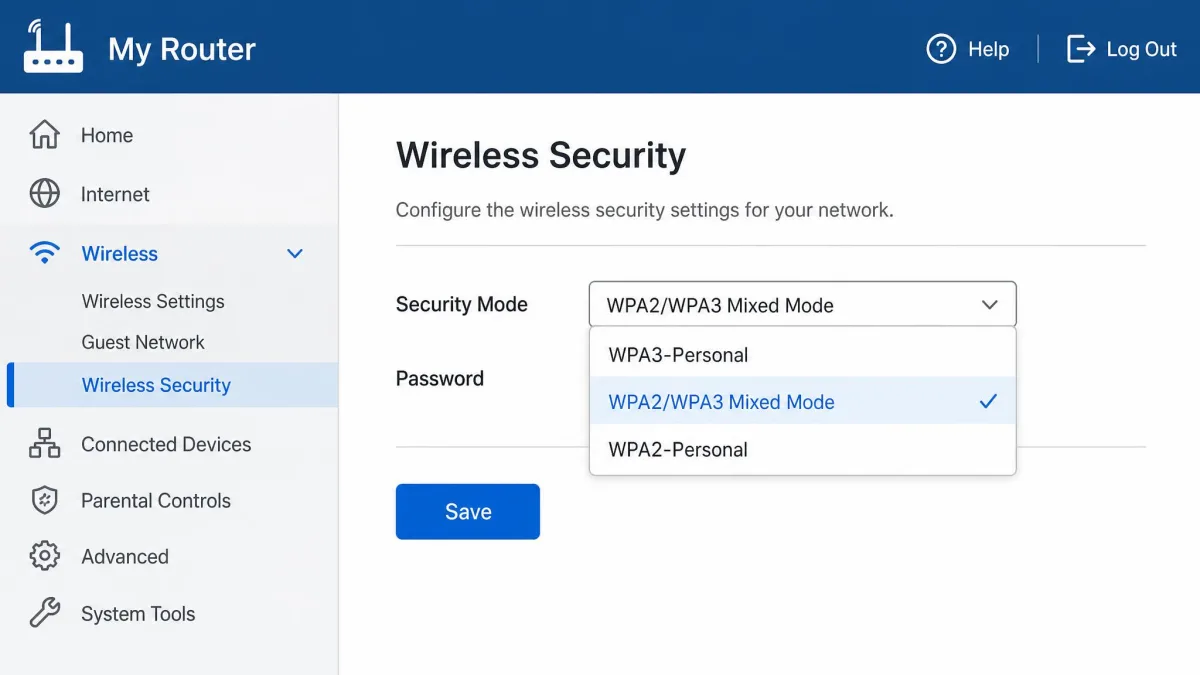
In our testing, the step that caused the most dropped connections was switching encryption modes, and the devices that fell offline were almost always older smart-home gear and printers.
If any device will not rejoin after the switch, keep the router in mixed mode. Alternatively, set up a separate network on the 2.4 GHz band using WPA2-Personal for the older gear. That is also where a guest network becomes useful, so we will come back to it in a moment.
Update Your Router's Firmware
Router firmware is the software that runs the box, and it carries the patches for the attacks described above. It only stays safe while it keeps receiving updates. The FBI warns that routers from 2010 or earlier likely no longer receive security fixes at all and are actively targeted by botnets such as TheMoon. If yours is that old, replacing it is the responsible fix.
For newer routers, firmware updates usually live under Advanced > System > Firmware Upgrade on a TP-Link, reached at tplinkwifi.net. On a NETGEAR, look under ADVANCED > Administration > Firmware Update, reached at routerlogin.net. Both recommend connecting over Ethernet and leaving the router alone while it works. A TP-Link upgrade takes about 3 minutes and reboots on its own. NETGEAR asks you to avoid using the internet while the update runs. If your router supports automatic updates, turn them on. TP-Link and NETGEAR both offer apps or cloud options that keep the firmware current without a manual visit.
Two things we learned from running updates ourselves. The first is that an update reboots the router and cuts the network for a few minutes. Do not start one in the middle of a video call. The second is that some updates reset settings to factory defaults. That wipes the Wi-Fi name, password, and guest network you just configured.
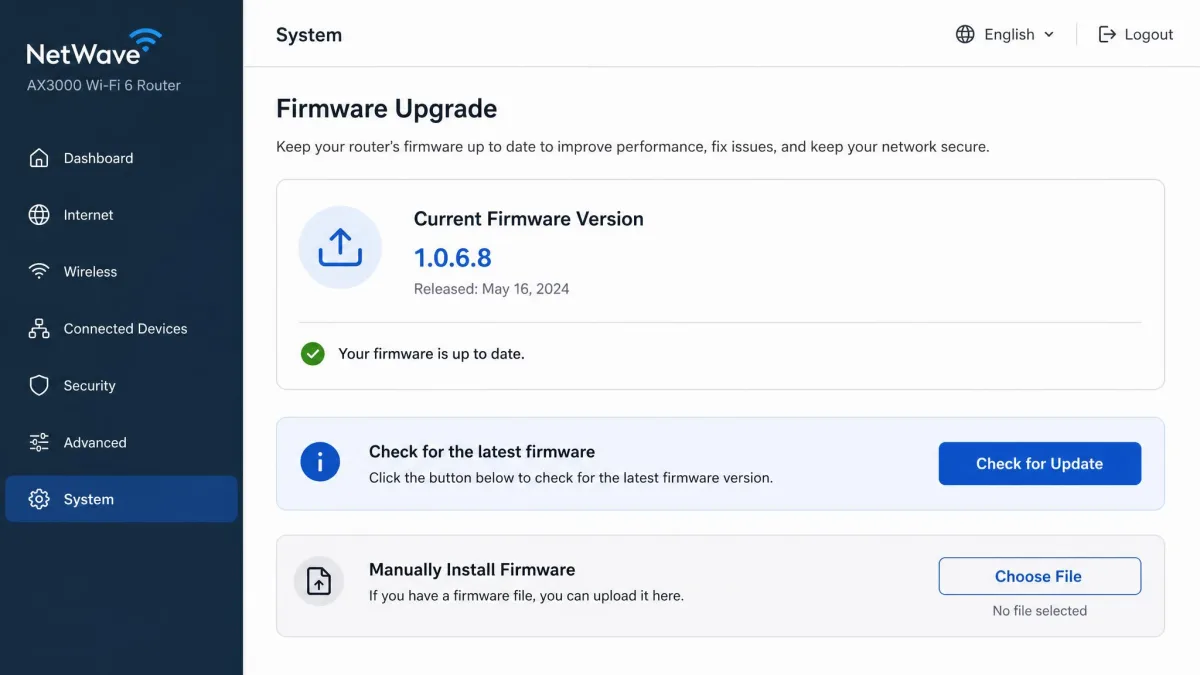
Before you update, look for a Backup or Backup & Restore option in the router's System or Administration menu (on a TP-Link it is Advanced > System > Backup & Restore) and save the config file. If the update resets anything, restoring that file puts the network back the way it was.
We also saw one Asus firmware release break several older IoT clients after an update. It forced a rollback to the previous version. Reading the release notes before updating is a reasonable habit when your network runs smart-home gear.
Set Up a Guest Network
A guest network is a second Wi-Fi name that shares your internet connection but is walled off from your main network. Setting one up is one of the most effective steps in securing your wireless network. Guest networks use client isolation, which stops guest devices from talking to each other and to your main network.
CISA recommends connecting smart-home and IoT devices to the guest network with a long, random, unique password. That way a compromised gadget cannot discover your other devices or reach your router settings. For a family network, it is also the right place for visitors' phones and kids' tablets.
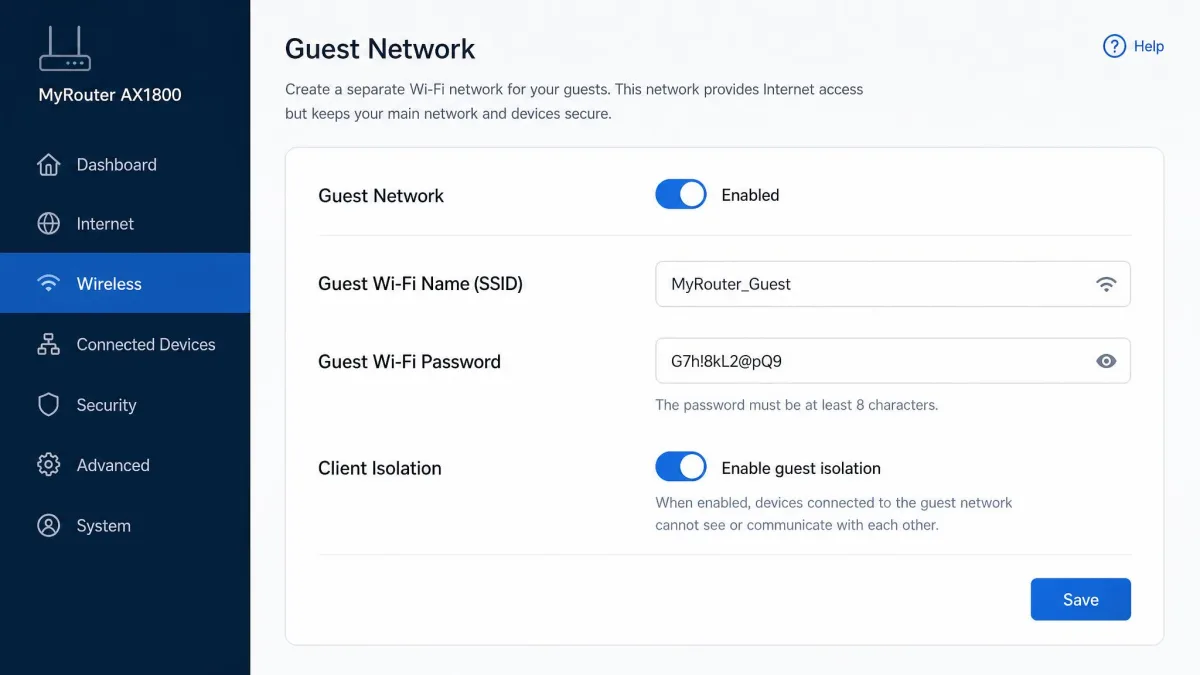
Most routers have a Guest Network or Guest Wi-Fi section where you set a separate name and password and turn on isolation. If your router offers a separate IoT or smart-home network segment, use that instead for the smart gear.
Two caveats from real use. Putting IoT devices on the guest network can break device control. A phone on the main network cannot control smart bulbs, thermostats, or Cast speakers on the guest network, because isolation separates them. Some smart speakers refuse to join a guest network at all. If a gadget needs to be reachable from your phone, keep it on the main network in its own 2.4 GHz band with WPA2-Personal. Use the guest network for everything else.
Disable WPS and Other Risky Features
Routers ship with convenience features that quietly undermine the security you just configured. The worst of them is WPS. WPS is meant to make joining devices easy through a button or a PIN, but the PIN has a design flaw. It is 8 digits, and an attacker can check the first 4 independently, which collapses the search space from 100 million to about 11,000 guesses. CISA's 2012 alert warned that anyone within radio range can brute-force the PIN with free tools and recover the network password in 4-10 hours. Some routers do not fully disable WPS even when the interface says they did. Turn WPS off.
Two more features deserve the same treatment. Universal Plug and Play (UPnP) lets devices open ports through the firewall automatically, which malware can abuse to slip past the router's protections. Switch it off unless a console or app genuinely needs it. Remote management, which lets you reach the admin console from outside your home, exposes the router to the whole internet and should stay off.
Hiding your network name is not a security measure. The NSA and CISA joint guidance advises against it, because it adds no real protection and causes compatibility problems.
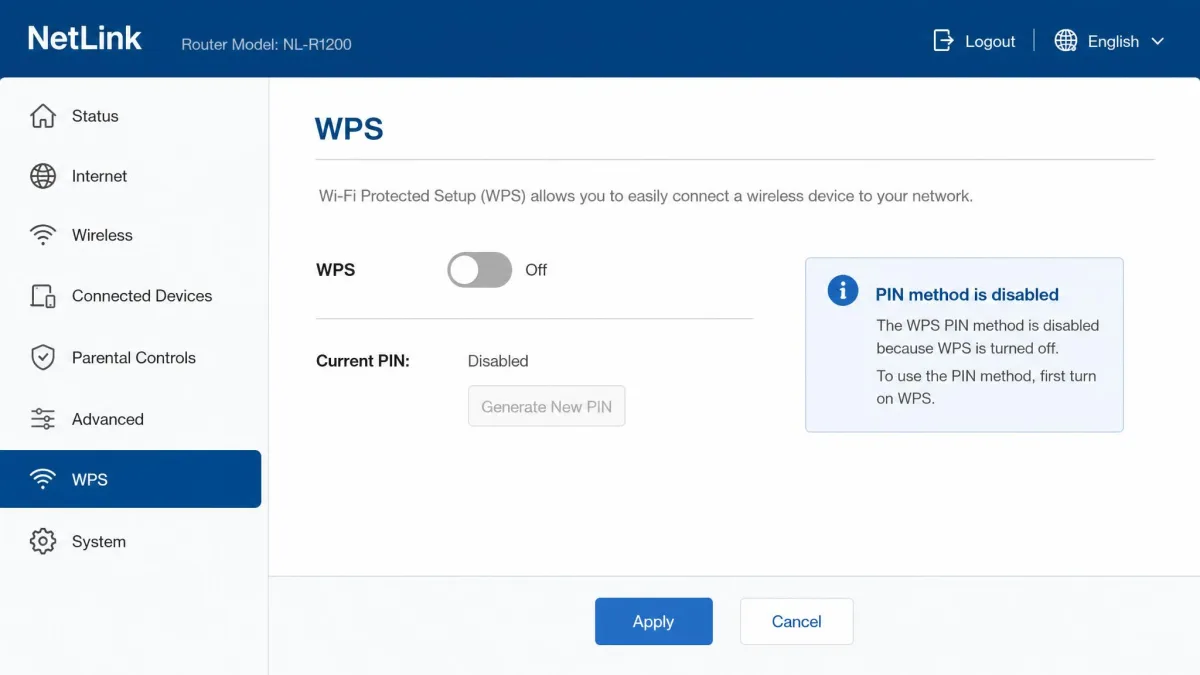
WPS brute-force tools are free, and the attack works from outside your front door. Even if you never used the WPS button, the PIN method ships enabled by default on many routers, and on a TP-Link it has to be turned off separately. Check the WPS settings page rather than assuming it is disabled.
Enable Your Router's Firewall
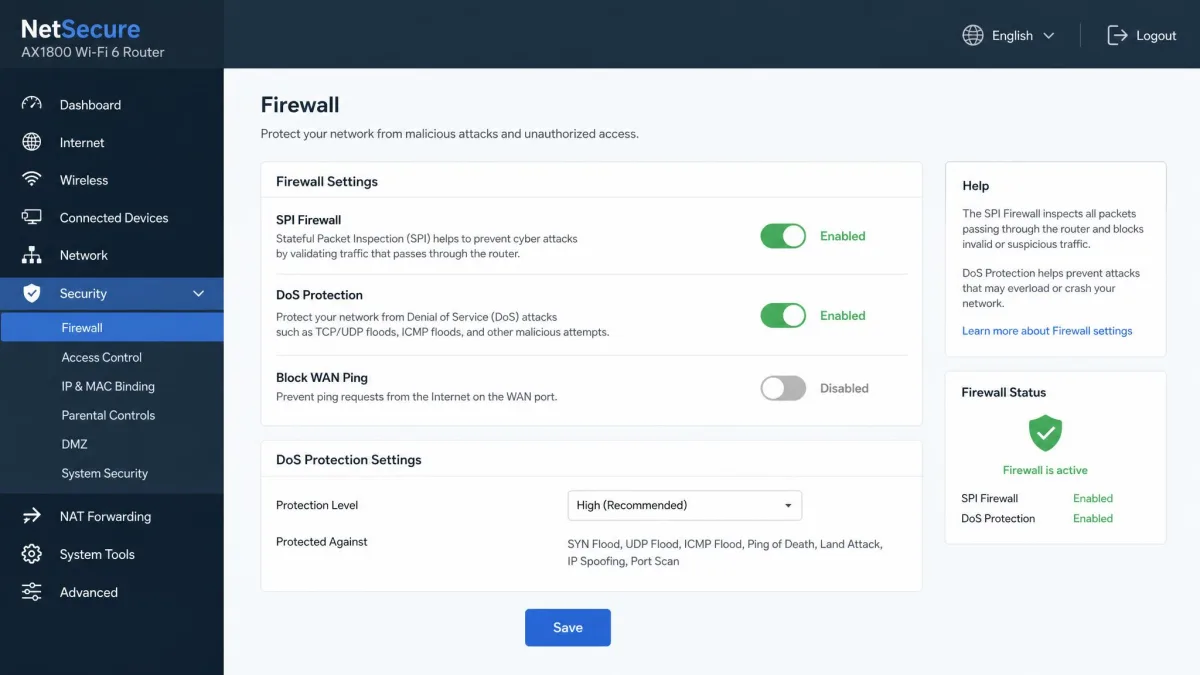
Your router already has a firewall, and the correct move is usually to leave it on. TP-Link routers ship with the SPI (Stateful Packet Inspection) firewall enabled by default, under Advanced > Security > Firewall & DoS Protection. Other brands keep a similar toggle in their Security or Firewall menus. Check that the firewall is switched on and that any DoS protection option is also enabled. Disabling the firewall disables the access rules and content filters tied to it. There is no good reason to turn it off.
The firewall is the router's defense against the outside world. For anything especially sensitive, add a second layer on the devices themselves: a VPN encrypts your connection beyond the reach of your network and your internet provider. If you are new to VPNs, our guide explains how to secure your network with a VPN.
Monitor Connected Devices
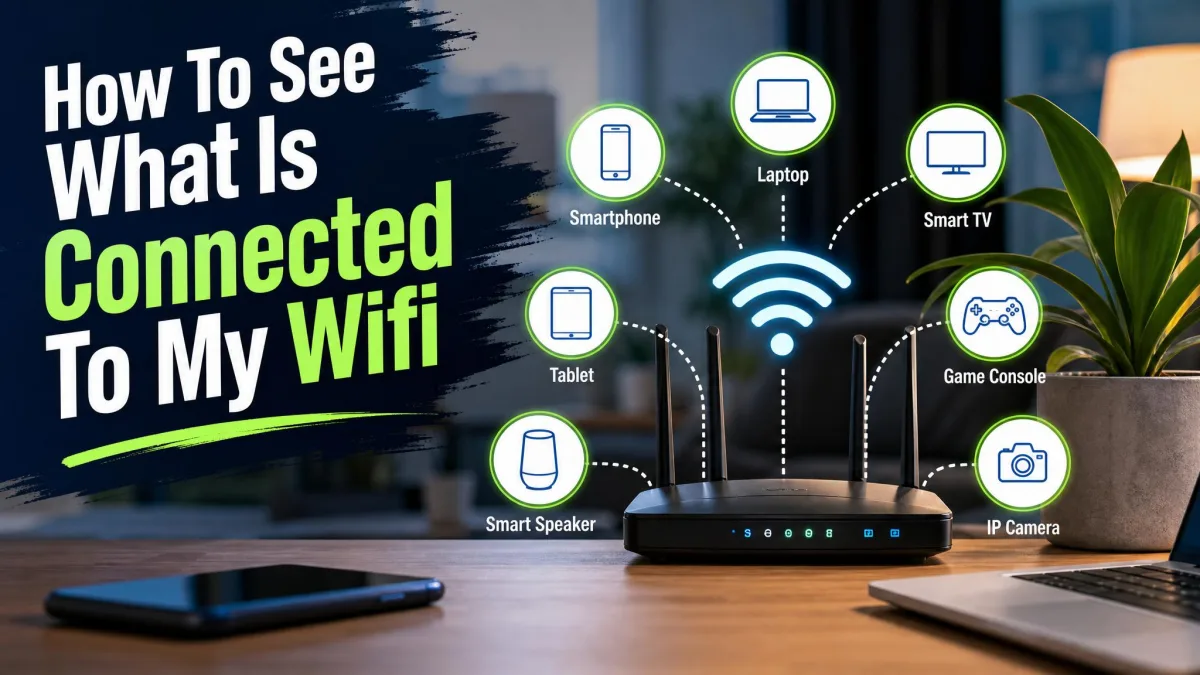
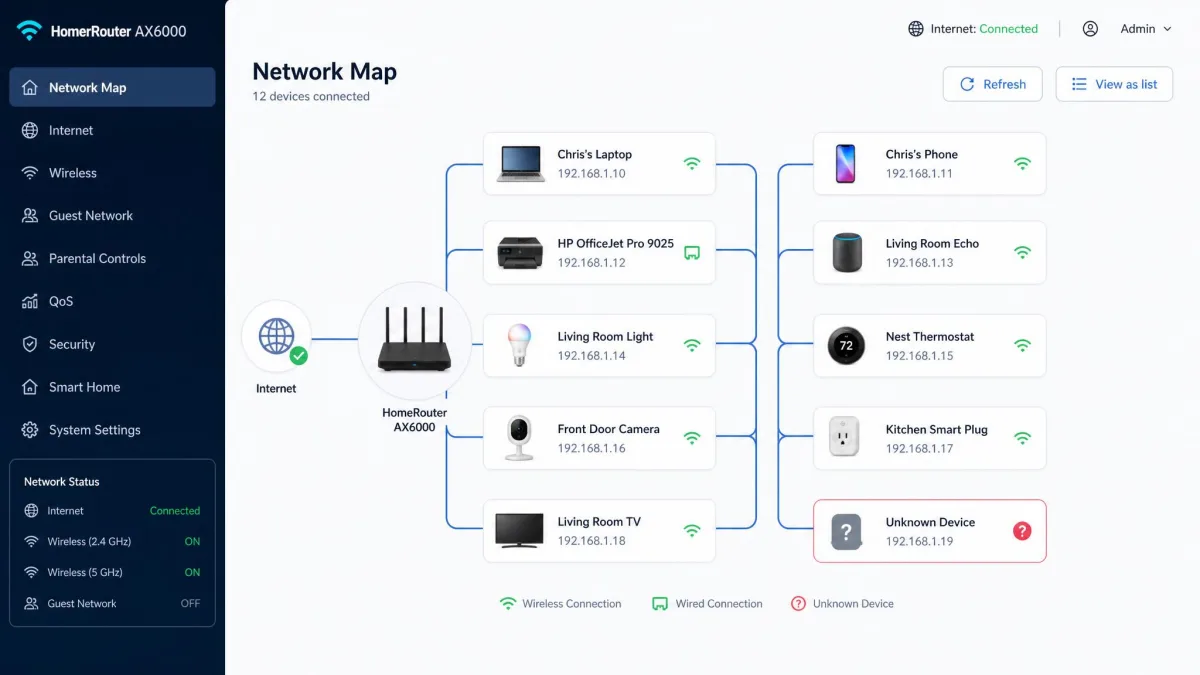
Knowing who is on your network is the fastest way to notice a problem, and the router keeps a running list. Most routers show every connected device under a label like Connected Devices, Device List, Attached Devices, or Network Map. The list gives each device's name, IP address, and MAC address with an Online or Offline status. NETGEAR calls it Attached Devices, TP-Link calls it Device List, and Linksys documents the same screen in its support pages.
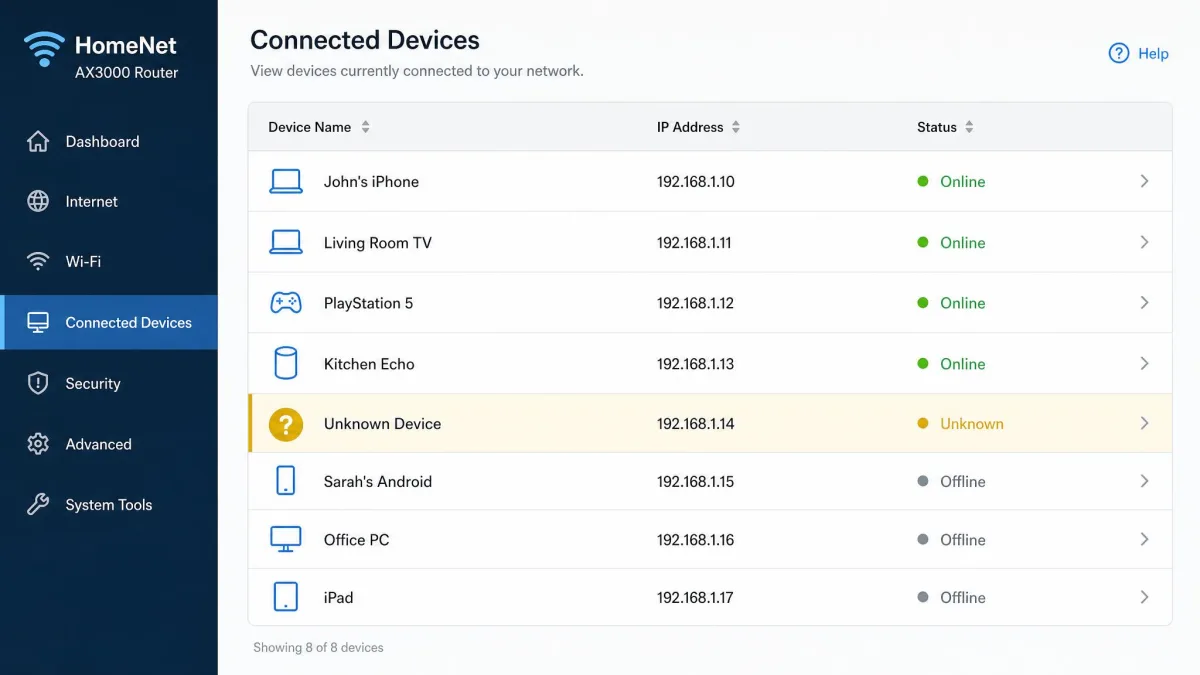
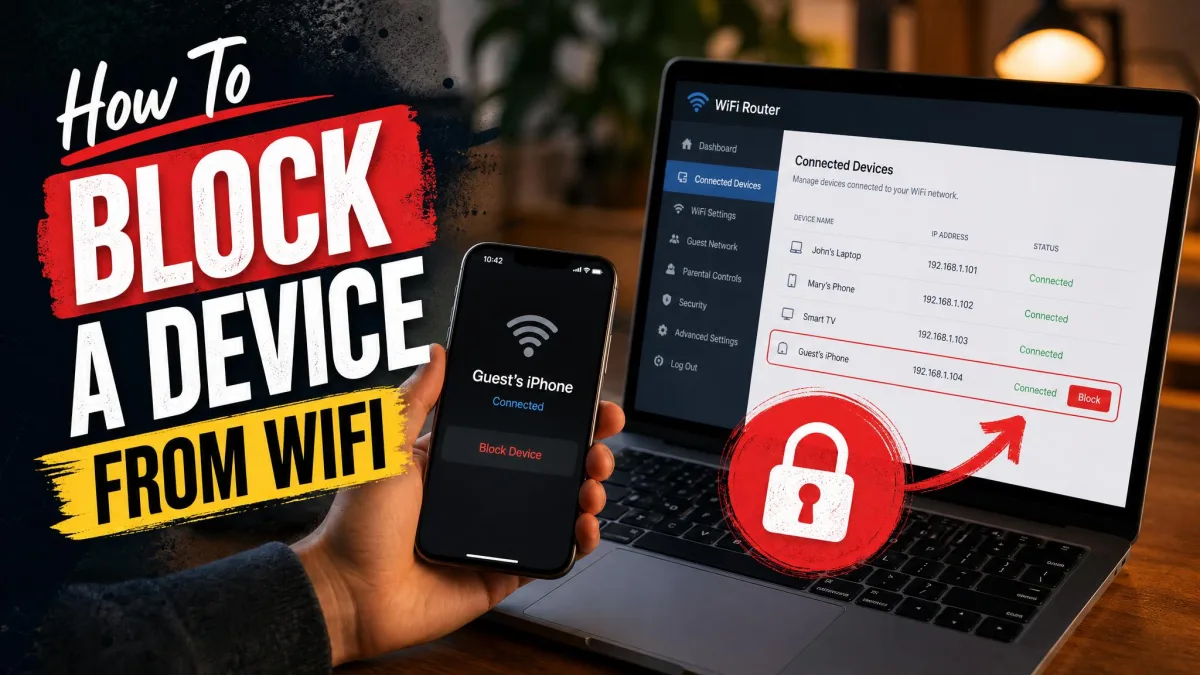
Spend a minute going through the list and matching entries to the devices you own: phones, laptops, the TV, a printer, smart speakers, and the router itself. Anything you do not recognize deserves a look. Most routers let you block an unknown device or cap its speed straight from the list. If the interloper turns out to be a neighbor, our guide on how to protect your WiFi from neighbors walks through the full fix.
Frequently Asked Questions
How do I know if my Wi-Fi is secure?
Is 5GHz more secure than 2.4GHz Wi-Fi?
How do I find my Wi-Fi security key?
Can I lock my internet without a router password?
Can I restrict or schedule internet access at certain times?
The Bottom Line
Locking down a home network is not one dramatic fix. It is a short checklist done once and revisited occasionally: change the admin login, set a long Wi-Fi password, choose WPA2 or WPA3, keep the firmware updated, wall off guests and smart-home gear, turn off WPS and remote access, leave the firewall on, and glance at the device list now and then.
We ran every step on the routers in our test setup before recommending them, and the steps that bit us were the ones most guides rush past: encryption-mode switches and firmware updates. Neither is a reason to skip the work. A single session now keeps your wireless internet locked down instead of wide open, which is the trade worth making.