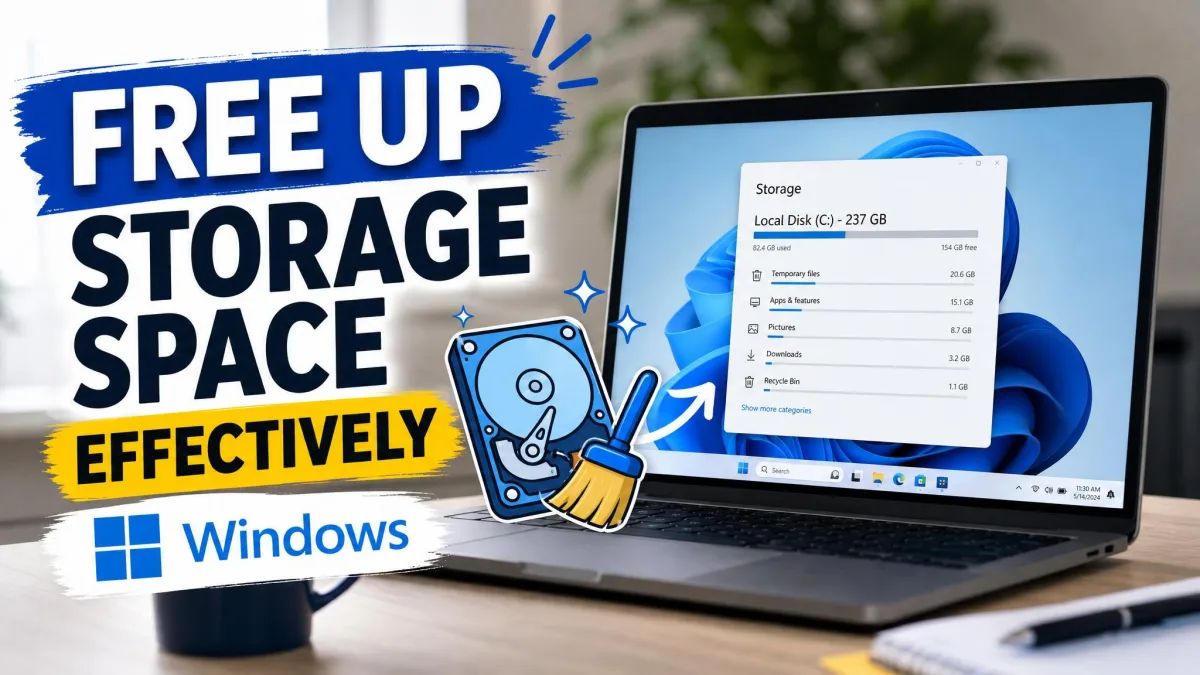
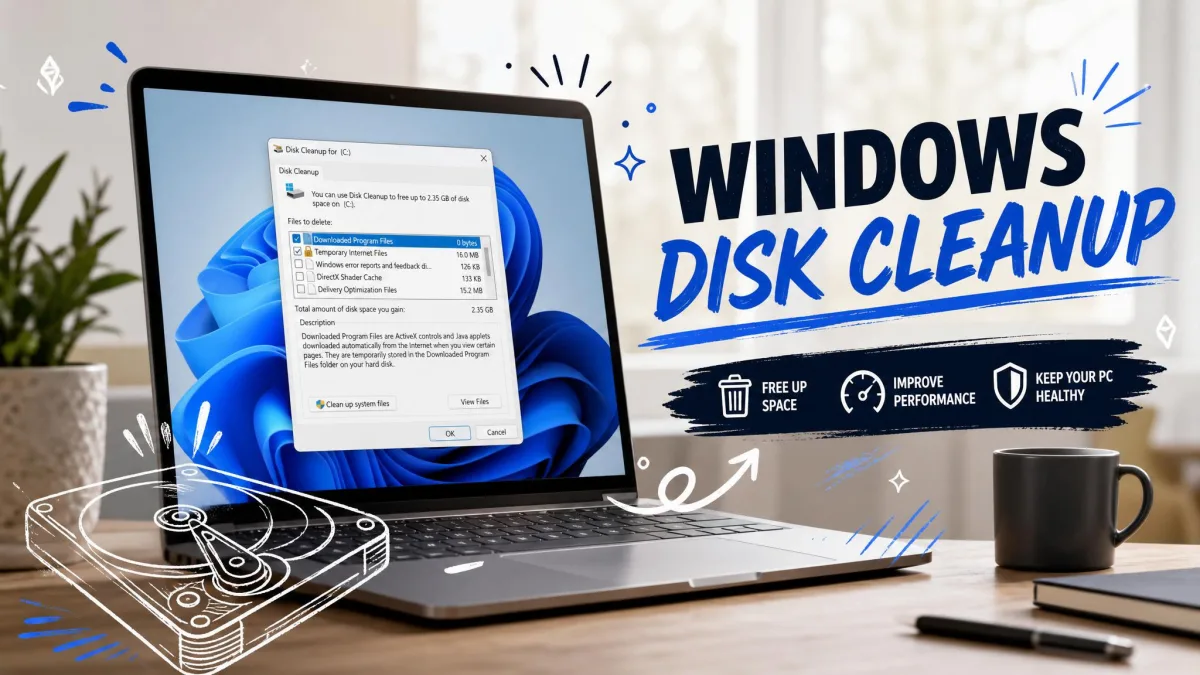
If your C: drive is running out of space and Windows keeps nagging you about it, the fastest fix is already installed. Disk Cleanup is a built-in Windows tool that scans a drive for files the system no longer needs and lets you delete them from one checkbox list.
It is old, plain-looking software, and that is part of why people trust it. It has shipped with Windows since Windows 98, it does not upsell anything, and it will not touch your documents unless you tell it to.
The anxious part is the checkbox list itself. Most of those categories are safe to clear, a couple are not, and nothing in the dialog explains the difference. This guide covers opening Disk Cleanup on Windows 11 and 10, running it step by step, reading every category, and using the advanced mode that frees the most space.
Disk Cleanup is still present in Windows 11, but it is no longer the path Microsoft promotes. Storage Sense in the Settings app is the successor, and Microsoft has moved the tool's entry points between Windows 11 builds, so where it appears varies by build.
Open Disk Cleanup in Windows 11 and 10
There are several ways in, and they all land on the same dialog. If you want the full set of entry points, our companion guide on how to run Disk Cleanup in Windows 11 and 10 covers all six.
Search from the Start menu
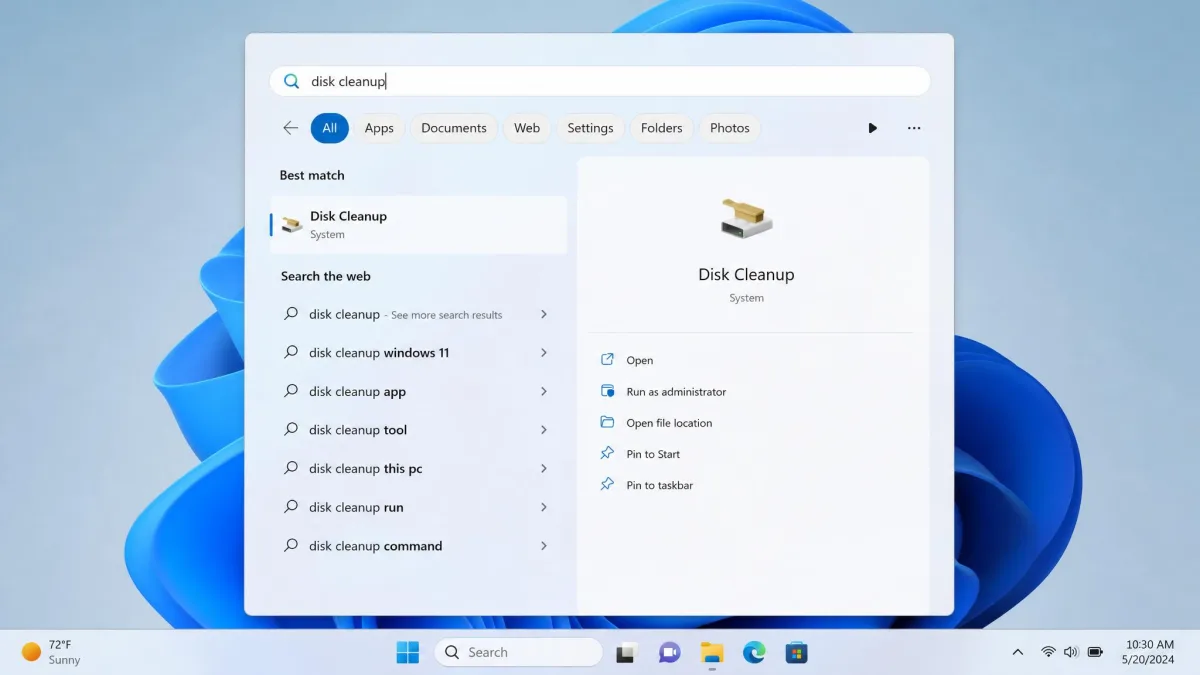
Select Start, type disk cleanup, and choose the Disk Cleanup app from the results. This works identically on Windows 10 and every Windows 11 build to date, which makes it the method worth memorising.
Run cleanmgr from the Run box
Press Windows key + R, type cleanmgr, and press Enter. Disk Cleanup runs as cleanmgr.exe, and the Run box gets you there in about two seconds.
The same command makes the tool scriptable. You can point it at a specific drive with cleanmgr /d C:, and you can save a reusable selection of categories with /sageset.
Open it from drive Properties in File Explorer
Open File Explorer, select This PC, right-click your drive, choose Properties, and select Disk Cleanup on the General tab. Microsoft removed this entry point in later Windows 11 builds, so if the button is missing, use Start menu search instead.
Run Disk Cleanup Step by Step
The whole run takes three decisions: which drive, what it found, and what you are willing to delete.
Choose the drive to clean
If your PC has more than one drive, Disk Cleanup asks which one to scan first. Choose C:, because that is where Windows keeps its temporary and update files.
On any other drive, the tool only offers Recycle Bin and content-index catalog files. That is not a bug. There is simply very little Windows-owned junk on a data drive.
Review what Disk Cleanup found
The scan runs before the category list appears, and on a large or heavily used drive it can take a noticeable while. A spinning progress dialog with no detail is normal, so give it a minute before assuming something has gone wrong.
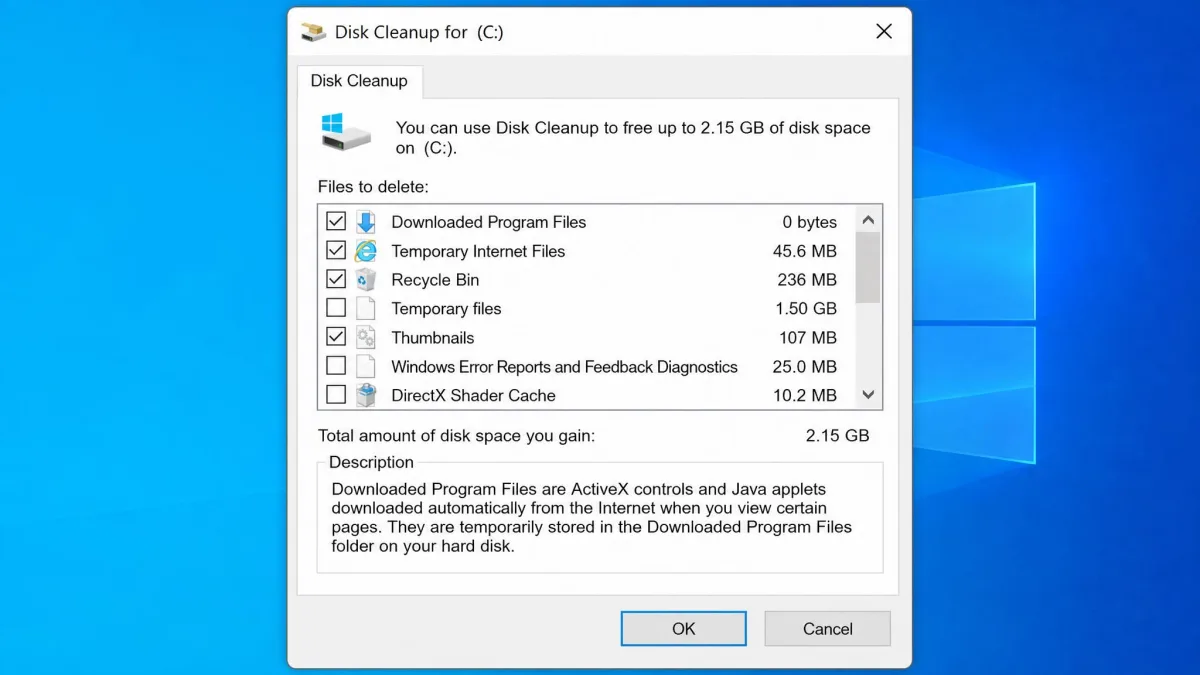
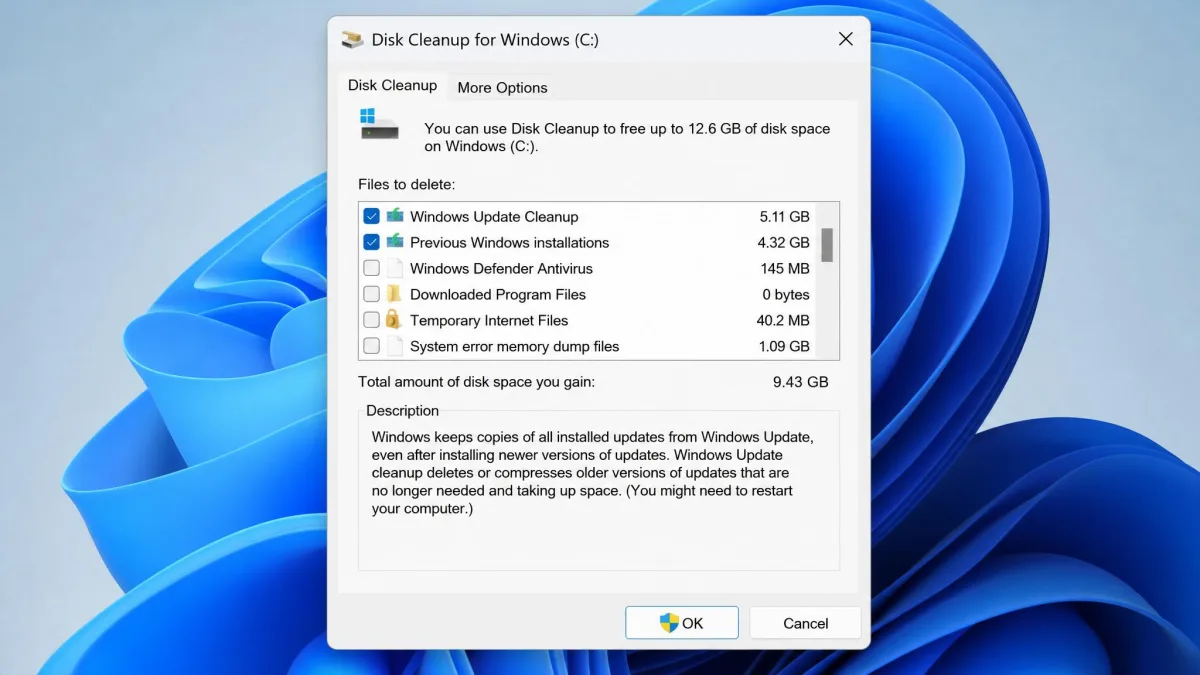
When the list appears, each category shows an estimated size, with a running total underneath. Downloaded Program Files, Temporary Internet Files and Thumbnails come pre-selected. Selecting a category shows a plain-English description below the list, which is the most useful part of the dialog.
Select file categories and confirm
Tick everything you want gone, leave anything you are unsure about alone, then select OK and confirm with Delete Files. The deletion is usually quicker than the scan that preceded it.
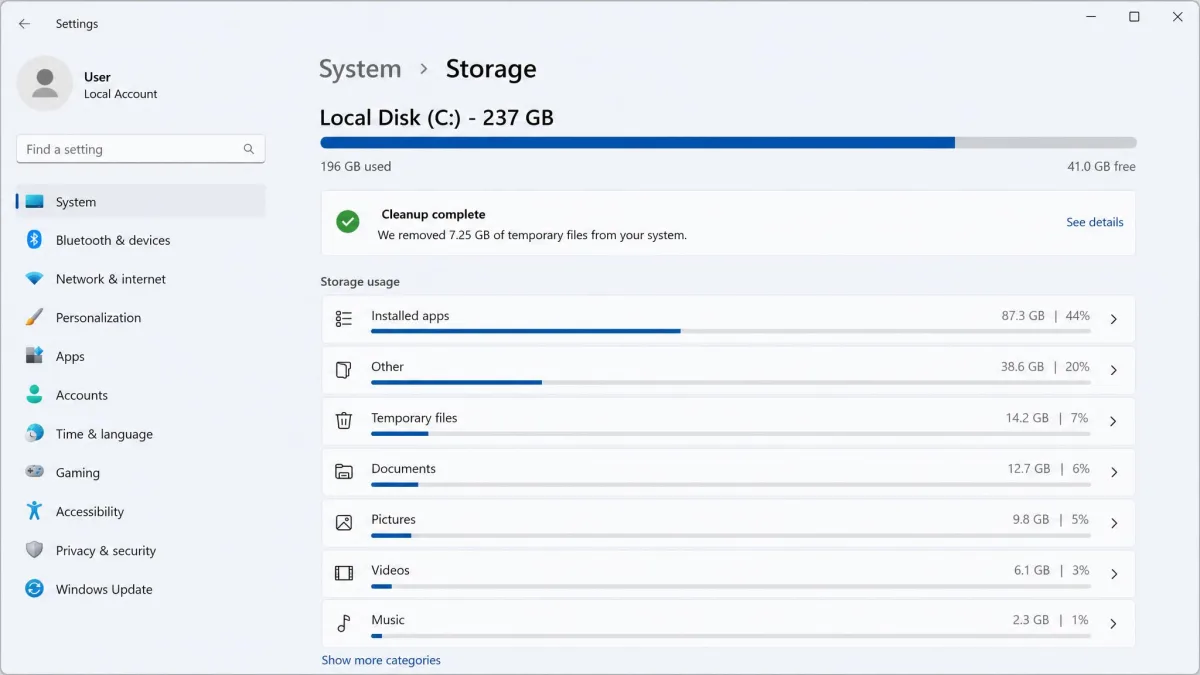
Note your free space on This PC before you open the tool, then check it again afterwards. The Windows Update Cleanup size estimate in particular can be wildly wrong, and we have seen the dialog report implausible totals in the terabyte range, so a before-and-after reading is the only number to trust.
What Disk Cleanup Is and What It Removes
Disk Cleanup is a file remover, not an optimiser. It finds files Windows created for its own purposes, decides which are now expendable, and deletes them when you say so. It does not touch your registry, your startup programs or your installed applications.
It is also deliberately cautious. Temporary files are only removed once they are more than roughly 48 hours old, which leaves anything still in use alone. That conservatism is why the tool has a good reputation and why it sometimes frees less than people expect.
Two limits catch people out. Temporary Internet Files covers the Microsoft browser cache only, so Chrome and Firefox caches survive a run intact. And Disk Cleanup knows nothing about the 40 GB of video sitting in your Downloads folder, because it only looks at categories Windows itself owns.
It is not defragmentation either. Defragmenting reorganises how files are laid out on a mechanical drive and frees no space at all.
How much space you can expect to reclaim
On a machine that has never been cleaned, a basic run typically clears somewhere between a few hundred megabytes and a couple of gigabytes. That is mostly thumbnails, delivery caches and the Recycle Bin.
The system-files mode is where the big numbers live. On a PC that has recently taken a feature update, Windows Update Cleanup and previous Windows installations together commonly account for several gigabytes and can run into double figures.
Our own before-and-after readings follow the same shape every time. A basic pass on a neglected laptop lands in the hundreds of megabytes to low gigabytes. The same machine, re-scanned with Clean up system files after a feature update, frees several times that. We treat these as typical ranges rather than fixed figures, because the result depends entirely on how recently Windows updated itself.
What Each Category Means, and What Is Safe to Delete
The standard list covers Temporary Setup Files, Downloaded Program Files, Temporary Internet Files, Old Chkdsk Files, Recycle Bin, Temporary Files, Offline Files, Compress Old Files and Catalog Files for the Content Indexer. System-files mode adds Windows Update Cleanup, Windows ESD installation files, Delivery Optimization Files, DirectX Shader Cache, Device driver packages, Windows error reports and Previous Windows installation(s).
Categories that are always safe to remove
These regenerate on their own or serve no ongoing purpose:
- Temporary files. Working files Windows left behind, offered once past the age threshold.
- Thumbnails. File Explorer previews. They come back on their own the next time you browse a folder, at the cost of a slower first load.
- Downloaded Program Files. Old ActiveX and Java applets that almost nothing uses now.
- Temporary Internet Files. The Microsoft browser cache, which refills as you browse.
- DirectX Shader Cache. Rebuilt automatically by games and graphics apps.
- Delivery Optimization Files. Update fragments cached for sharing with other PCs.
- Windows error reports. Crash dumps you are never going to read.
Categories to think twice about
Four entries deserve a pause:
- Recycle Bin. Emptying it is permanent. Open it and check nothing in there is wanted.
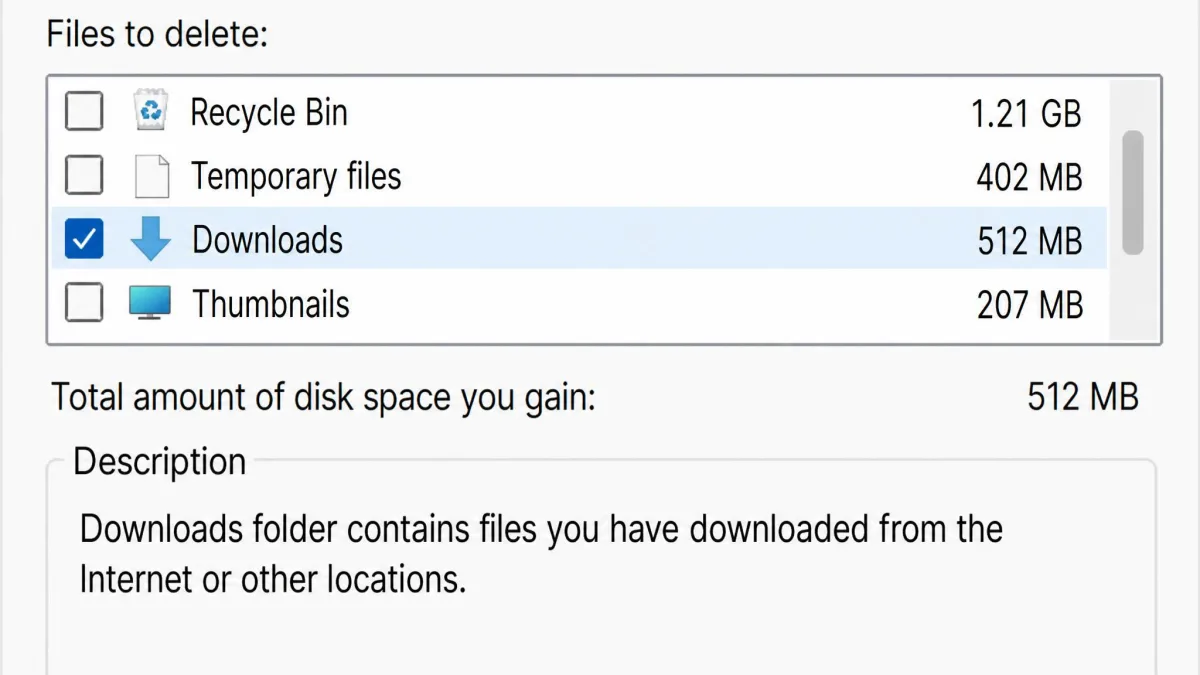
- Downloads. This deletes real personal files, and it sits in the same unremarkable checkbox list as the harmless categories.
- Windows ESD installation files. Keep these. Windows uses them to reset the PC.
- Previous Windows installation(s). Removing this closes off your rollback path for good.
Ticking Downloads deletes the actual contents of your Downloads folder, not a cache of it. Recycle Bin and Previous Windows installation(s) are equally final. None of these three can be undone from inside Disk Cleanup, so open each folder and look before you commit.
Clean Up System Files
The first pass only shows a short category list. The bigger items appear after you select Clean up system files, which re-runs the scan with elevated rights and adds the Windows-owned categories.
Select Clean up system files at the bottom left of the dialog, approve the prompt, pick the drive again if asked, and wait through a second scan. That scan is usually slower than the first, and it is the one worth waiting for. For scripted or scheduled runs, the cleanmgr command reference documents every switch.
Run cleanmgr /sageset:1 from an elevated Command Prompt to build a saved selection of categories once, then run cleanmgr /sagerun:1 any time to repeat that exact cleanup with no dialog. The profile number can be any integer up to 9999, so you can keep several presets.
Previous Windows installations and Windows Update cleanup
These two categories are the reason system-files mode exists. Windows Update Cleanup removes superseded update packages and the servicing data behind them. Previous Windows installation(s) is the windows.old folder left by a feature upgrade.
Windows keeps windows.old so you can go back to the earlier build, and that window is short. You can only roll back for 10 days after the upgrade, after which Windows deletes the folder automatically. Removing it yourself inside those ten days is safe as long as the new build is working properly. Microsoft's own walkthrough of the same ground, Microsoft's official guide to freeing up drive space, is worth a read alongside ours.
Turn On Storage Sense
Where Disk Cleanup is manual and one-shot, Storage Sense is set-and-forget. The two overlap heavily rather than replacing each other cleanly. Run Disk Cleanup for a deep clean, and leave Storage Sense on to stop the drive filling up again.
Storage Sense arrived with Windows 10 version 1803 in 2018 and works on the system drive only, normally C:. Microsoft's Storage Sense documentation is the authoritative reference for what each toggle does.
Configure the Storage Sense schedule
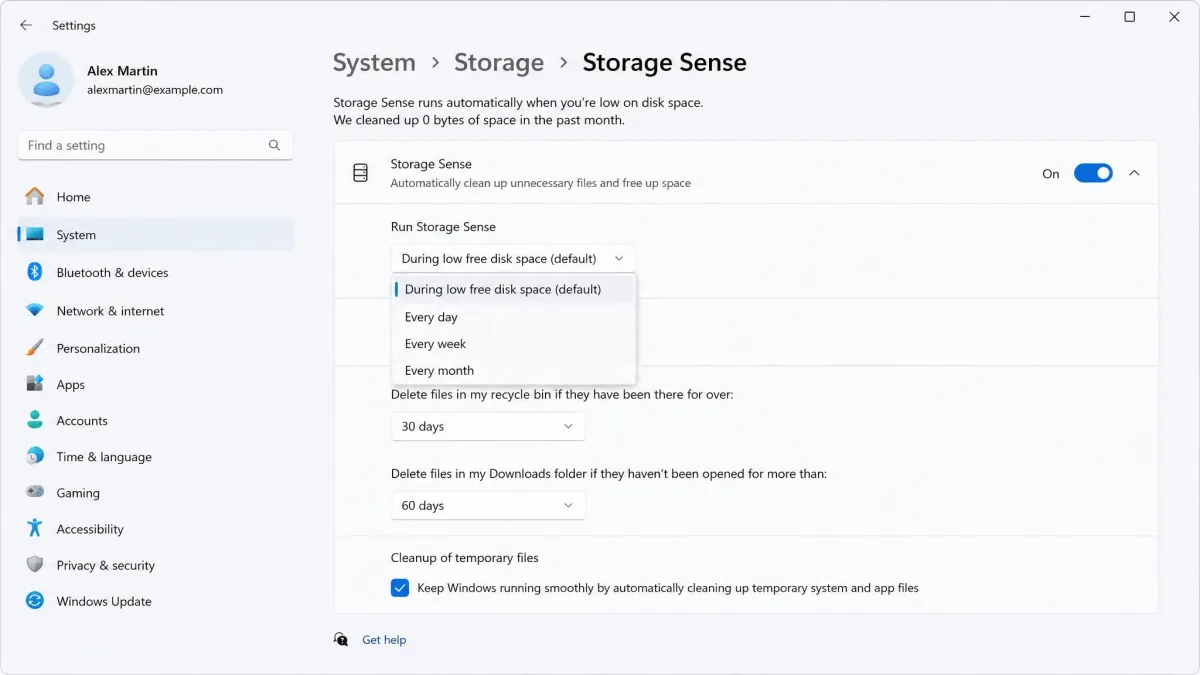
Select Start > Settings > System > Storage > Storage Sense to open the settings, turn the feature on, then choose how often it should run.
By default Storage Sense runs when the device is low on free disk space, and the point at which it considers itself low varies with disk size. You can switch that to daily, weekly or monthly. Below the schedule you set separate age thresholds for emptying the Recycle Bin and for deleting files from Downloads, selectable at 1, 14, 30 or 60 days.
Cloud content has its own rule. Files backed by OneDrive become online-only if they have not been opened for more than 30 days, the default since Windows 11 version 22H2.
Storage Sense quietly turning Downloads and cloud files into online-only copies catches people out when they are offline. If you work on a train or a plane, set the Downloads threshold to Never and mark the folders you need as Always keep on this device.
Use Cleanup recommendations
Windows 11 has a third option most people never open. Select Start > Settings > System > Storage > Cleanup recommendations to find it.
It groups suggestions into 4 categories: temporary files, large or unused files, files synced to the cloud, and unused apps. It is a faster read than the Disk Cleanup checkbox list, because it surfaces your large unused files and unused apps up front. Removing an app from here is permanent, so check the list before you confirm.
Disk Cleanup vs Storage Sense vs Third-Party Cleaners
Each of these tools does one thing better than the others.
| Tool | What it removes | Automation | Space typically reclaimed | Risk level | Best for |
|---|---|---|---|---|---|
 |
Temp files, Recycle Bin, thumbnails, update cleanup, previous Windows installations | Manual, scriptable via cleanmgr /sagerun | Largest wins come from update cleanup and windows.old | Low, except Downloads and Previous Windows installation(s) | A one-off deep clean after an update |
 |
Temp files, Recycle Bin, Downloads by age, cloud files to online-only | Automatic, on a schedule or on low space | A steady trickle, mostly Recycle Bin and Downloads | Low, but deleting Downloads by age can surprise | Keeping a full drive from filling again |
 |
Temporary files, large or unused files, cloud-synced files, unused apps | Manual, one click from suggestions | Whatever the four categories surface | Low, though unused-app removal is permanent | A quick guided pass on Windows 11 |
 |
App and browser caches beyond Windows' own, logs, per-app cleaners | Manual, per-cleaner selection | Depends on installed apps and browser caches | Higher, aggressive cleaners can clear wanted app data | Cleaning what Windows itself ignores |
The honest summary is that you want the first two and rarely need the fourth. BleachBit earns its place only if your Chrome or Firefox caches have grown large, since Windows never touches those. The current release is BleachBit 6.0.2, free with no payment or registration, and it supports Windows 10 and 11. A legacy 4.7.0 build covers Windows XP through 8.
Free Up More Space When Disk Cleanup Is Not Enough
If a full system-files run still leaves you short, the remaining space is being used by things you installed or created.
Uninstall space-hungry apps
Select Start > Settings > Apps > Installed apps, then sort the list by size. Games, creative suites and virtual machine images dominate the top of that list on most PCs, and removing one usually beats every cleanup category combined.
Move or offload files with OneDrive Files On-Demand
Files On-Demand keeps a placeholder on the drive and the real file in the cloud until you open it. Right-click a folder in File Explorer and choose Free up space to convert its contents to online-only copies. Photo libraries and archived projects are the obvious candidates.
Find what is eating your disk with a space analyzer
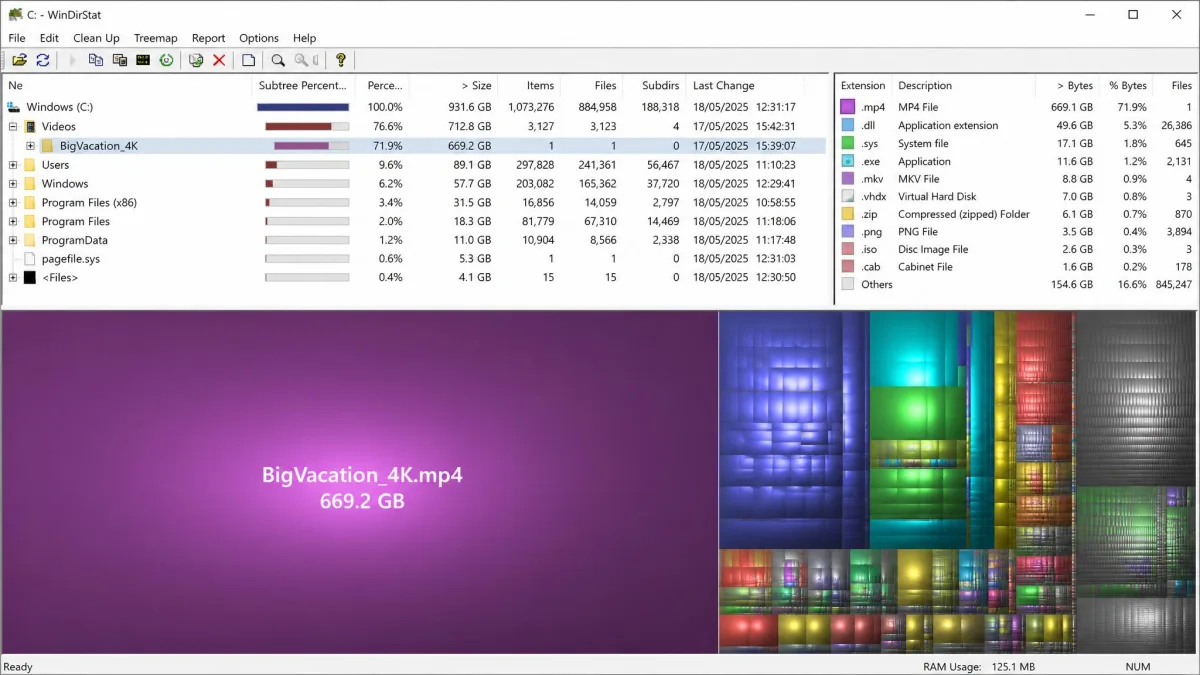
A disk-space analyzer's treemap finds the single huge folder Disk Cleanup never touches, because Disk Cleanup only looks at categories Windows knows about. WinDirStat draws your whole drive as coloured rectangles sized by file, so a forgotten 60 GB of old video renders becomes obvious in seconds.
It is free and open source under GPLv2, and it also gives you a directory tree, a largest-files view, extension statistics and duplicate file detection.
When Disk Cleanup Is Stuck or Will Not Finish
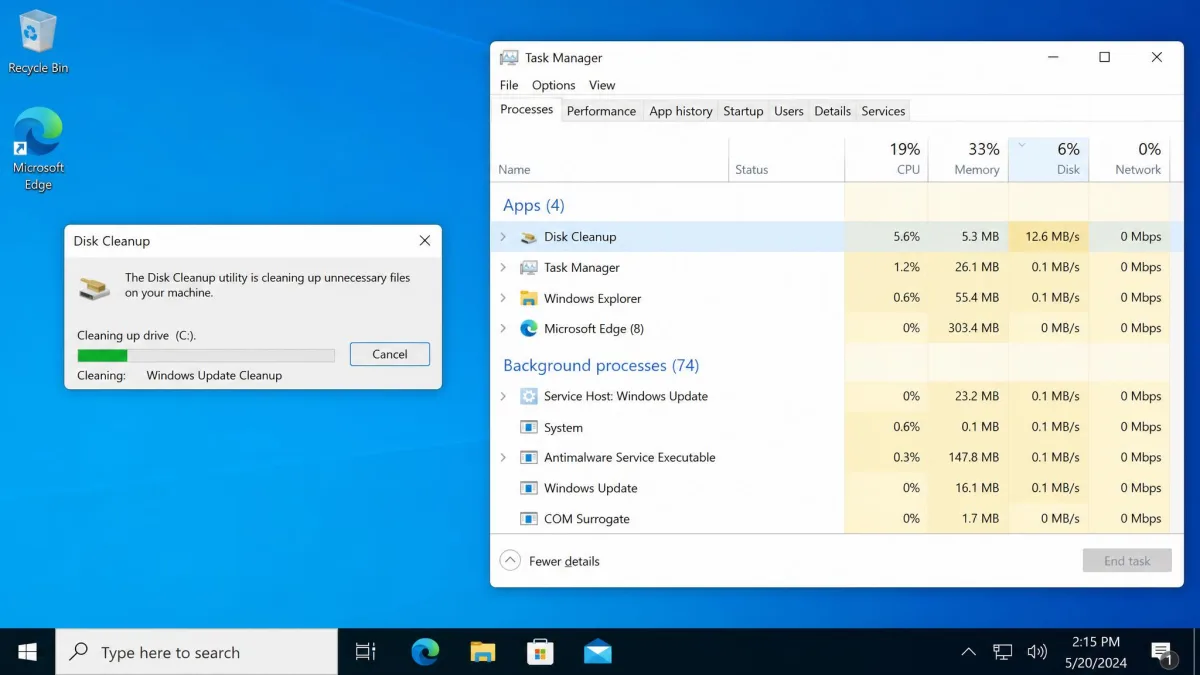
Windows Update Cleanup is the slowest category by far, because it works through update servicing and rollback data rather than plain temporary files. Disk Cleanup can sit on it for well over an hour, and the progress bar stays put even while work continues in the background.
Disk activity and CPU use are the reliable signals that a seemingly frozen cleanup is still running. Open Task Manager and watch the Disk and CPU columns for the cleanmgr process. If both are moving, leave it alone.
If both stay flat for a long stretch, a restart and a second run is the practical move. Windows finishes some servicing work during the reboot, so the repeat run often completes far faster than the first attempt.
Frequently Asked Questions
Is it safe to delete everything in Disk Cleanup?
What should I not delete?
How much space will Disk Cleanup free?
Does Disk Cleanup delete personal files or programs?
Why is Disk Cleanup stuck on Windows Update Cleanup?
Is Disk Cleanup still in Windows 11?
Disk Cleanup or Storage Sense, which should I use?
The Bottom Line
Disk Cleanup is worth the five minutes it takes, provided you use the system-files mode. The basic pass clears the small stuff, but the categories that free real space only appear after you select Clean up system files and let the second scan finish.
Take the two-step approach. Run Disk Cleanup with system files included to reclaim what a recent Windows update left behind, then turn on Storage Sense so your drive does not fill up again in six months. If both leave you short, the space is yours rather than Windows', and a treemap will find it in about a minute.