Windows drives fill up quietly. Updates leave installers behind, apps cache far more than they admit, and one morning Settings shows the drive in red with almost no storage space left. A machine in that state stops cooperating: updates refuse to install, large files will not save, and everything feels slower than it did a month ago.
Getting that space back rarely means deleting anything you care about. Most of what is taking up room is unnecessary files Windows and your apps left behind. Below are the twelve most effective methods, in the order we would run them, starting with the built-in cleanups that carry no risk at all.
How much comes back depends on what is already sitting there. A leftover Windows.old folder from a recent upgrade is usually worth 10 GB to 35 GB by itself, and the update and component caches behind it add several gigabytes more. A PC that was cleaned last month will return far less, so read the table below as ceilings rather than promises.
How Much Disk Space You Can Realistically Reclaim
Some of the space on a Windows drive is never coming back. Windows sets aside about 7 GB of reserved storage for updates and temporary files, growing or shrinking that allocation as optional features and languages come and go. Windows 11 also needs a 64 GB or larger drive to be supported, so on a small laptop a large slice is spoken for on day one.
The realistic target is the leftovers: update caches, previous installations, temporary files, and apps nobody has opened in two years. Microsoft's official guide to freeing up drive space covers the same built-in tools, and the table below shows what each of the twelve methods is typically worth.
| Method | Typical space reclaimed | Time required | Risk level | Windows 10 / 11 |
|---|---|---|---|---|
| 1. Cleanup recommendations | Varies with what it finds | A few minutes | Low | Windows 11 only |
| 2. Turn on Storage Sense | Ongoing, stops the refill | Under two minutes to set up | Low, unless Downloads cleanup is on | Both |
| 3. Delete temporary files | Often a few GB | A few minutes | Low | Both |
| 4. Disk Cleanup on system files | Around 3 GB from Windows Update Cleanup alone | Minutes, sometimes far longer | Low | Both |
| 5. Recycle Bin and Downloads | Up to about 5% of the drive from the bin | Under a minute | Low | Both |
| 6. Uninstall unused apps and games | Varies with what is installed | Minutes per app | Low | Both |
| 7. Move large files to an external drive | Varies with what you move | Depends on how much you move | Low | Both |
| 8. OneDrive Files On-Demand | Varies with the size of the sync folder | A few minutes | Low, files then need a connection | Both |
| 9. Shrink System Restore space | Depends on the current Max Usage setting | Under two minutes | Medium, fewer restore points | Both |
| 10. Turn off hibernation | 1.5 GB on Microsoft's 4 GB test machine, scaling with RAM | Under a minute | Medium, removes Fast Startup | Both |
| 11. Compress folders or run Compact OS | 3.7 GB on Microsoft's reference image, 11 GB on a live laptop | About 23 minutes | Medium, reversible | Both |
| 12. Clean the component store with DISM | 3 GB to 6 GB | Several minutes | Medium with /ResetBase | Both |
First, Find Out What Is Actually Filling Your Drive
Guessing wastes an hour. Ten minutes spent finding the real space hogs tells you which two or three methods below are worth running at all.
Check Storage in Windows Settings
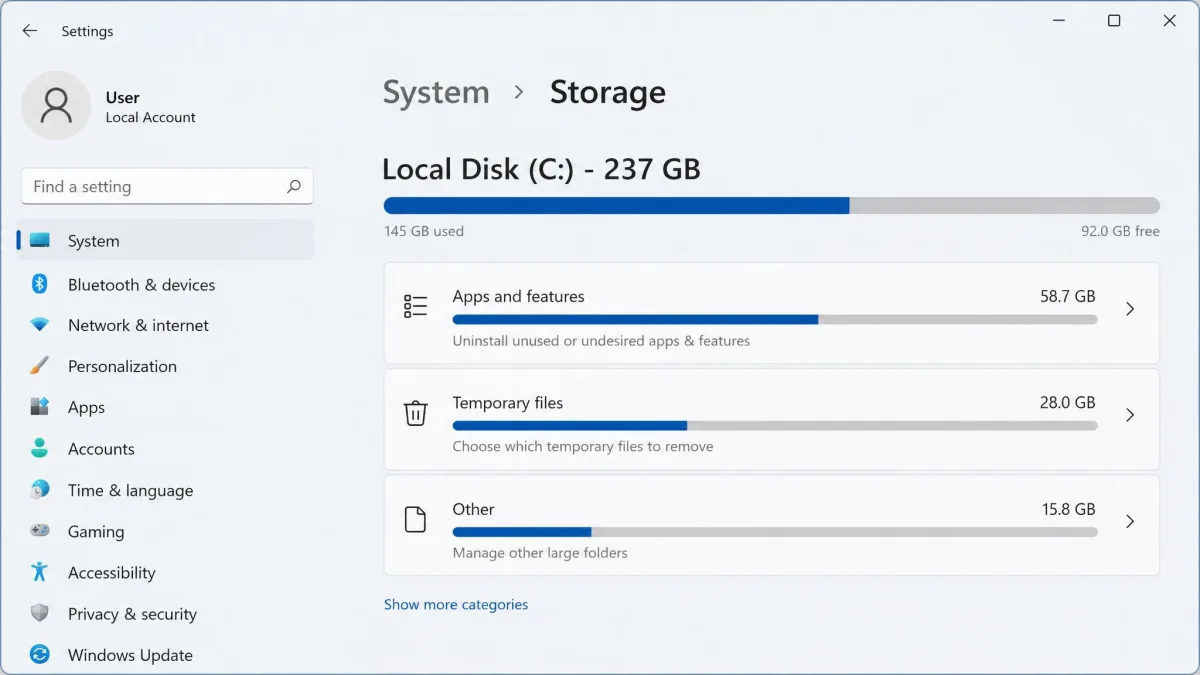
Open Settings > System > Storage and let the breakdown finish loading. Windows splits usage into categories including Apps and features, Temporary files, and System and reserved.
The buckets labelled Other and System and reserved are where the space people are hunting for usually hides: forgotten video projects, downloaded ISO files, old game mods.
Find Your Biggest Files and Folders in File Explorer
Settings tells you the category but not the folder, and that gap sends most people in circles. File Explorer's search box closes it.
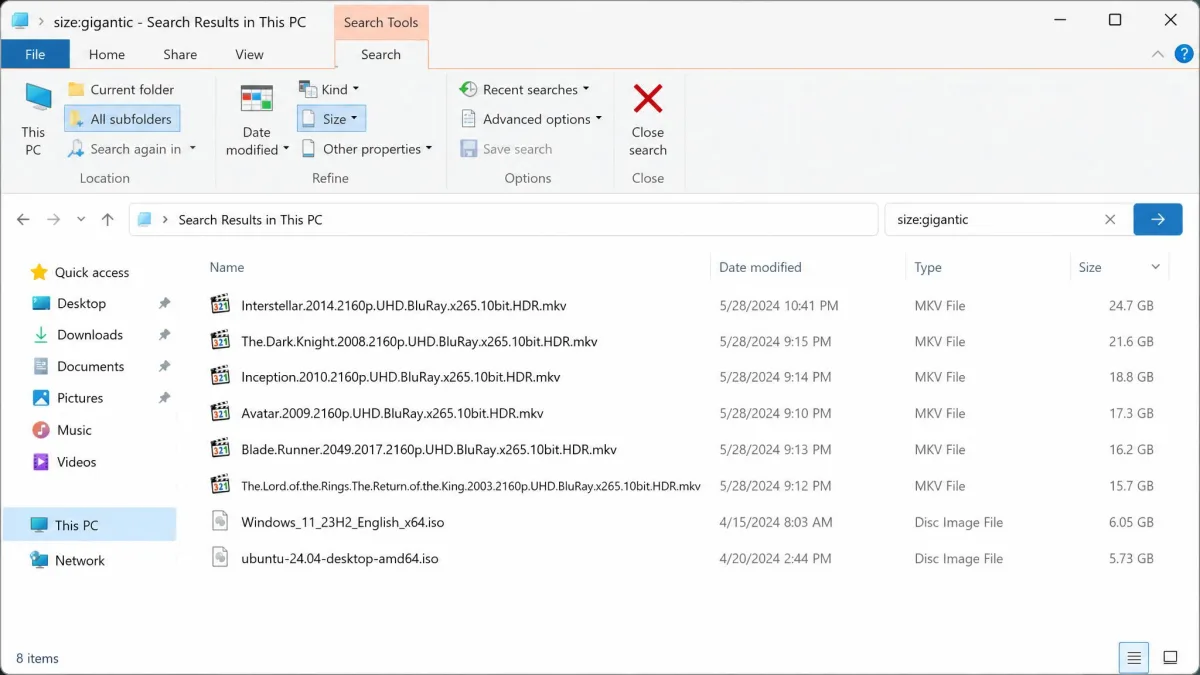
Open File Explorer, select This PC, type a size filter into the search box and press Enter. Sort the results by Size and work down from the top.
Typing size:gigantic into the File Explorer search box returns everything over 4 GB, which is usually a handful of video files, disk images and virtual machines. Use size:huge for the 1 GB to 4 GB band underneath it.
Use a Free Disk Space Analyzer to Find Hidden Space Hogs
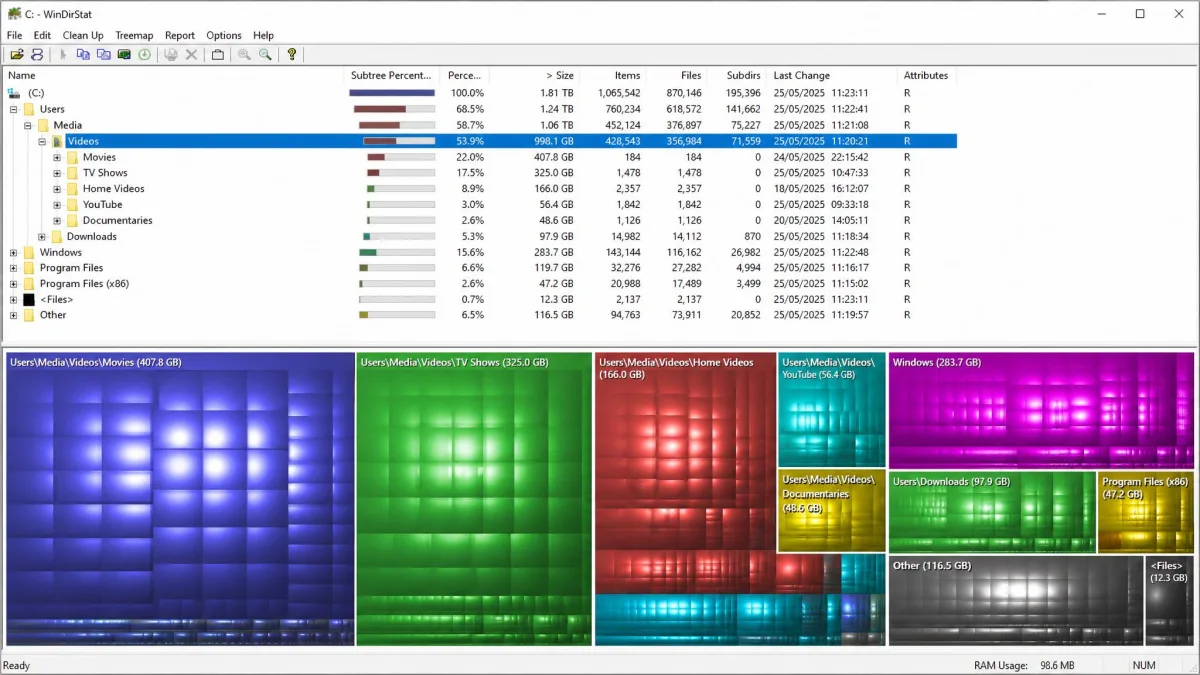
A tree-map analyser draws the whole drive as coloured blocks scaled by size, which is the fastest way to spot one oversized directory. WinDirStat is free and open source under GPLv2, and ships as x64, x86 and arm64 installers.
Scan the system drive, then read the largest rectangles rather than the folder tree. If you would rather have something that cleans as well as measures, our roundups of the best computer cleaners for Windows and the best free computer cleaners for Windows cover the tools worth installing.
1. Run Cleanup Recommendations (Windows 11)
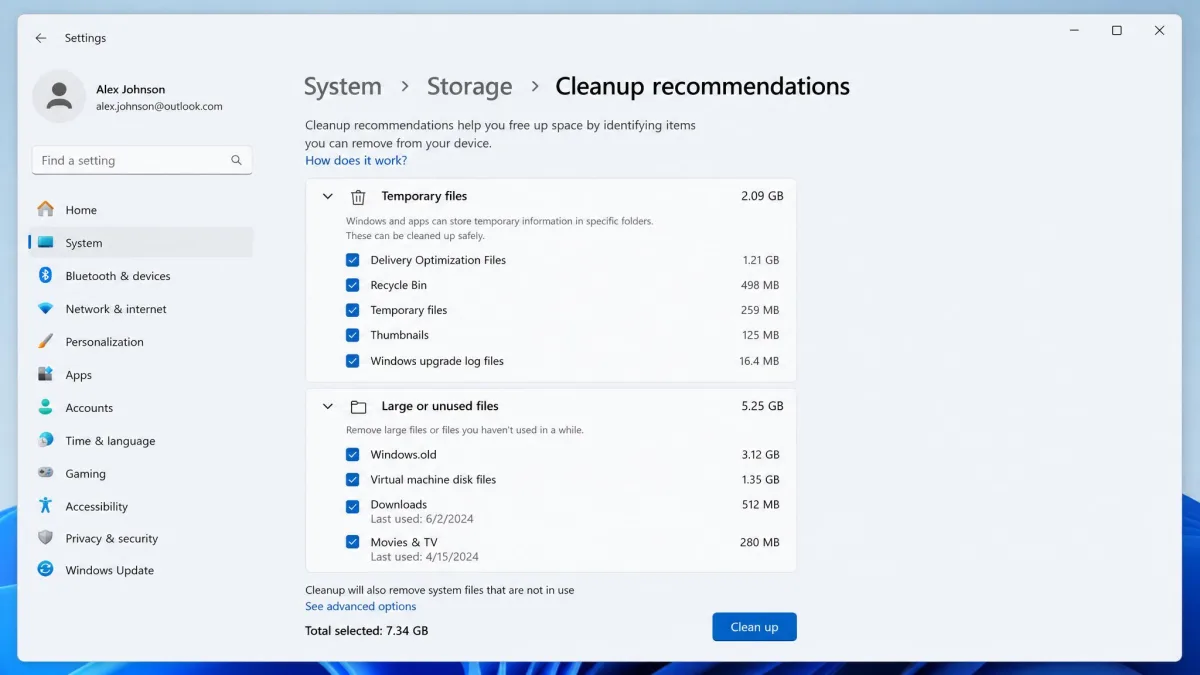
Windows 11 keeps a shortlist of things it already knows are safe to delete, and it is the fastest place to start. Cleanup recommendations sorts them into temporary files, large or unused files, cloud-synced content, and unused apps.
- Open Settings > System > Storage.
- Select Cleanup recommendations.
- Expand each of the four groups and tick the items you no longer need.
- Choose the Clean up button under each group.
Nothing is ticked for you, so read the large or unused files list properly before you agree to it.
Windows 10 has no equivalent panel, so start at method 3 instead.
2. Turn On Storage Sense So Windows Cleans Up for You
Storage Sense is the only method here that keeps working after you close Settings. It deletes unused temporary files, empties the Recycle Bin on a schedule, and can turn unopened OneDrive files back into online-only placeholders. Microsoft's page on how to manage drive space with Storage Sense lists every switch it exposes.
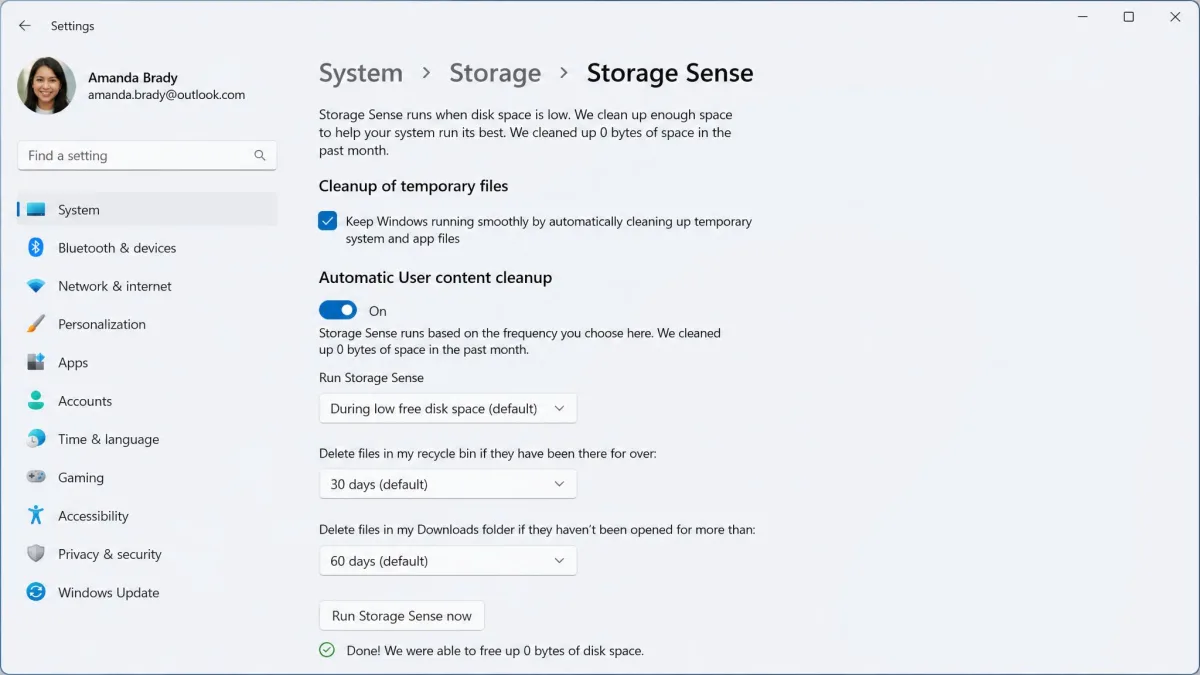
Left alone it stays dormant until the drive is genuinely low on free space, which is the shipped default.
Changing the cadence to weekly or monthly turns it into prevention rather than a last resort.
Switching on the Downloads cleanup schedule deletes qualifying files permanently. There is no confirmation prompt and nothing lands in the Recycle Bin, so leave that dropdown on Never unless Downloads really is a scratch folder for installers.
Configure Storage Sense in Windows 11
- Open Settings > System > Storage and turn the Storage Sense toggle on.
- Select Storage Sense to open its own page.
- Set Run Storage Sense to Every week or Every month.
- Leave the Recycle Bin dropdown at 30 days and set Downloads to Never.
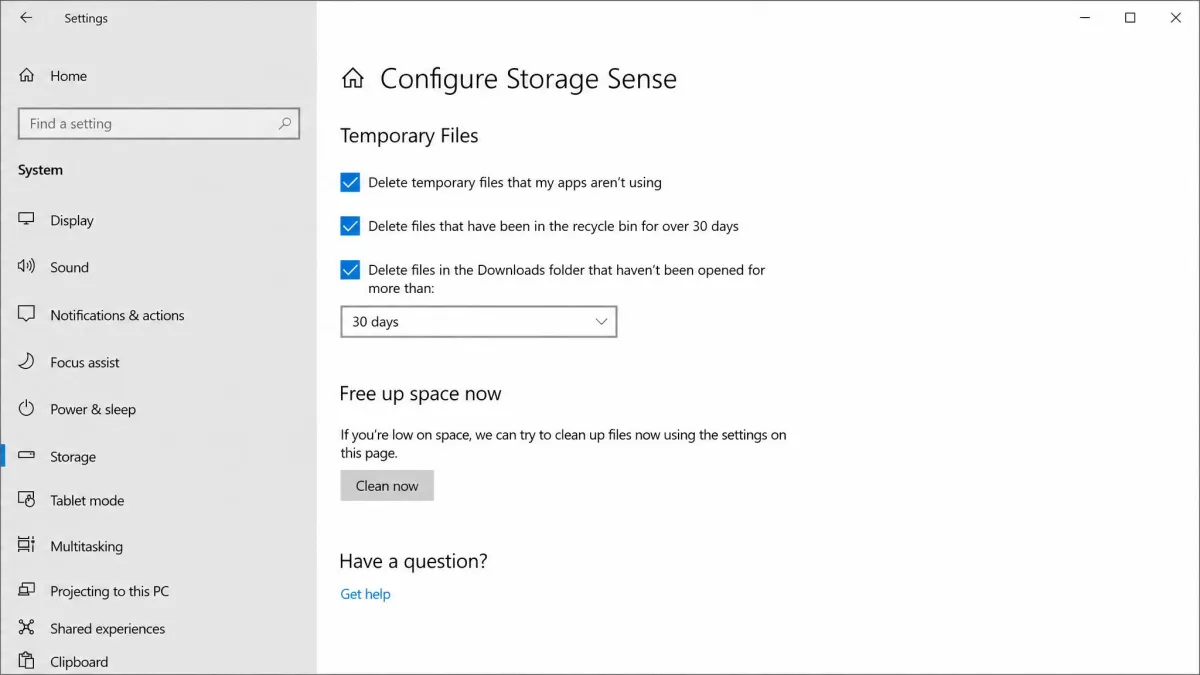
Storage Sense clears Recycle Bin items that have been sitting there for over 30 days by default.
Both dropdowns offer Never, 1 day, 14 days, 30 days and 60 days.
Configure Storage Sense in Windows 10
- Open Settings > System > Storage.
- Turn the Storage Sense toggle on.
- Select Configure Storage Sense or run it now.
- Set the same intervals, then choose Clean now for one immediate pass.
The route and the options are the same on both versions. Storage Sense only runs while you are signed in, so a machine left at the lock screen never gets cleaned.
3. Delete Temporary Files
Temporary files are the safest thing on this list to remove, and there are two routes to the same pile.
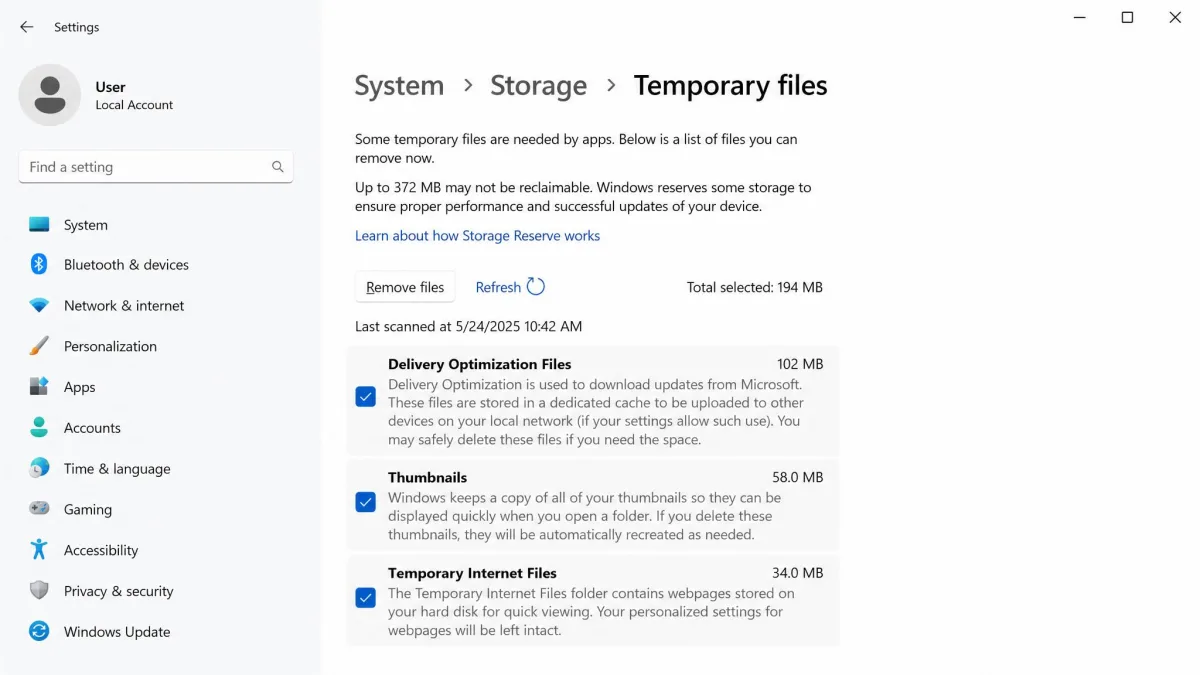
- Open Settings > System > Storage and select Temporary files.
- Review the tick boxes, then choose Remove files.
- For anything left behind, press Windows + R, type %temp% and press Enter.
- Select everything in that folder and delete it, skipping the few files in use.
Nothing in the temp folder is needed once the app that created it has closed.
Browser caches sit somewhere else entirely, so it is worth knowing how to clear the cache on a Windows PC as well.
The %temp% shortcut also works in the File Explorer address bar, with no Run dialog involved. It resolves to your own user profile, so you are never touching another account's files.
4. Run Disk Cleanup on System Files
Disk Cleanup looks like a relic, but it reaches files nothing else does, and it is not on Microsoft's deprecated features list. The categories that hold real space only appear once you switch to system files mode.
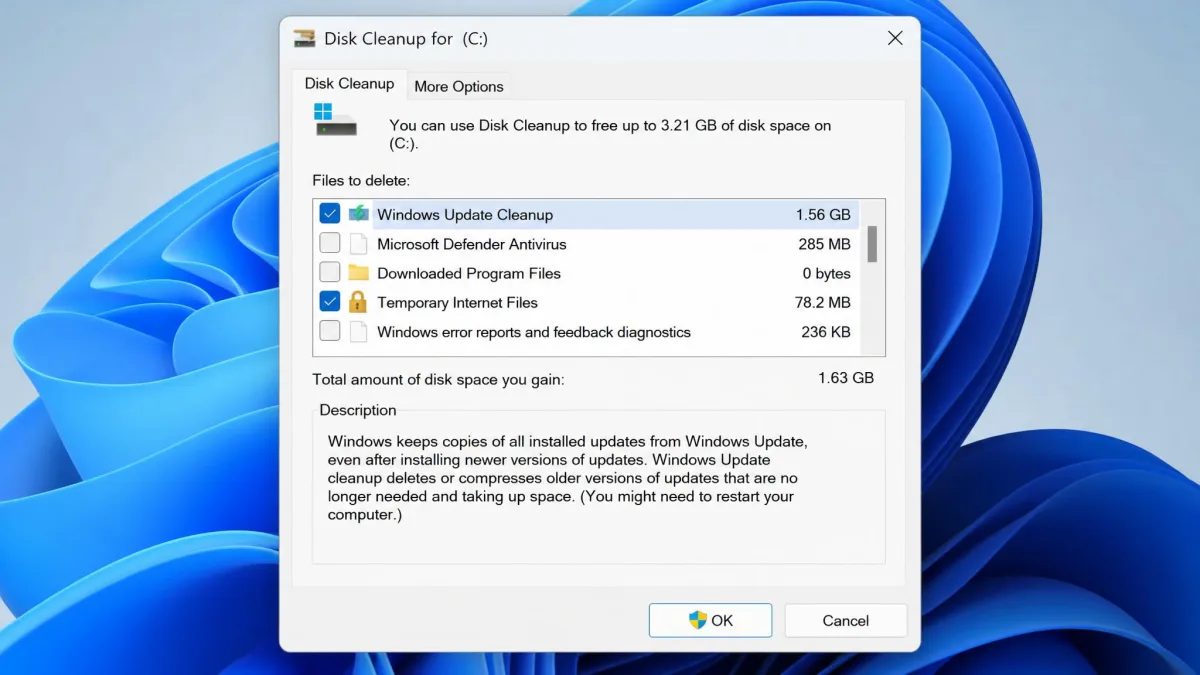
- Press Windows + R, type cleanmgr and press Enter.
- Pick your system drive and choose OK.
- Select Clean up system files, then pick the drive again.
- Tick Windows Update Cleanup, Delivery Optimization Files and temporary Windows installation files.
- Choose OK, then Delete Files.
Ticking Windows Update Cleanup on a routinely patched PC returns roughly 3 GB, though that depends entirely on how many cumulative updates have piled up since the last cleanup.
Our walkthrough of how to run Disk Cleanup in Windows 11 and 10 covers the individual categories.
We have watched Disk Cleanup sit on the Windows Update Cleanup stage for hours instead of the couple of minutes it normally takes, and occasionally never finish at all. Cancelling it and rerunning it as administrator usually gets it past whatever it hung on. A stall almost always traces back to a bloated SoftwareDistribution folder, a damaged system image, or antivirus holding the files open.
The extra categories only appear after the second scan that Clean up system files triggers, and that pass is noticeably slower than the first. A long wait there is normal, not a fault.
Remove Windows Update Leftovers and the Windows.old Folder
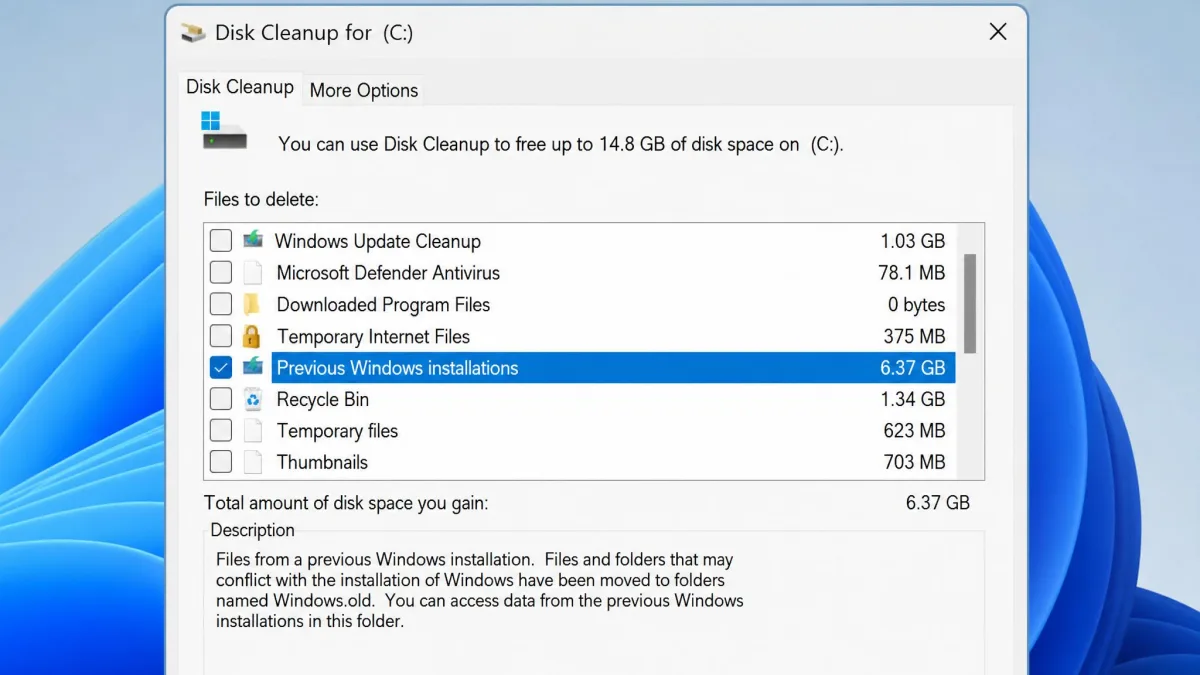
Previous Windows installation(s) is the largest line item in that list whenever it appears. Windows removes the folder automatically 10 days after an upgrade, and the rollback option is only offered inside that window.
It does not always go on schedule. We have found Windows.old still sitting on drives weeks after the upgrade that created it, so it is worth checking even on a machine you upgraded recently.
Deleting Windows.old is not reversible and removes the ability to go back to the previous version of Windows. Make sure the current build has been behaving for a week or two before you clear it.
5. Empty the Recycle Bin and Clear Your Downloads Folder
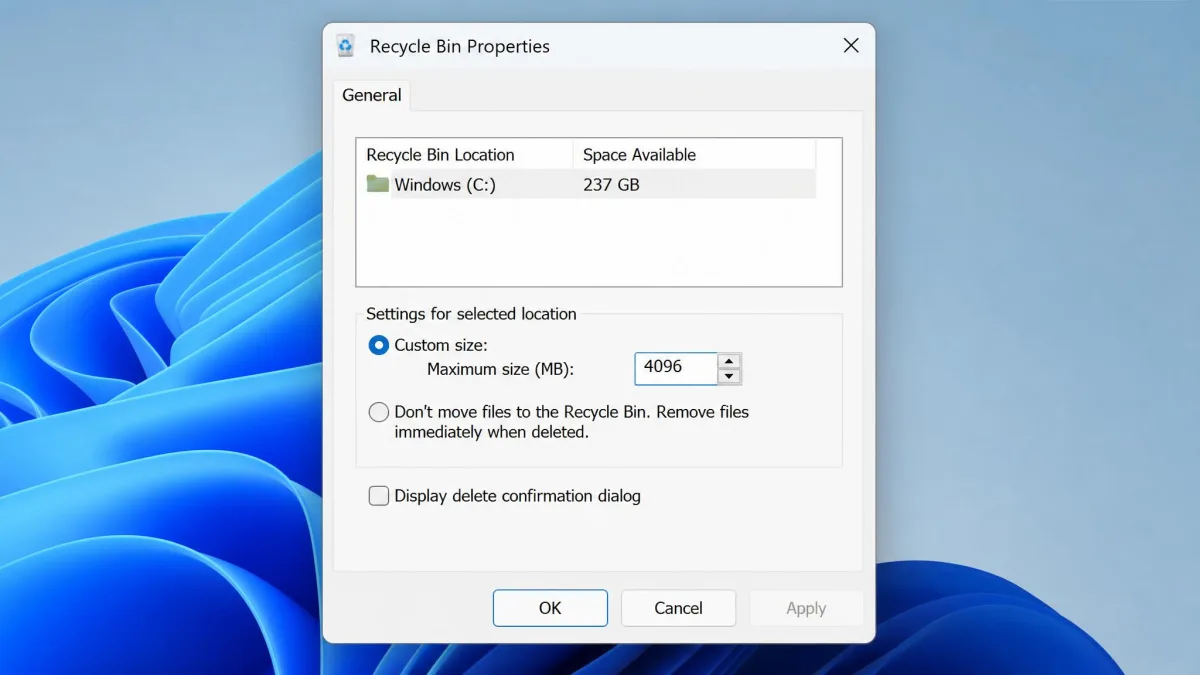
The Recycle Bin is not a free holding area. It defaults to about 5% of the drive, roughly 46 GB on a 1 TB disk, and every byte counts as used space until you empty it.
- Right-click the Recycle Bin and choose Empty Recycle Bin.
- Right-click it again, choose Properties, and set a smaller Custom size in MB.
- Open Settings > System > Storage > Downloads and sort the list by size.
- Get rid of the installers and archives you have already used.
Files can also vanish from the bin on their own, because Windows purges the oldest entries once the cap is reached.
Anything larger than the space left in the bin skips it completely, with only a prompt between that file and permanent deletion.
6. Uninstall Apps and Games You No Longer Use
Games are usually the largest single category on a personal PC, and most people have several installed they have not launched in a year.
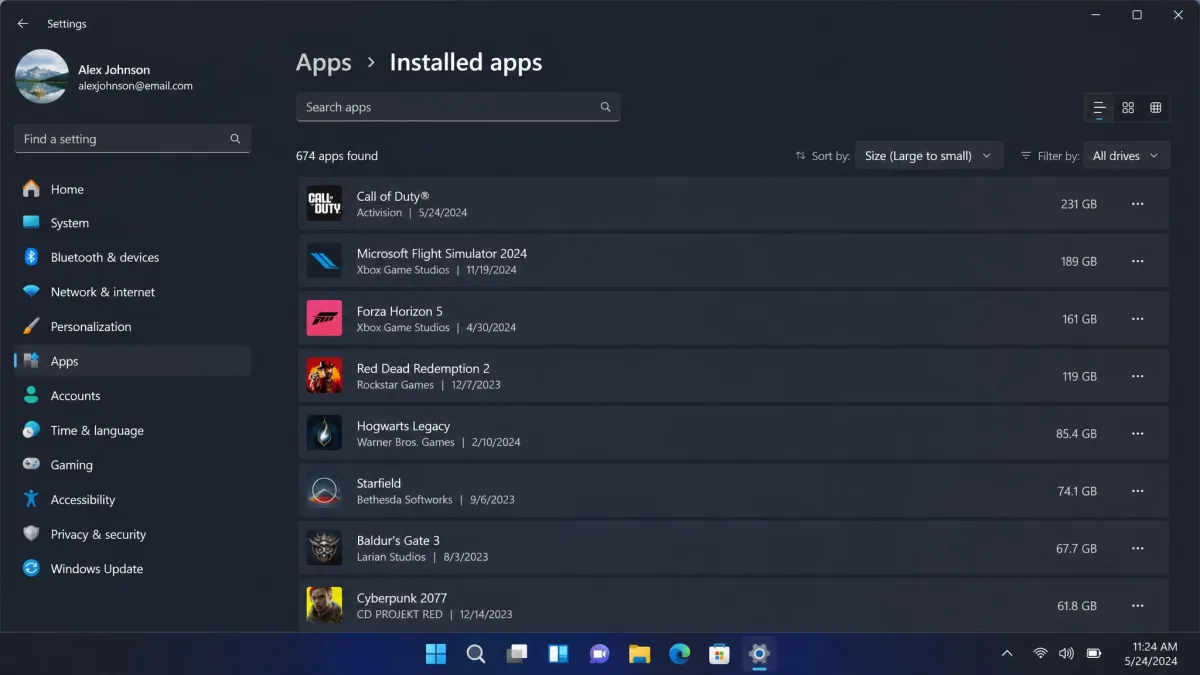
- Open Settings > Apps > Installed apps.
- Change the Sort by dropdown to Size.
- Select the three-dot menu beside anything you no longer use and choose Uninstall.
- Check Steam, Epic and Xbox separately, since launcher-installed titles are not always reported accurately.
Work down from the top of the list. The entries at the bottom are rarely worth the click.
Sorting by size is what makes this quick. It lifts the multi-gigabyte games to the top and leaves the small utilities where they belong, which turns a long list into a short one.
Remove Unused Languages and Optional Features
Language packs and Features on Demand leave resource files on the drive even when nobody uses them.
- Open Settings > Time & language > Language & region and remove any language you do not need.
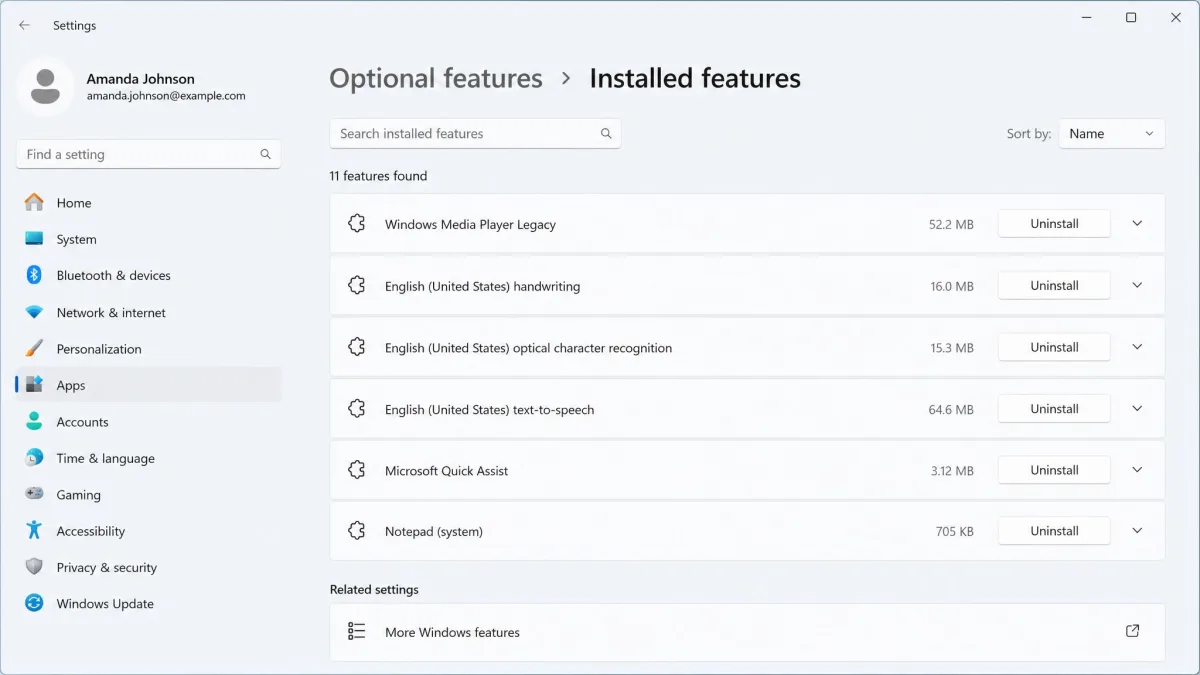
- Open Settings > System > Optional features to see what is installed.
- Select anything you do not recognise or use, then choose Uninstall.
Microsoft publishes no typical figure for what this returns, so treat it as a tidy-up rather than a fix for a full drive.
On one machine we cleaned up, AppData had quietly grown to 140 GB, almost all of it browser caches and Electron apps such as Discord, Spotify and Teams. Clearing only the Cache, Temp and GPUCache subfolders inside it gave back around 25 GB.
7. Move Large Files to an External Drive
Photos, video projects and downloaded installers move to an external drive without any of the risk that comes with deleting them.
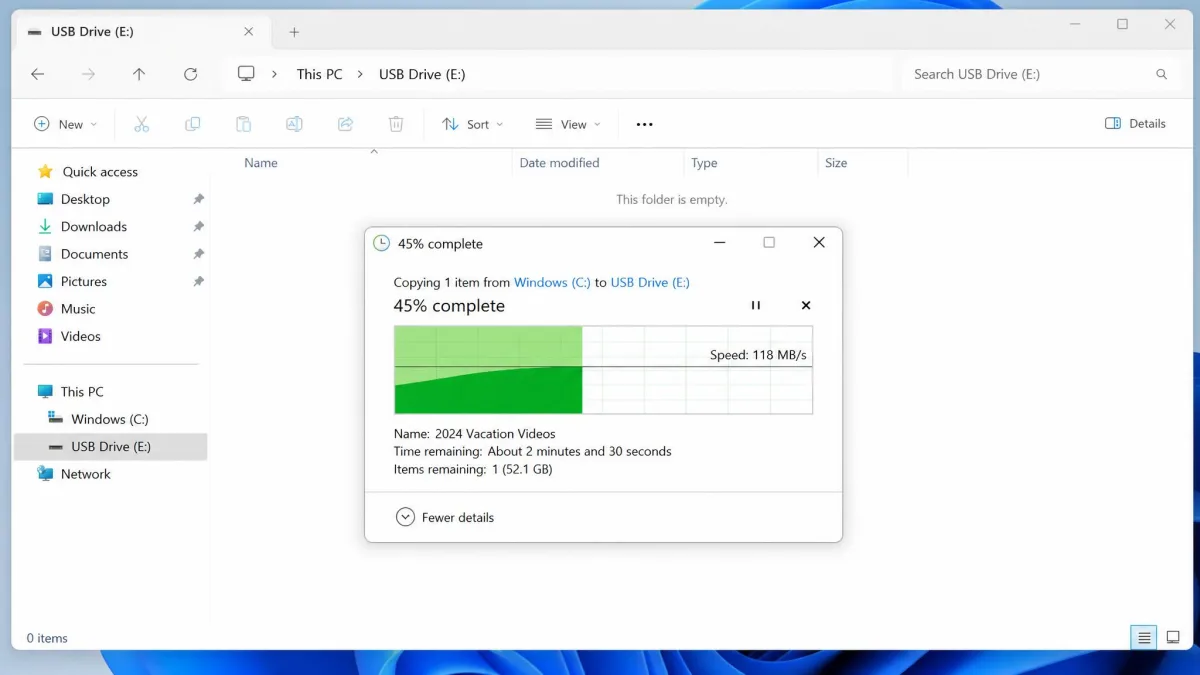
- Plug in an external drive or a large USB stick.
- Open File Explorer and sort your Videos, Pictures and Downloads folders by Size.
- Drag the largest folders across.
- Open two or three of them from the external drive to confirm the copy worked, then delete the originals.
Moving what is already there does nothing about what lands tomorrow, which is what the next setting handles.
Change Where New Files, Apps, and Games Are Saved
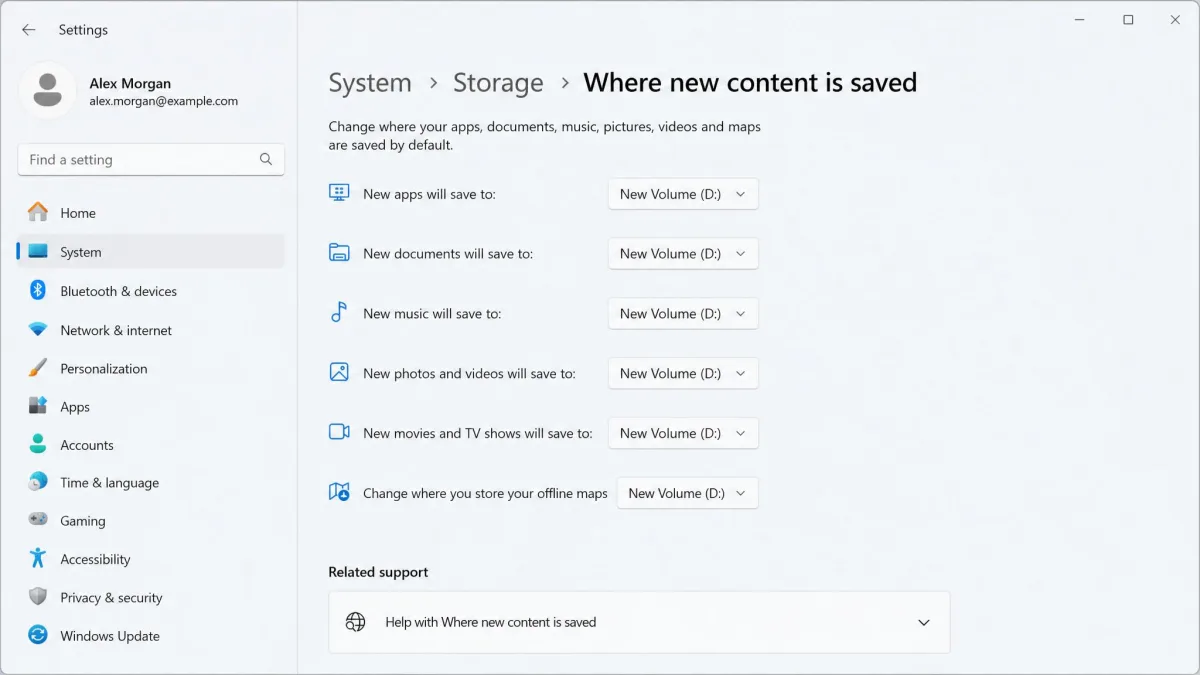
- Open Settings > System > Storage > Advanced storage settings > Where new content is saved.
- Point new apps, documents, music, photos and videos at the second drive.
- In Steam, add a library folder on that drive and install new games there.
Existing files stay exactly where they are, so this is prevention rather than a cleanup.
8. Make OneDrive Files Online Only with Files On-Demand
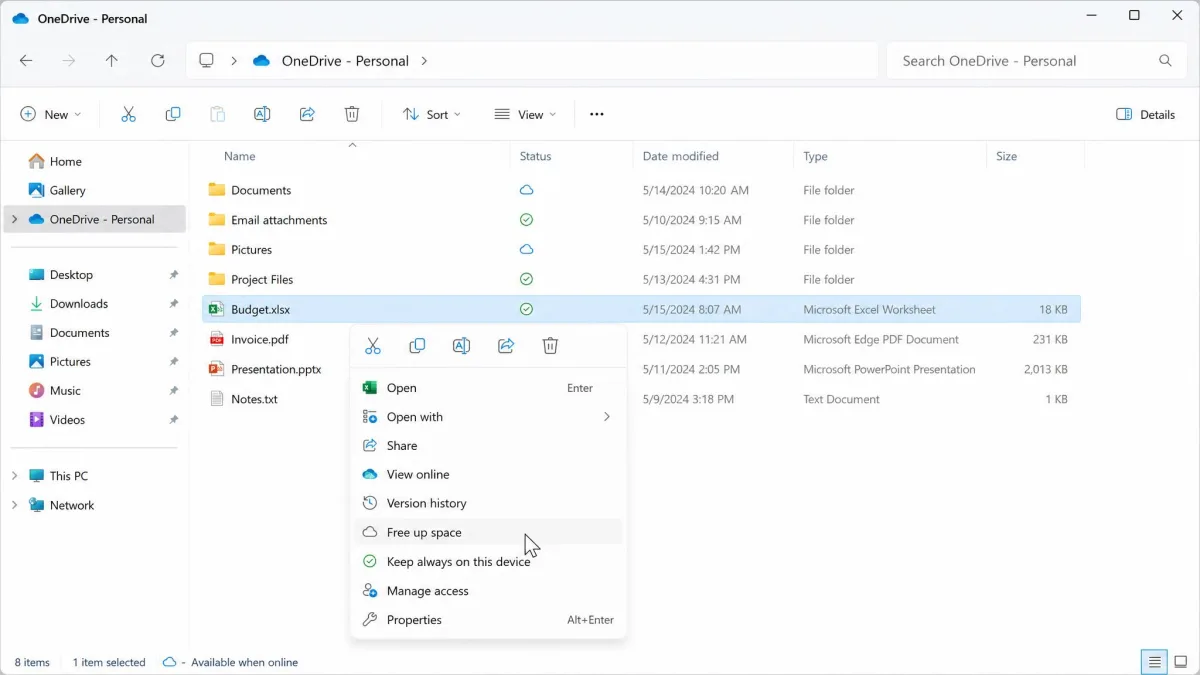
OneDrive can hold every synced item as a placeholder instead of a full local copy. OneDrive Files On-Demand keeps files visible in File Explorer and downloads each one the first time you open it.
- Open File Explorer and go to your OneDrive folder.
- Select the folders you rarely open.
- Right-click and choose Free up space.
- Right-click anything you need offline and choose Always keep on this device.
From Windows 11 version 22H2, Windows turns synced files back into online-only placeholders once they have gone 30 days without being opened.
An online-only file will not open with no connection, so pin what you need before a flight.
Placeholders occasionally stall on the cloud icon and refuse to download, usually after the PC wakes from sleep or the sync engine updates. Pausing and resuming sync from the tray icon clears most of them.
9. Shrink the Space Reserved for System Restore
System Protection reserves a share of the drive for restore points, and Microsoft names those automatic points as one of the main reasons a Windows footprint grows over time.
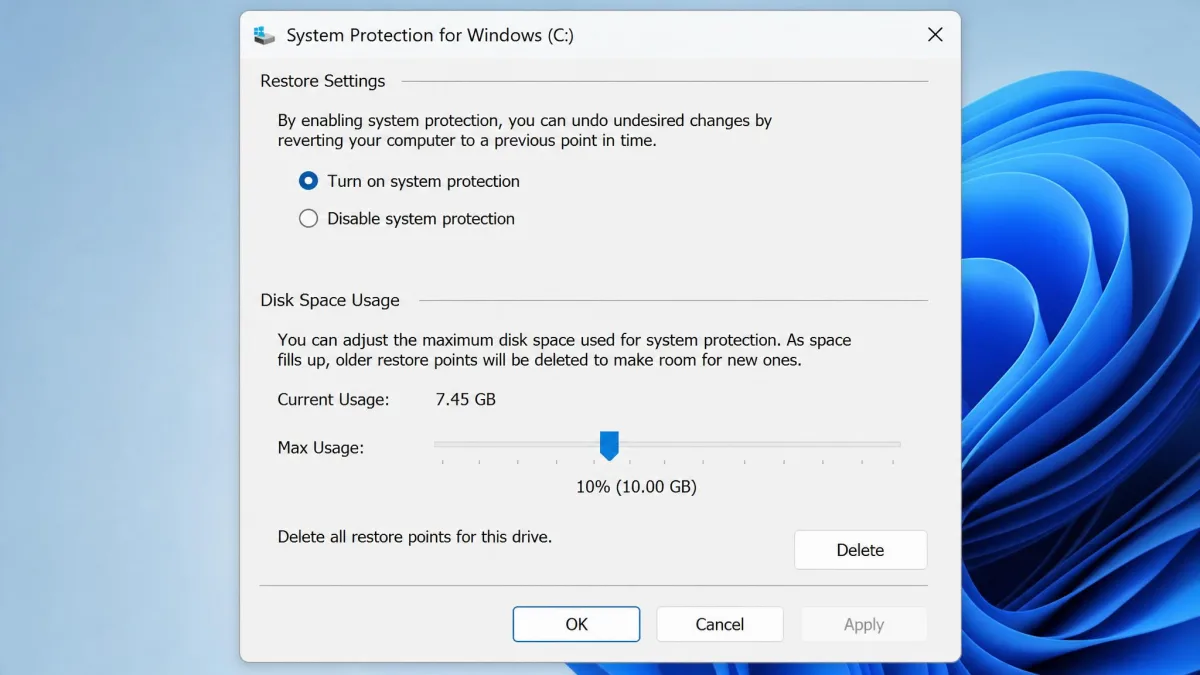
- Press Windows + R, type sysdm.cpl and press Enter.
- Open the System Protection tab and choose Configure.
- Read the current Max Usage figure, then drag the slider down.
- Choose Delete to clear existing restore points if you need the space now.
The reserved share is not the same on every build, so read the slider on the machine in front of you rather than assuming a percentage.
A Max Usage near 5% to 10%, or roughly 10 GB to 15 GB, leaves room for a few restore points without the allocation running away.
10. Turn Off Hibernation to Delete hiberfil.sys
The hibernation file is pre-allocated in direct proportion to installed RAM, whether you ever hibernate or not.
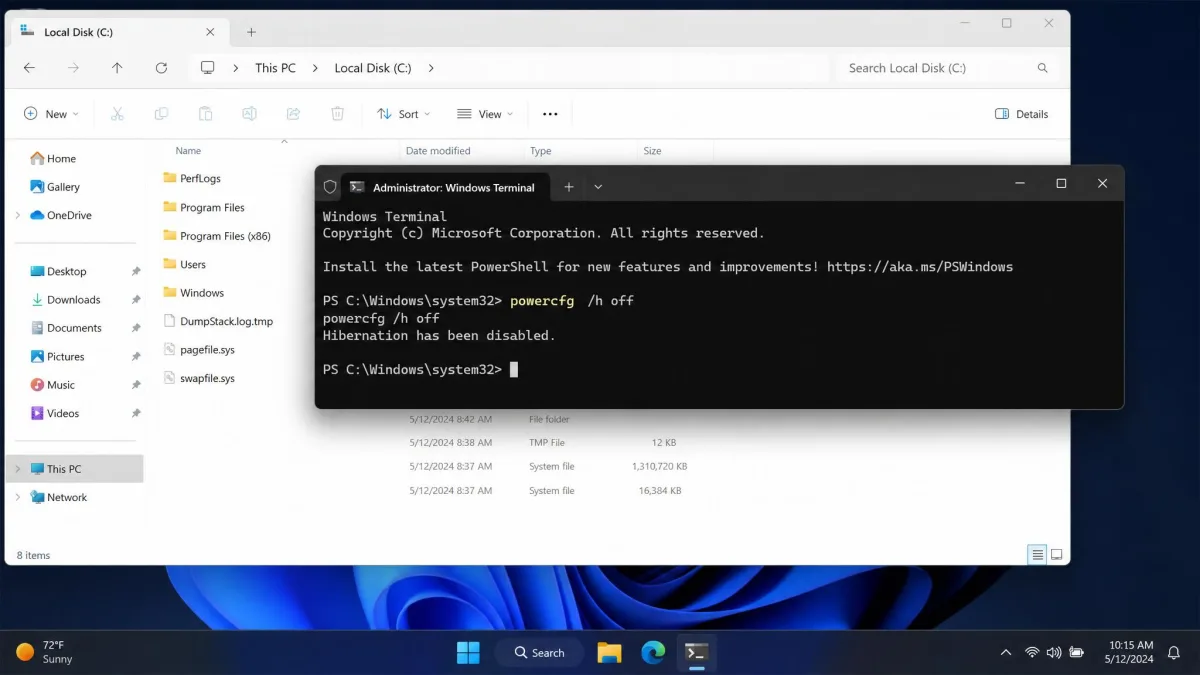
- Right-click Start and choose Terminal (Admin) or Command Prompt (Admin).
- Type powercfg /h off and press Enter.
- Check that hiberfil.sys has gone from the root of the C drive.
- To keep hibernation but shrink the file, run powercfg /h /type reduced instead.
In Microsoft's own size comparison, turning the hiberfile off saved more than 1.5 GB on a 4 GB x64 machine, and the reduced file type shrinks it by 30%.
The share of RAM a full file takes moves with the Windows build, so check the actual file size before counting on a figure.
Fast Startup and Hybrid Sleep are both built on the hibernation file, so powercfg /h off takes all three away. Hibernate disappears from the power menu and cold boots get slower, which is felt more on a hard drive than on an SSD.
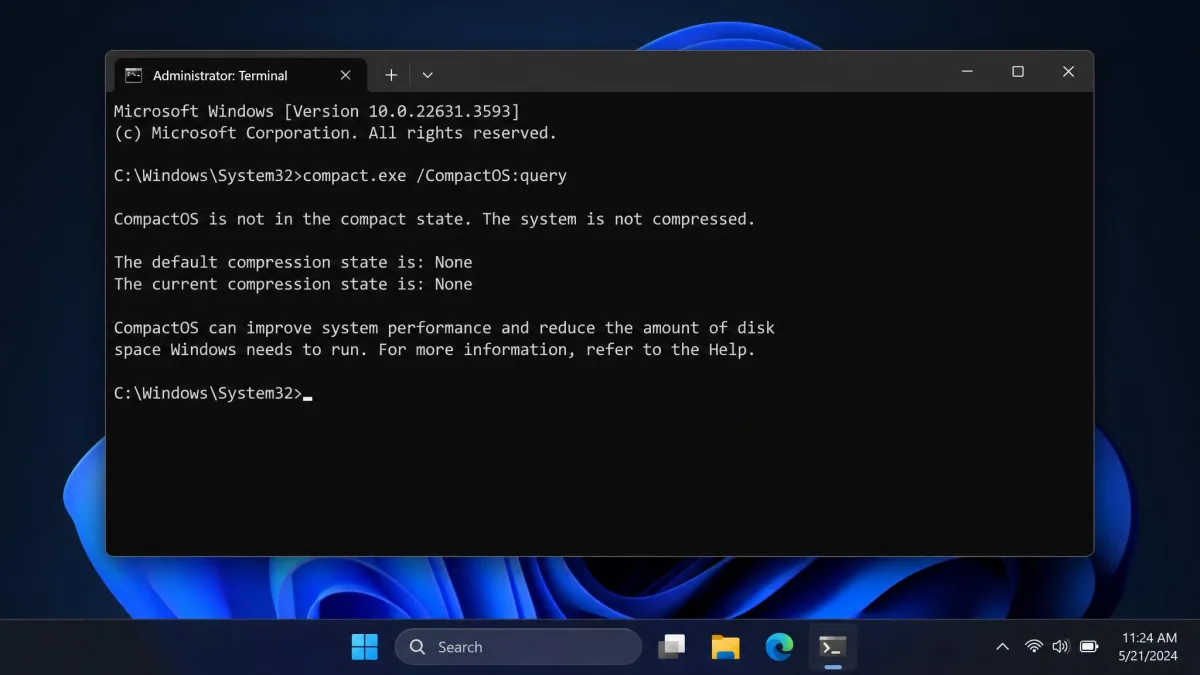
11. Compress Folders, or Compress Windows Itself with CompactOS
NTFS offers two compression features, and the useful one is not the checkbox in folder Properties. Compact OS compression squeezes the Windows binaries themselves rather than your data.
- Right-click Start and open Terminal (Admin).
- Run compact.exe /CompactOS:query to see the current state.
- Run compact.exe /CompactOS:always to compress.
- Run compact.exe /CompactOS:never to reverse it.
Microsoft's published comparison puts the saving at more than 3.7 GB on a Windows 10 Home x64 reference image. Live machines return more, because a real PC carries years of compressible system and app files on top of a clean install. On one laptop, compression ran for about 23 minutes and returned 11 GB, and decompressing later took roughly as long.
It is a poor trade on a roomy 1 TB drive, or on a machine doing video editing, virtual machines or development work. A modern multi-core CPU absorbs the decompression overhead without a noticeable difference in daily use, while older low-power chips can feel it loading system files.
Per-folder NTFS compression is the older, separate feature, set through folder Properties > Advanced > Compress contents to save disk space. It applies to data folders rather than the operating system.
12. Clean the Component Store with DISM
The component store keeps every version of every system component Windows has installed, and it is the last large reclaim on this list. Microsoft's guidance on how to clean up the WinSxS folder is the only safe route into it.
- Right-click Start and open Terminal (Admin).
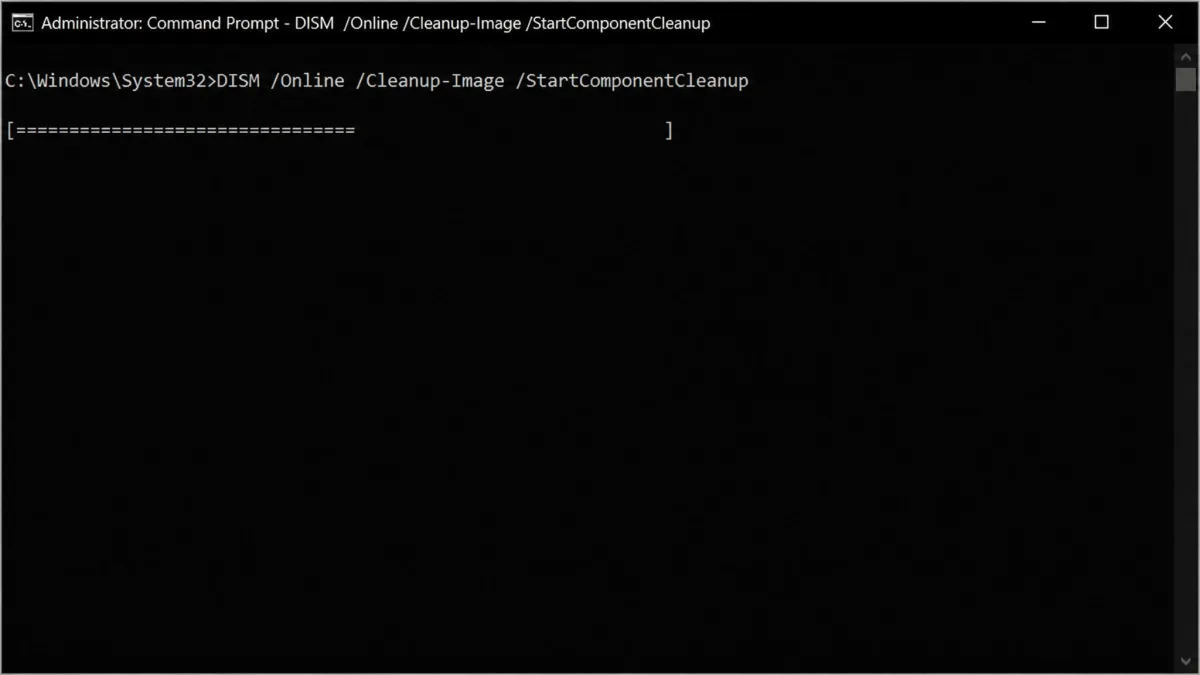
- Run DISM /Online /Cleanup-Image /StartComponentCleanup.
- Let it finish, then check the drive.
The built-in StartComponentCleanup task waits at least 30 days after an updated component is installed before removing the previous version, and the scheduled version carries a 1 hour timeout that means it may not finish the job. Running DISM by hand removes both limits. Expect 3 GB to 6 GB back, though the figure scales with how many cumulative updates have accumulated since the store was last cleaned.
DISM runs for several minutes with very little on-screen feedback, so a progress bar stuck at a percentage is normal.
Adding /ResetBase removes every superseded component version, after which no already-installed update can be uninstalled, which is why we hold it back until a PC has been stable for a few weeks.
Still Out of Space? Extend the Partition or Upgrade the Drive
If the drive is still almost full after all twelve methods, the problem is capacity rather than clutter.
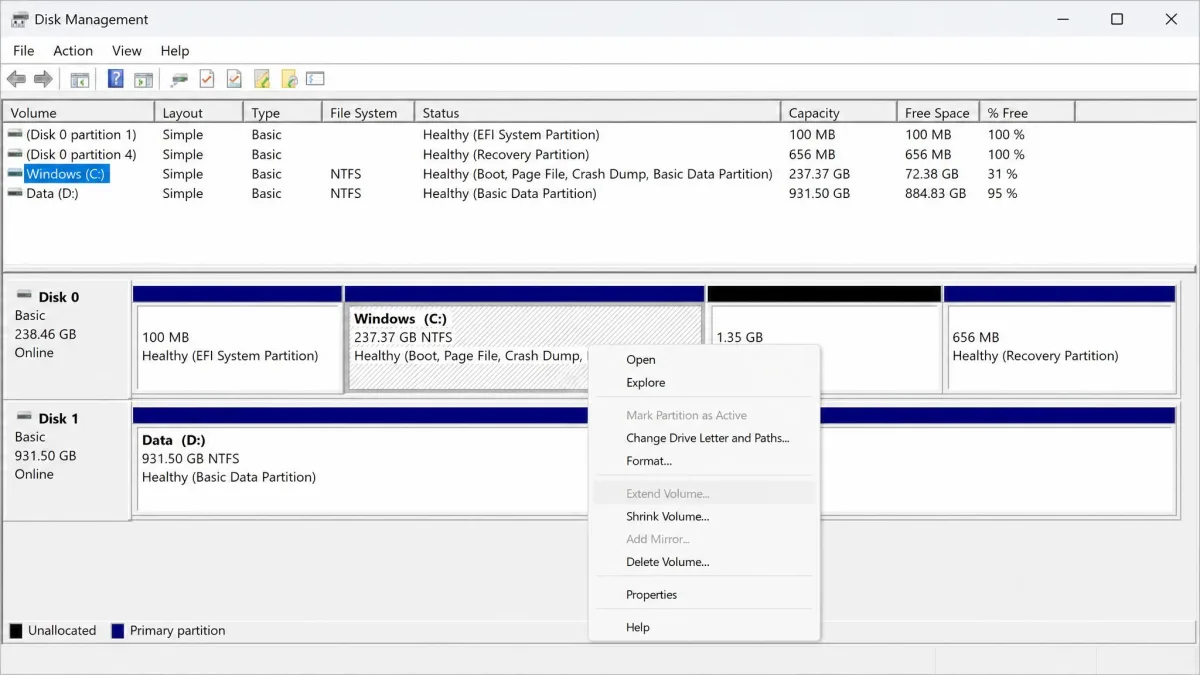
Disk Management can grow a partition into free space on the same disk. Microsoft's instructions for how to extend a basic volume in Disk Management set out what has to be true first: administrator rights, unallocated space sitting immediately after the volume on the same physical disk, and an NTFS or ReFS file system.
Extend Volume greys out whenever that unallocated space is not immediately to the right of the partition, which is the usual reason the option looks broken. Microsoft's troubleshooting table adds a non-elevated Disk Management window and a disk over 2 terabytes that is not using GPT. A volume also cannot be extended across two disks.
When none of that applies, a larger SSD is the honest answer.
What You Should Never Delete to Free Up Space
Several folders look like dead weight and are anything but.
- WinSxS. Microsoft states plainly that deleting files from it, or the folder itself, may leave the PC unable to boot and impossible to update. Clean it with DISM or leave it alone.
- System32 and Program Files. Nothing in either should be deleted by hand. Uninstall through Settings instead.
- pagefile.sys. Windows uses it as virtual memory. Shrinking it on a machine with modest RAM buys a little space and costs you stability.
- The EFI system partition and the recovery partition. Both look like unused gigabytes in Disk Management.
- Whole folders inside AppData. Deleting an application's folder while the app is still installed breaks it.
The recovery partition shows up as unlabelled space in Disk Management and is one of the more tempting things on a full drive. Removing it frees those gigabytes and takes away your ability to reset the PC from the built-in recovery environment.
How to Stop Your Drive from Filling Up Again
Prevention is three settings and one habit.
- Leave Storage Sense on with a weekly or monthly cadence, so it stops waiting for the drive to run low.
- Point new content at a second drive under Where new content is saved.
- Keep Downloads as a scratch folder rather than a filing cabinet, and clear it whenever you empty the Recycle Bin.
Then open Settings > System > Storage once a month and note which category grew. Watching the trend takes a minute and beats hunting for the cause after the drive is already full.
Frequently Asked Questions
Why is my C drive full when I have not saved anything new?
Why is my drive still full after deleting temporary files?
How much free disk space should Windows always have?
What should I do if Windows needs more space to install an update?
Can malware or a virus be eating my disk space?
Should I use a duplicate file finder?
The Bottom Line
Three of the twelve do most of the work on a badly full drive. Disk Cleanup in its system files mode clears Windows Update Cleanup and, when it is still there, the previous installation. DISM component cleanup adds several gigabytes more, and uninstalling the games nobody plays often beats both of them put together.
Everything else is smaller and worth doing in the order above rather than all at once, so you can see what each step moved. Then leave Storage Sense running on a weekly schedule so the drive does not quietly refill.
A laptop that felt sluggish while its drive was nearly full felt noticeably more responsive after a cleanup pass, though how much space comes back varies a lot from PC to PC.
If the answer on your machine is not enough, a bigger drive is the only real solution.