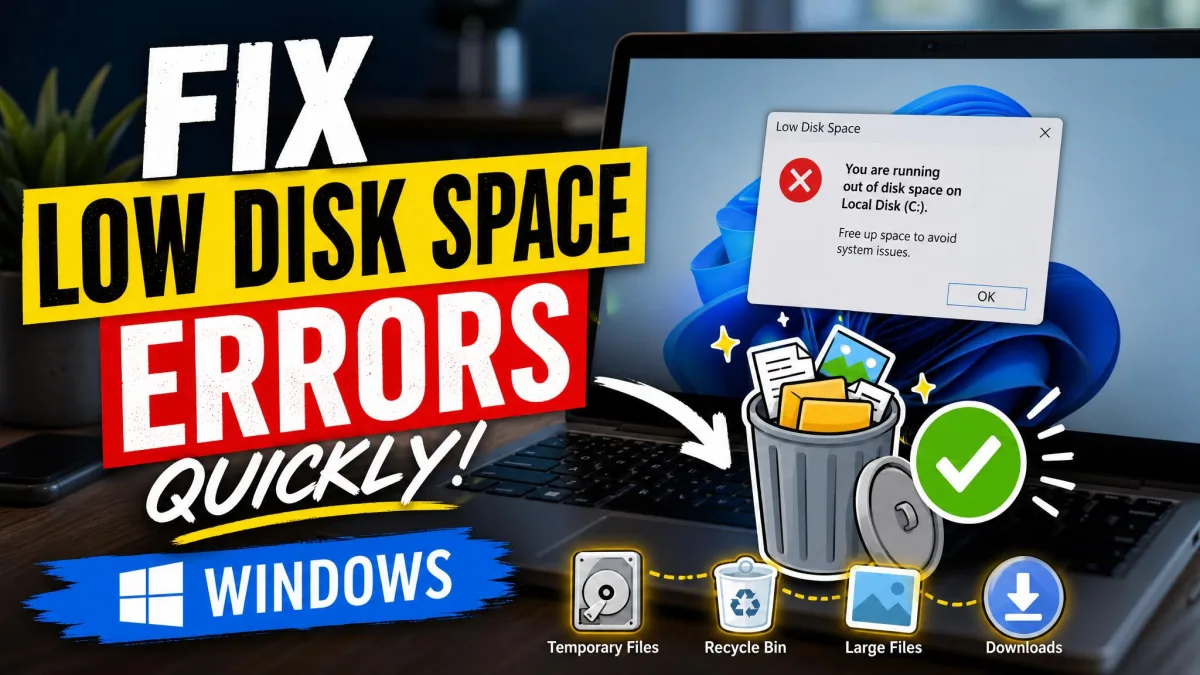
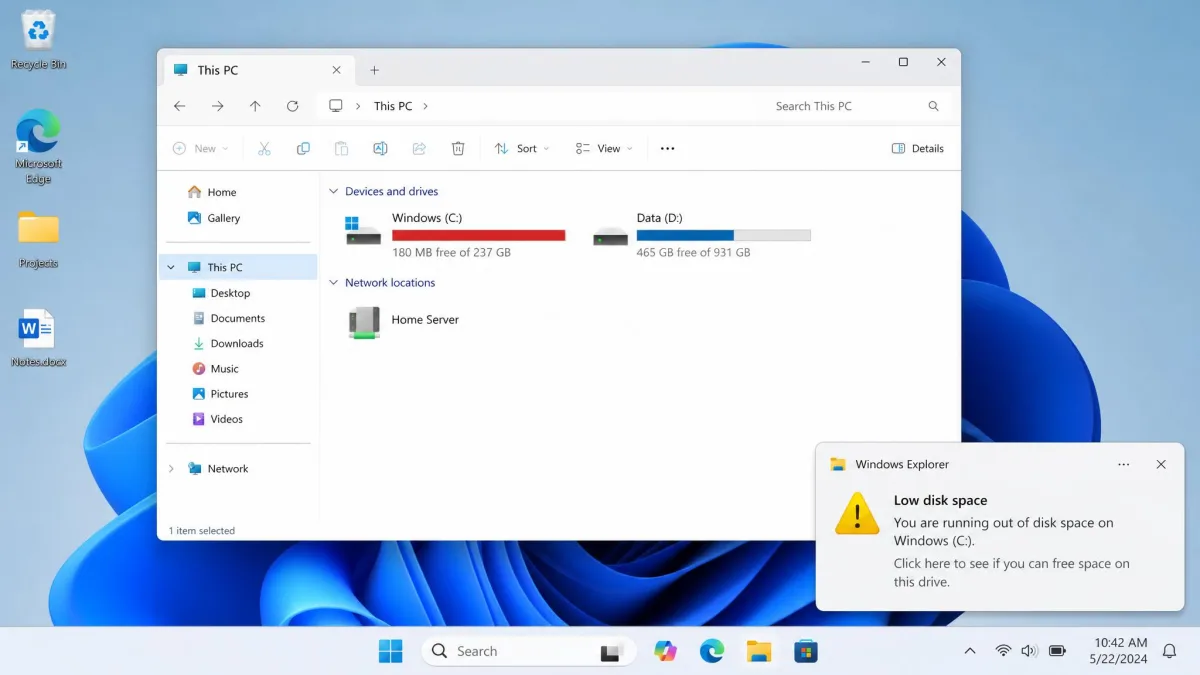
The red bar under your C: drive and the "You're running out of space" notification both mean the same thing: Windows has almost nothing left to work with. Apps stop saving, updates fail halfway, and the warning keeps returning every few minutes.
The good news is that most of the space is recoverable, and the first fix takes about two minutes. Below are 11 fixes in order of speed, starting with the ones that free the most space for the least effort and ending with the deeper changes that stop the warning from coming back. Microsoft's own guide to freeing up drive space covers the basics, and we have added the numbers, the risks, and the traps it leaves out.
What the Low Disk Space Warning Actually Means
Windows watches your free space on a timer and speaks up when the margin gets thin. It checks free disk space every 10 minutes, and the notification sits on screen for roughly 10 seconds before it slides away.
The first warning appears when free space on a drive drops below 200 MB. A more urgent "very low on disk space" message appears below 80 MB free, and it repeats every five minutes once you fall under 50 MB.
Those thresholds are tiny by modern standards, which is why the warning usually arrives long after the real trouble started. Windows needs working room well before 200 MB, so treat the notification as a symptom that has been building for weeks.
Why Your Drive Filled Up So Fast
Drives rarely fill up gradually. Something specific usually claims a large block of space in one go, and update files are the most common culprit.
Windows sets aside reserved storage of roughly 7 GB on the system drive so updates and temporary installer files always have somewhere to go. A monthly patch wants around 10 GB to 20 GB of working room, and a feature update wants considerably more, in the 20 GB to 30 GB range. That working-space figure varies with the specific update and with how much Windows can clear mid-install, so read it as a planning range rather than a fixed number.
Other repeat offenders are quieter. The Delivery Optimization cache, which holds update files Windows shares with other PCs, defaults to 20% of available drive space and lives on the operating system drive. Browser caches quietly reach gigabytes on a machine nobody has cleaned in a while. Downloads folders collect installers that were needed once.
One more thing worth knowing before you start counting: a drive never shows the capacity printed on the box, so the Storage page total will always read lower than the advertised size.
First: Check What Is Using Your Disk Space
Before you delete anything, find out where the space went. Guessing wastes an afternoon on 300 MB of temp files while a 40 GB games folder sits untouched.
The Windows Settings > Storage breakdown
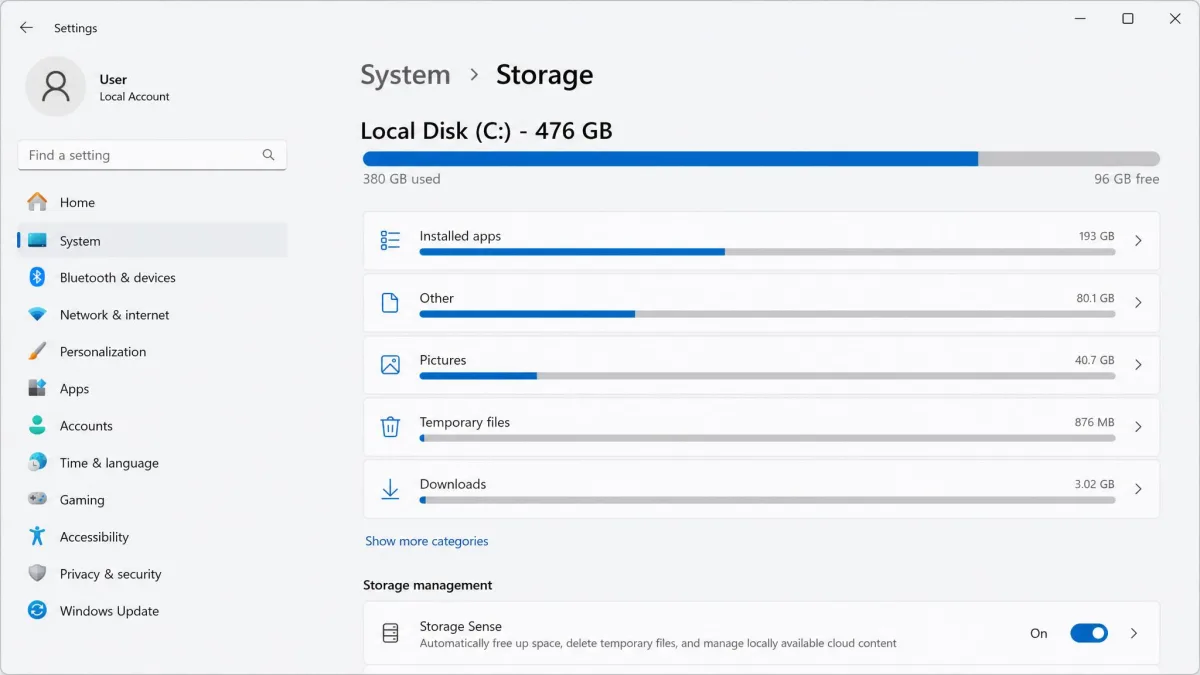
Open Settings > System > Storage. Windows groups your used space into categories such as Apps and features, Temporary files, Documents, and Other, each with a size next to it.
Select any category to drill in. Temporary files opens straight into the cleanup list, and Apps and features sorts your installed software by size, which is the fastest way to spot something you forgot you installed.
Using a disk space analyzer for a deeper look
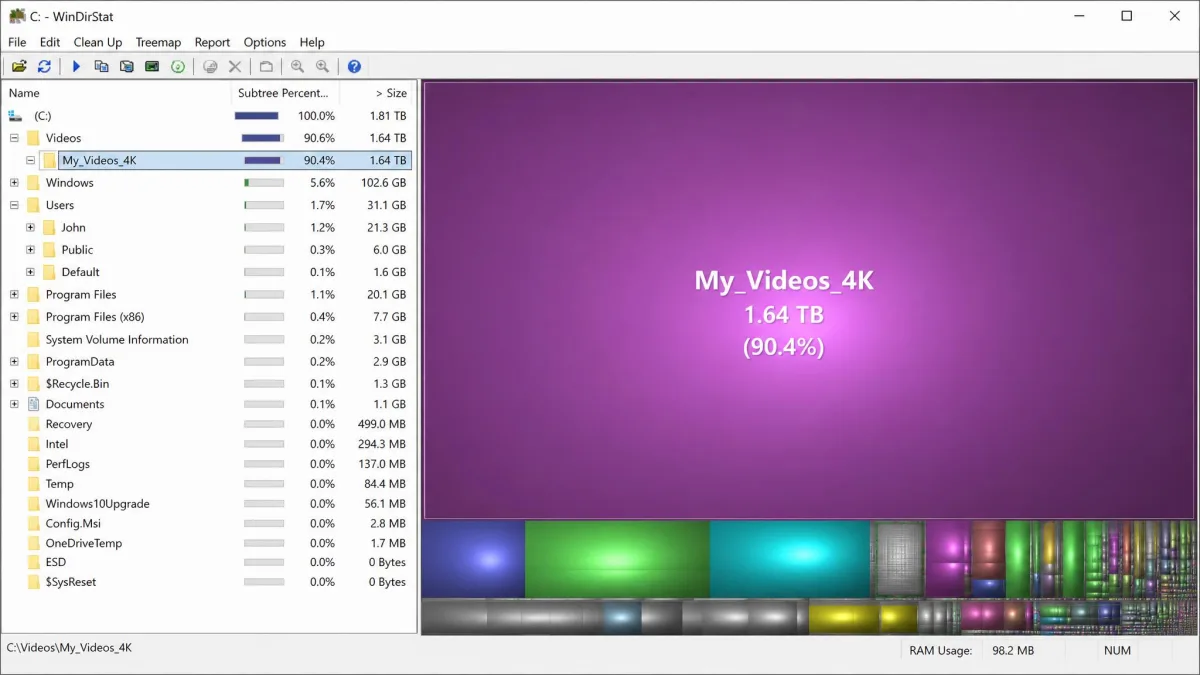
The Storage page stops short of individual files. For that, use WinDirStat, which is open source under GPLv2 with no paid tier and runs on Windows 7 through 11.
It draws your whole drive as a treemap, so a single enormous file shows up as a single enormous rectangle. In our experience the treemap surfaces the biggest offender faster than clicking through the Storage page category totals, and the portable build needs no install at all. Stick to the 2.x line, since the point release moves with every update.
WinDirStat also lists your largest files, breaks usage down by file extension, and flags duplicates, which saves you a separate duplicate-file cleanup pass later.
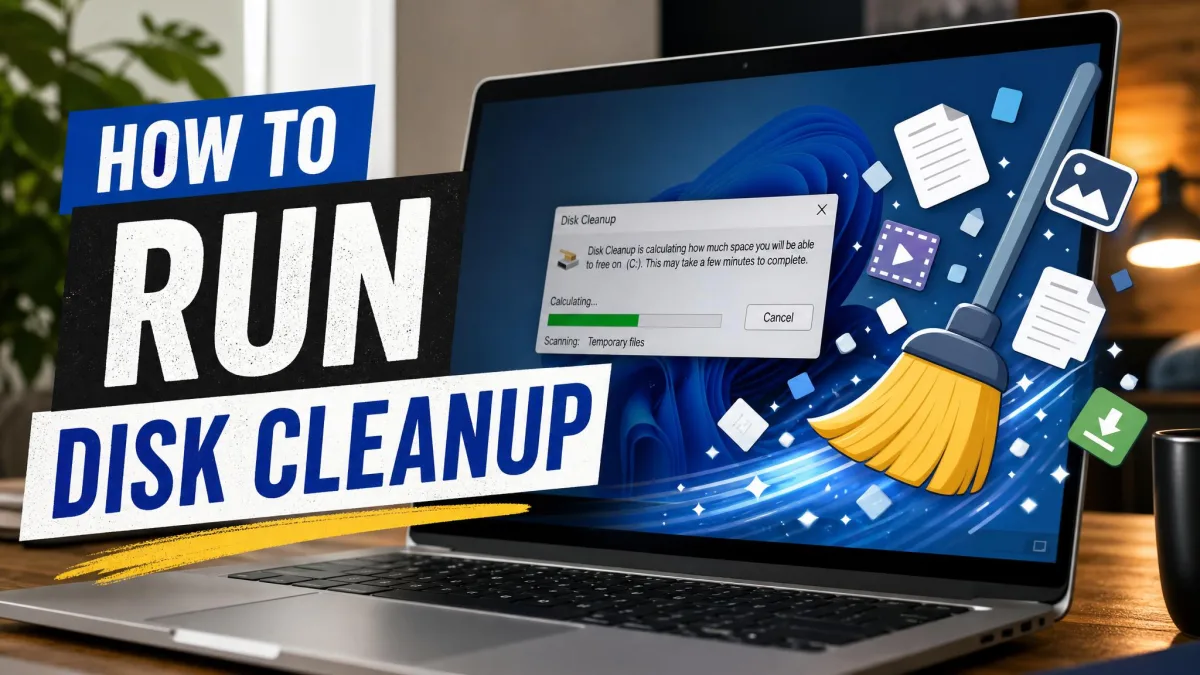
Fix 1: Run Disk Cleanup (Fastest Win)
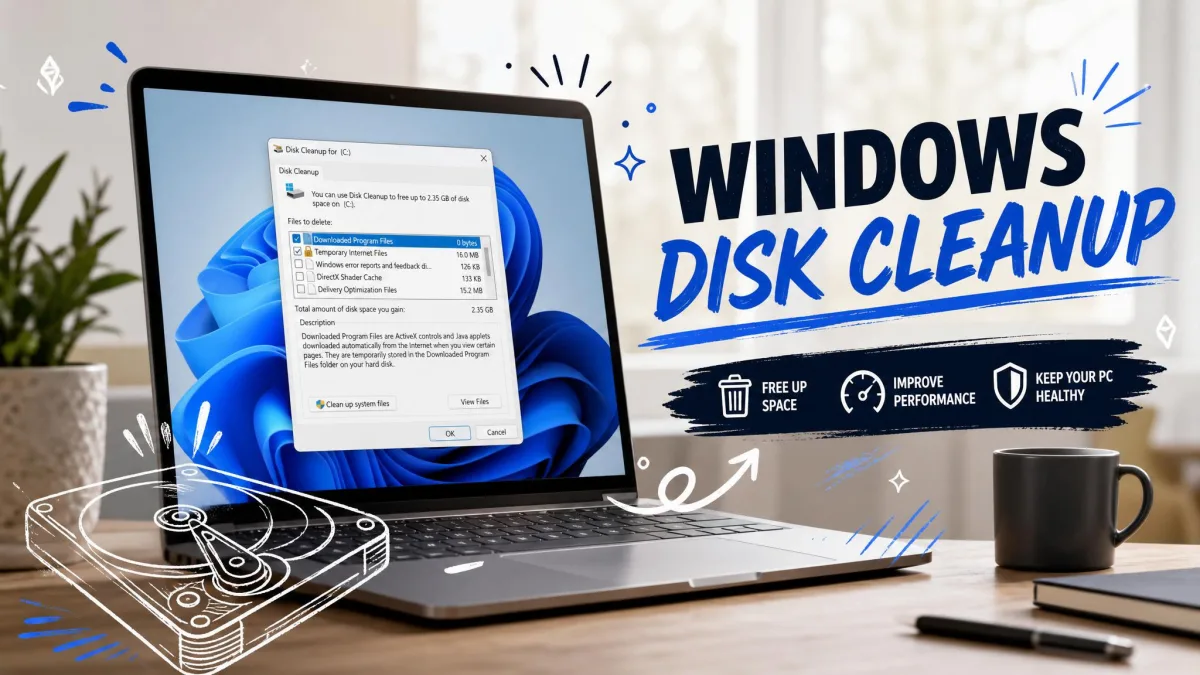
Now that you know where the space went, start with the tool that clears the most of it in one pass. Press Windows key + S, type Disk Cleanup, and open it. Pick your C: drive, tick the categories you want gone, then select OK and Delete Files.
Start with Temporary files, Temporary Internet Files, Downloaded Program Files, Old Chkdsk Files, and Recycle Bin. Select Clean up system files to add the update and installation categories. Disk Cleanup has shipped with Windows for decades, and it still clears more in one pass than anything else on this list.
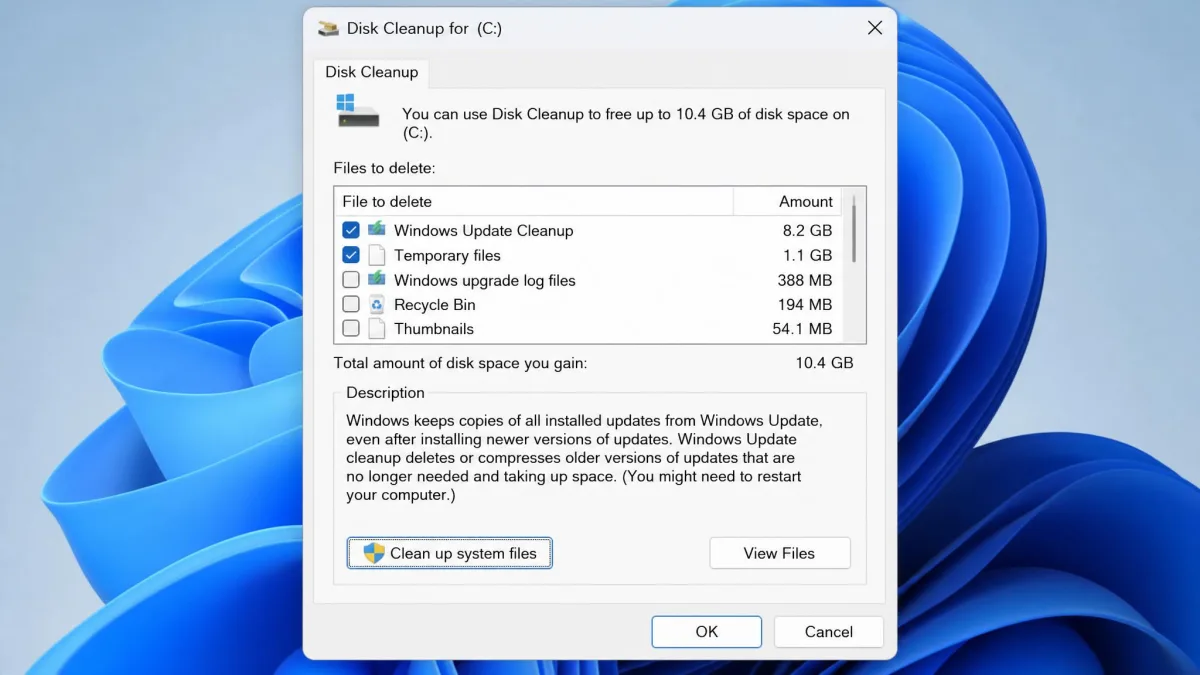
A temp-files-only pass finishes in a couple of minutes on our test machines, but ticking Windows Update Cleanup changes the job entirely. That stage can sit for an hour or more, and occasionally it never finishes. When it stalls, the cause is usually a bloated update cache or a background process holding the files open, and running it again after a restart clears it.
What is safe to delete, and what is not
Everything in the default list is safe. Temporary files that have not been modified in the last week are fine to remove, though files still held open by a running program will refuse to delete, so a sweep clears most but not all of what it lists.
One entry deserves a second thought. Clearing the system restore and shadow copies entry also destroys your older restore points, which leaves nothing to roll back to if the machine misbehaves afterwards.
If you would rather script it, the cleanmgr command accepts switches such as /d, /sageset:n, /sagerun:n, /lowdisk and /verylowdisk. Save a profile with /sageset using any number from 0 to 9999, then run it later with /sagerun.
On a drive that does not hold Windows, Disk Cleanup only offers the Recycle Bin and content-index catalog files. That is expected behavior, not a bug, so do not go looking for the system categories on your D: drive.
Fix 2: Turn On Storage Sense for Automatic Cleanup
Disk Cleanup only helps on the days you remember to open it, so the next step is to hand that job to Windows. Storage Sense does the same work on a schedule, without you remembering anything.
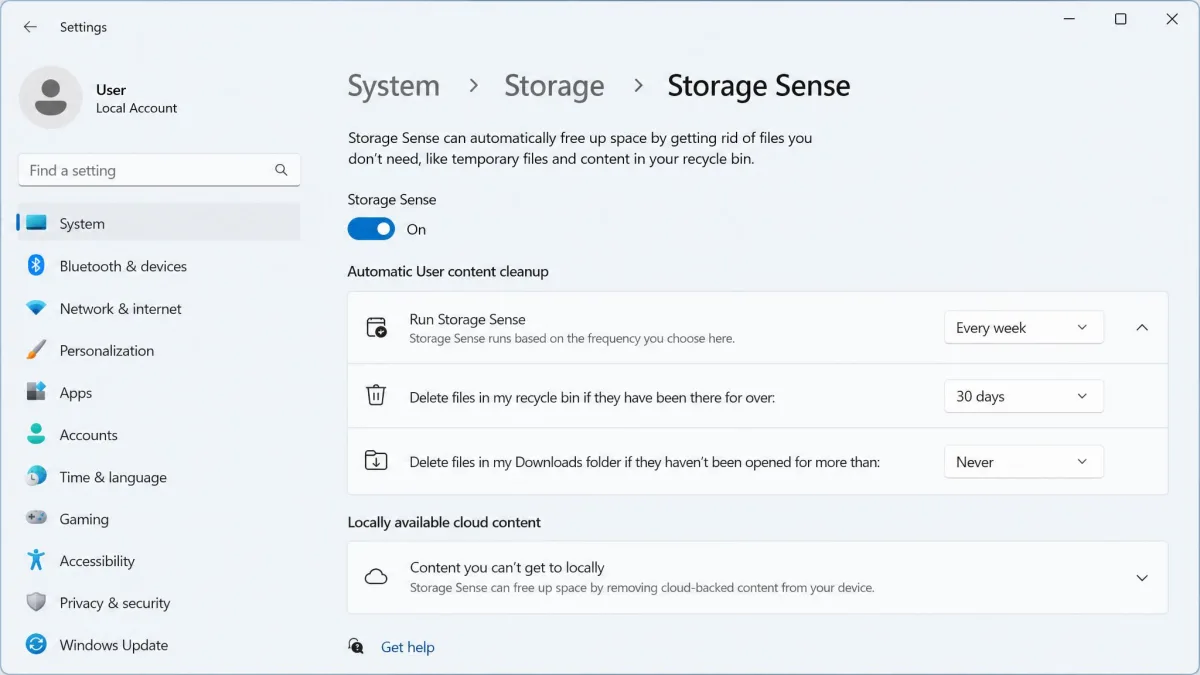
On Windows 11, open Settings > System > Storage > Storage Sense. On Windows 10, open Settings > System > Storage and select Configure Storage Sense or run it now.
You get three decisions. Storage Sense can run during low free disk space, every day, every week or every month, and it defaults to running during low free disk space. Recycle Bin auto-delete offers Never, 1 day, 14 days, 30 days and 60 days, with 30 days as the default. Downloads auto-delete offers the same choices and defaults to Never.
Set the schedule to every week and leave the Recycle Bin at 30 days. That single change keeps a drive from creeping back toward full without any further attention from you, which makes it the best value on this whole list.
On a small SSD, the 64 GB and 128 GB machines especially, the low-free-space trigger works better than a calendar schedule, because cleanup then happens before app installs and updates start failing.
Leave Downloads auto-delete on Never. Storage Sense judges those files by when they were last opened rather than when they were saved, so PDFs, screenshots and scanned documents you are deliberately keeping get deleted simply because you have not reopened them. Deletions are permanent, with no confirmation prompt and no reminder to revisit the schedule later.
Fix 3: Clear Temporary Files and Browser Cache Manually
Disk Cleanup misses some caches, and browsers keep their own. Clearing both by hand takes about five minutes.
Emptying the Temp folder
Press Windows key + R, type %temp%, and press Enter. Select everything with Ctrl + A and delete it.
Some items refuse to delete while programs are running. Skip those, restart, and make a second pass. If the folder refills within days, the source is usually Microsoft Store or Windows Update components, and the low disk space error will keep returning until you deal with that source directly.
Clearing browser cache and downloads
In Chrome or Edge, press Ctrl + Shift + Delete, choose All time, and tick cached images and files. Leave passwords and sign-in data alone unless you want to log back into everything.
Browser caches routinely reach gigabytes on a machine that has gone a year without cleaning, and clearing them costs nothing except slower first page loads. While you are in there, check your downloads list for duplicate installers, which WinDirStat's duplicate detection will also flag if you want a full sweep.
Fix 4: Use Cleanup Recommendations (Windows 11)
If hunting through folders by hand sounds like too much work, Windows 11 will do the shortlisting for you. Open Settings > System > Storage > Cleanup recommendations. Windows groups the biggest safe wins into Temporary files, Large or unused files, Files synced to the cloud, and Unused apps, with a size next to every item and a checkbox beside each one.
This is the friendliest route to the heavy items, because it surfaces the previous Windows installation and unused apps in the same list rather than making you hunt for them. Tick what you want and select Clean up.
Cleanup recommendations lives on the Windows 11 Storage settings page. On Windows 10 the equivalent work happens through Disk Cleanup with Clean up system files selected, which reaches the same files by a longer route.
Fix 5: Uninstall Programs and Apps You No Longer Use
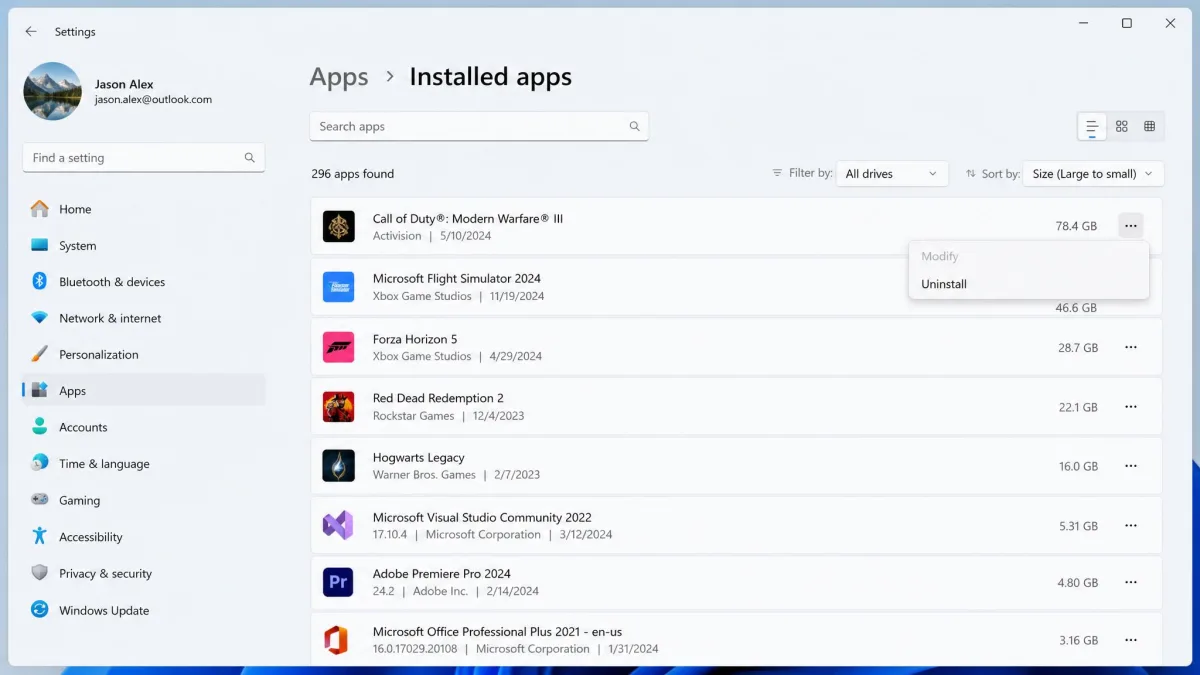
Cleanup recommendations flags the apps you have ignored, but the full picture lives one page over. Open Settings > Apps > Installed apps, then sort by size. Work down the list and remove anything you cannot remember using.
Games and creative suites are where the gigabytes hide. A single modern game routinely outweighs every temporary file on the drive combined, so one uninstall can end the low disk space warning by itself.
Watch for preinstalled trials on an OEM machine and for old versions of software you have since updated separately. Uninstalling is permanent in the sense that space does not creep back, which makes it one of the few fixes here you only do once.
Fix 6: Empty the Recycle Bin and Downloads Folder
Everything you removed in the last two fixes may still be sitting on the drive. Right-click the Recycle Bin and choose Empty Recycle Bin, because deleted files are not gone until you do, and a "deleted" 20 GB folder is still occupying 20 GB.
Then open your Downloads folder, sort by size, and clear the installers. Downloads fills up quietly, because every setup file you ever ran is still sitting there.
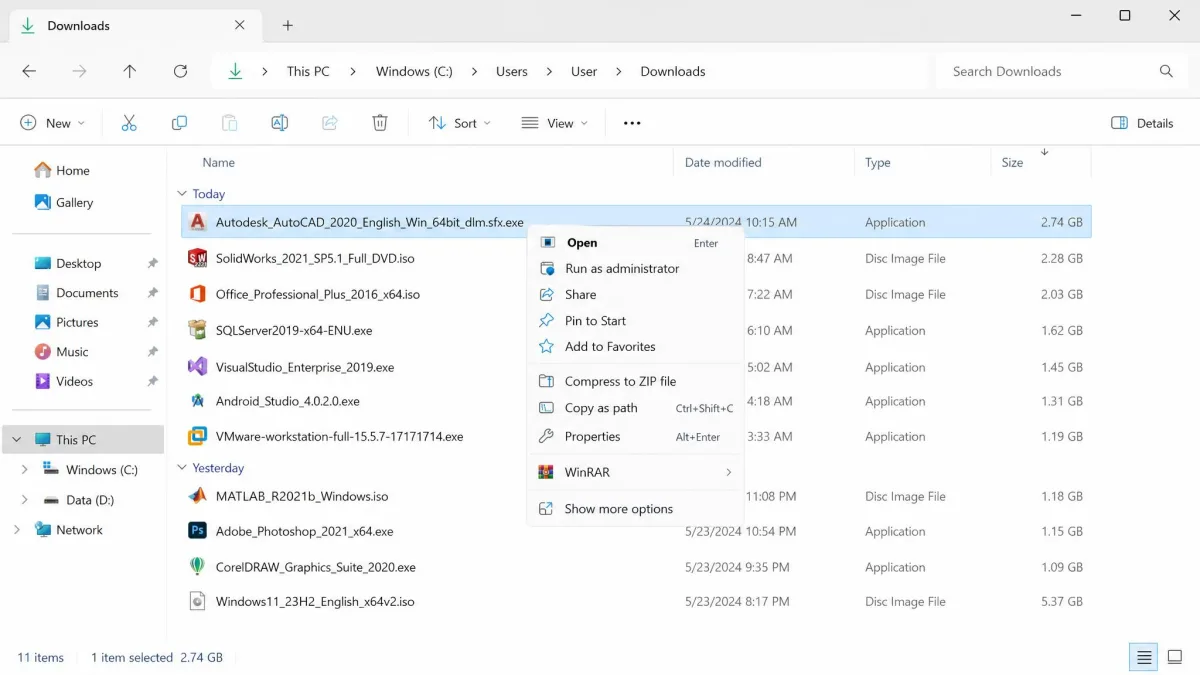
Sort Downloads by Date modified rather than size and delete everything older than six months first. Anything you genuinely still need has almost certainly been opened more recently than that.
Fix 7: Delete Windows Update and Previous Installation Files
After a major upgrade, Windows keeps your old installation in a Windows.old folder so you can roll back. It is often the single largest reclaimable item on the drive.
Windows deletes the previous installation automatically 10 days after an upgrade, and rollback stops being possible once it is gone. In practice it does not always vanish on schedule, so the Cleanup recommendations route is the dependable way to reclaim that space.
Open Settings > System > Storage > Cleanup recommendations, tick Previous Windows installation(s), then select Clean up.
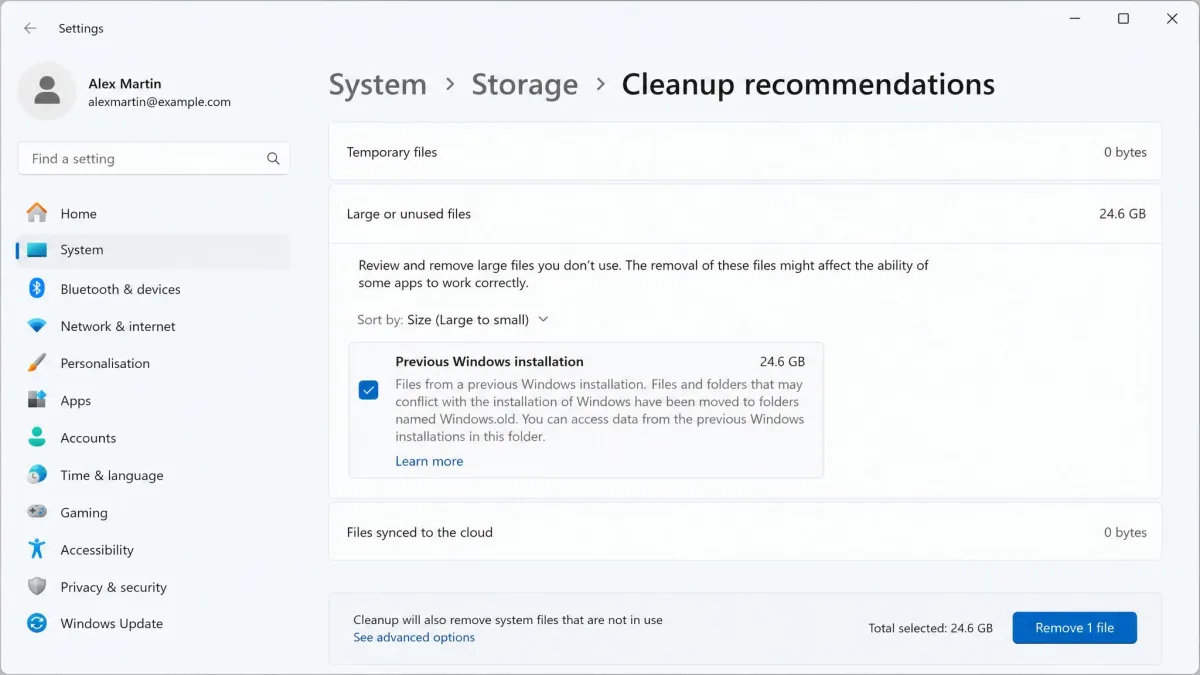
Once the previous installation is deleted, you cannot roll back to your old Windows version. Wait out the full 10 days if the upgrade is recent and anything still feels unstable, and never delete it on the same day you upgraded.
Fix 8: Move Personal Files to an External or Second Drive
The first seven fixes all delete something. This one does not, which matters if your photos, videos and documents are the bulk of the problem: move them off C: rather than removing them. Relocating the main user folders and repointing your default save locations takes about 20 minutes.
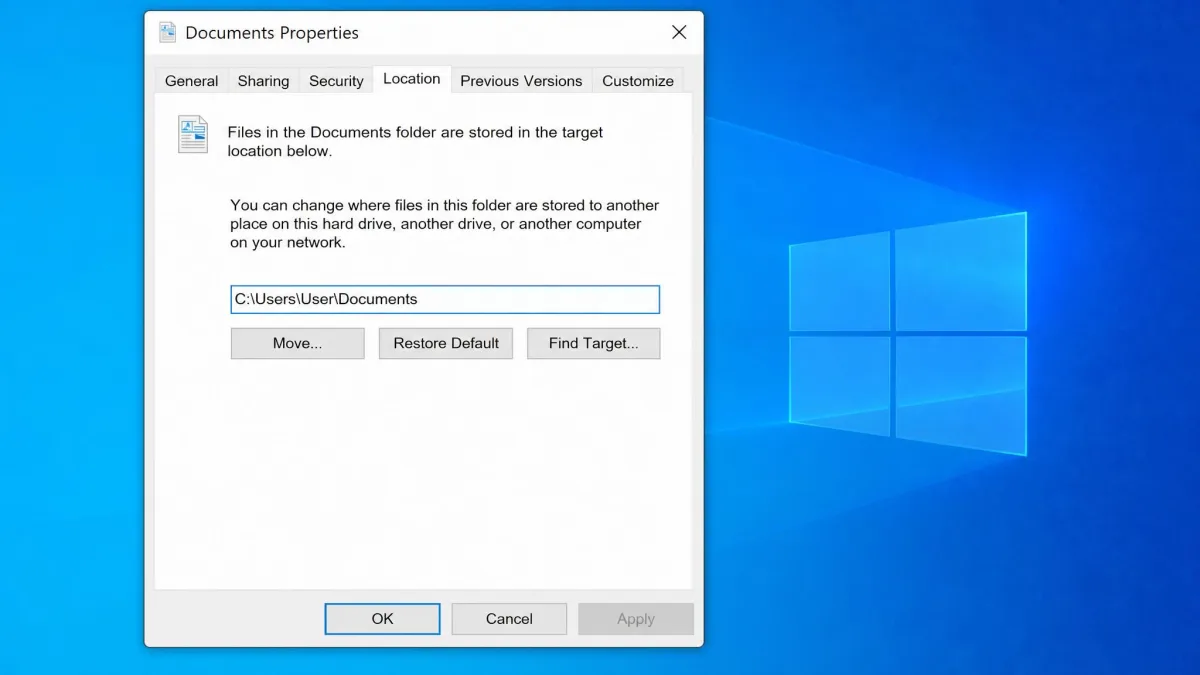
Do it properly. Right-click the folder, for example Documents, choose Properties, open the Location tab, and select Move. That updates the Windows path mapping so apps follow the folder to its new home.
Never drag or cut-and-paste a known folder such as Documents or Downloads to another drive. Doing that breaks the folder mapping, and apps then keep saving to the old path or fail outright. Leave AppData and other system-managed hidden folders exactly where they are, since they resist this treatment entirely.
If Desktop and Documents are already backed up to OneDrive, the real folder path sits under C:\Users\YourName\OneDrive. Changing your OneDrive backup settings after a move can re-route those folders unexpectedly, so check the Location tab again once syncing settles.
Fix 9: Turn On OneDrive Files On-Demand or Another Cloud Option
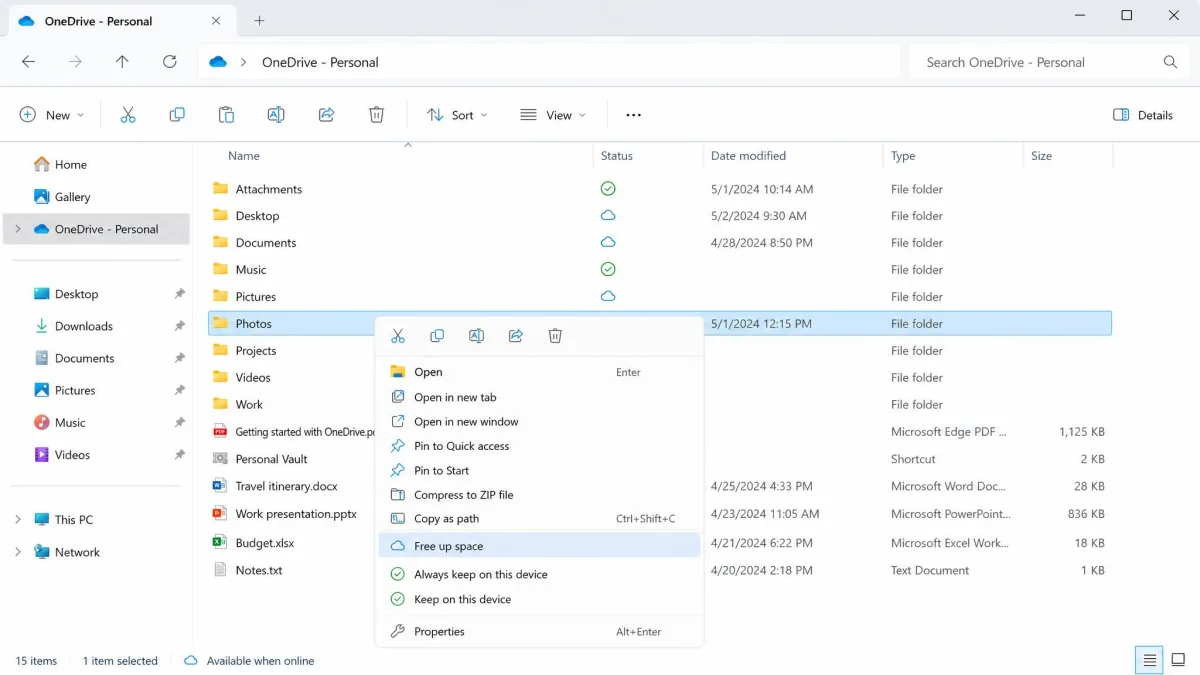
A second drive is not the only place to put those files. Files On-Demand keeps your OneDrive files visible in File Explorer while storing only a placeholder locally, so you get the whole library in the folder tree and pay almost no disk space for it.
Right-click the OneDrive cloud icon in the notification area, open Settings, and check Files On-Demand. Then right-click any large synced folder and choose Free up space to convert the local copies into placeholders.
The trade is straightforward: those files need a connection before they open. Keep the folders you work in offline and let the archive live in the cloud.
Fix 10: Change Where New Content Is Saved
This one prevents future growth rather than freeing space today, and it takes two minutes.
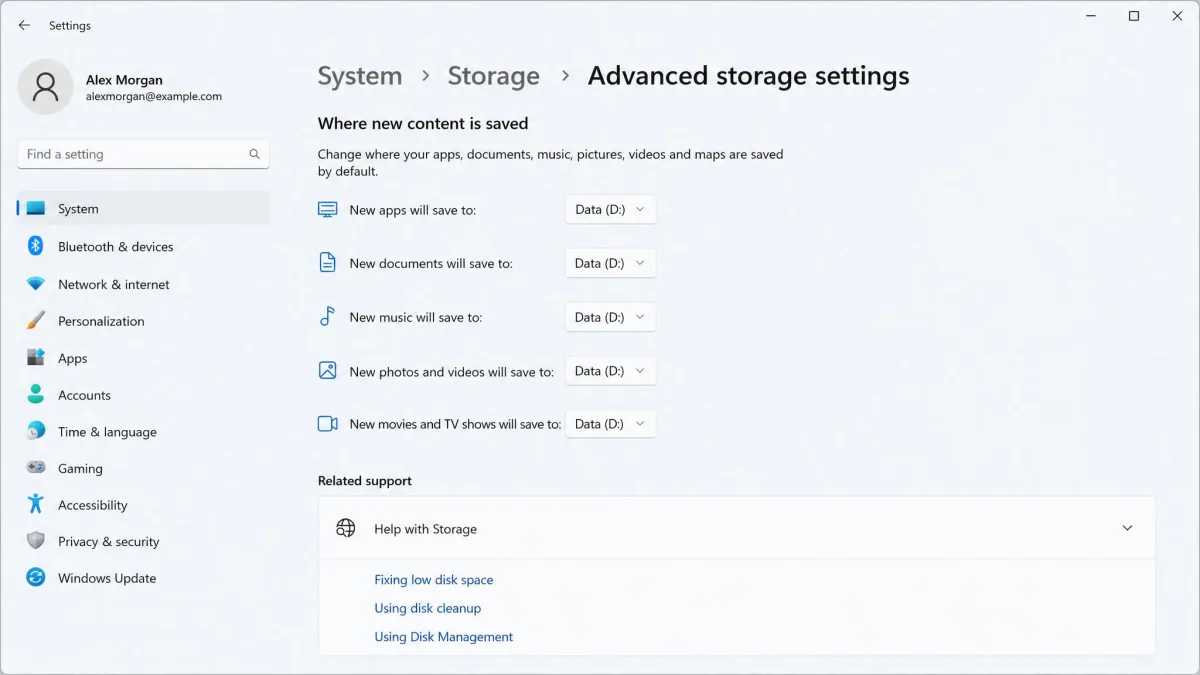
Open Settings > System > Storage > Advanced storage settings > Where new content is saved. Point new apps, documents, music, photos and videos at your second drive.
This setting mainly redirects Microsoft Store apps. Desktop installers such as Chrome, Steam and Adobe still default to C: unless you change the destination during installation, so set your game library folder inside Steam and Epic separately.
Fix 11: Reclaim Space From System Restore and Hibernation
With your own files handled, the last of the space is held by Windows itself. Two system features reserve room you may not need in full, and both give it back on request.
Hibernation keeps a copy of your memory contents in hiberfil.sys. A full hibernation file is sized at 40% of installed RAM and a reduced one at 20%, which puts a 16 GB machine at roughly 6 GB. The percentage depends on the file type in force and on your Windows version, so the file on your PC can land well outside 40%. Open an admin Command Prompt and run powercfg /hibernate off to remove it, accepting that you lose hibernate and fast startup.
System protection is the other one. Restore points can quietly grow until they are a leading consumer of C: space, and capping shadow storage keeps that in check. Open System Properties > System Protection > Configure and pull the Max Usage slider down, or run vssadmin Resize ShadowStorage, which will not accept a maximum below 300 MB.
Restore points disappear on their own once the shadow storage cap is reached, so a smaller cap trades recovery depth for disk space. The default allocation sits near 10% of the volume in the interface, though the registry default and recent Windows 11 builds report different numbers, so read the current value on your own machine before you change it. Do not turn System Restore off entirely.
How Much Free Space Windows Actually Needs
Windows 11 requires at least 64 GB of storage to install, but that is a floor for installation, not a comfortable working figure.
Aim for 15% to 20% of the drive free, or at minimum 20 GB on the system drive. That covers a monthly update, temporary installer files, and the reserved storage of roughly 7 GB Windows holds back for update work.
On a 64 GB device the arithmetic barely works. A Windows 11 24H2 update cannot complete on a 64 GB machine without first freeing space to external media, which is worth knowing before you plan around one.
| Fix | Approx. space reclaimed | Time required | Risk level | Permanent or repeating |
|---|---|---|---|---|
| 1. Run Disk Cleanup | Varies by machine | 2 minutes, up to an hour with Windows Update Cleanup | Low, except restore points | Repeating |
| 2. Turn on Storage Sense | Depends on your thresholds | Under 2 minutes | Medium if Downloads auto-delete is on | Permanent, runs on schedule |
| 3. Clear temp files and browser cache | Caches commonly reach gigabytes | 5 minutes | Low | Repeating |
| 4. Cleanup recommendations | Includes the previous installation | 3 minutes | Low to medium | Repeating |
| 5. Uninstall unused programs | Varies by machine | 5 to 15 minutes | Low | Permanent |
| 6. Empty Recycle Bin and Downloads | Varies by machine | 1 minute | Low, files are gone for good | Repeating |
| 7. Delete update and previous installation files | The previous installation is the large item | 10 minutes to an hour | Medium, rollback is lost | Permanent for that upgrade |
| 8. Move personal files to another drive | Whatever the folders hold | About 20 minutes | Medium, use the Location tab | Permanent |
| 9. OneDrive Files On-Demand | Whatever syncs locally now | 2 minutes | Low, files need a connection | Permanent |
| 10. Change where new content is saved | Prevents future growth | 2 minutes | Low, Store apps only | Permanent |
| 11. System Restore and hibernation | Near 6 GB on a 16 GB machine | 5 minutes | Medium to high | Permanent |
Stop Low Disk Space Errors From Coming Back
Fixes 1, 3 and 6 free space today and will need repeating. Fixes 2, 8, 9, 10 and 11 change how the drive fills, which is what actually ends the warnings.
Set Storage Sense to run every week, keep your media on a second drive, leave Files On-Demand switched on, and point new content somewhere other than C:. Then check the Storage page once a month and watch which category grew.
If a category grows every month, that is your real problem. A Temp folder that refills within days points at update or Store components rather than at your own habits, and no amount of manual cleaning will settle it.
When to Upgrade the Drive Instead
At some point cleaning stops being worth the hour it costs. If your drive is 128 GB or smaller, or you are freeing the same 10 GB every month, more storage is the honest answer.
An external SSD is the cheap route and works well for media libraries and archives. Replacing the internal drive is better if C: itself is the constraint, because Windows, your apps and your working files all want to live there.
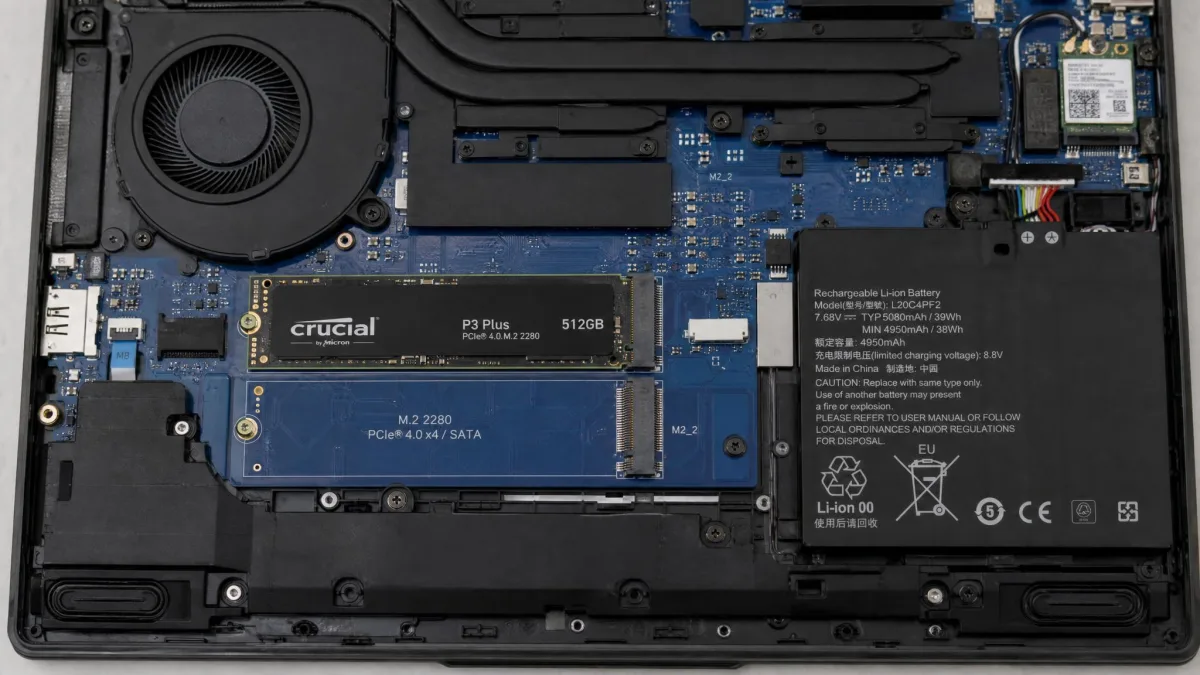
Check what your PC accepts before you buy. Many laptops have a single M.2 slot, some have a spare, and a desktop usually has room for both.