
Proton VPN on Linux comes in two official forms: the Proton VPN Linux app, a native desktop client, and a command-line tool that installs alongside it. Both come from Proton's own package repositories, both work on the free plan. Proton VPN for Linux officially targets the latest stable releases of Ubuntu, Debian and Fedora.
This guide shows you how to install it on Ubuntu and Debian, Fedora, Arch and Kali. After that, we cover signing in, connecting from the app or the terminal, the features worth turning on, and fixes for the errors Linux users run into most often.
Proton VPN for Linux: GUI App vs CLI and What You Need First
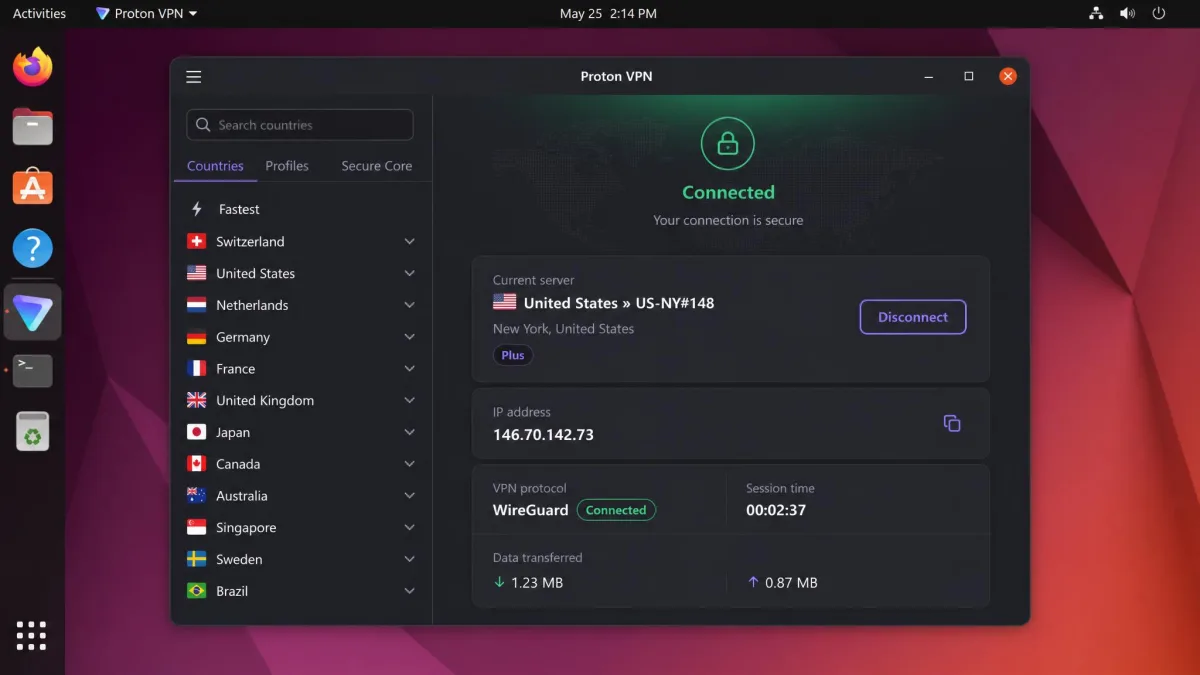
The GUI app is the better starting point on most desktops. It puts the server list, kill switch, NetShield, split tunneling and protocol choice in one Settings window. It can also sit in your system tray with your pinned servers one click away.
The CLI, whose command is simply protonvpn, suits terminal-first users and lighter desktops. It handles country, city and server selection, Secure Core, P2P and Tor servers, the kill switch, NetShield, port forwarding and custom DNS, but it has no split tunneling. You can't run the GUI app and the CLI at the same time, so pick one per session.
Both clients are open source under GPL-3.0, and you can read the desktop client's code as the open-source Linux app on GitHub. That openness sits on top of Proton's Swiss base and its strong privacy laws, which we weigh up alongside Proton VPN's audits and no-logs record.
Supported distros (and how to check which one you're running)
According to Proton VPN's Linux download page and its support docs, the GUI app is officially supported on the latest stable Debian, Ubuntu and Fedora. Each of those needs the GNOME desktop. On the Fedora side, that currently means Fedora 44.
Arch and Kali sit outside that core list in different ways. Arch has packages in its official repositories, but a community contributor maintains them rather than Proton. Kali is not officially supported at all, although Proton points Kali users to its Ubuntu instructions.
If you're not sure which distribution you're running, use Proton's suggested command:
cat /etc/*releaseFree vs paid plan on Linux
The free plan works in both the GUI app and the CLI, with no data cap and no ads. It connects you to servers in 10 countries, but Proton assigns the server rather than letting you choose one. The plan also secures 1 device at a time. Free users also go without NetShield, Secure Core, P2P, streaming support and the 10 Gbps servers.
VPN Plus unlocks all of those, covers 10 devices and comes with a 30-day money-back guarantee. If you're deciding whether the upgrade is worth it, our Proton VPN review covers the paid plan in full.
How to Install Proton VPN on Ubuntu and Debian
Proton VPN Ubuntu and Debian installs run through Proton's own APT repository, which you add with a small release package before installing the app itself. These steps add the repository, refreshing and installing one metapackage takes a couple of minutes.
Add the Proton VPN repository
Download the repository release package:
wget https://repo.protonvpn.com/debian/dists/stable/main/binary-all/protonvpn-stable-release_1.0.8_all.debOptionally, verify the file's checksum before you install it:
echo "0b14e71586b22e498eb20926c48c7b434b751149b1f2af9902ef1cfe6b03e180 protonvpn-stable-release_1.0.8_all.deb" | sha256sum --check -Install the release package, then refresh your package lists:
sudo dpkg -i ./protonvpn-stable-release_1.0.8_all.deb && sudo apt updateInstall the Proton VPN GUI app
Install the proton-vpn-gnome-desktop metapackage, which pulls in the GUI app, the CLI, the keyring integration and the background daemon:
sudo apt install proton-vpn-gnome-desktopIf APT replies that it's unable to locate proton-vpn-gnome-desktop, Proton doesn't document that error. It points back to the repository step, though: either the release package wasn't installed, or apt update didn't run after it.
On stock GNOME, the tray icon won't appear until you install the AppIndicator extension, restart, and enable Ubuntu AppIndicators in the Extensions app:
sudo apt install gnome-shell-extension-appindicator gnome-shell-extension-prefsSplit tunneling in the GUI app needs two more packages, the kernel headers for your running kernel and systemd-resolved:
sudo apt install linux-headers-$(uname -r)
sudo apt install systemd-resolved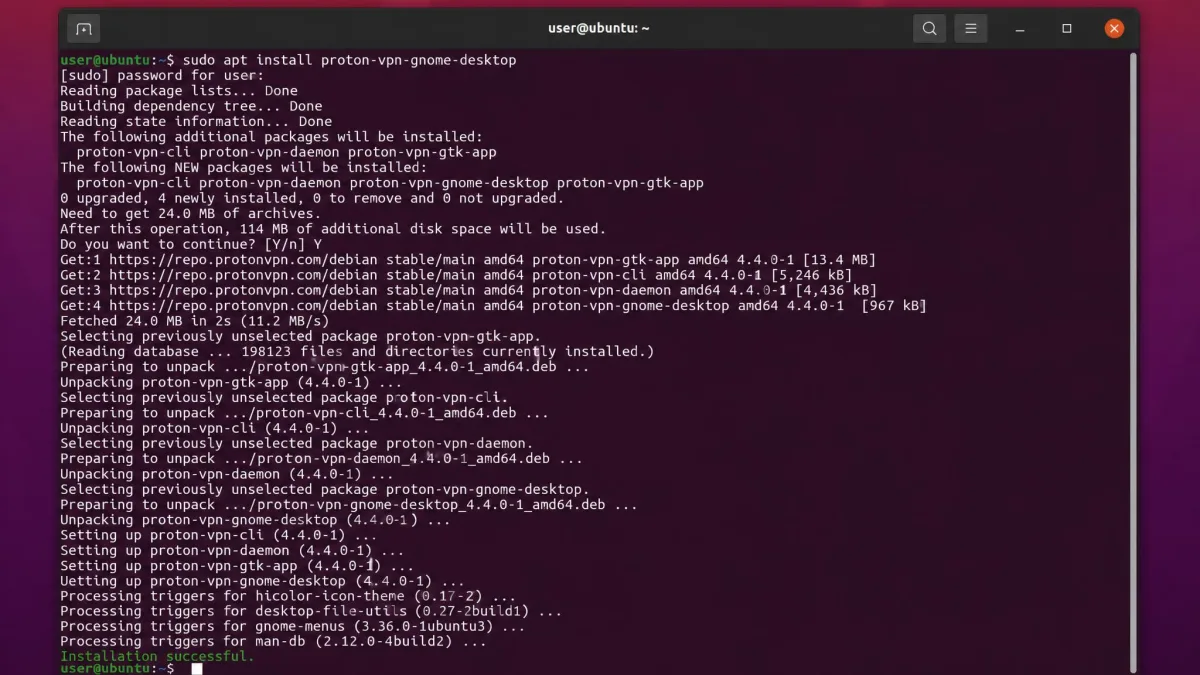
Install the Proton VPN CLI
The CLI arrives with the metapackage above, so there's nothing extra to install. Proton's repository also carries a standalone proton-vpn-cli package, but Proton's current documentation only gives the metapackage route, so that's the method to follow. Confirm the CLI is in place by printing its help:
protonvpn -hProton VPN Ubuntu install via Snap (and its limitations)
Proton publishes the Proton VPN snap itself under its verified Proton AG account, and the snap tracks the same 4.18.2 release as the repository build. It's the quickest route on Ubuntu:
sudo snap install proton-vpnSnap's sandboxing costs you features, though. The snap is GUI only, with no CLI, no Proton Protocols (so no Smart Protocol and no Stealth), no split tunneling and no ARM support. Proton recommends its repositories if you need any of those.
A Flatpak build also exists, but it is third-party maintained, and its listing states it is not an official Proton app:
flatpak install flathub com.protonvpn.wwwHow to Install Proton VPN on Fedora
Fedora uses DNF, so you add Proton's RPM repository first, and the remaining steps mirror the Ubuntu ones. Proton currently supports Fedora 44.
Download the release package that matches your Fedora version:
wget "https://repo.protonvpn.com/fedora-$(cat /etc/fedora-release | cut -d' ' -f 3)-stable/protonvpn-stable-release/protonvpn-stable-release-1.0.4-1.noarch.rpm"Install it and refresh the repository metadata:
sudo dnf install ./protonvpn-stable-release-1.0.4-1.noarch.rpm && sudo dnf check-update --refreshInstall the GUI app and the CLI together:
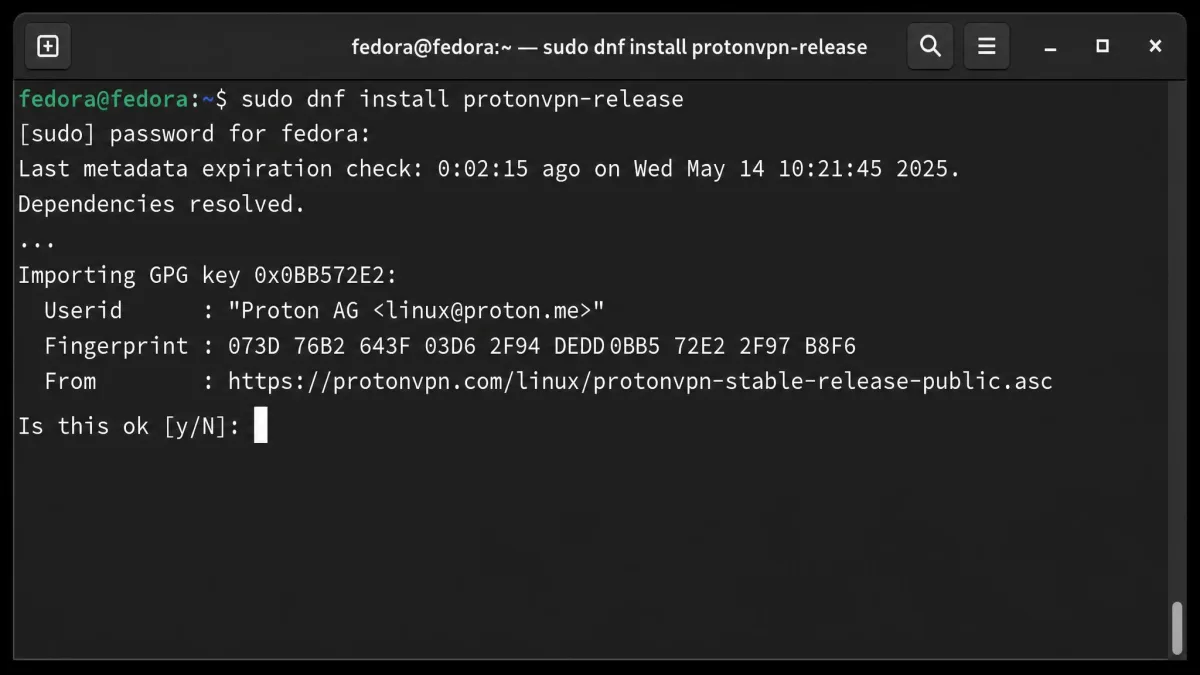
sudo dnf install proton-vpn-gnome-desktopWhen DNF asks you to import Proton's OpenPGP key, check that the fingerprint reads 6929133BDE1CE1CFA9EDB286D84176F6844830D4 before you accept it.
For the tray icon, install these packages, restart, then turn on AppIndicator and KStatusNotifierItem Support in the Extensions app:
sudo dnf install libappindicator-gtk3 gnome-shell-extension-appindicator gnome-extensions-appSplit tunneling launched in version 4.11.0 as an Ubuntu-only feature. Proton has been extending it distro by distro since, so it may reach Fedora later than Ubuntu.
How to Install Proton VPN on Arch Linux
Proton VPN Arch packages sit in Arch's official extra repository, so you don't need an AUR helper. On Arch Linux, Proton VPN is packaged by a community contributor rather than by Proton. Proton's own Arch page says official support is still in progress, so its help may be limited.
Install the GUI app with pacman:
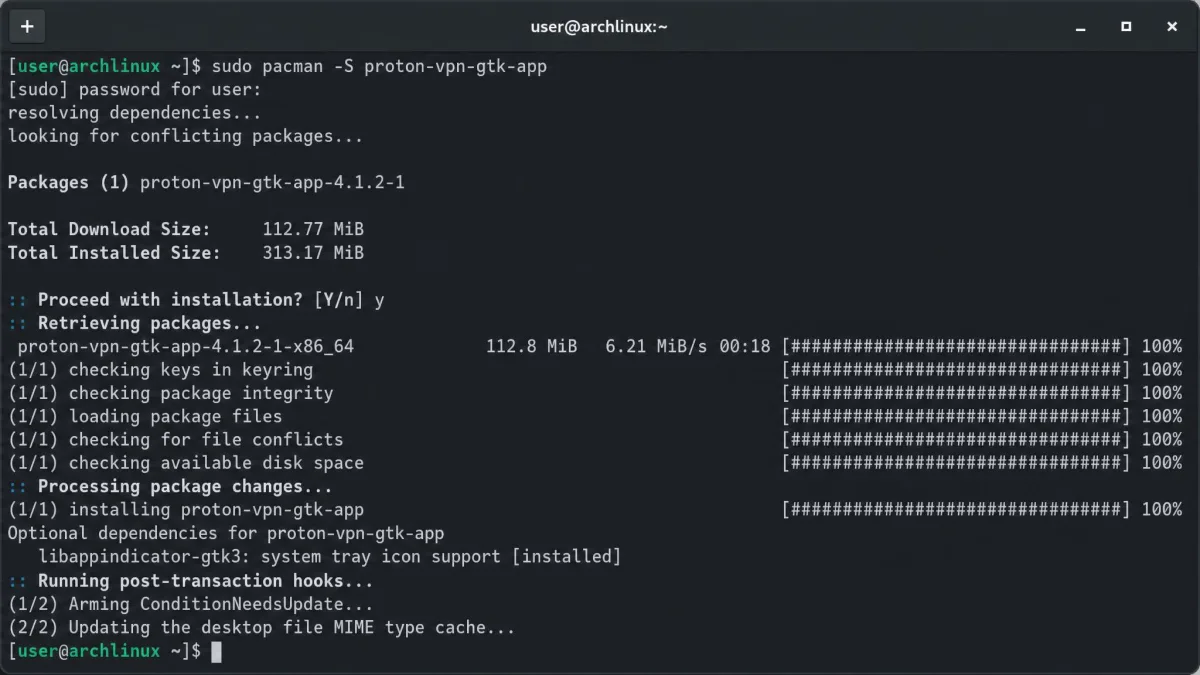
sudo pacman -S proton-vpn-gtk-appThe CLI is a separate package on Arch:
sudo pacman -S proton-vpn-cliArch turned out to be the lowest-friction install of the four distros, with one catch: gnome-keyring must be installed explicitly, or the app won't start. KWallet may work, but Proton doesn't support it.
sudo pacman -S gnome-keyringThe app also expects NetworkManager. If you plan to use split tunneling, make sure the systemd-resolved service is active first, because split tunneling on Arch fails silently without it.
How to Install Proton VPN on Kali Linux
To install Proton VPN on Kali, follow the Ubuntu and Debian steps above. Kali has no dedicated instructions, and Proton points Kali users to its Ubuntu guide. Kali is not officially supported, but Proton says reports indicate both the GUI app and the CLI work there, including on non-GNOME desktops.
In practice, that means the same order: download the release package, install it with dpkg, run apt update, then install the metapackage:
sudo apt install proton-vpn-gnome-desktopThe AppIndicator extension step only applies if you run GNOME, so skip it on Kali's other desktops. If your desktop doesn't start a keyring service, read the keyring fix under Troubleshooting before your first launch.
Kali sits outside Proton's supported list, so Proton's support team may not be able to help if the app misbehaves there. For a machine you depend on for daily VPN use, a supported distro is the safer choice.
How to Sign In and Connect to a Server
Connecting with the GUI app
Open Proton VPN from your app menu and sign in with your Proton account. On first launch, the app stores your session in the system keyring, which is why keyring problems show up at this point rather than later.
Once you're signed in, pick a country or a specific server from the list, or let the app connect you to the fastest one. You can pin favorite servers to the tray icon. The settings also let you auto-connect to the fastest or a named server at startup and start the app minimized.
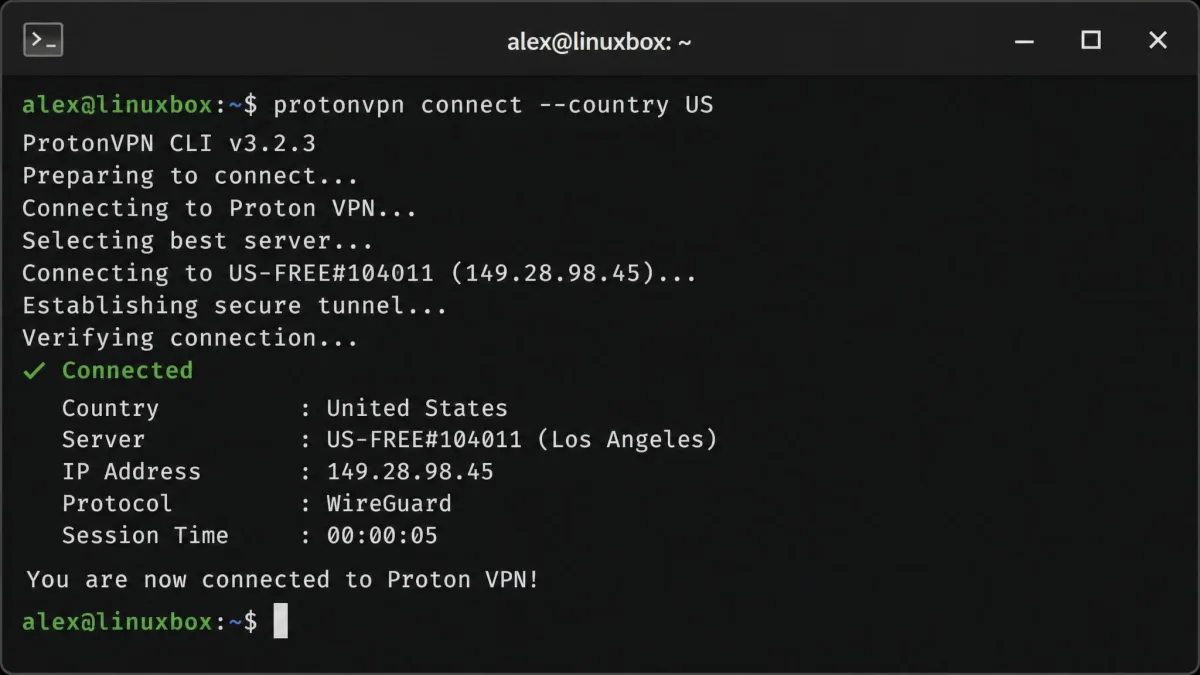
Connecting with the CLI (connect, disconnect, status)
The CLI's syntax is short, and the Proton VPN CLI documentation lists every option. Sign in first:
protonvpn signin your_usernameConnect to the fastest server, a country, or a named server (server names aren't case sensitive):
protonvpn connect
protonvpn connect --country US
protonvpn connect CH#242
Disconnect or sign out when you're done:
protonvpn disconnect
protonvpn signout
A connection status command arrived in CLI version 0.1.8. Proton's usage page doesn't print its exact syntax, so confirm it with protonvpn -h on your installed version:
protonvpn statusThe built-in help is enough to learn the rest of the commands without opening the docs. On a fiber line, the CLI connected quickly over WireGuard and ran close to the connection's full speed. That is the result we look for before trusting any VPN client on a daily machine.
Proton VPN Features Worth Turning On in Linux
The defaults get you connected, but three settings change how well the connection protects you.
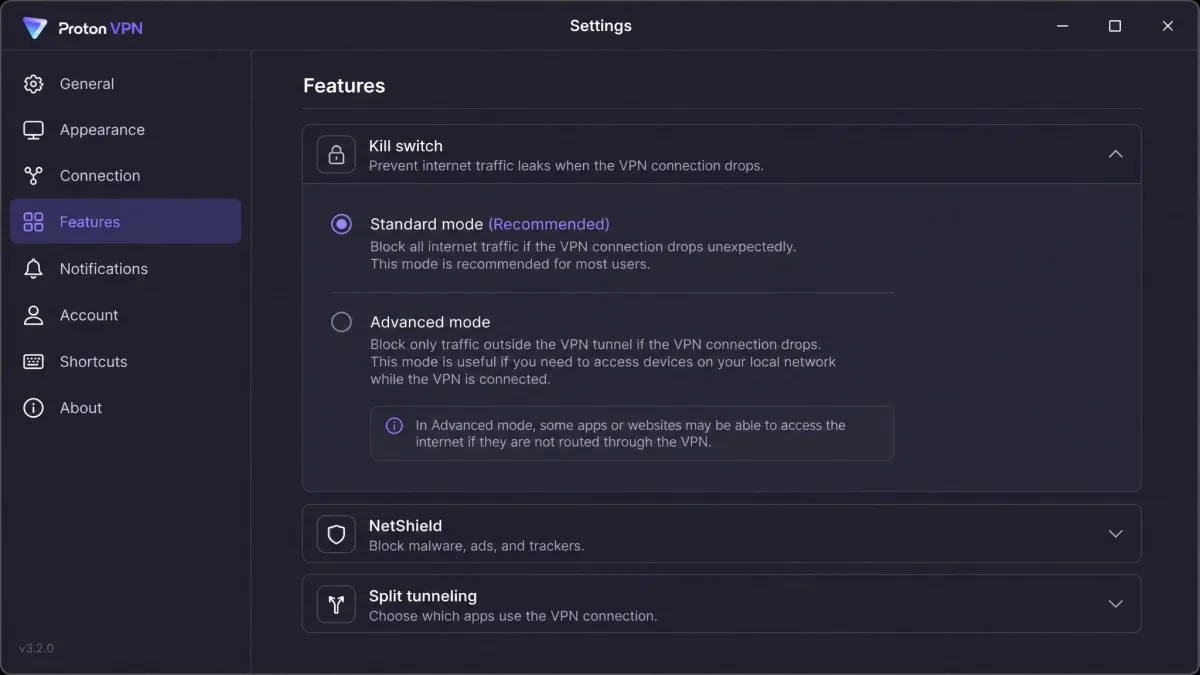
Kill switch
The kill switch stops your device from reaching the internet until it reconnects to a VPN server. A dropped tunnel never falls back to your normal connection. If you want the background first, we explain what a VPN kill switch does in a separate guide. In the GUI app, open Settings, go to Features and turn on Kill switch, choosing between the standard and advanced modes.
In the CLI, list the available settings, then set the kill switch to the value you want:
protonvpn config list
protonvpn config set kill-switch <setting>
Ignore older write-ups that say the CLI has no kill switch. Early CLI builds lacked the kill switch, NetShield and port forwarding, and all three arrived as config settings from version 0.1.5 onward.
NetShield ad-blocker
NetShield is Proton's built-in ad-blocker, and it's a paid-plan feature available on VPN Plus and up. In the CLI, you set it with protonvpn config set netshield, using one of the values protonvpn config list shows.
Secure Core and protocol choice (WireGuard, Stealth)
Secure Core routes your traffic through an extra Proton server before it exits, and like NetShield it needs a paid plan. Both clients also support WireGuard and OpenVPN.
Stealth, Proton's anti-censorship protocol, reached the stable Linux GUI app in version 4.18.0 on August 24, 2026. It helps on networks that block VPN traffic, but the snap build can't use it.
Manual Setup With WireGuard or OpenVPN
If neither client suits your system, Proton also documents manual setups for Linux. WireGuard is the recommended option, and OpenVPN is there for older or legacy devices. You generate a configuration file from your Proton account and load it with the standard tools. That also makes it the route for distros the app doesn't run on.
For the WireGuard side, our guide on how to use WireGuard walks through the tools and config files. If you need OpenVPN instead, we cover how to set up OpenVPN step by step.
Troubleshooting Proton VPN on Linux
Most Proton VPN Linux problems fall into four groups: keyring errors, outdated instructions, a leftover kill switch and unstable connections. If the app won't launch at all, our guide on why Proton VPN won't open covers the wider set of causes.
Keyring errors on first launch
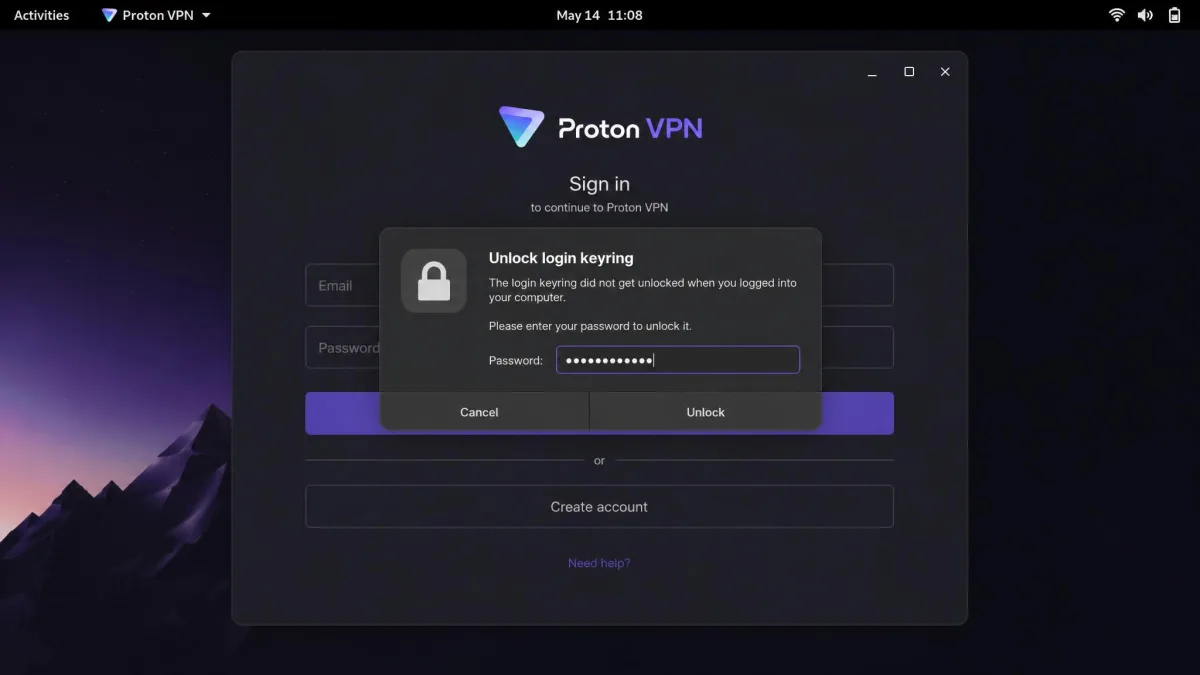
The most common first-launch failure is the app refusing to start or sign in with a keyring error, because no Secret Service keyring is running. Install and run gnome-keyring on any desktop that doesn't start one for you. On minimal window managers without a full GNOME session, the app can also ask for the keyring password on every boot.
A locked GNOME keyring at login can cause a similar race, where the app's authentication is denied until you unlock the keyring. As a last resort, close the app and move your keyring files aside, then relaunch:
mv ~/.local/share/keyrings ~/.local/share/keyrings.bakThis wipes secrets that other apps have stored and can leave the new keyring unencrypted, so only use it when nothing else works.
Old pip-based CLI instructions no longer work
Many older tutorials install a community tool called protonvpn-cli through pip. That project is dead. Its repository was archived on November 5, 2025 and is read-only, and the legacy OpenVPN configuration it relied on stopped working on March 31, 2025.
Skip any guide that installs Proton VPN through pip or uses protonvpn-cli commands. The official CLI is a different tool that installs from Proton's repositories and uses the protonvpn command.
The official CLI shipped its first release, version 0.1.2, on November 14, 2025. Version 1.0.0 on April 7, 2026 was its first fully stable release, and the current package is 1.0.3.
No internet after uninstalling (kill switch leftovers)
Uninstalling with the kill switch still enabled leaves the machine with no internet, because the kill switch's NetworkManager connections survive package removal. List the active connections, then delete any that start with pvpn-:
nmcli connection show --active
nmcli c delete pvpn-killswitch
nmcli c delete pvpn-ipv6leak-protection
The standard uninstall commands don't always clear the kill switch interface either, so the default route can stay pointed at a dead VPN interface. If it's still listed, delete it by hand:
nmcli device delete pvpnksintrf1Connection drops and unsupported distros
Wi-Fi drops while connected are often your laptop's power management putting the adapter to sleep, and turning power saving off for that adapter stops them. If you're on a distro Proton doesn't support and the app keeps failing, switch to a manual WireGuard configuration instead.
How to Update or Uninstall Proton VPN on Linux
Updates arrive through your normal package manager once Proton's repository is installed. On Ubuntu and Debian, run:
sudo apt update && sudo apt upgradeOn Fedora, run:
sudo dnf upgrade --refreshOn Arch, a full system upgrade picks up new builds from the extra repository:
sudo pacman -SyuTurn off the kill switch before you uninstall. If you remove the app with it still on, you'll need the nmcli commands in the Troubleshooting section to get your connection back.
To uninstall on Ubuntu, Debian or Kali, remove the app and purge the repository package:
sudo apt autoremove proton-vpn-gnome-desktop && sudo apt purge protonvpn-*-releaseTo uninstall on Fedora:
sudo dnf remove proton-vpn-gnome-desktop protonvpn-*-releaseTo uninstall on Arch, remove both packages with pacman:
sudo pacman -R proton-vpn-gtk-app proton-vpn-cliTo remove the snap, use Snap's standard removal command:
sudo snap remove proton-vpnFAQ
Does Proton VPN work on headless Linux servers?
Can I try beta builds of the Linux app?
Should I use the Flatpak instead of the snap?
Where does the Linux app keep its logs and settings?
Does Proton VPN work on KDE or other desktops?
Which Ubuntu version should I run for Proton VPN?
Final Thoughts
For most people, the smoothest Proton VPN Linux experience is the official repository package on a supported distro: Ubuntu, Debian or Fedora with GNOME. Arch users get an easy pacman install from the extra repository, as long as gnome-keyring is in place. Kali users can follow the Ubuntu steps and accept that Proton's support is limited there.
Whichever route you take, turn on the kill switch once you're connected, stay clear of old pip-based tutorials, and switch the kill switch off before you ever uninstall.