Setting up a VPN at home is more approachable than most guides make it sound. A VPN, short for virtual private network, wraps your internet traffic in an encrypted tunnel so that your activity stays private and your connection stays secure on any network. You do not need to be a network engineer to get one working. You just need to pick the method that matches your goal.
That goal is what shapes everything else. Some people only want a private app on a laptop and a phone. Others want to protect every device in the house, or reach their home network from the road. We have set up all four common methods ourselves, and each one trades ease of setup against how much of your network it covers. This guide walks through every path, from the five-minute app install to a self-hosted server you build and maintain.
We use these tools the way you would at home, on ordinary hardware and ordinary internet connections, so the friction we describe is the friction you should expect. Where a home-hosted server behaves differently from a commercial service, we say so plainly.
What a VPN Does and Why Set One Up at Home
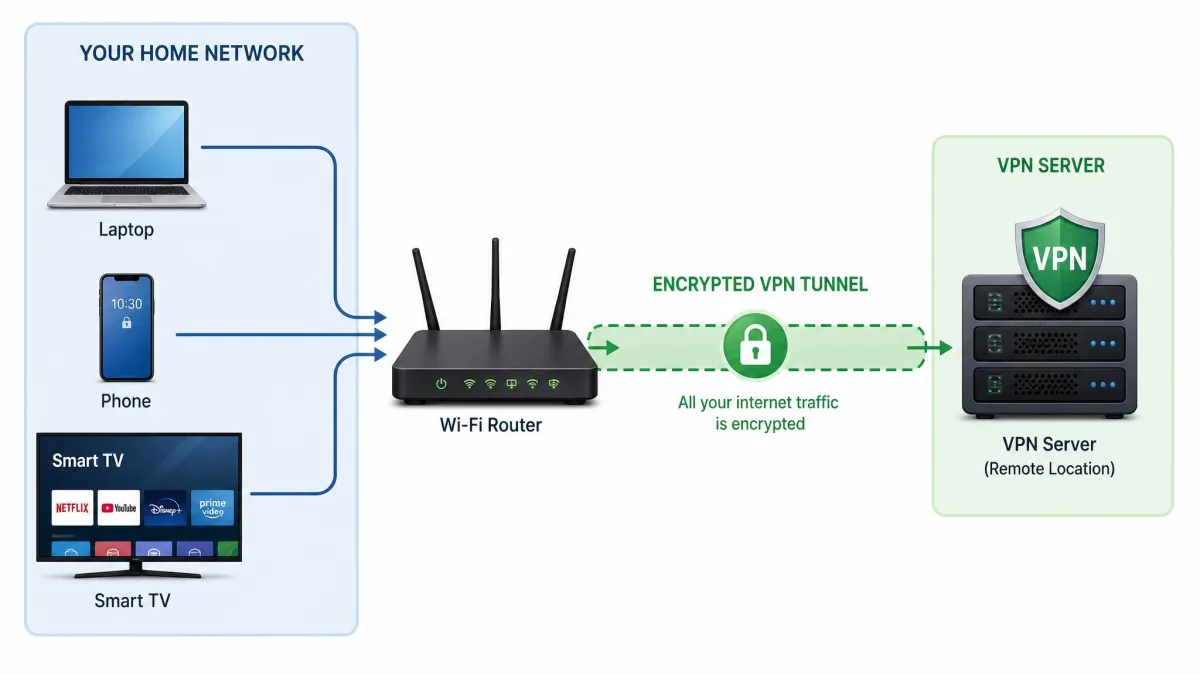
A VPN creates a secure tunnel between your device and a server. Everything that passes through that tunnel is encrypted, so anyone watching the network sees scrambled data instead of your browsing. That single mechanism drives every benefit below.
Privacy and security benefits
The clearest reason to set one up is privacy on shared or untrusted connections. On public Wi-Fi, an encrypted tunnel keeps your logins and messages away from anyone snooping on the same network. At home, a VPN masks your traffic from anyone positioned between your device and the wider internet.
There is one honest limit worth stating early. A VPN you host yourself does not hide your activity from your internet provider, because all of your traffic still exits through your home IP address, which the provider links to your account. A commercial VPN routes you out through its own servers instead, which is a real difference in what your provider can see.
A VPN encrypts your connection and changes the IP address that websites see. It does not make you anonymous on its own, and it does not replace good passwords or two-factor authentication.
Protecting your whole home network
A per-device app protects only the device it runs on. If you want every phone, laptop, smart TV, and console covered at once, you need the VPN running at the network level, which usually means your router. That way, anything that connects to your Wi-Fi is inside the tunnel automatically, including devices that have no VPN app available.
Accessing geo-restricted content
Because a VPN can place your apparent location on a different server, it is often used to reach content that varies by region. This works best with a commercial provider that maintains servers in many countries. It is worth knowing that some streaming services actively block VPN connections, and that smart TVs and consoles may not offer a dedicated VPN app at all, which pushes you toward the router method for those devices.
Before You Start: Requirements and Choosing Your Method
Before you install anything, decide what you actually need the VPN to do. The right method follows directly from that answer, and picking well now saves you from redoing the setup later.
Home VPN setup methods compared (app vs. router vs. own server)
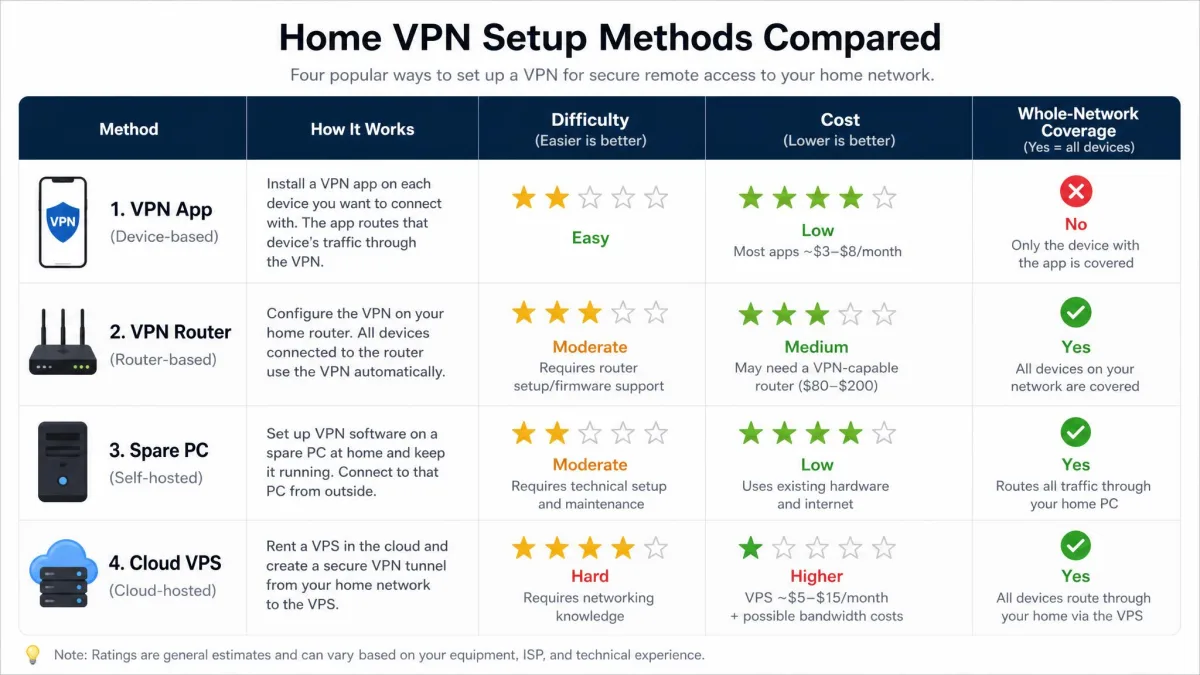
There are four practical ways to set up a VPN at home. Installing a provider's app is the easiest and fastest. Configuring your router covers the whole network. Building a server on a spare PC or Raspberry Pi gives you remote access into your home. Renting a cloud VPS gives you a private tunnel you control without depending on your home connection.
The table below lays them side by side so you can match a method to your goal before you commit.
| Method | Difficulty | Cost | Whole-network coverage | Remote-access support | Maintenance |
|---|---|---|---|---|---|
| Provider app | Easy, a few minutes | Provider subscription | Per-device unless installed on a router | Provider servers only | Handled by the provider |
| Router firmware | Hard and risky, can brick the router | Free to flash, around $150 or more for a pre-built VPN router | Yes, covers the whole network | Yes, into your home network | You patch the firmware |
| Spare PC / Raspberry Pi | Medium to hard | Free if you own the hardware | LAN-wide once configured | Yes, into your home network | You patch the OS and VPN software |
| Cloud VPS | Easy to medium, about 30 minutes and up | Roughly $5 per month | Remote-only tunnel, not your home LAN | Yes, into the VPS | You patch the VPS |
What you need (device, static IP, Dynamic DNS, ISP considerations)
For the app method, you need almost nothing beyond a device and a provider account. The self-hosted methods ask for more.
To host a VPN server at home, the server needs a static internal IP address so your router always knows where to send traffic, plus port forwarding on the router to let incoming connections reach it. If your provider gives your home a dynamic public IP, which most do, you also need Dynamic DNS. A dynamic public IP breaks remote access every time the provider rotates it, and a Dynamic DNS service such as No-IP hands you a fixed hostname that automatically follows the changing address.
One provider setup can stop a home server before you start. If your provider uses Carrier-Grade NAT, port forwarding never connects, and you cannot host a traditional VPN server on that connection at all. When that happens, the practical fallbacks are a mesh networking service or a cloud VPS, which sidesteps your home connection entirely.
Check whether your internet provider uses Carrier-Grade NAT before you plan a home-hosted server. If it does, port forwarding will silently fail no matter how carefully you configure it, and a cloud VPS is the cleaner route.
Method 1: Set Up a VPN Using a Provider's App
If you want privacy on your own devices with the least fuss, start here. The provider-app route really is a few-minutes job in practice. You install the app, allow the VPN profile or permission, sign in, and connect. We reach for this method whenever the goal is simply to protect a laptop and a phone rather than the whole network.
The flow is the same across platforms. Choose a reputable provider, download its app, sign in, pick a server location and protocol, and connect. Once you are connected, the app manages the encrypted tunnel in the background and reconnects on its own when you change networks.
Windows and macOS
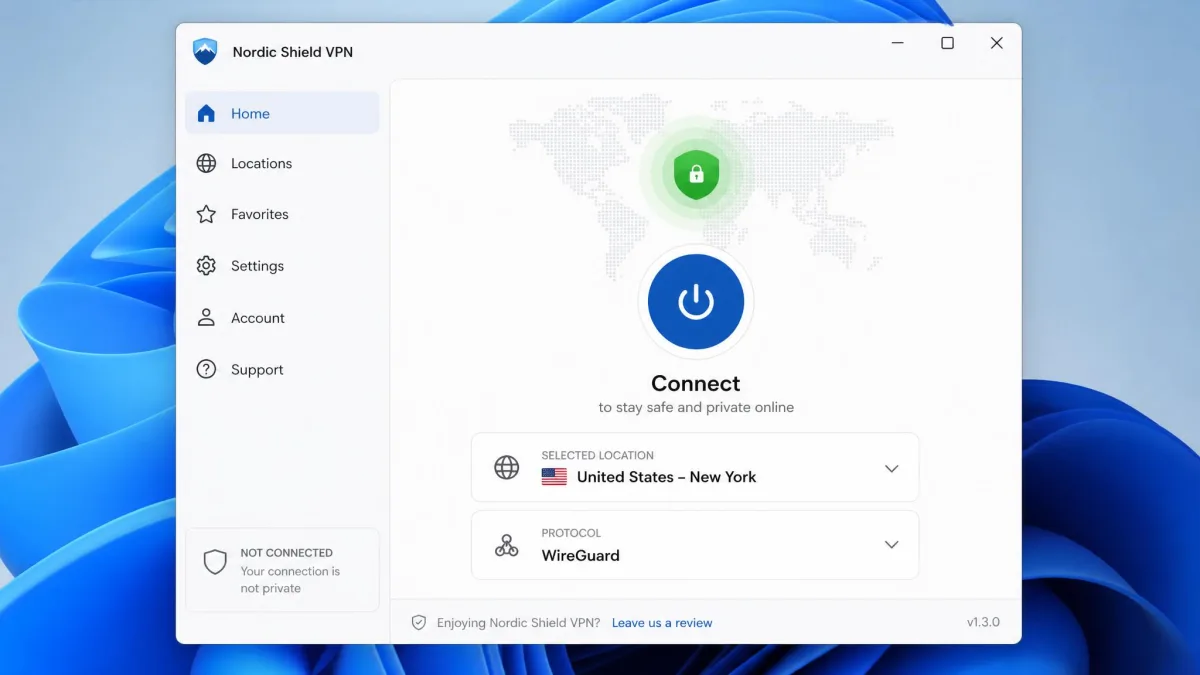
On Windows and macOS, download the provider's desktop app from its official site, install it, and sign in with your account. Pick a server, usually the nearest one for the best speed, and click connect. The first connection may ask you to approve a system permission or install a helper, which is normal.
If you prefer not to install a third-party app, both Windows and macOS include a built-in VPN client that supports IKEv2/IPsec natively. You add the connection manually using the server address and credentials your provider gives you. This is handy for a minimal setup, though the app is friendlier for switching locations.
iPhone, iPad, and Android
On mobile, install the provider's app from the App Store on iOS and iPadOS, or from Google Play on Android. Open it, sign in, and connect. The first time you connect, the phone asks you to allow a VPN configuration, which lets the app manage the tunnel. After that, connecting is a single tap.
Built-in IKEv2/IPsec support is available on iOS and Android too, so you can add a manual connection in system settings if your provider supplies the details. For most people the app is quicker and easier to maintain.
Turn on the app's auto-connect or always-on setting so the VPN starts itself on untrusted Wi-Fi. It removes the one weak point of the app method, which is forgetting to connect.
Method 2: Set Up a VPN on Your Router
Where the app method protects one device at a time, a router-based VPN protects everything on your network at once. This is the method to choose when you want smart TVs, consoles, and guests all inside the tunnel without installing anything on them.
Check router firmware and VPN support
First, find out what your router can do. Some higher-end models ship with native VPN-server support out of the box, such as the Asus RT-AX88U Pro, a Wi-Fi 6 router, and those let you skip custom firmware entirely. Check your router's admin page for a VPN section before you consider anything riskier.
If your router does not support VPN natively, you can often add it by flashing custom firmware. Before you do, confirm your exact model is supported by looking it up in the DD-WRT router database. Flashing an unsupported build is the fastest way to cause trouble.
Installing custom firmware (DD-WRT / OpenWrt)
Custom firmware such as DD-WRT or OpenWrt replaces your router's stock software with a version that can run VPN features. This is the hard and risky part of the whole guide. Flashing the wrong build can brick the router and leave it unusable, so it is the one step we treat with real caution.
Flashing custom firmware can permanently brick your router if you use the wrong build for your exact hardware revision. Match the model and revision precisely, and read the device-specific instructions before you start.
Step-by-step router configuration
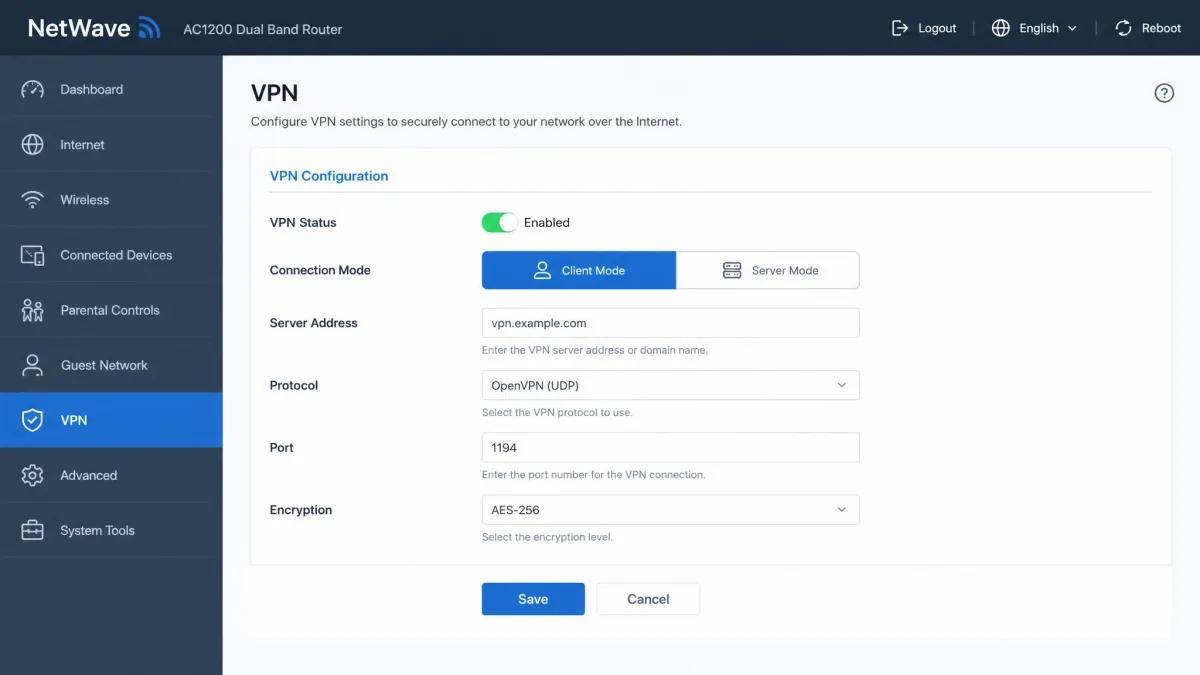
Once your router runs firmware that supports VPN, the configuration follows a consistent shape. Log in to the router admin page. Open the VPN section and choose whether the router acts as a VPN client, sending all home traffic out through a provider, or as a VPN server, letting you reach your home network from outside. Enter the configuration your provider or server gives you, including the server address, protocol, and keys or certificates. Save, enable the connection, and reboot if prompted.
After the router reconnects, every device on the network rides the tunnel automatically. Test from one device to confirm the connection is live before you rely on it.
Pros
- Covers every device on the network, including ones with no VPN app
- Works continuously without per-device setup
- Can act as a server for remote access into your home
Cons
- Flashing custom firmware risks bricking the router
- Router hardware can throttle encrypted speeds
- You are responsible for keeping the firmware patched
Method 3: Build Your Own Home VPN Server
Building your own server is the most involved method, and also the most flexible. You get a private tunnel that you fully control, plus the ability to reach your home network or a cloud machine from anywhere. It asks the most of you in setup and upkeep, so choose it when control matters more than convenience.
Option A: Spare PC or Raspberry Pi
A spare computer or a Raspberry Pi makes a capable home VPN server, and this route is medium-to-hard difficulty. The hardware is often free if you already own it. The catch is that the host device must run around the clock. If it is switched off or your home connection drops, remote access goes with it.
This is also where the home-hosting requirements bite. The server needs a static internal IP, port forwarding, and Dynamic DNS if your public IP is dynamic. Get those three right and the rest is software.
Option B: Cloud server (VPS)
Renting a cloud VPS sidesteps the home-connection problem entirely. A small instance runs roughly $5 per month, and this route is easy-to-medium difficulty, often the quickest of the self-hosted options at around 30 minutes and up. Common hosts include DigitalOcean and AWS. A comfortable-headroom VPS carries around 2 GB of RAM and a couple of CPU cores, though a lightweight WireGuard box happily runs on far less.
One thing a VPS does not give you is access to your home LAN. It is a remote tunnel out through the cloud server, which is ideal for privacy and a stable IP, but it will not let you reach a printer or NAS sitting at home.
If your provider uses Carrier-Grade NAT, a cloud VPS is usually the simplest working option. It does not depend on port forwarding through your home router, so the CGNAT problem never comes up.
OpenVPN vs. WireGuard
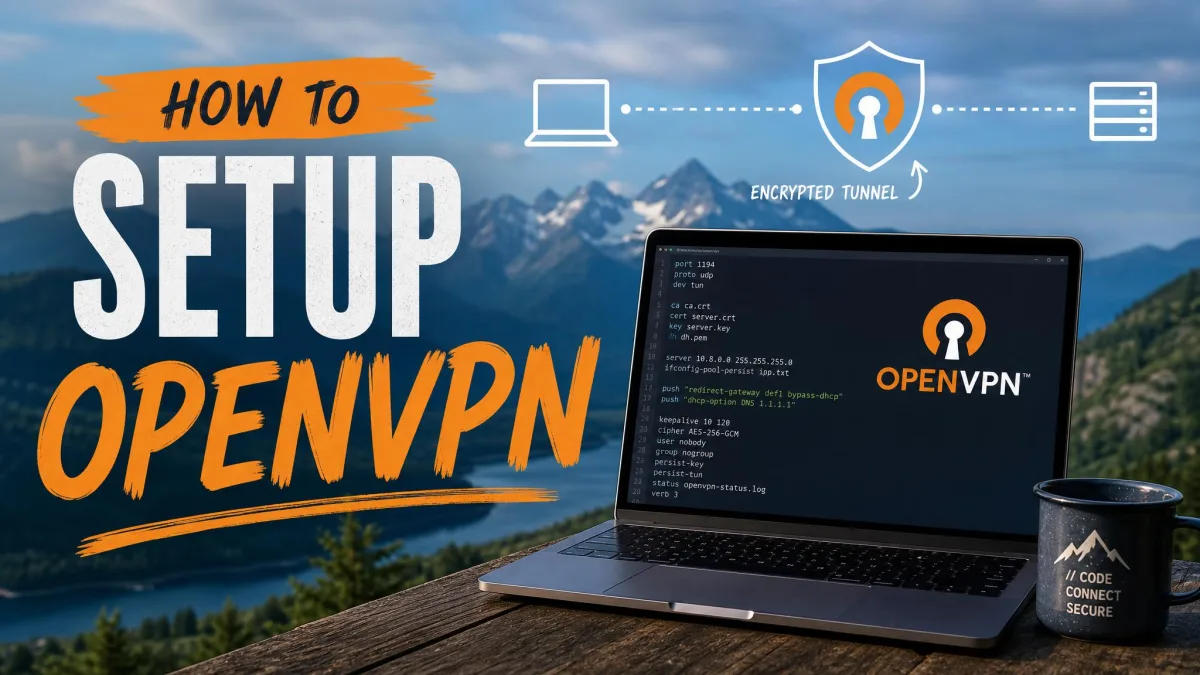
Two protocols dominate self-hosted setups. OpenVPN is certificate-based and highly configurable, which makes it a common choice on a spare PC or Raspberry Pi. Its official client, OpenVPN Connect, connects to either a self-hosted or a provider OpenVPN server.
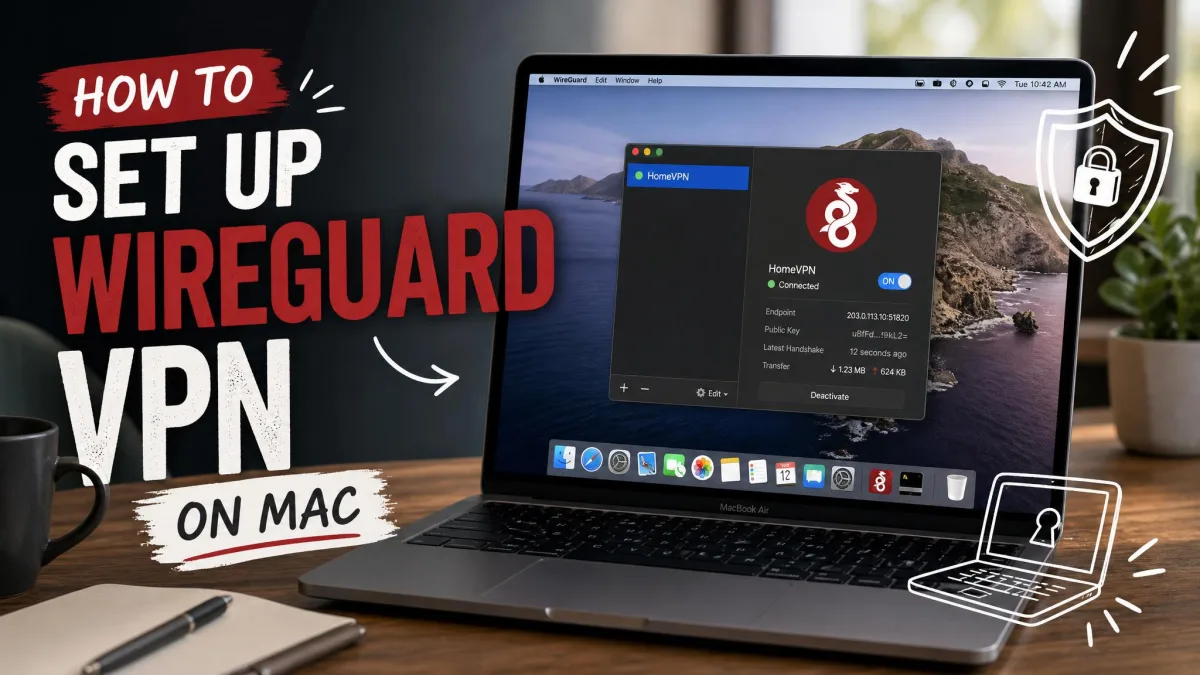
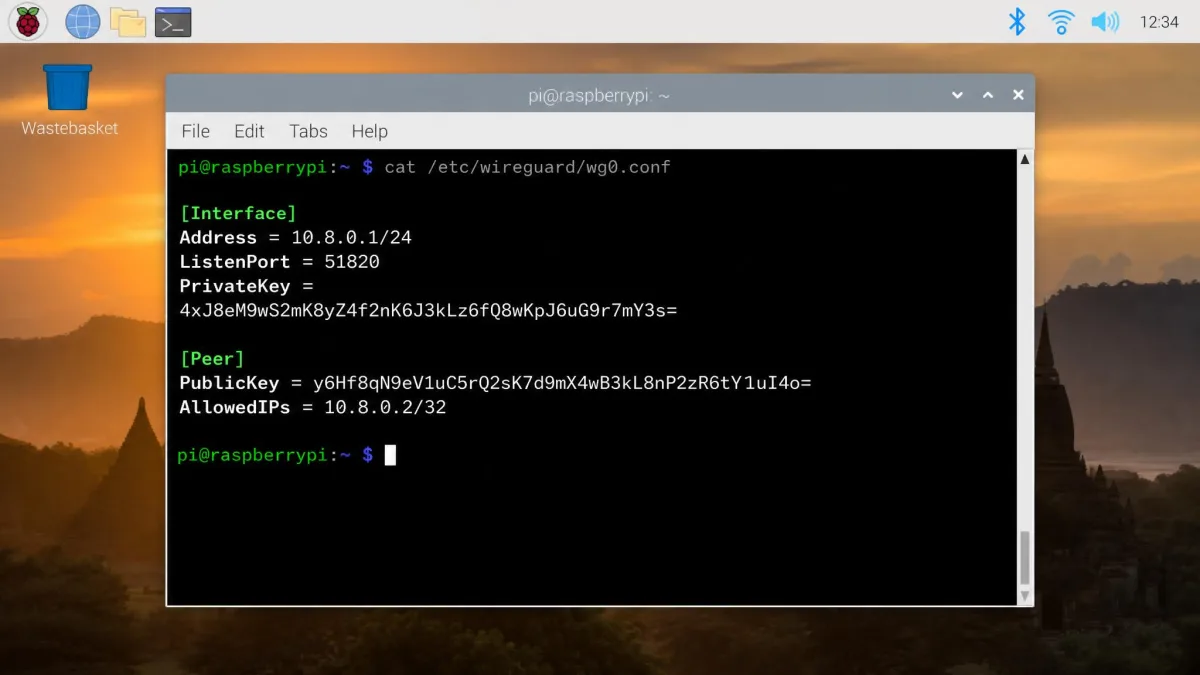
WireGuard takes a leaner approach. It uses key-based configuration with a lighter CPU load, aiming to be faster than OpenVPN and simpler than IPsec, with a small and auditable codebase. It is free and open-source, with kernel components released under the GPLv2 licence, and official install support spans more than forty platforms and packages including Windows, macOS, Linux, iOS, Android, and OpenWrt. When self-hosted speeds feel slow on modest hardware, switching from OpenVPN to WireGuard commonly helps, because encryption overhead is lighter.
Step-by-step server setup
The setup follows the same arc whichever protocol you pick. Provision the machine, whether that is your Raspberry Pi or a fresh VPS. Install the VPN software, generate the server keys or certificates, and create a configuration for each client device you want to connect. On the network side, assign the server a static internal IP, forward the VPN port on your router, and set up Dynamic DNS if your public IP changes.
For a cloud VPS, a well-trodden path is DigitalOcean's WireGuard on Ubuntu tutorial, which walks through the server install end to end. Finish by importing each client configuration into the app on your devices, then connect.
Pros
- Full control over the server, protocol, and configuration
- Free to run on hardware you already own
- A VPS route avoids home-connection and CGNAT problems
Cons
- You own all patching and security on the server
- Home-hosted speed is capped by your upload bandwidth
- Setup is the most demanding of the four methods
With a self-hosted server, security is entirely on you. The box has to be patched constantly, or it slowly turns into an exposed target rather than a private tunnel.
Connecting and Testing Your Devices
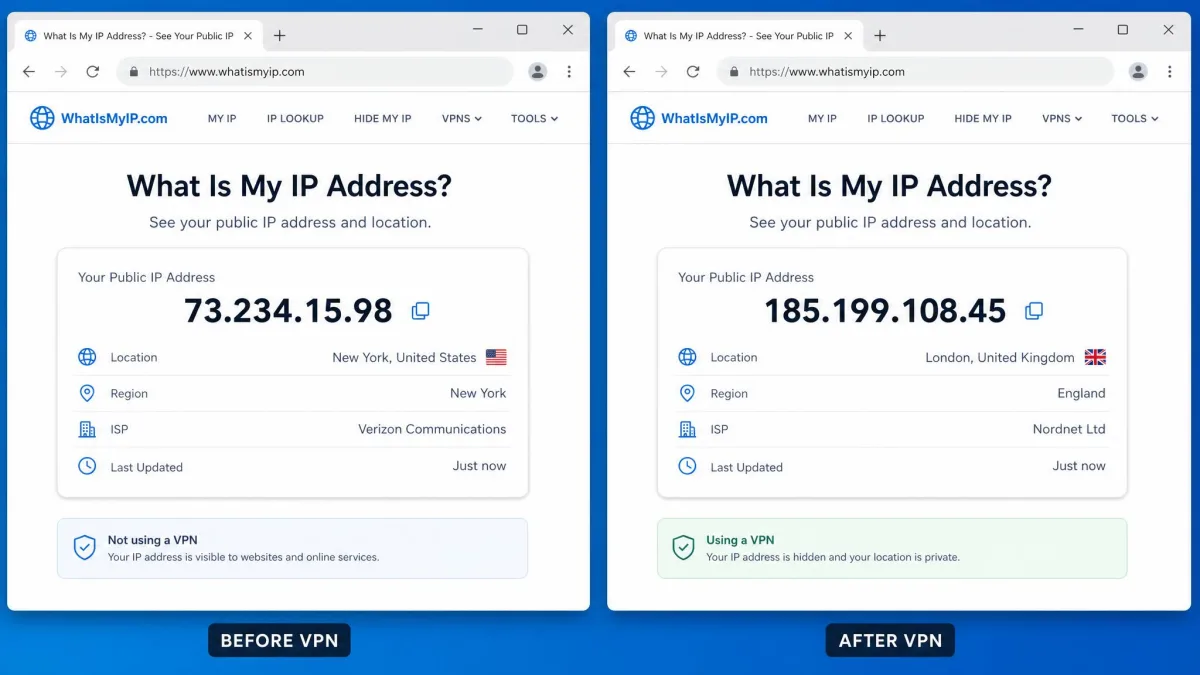
Once the tunnel is up, confirm it actually works before you trust it. Connect a device, then check that your public IP address has changed to the VPN server's address. A quick online IP lookup tells you whether traffic is leaving through the tunnel.
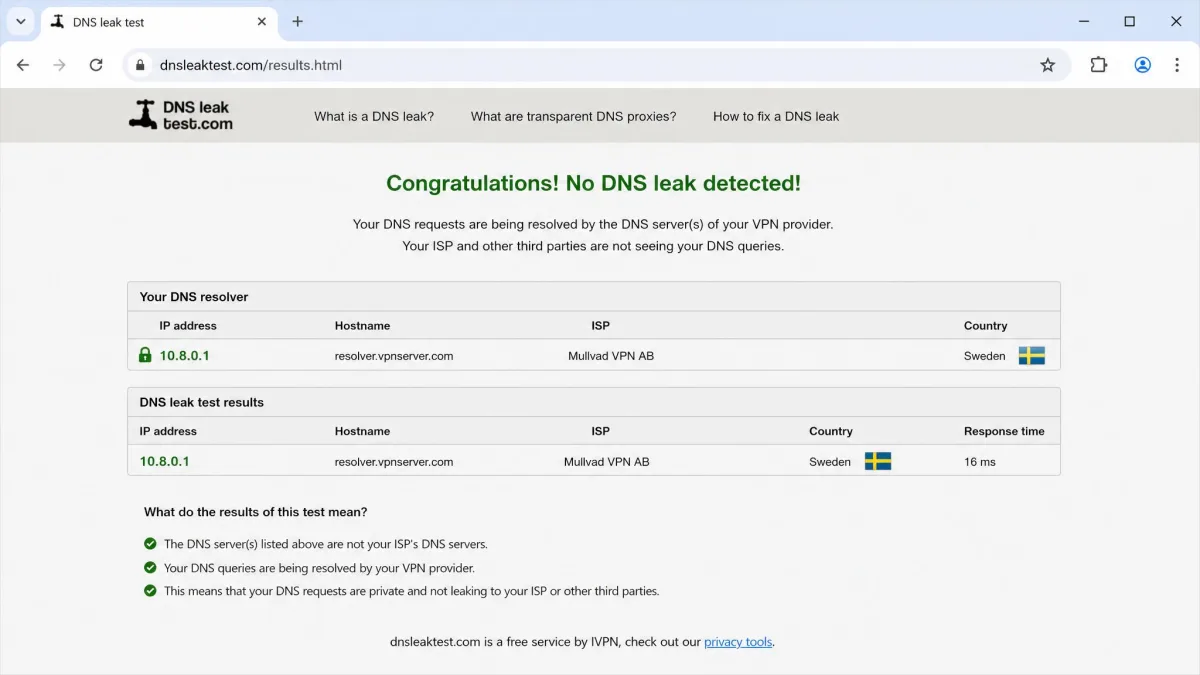
Next, run a DNS leak test. DNS leaks happen when name lookups slip outside the tunnel to your provider's resolvers, which quietly undoes the privacy you set up. A leak test after connecting is the fast way to catch it, and it is the check we always run before calling a setup finished. Finally, test any device that matters, since a router or server setup should cover phones, laptops, and anything else on the network.
Test the connection from outside your home network too, using mobile data rather than your own Wi-Fi. A remote-access server can look fine from inside the house and still fail from the road if port forwarding or Dynamic DNS is not set correctly.
Troubleshooting Common Issues (slow speeds, DNS leaks, connection failures)
Most home VPN problems fall into a few familiar buckets, and each has a clear first thing to check.
Slow or unstable speeds on a self-hosted server usually trace back to encryption overhead on underpowered hardware. Switching from OpenVPN to WireGuard commonly helps, since WireGuard is lighter on the processor. On a home-hosted server there is also a hard ceiling you cannot code around, which we cover in the next section.
DNS leaks show up when requests reach your provider's resolvers instead of staying inside the tunnel. Re-run the leak test, and set your VPN or router to use the tunnel's DNS servers rather than the ones your provider hands out.
Connection failures on self-hosted setups most often come down to mismatched keys or certificates, or expired credentials on one end. Regenerate the client configuration, confirm the server address and port match on both sides, and check that Dynamic DNS is still pointing at your current public IP.
Setting Up Your Own VPN vs. Using a VPN Service
The honest trade-off between hosting your own VPN and paying for a commercial one comes down to speed, effort, and what you are trying to hide.
A home-hosted VPN is bottlenecked by your residential upload speed, which is usually far slower than your download speed. That makes a home server feel noticeably slower than a commercial service, especially for anything you upload or stream back to yourself. Many residential connections also carry bandwidth caps on top of slow upload, which limits a self-hosted VPN further. A commercial provider runs on fast data-center links and sidesteps both problems.
There is also the privacy point from earlier. A self-hosted VPN does not hide your activity from your provider, because your traffic still exits through your home IP. A commercial service routes you out through its own servers instead. Set against that, self-hosting gives you full control and no subscription, and a VPS gives you a stable IP you own. Choose a service for speed, convenience, and location variety. Choose to self-host when control and remote access into your own network matter most.
Tips for Staying Secure and Maintaining Your VPN
A VPN is not a set-and-forget appliance, especially when you host it yourself. With a self-hosted server, security sits entirely on you, so patch the operating system and the VPN software regularly to keep the box from becoming an exposed target. Keep your keys and certificates private, and rotate them if a device is lost.
On the router side, keep the firmware current, since an unpatched router undermines every device behind it. Whatever method you use, run an occasional leak test to confirm the tunnel still behaves, and revisit your Dynamic DNS setup after any provider change. A little routine upkeep is what keeps a VPN reliable over the long run.
Do not leave default admin passwords on a self-hosted server or a flashed router. An exposed VPN endpoint with weak credentials is worse than no VPN, because it hands an attacker a direct route into your network.
Conclusion
Setting up a VPN at home comes down to matching the method to your goal. If you want privacy on a few devices, a provider app has you connected in minutes. If you want the whole house covered, the router method is the one to learn, carefully. If you want a private tunnel you fully control, a spare PC, a Raspberry Pi, or a cloud VPS will get you there, as long as you accept the maintenance and the home-upload speed ceiling that come with self-hosting.
Whichever path you choose, test the connection and run a leak check before you rely on it. Once it is up and running and verified, a home VPN is a genuinely useful layer of privacy and security across your network.