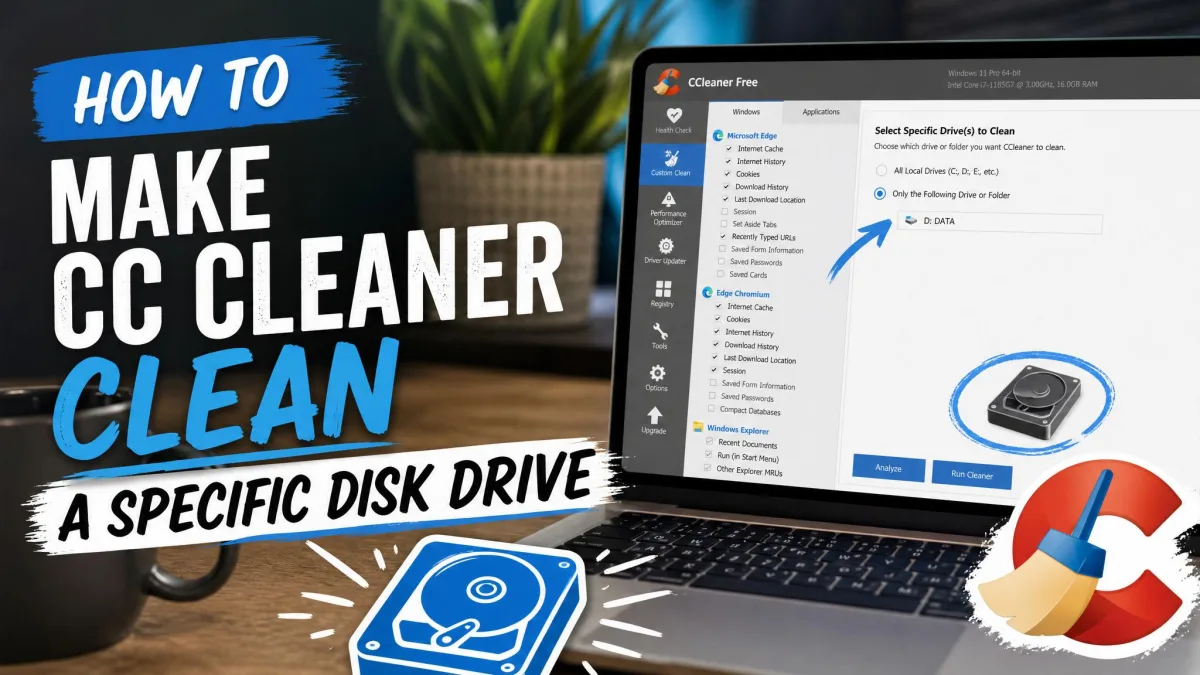
CCleaner cleans the drive that Windows is running from, plus the temporary files and caches that your installed applications keep in their own locations. There is no drive letter box on the main screen and no way to say "clean D: instead of C:". Pointing it at one specific disk drive is possible, but you do it through Custom Clean, Options > Include, and Tools > Drive Wiper rather than through a picker. This guide walks through each method, shows which one fits which job, and explains the one limit you cannot configure your way around.
What CCleaner actually cleans by default
Out of the box, CCleaner looks at two categories of junk files. The first is Windows itself: the Recycle Bin, temporary files, logs, memory dumps, thumbnail caches and browser data belonging to the running installation. The second is your installed applications, each with its own cache and history locations.
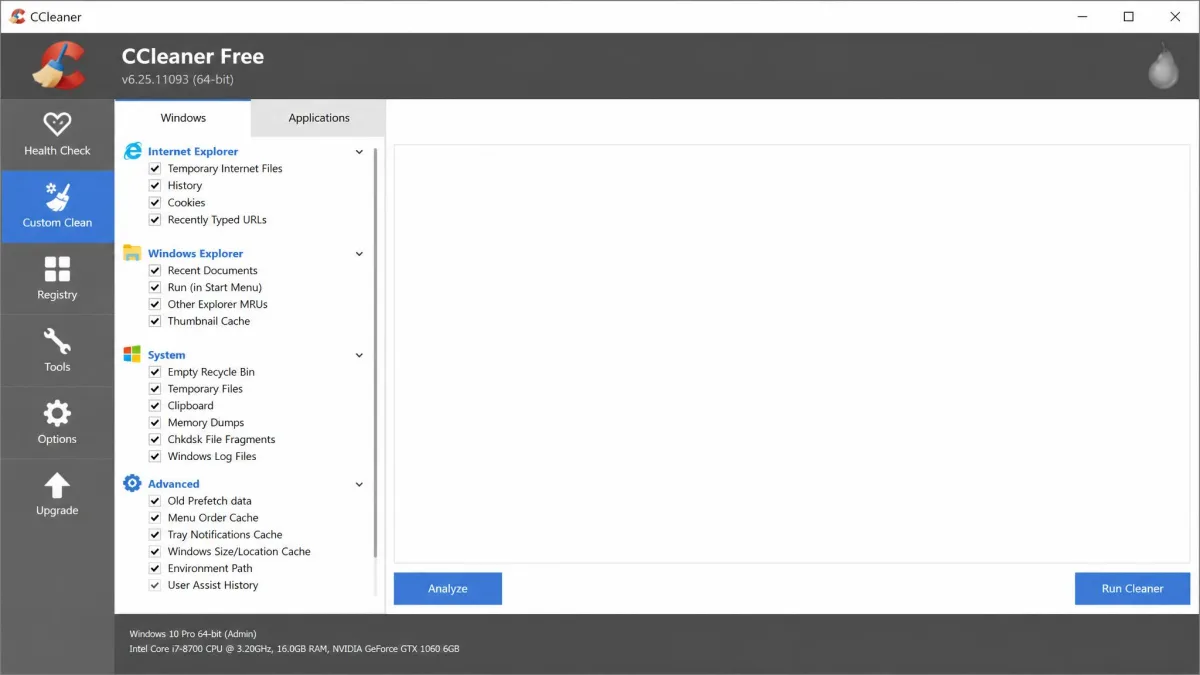
Custom Clean splits those two categories into the Windows tab and the Applications tab, and each tab is a list of checkboxes for a particular area or app. Every one of those checkboxes points at a path that Windows already knows about, which is almost always somewhere on the system drive. That is the whole reason the tool feels drive-blind: it is not scanning volumes, it is visiting a list of known locations.
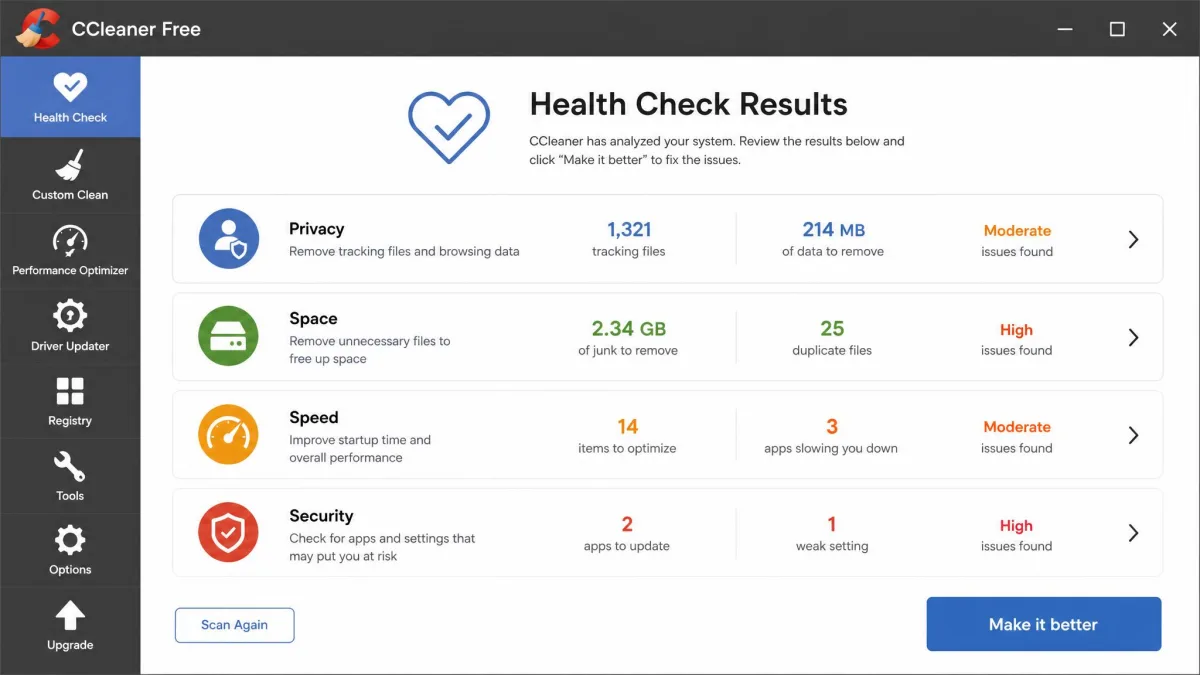
Health Check, the screen that opens when you launch the program, works from the same idea. It reports issues in 4 areas and gives you a one-click clean, but it is really a friendlier front end for cleanup you could select by hand in Custom Clean. It has no drive selection of its own.
Why CCleaner has no drive picker
Windows Disk Cleanup opens with a drive-letter picker, so people reasonably expect the same control here. CCleaner took a different approach. It has no one-click select-a-drive-and-clean-everything control, and drive targeting is manual configuration through Include rules or Drive Wiper.
Health Check and Quick Clean are system-drive only
Health Check in the free tier cleans trackers and junk files, with startup programs and outdated program checks added for Professional. None of those steps ask which volume to work on, because all of them read locations tied to the running Windows install. Run Health Check hoping to relieve a full second drive and nothing on that drive changes.
Why a second drive shows nothing to clean
We see the same result every time someone tries this: pointing CCleaner at a second drive through Custom Clean alone returns almost nothing to clean, because the checkbox rules map to system and per-app locations on the running Windows drive. The program is behaving correctly. You simply have not told it about any path on the other disk yet, and that is what the Include list is for.
Method 1: Target one drive with Custom Clean
Use this method when you want CCleaner to delete specific junk files on a specific disk drive and leave everything else alone.
Step 1: Open Custom Clean and switch to the Applications tab
Launch CCleaner and click Custom Clean in the left sidebar. You will land on the Windows tab. Click across to the Applications tab so you can see everything currently selected across both lists.
Step 2: Uncheck everything you do not want touched
Work down both tabs and clear the boxes for anything you want left alone. If your only goal is to clean up a folder on drive D:, clear both tabs completely so the run touches nothing except your custom path. That is what turns a general cleanup into a targeted one.
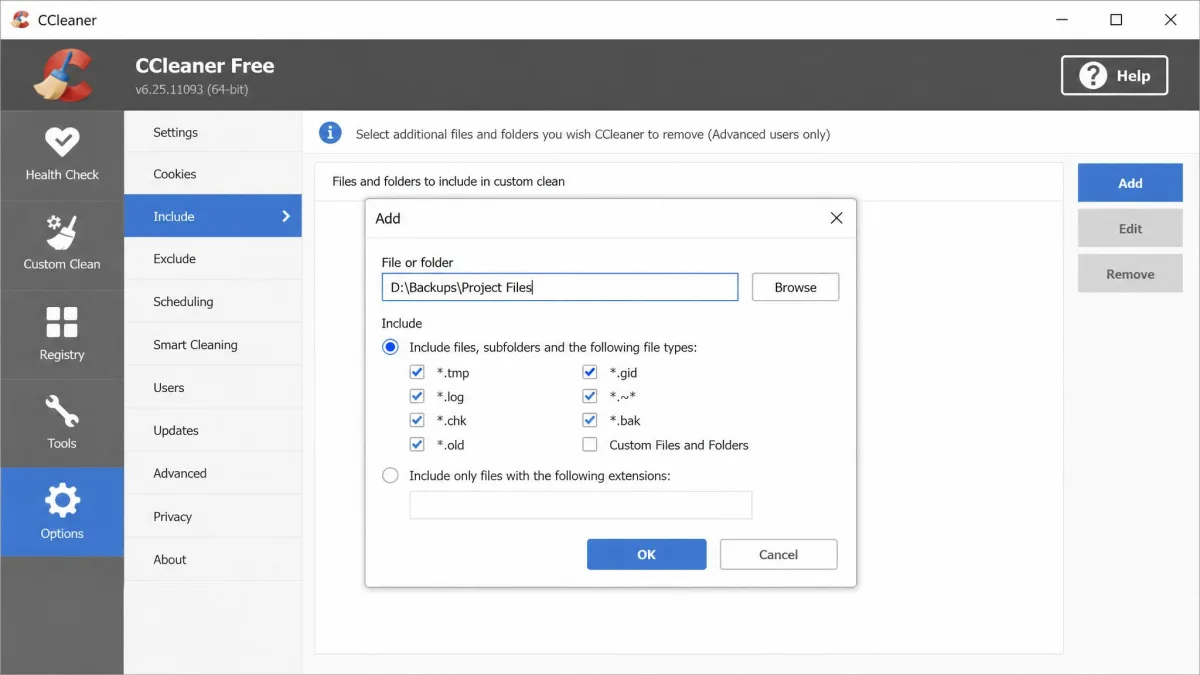
Step 3: Add the drive path in Options > Include
Open Options, then click Include, then click Add. Choose Folder, browse to the location on the drive you want cleaned, and confirm. Custom folders and drive paths are added here, and you can repeat the process to add as many files and folders as you need. The list accepts more than 1 custom entry, but you add them one at a time. Vendor documentation on how to select files and folders to clean covers the file-type and subfolder options available in the same dialog.
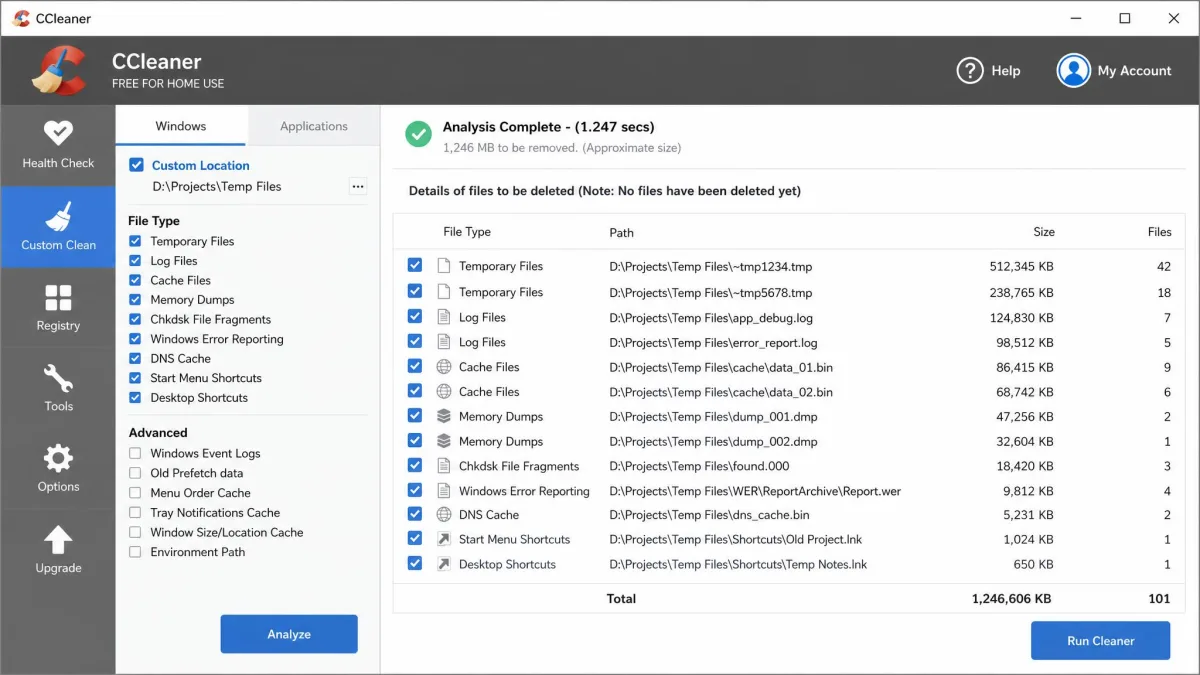
Back on the Custom Clean screen, tick the Custom Files and Folders box under the Windows tab's Advanced section. Without that box, your Include entries are stored but never used.
Adding a folder under Options > Include is the step where files get lost. An over-broad path, for example the root of D: rather than a cache folder inside it, can pull in documents you still need. Point the rule at the narrowest folder that solves the problem.
Step 4: Analyze before you run Clean
Click Analyze rather than Run Cleaner. Analyze shows the file list and the space it would recover, which is the cheapest way to catch a bad Include rule before anything is deleted. Read the list, confirm every path sits where you expect, then run the clean.
Check the drive letter in the Analyze results, not just the folder name. Windows reassigns letters when you plug in external drives, so the D: you configured last month may be a different disk today.
Method 2: Wipe free space on one drive with Tools > Drive Wiper
Custom Clean removes files. Drive Wiper overwrites the space where deleted files used to live, so their remnants cannot be recovered. This is the one part of the program that genuinely lets you choose a disk.
Choosing the drive letter
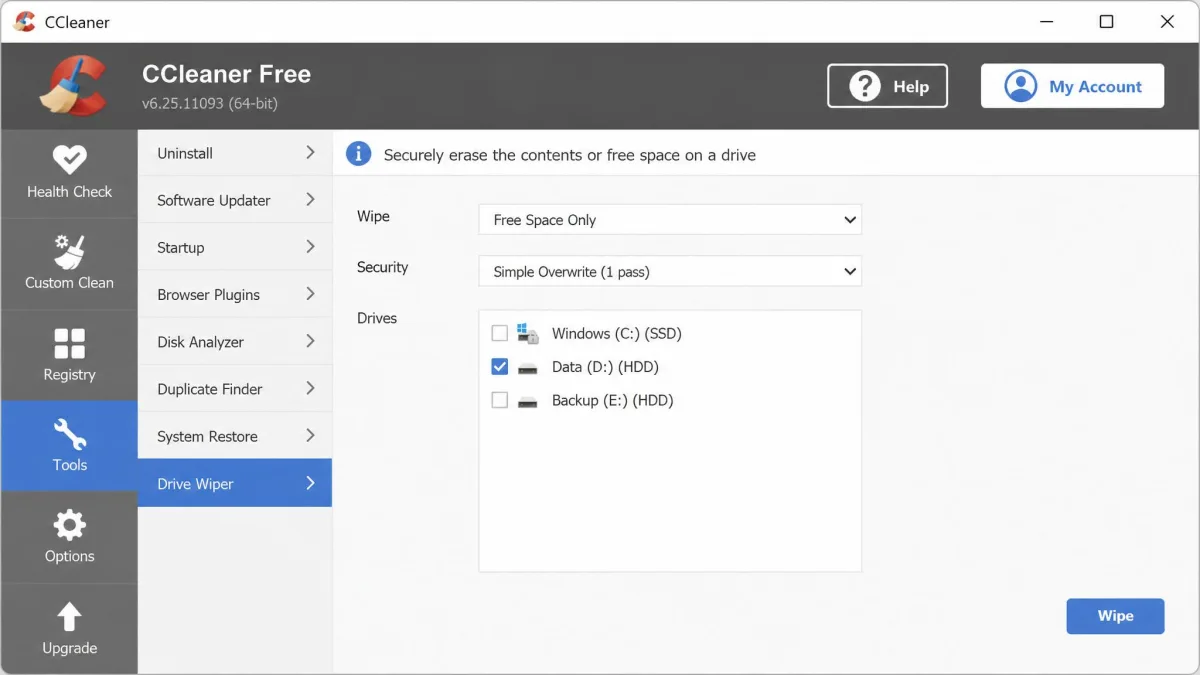
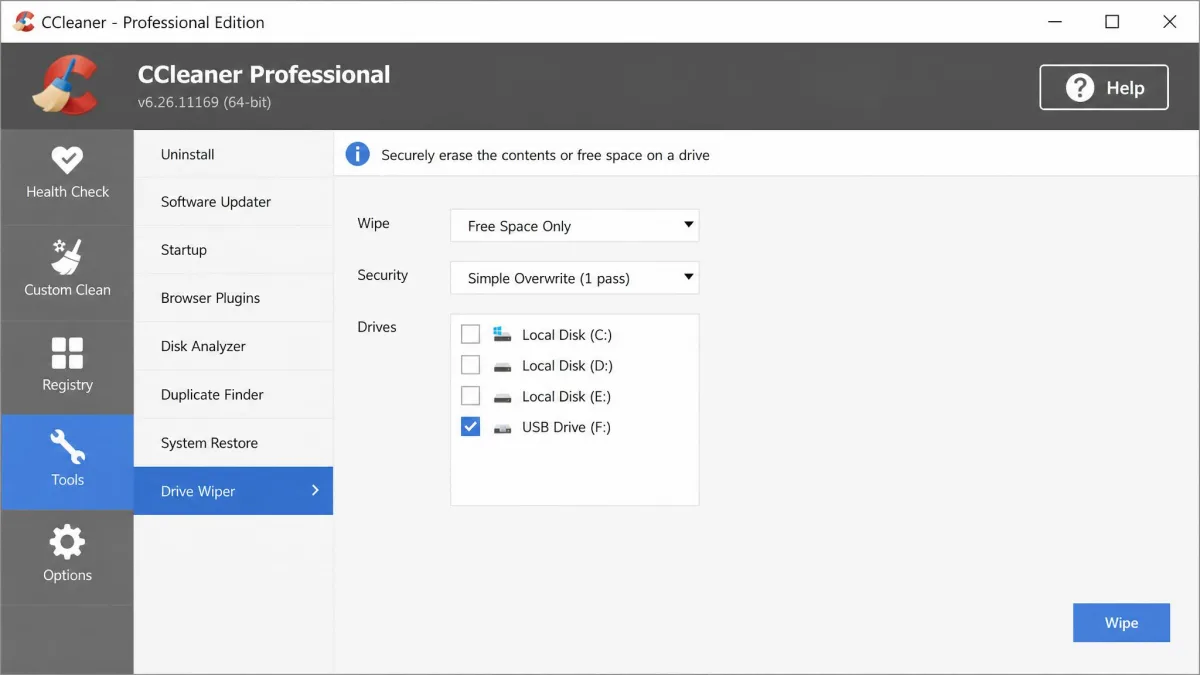
Click Tools, then Drive Wiper. The Drive dropdown lists any drive letter visible to Windows, and it will not offer the drive the running operating system is on. Pick the letter you want and check it against File Explorer before you start.
Free Space Only vs Entire Drive
The Wipe dropdown gives you two choices, Free Space Only and Entire Drive. Free Space Only leaves your files alone and scrubs the unused areas. Entire Drive erases everything on the volume. The two sit one line apart in the same dropdown, which is exactly where accidental full wipes come from.
Entire Drive is not reversible and there is no confirmation step that names your files. Once the overwrite starts, nothing on that volume comes back. Read the Wipe dropdown twice before clicking Wipe, and keep a backup of anything on the drive that matters.
How many passes you actually need
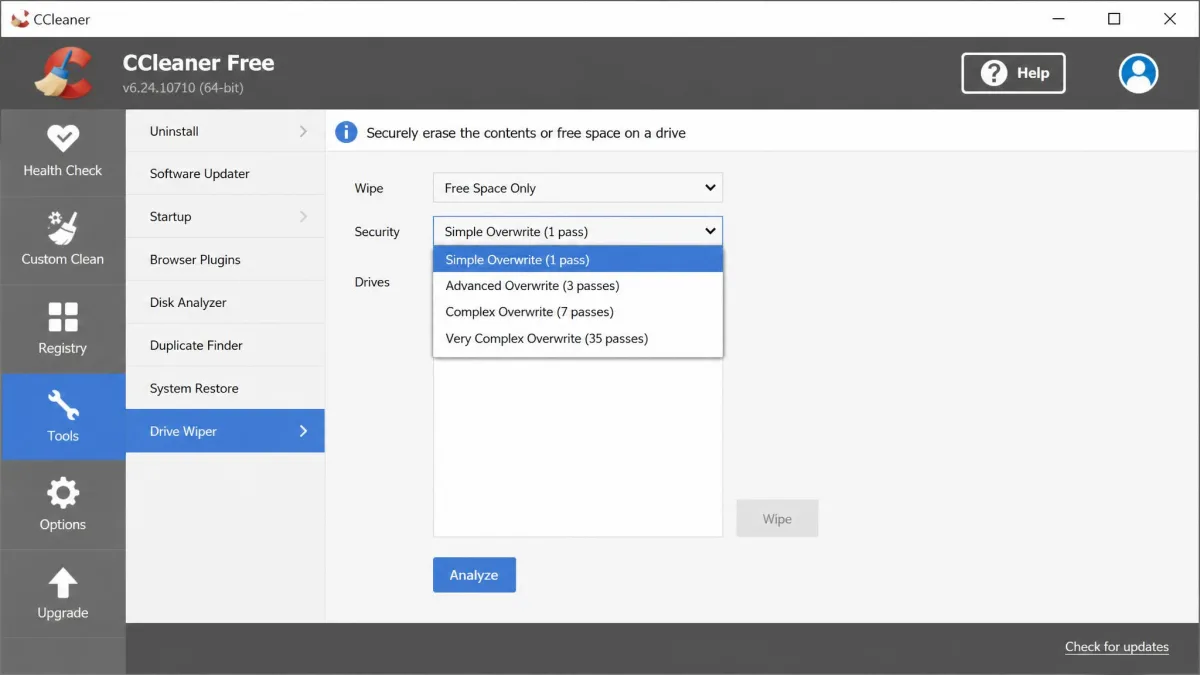
The Security dropdown offers four levels. Simple Overwrite is 1 pass. Advanced Overwrite is 3 passes using the DoD 5220.22-M pattern. Complex Overwrite is 7 passes, and Very Complex Overwrite is 35 passes, the Gutmann method. NIST SP 800-88 guidance holds that a single overwrite pass is enough to make data unrecoverable on modern hard drives.
That gap matters, because the higher pass counts mostly buy time rather than security, and they create a false impression of extra protection. A single-pass free-space wipe of a 1 TB hard drive typically runs two to four hours, though elapsed time swings widely with drive speed, connection type and how much free space is actually being overwritten. Three passes roughly triples it. Thirty-five passes can run for days. Drive Wiper also gives no completion report, so there is no confirmation that the overwrite finished across the whole free area. The vendor guide to CCleaner's Drive Wiper documents the same controls.
Why you should never run Drive Wiper on an SSD
Drive Wiper does software-level overwriting only. It cannot issue ATA Secure Erase or NVMe Sanitize, and it cannot reach data in wear-leveled blocks, over-provisioned areas or remapped sectors. On an SSD you spend write cycles for data the controller may have already moved out of reach, and repeated wiping shortens the drive's life. Use the manufacturer's secure erase tool or BitLocker encryption instead.
Method 3: Clean an external or USB drive
External hard drives and USB flash drives work with both methods. For file cleanup, add the folder you care about under Options > Include exactly as you would for an internal disk. For free-space wiping, plug the drive in and select its letter in Drive Wiper, which uses the same overwrite methods it uses on internal drives.
The catch is coverage. External drives clean fine, but only for the folders you add by hand, so the result is only as good as the paths you enter. There is no automatic detection of junk files on a drive Windows is not running from.
Method 4: Exclude a drive you never want cleaned
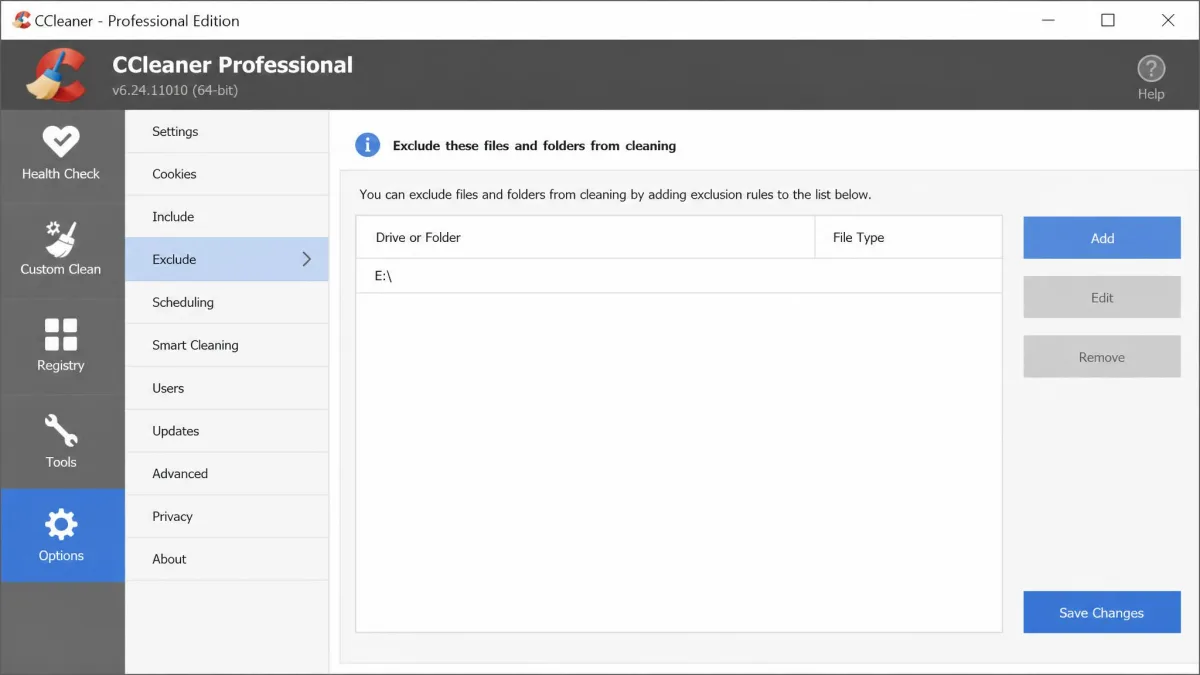
The mirror image of Include is Exclude, and it is worth setting up once. Open Options, then Exclude, then Add, and point the rule at the drive or folder you want protected. The Exclude list accepts an entire drive, a folder, a single file or a registry key, and you can restrict an exclusion to specific file extensions.
If you keep project archives or a media library on a secondary drive, excluding that whole volume takes a minute and removes the risk that a future Include rule or scheduled clean reaches it.
Custom Clean vs Drive Wiper vs Health Check: which to use when
| Method | Can it target a specific drive? | What it removes | Recoverable afterwards? | Safe on an SSD? | Time to run |
|---|---|---|---|---|---|
 |
Yes, via Options > Include paths | Temp files, caches, logs and any custom paths you add | Usually yes, unless secure deletion is on | Yes | Seconds to a few minutes |
 |
Yes, any drive letter except the running OS drive | Free space remnants, or the entire drive contents | No | No, it adds write wear and cannot reach remapped blocks | Two to four hours for 1 pass on a 1 TB hard drive |
 |
No | Trackers and junk files on the system drive | Usually yes | Yes | Under a few minutes |
Use Custom Clean to free up space by deleting junk files in known locations. Use Drive Wiper when you are selling or handing on a hard drive and want deleted data gone for good. Use Health Check for a fast general tidy of the system drive. Our CCleaner vs Wise Disk Cleaner comparison covers how the two handle the same routine jobs.
Settings that give you more control over drives
Secure deletion and wipe-on-clean
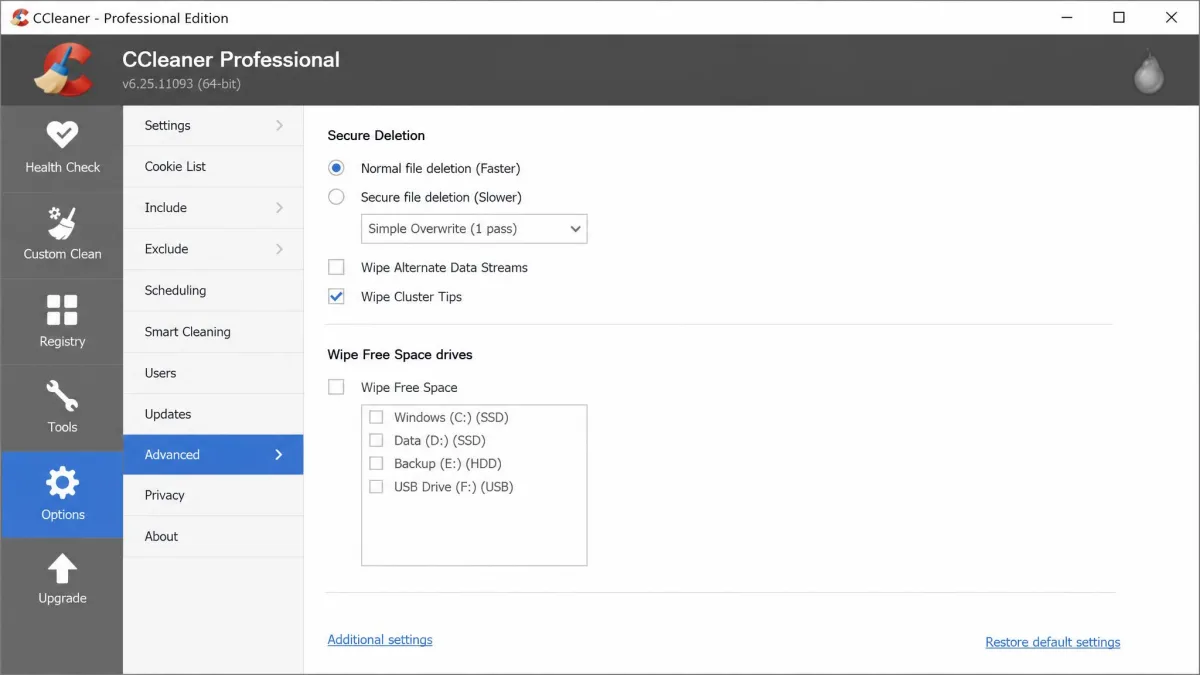
Open Options, then Settings, to switch normal file deletion for secure deletion. Secure deletion applies the wiper to each file CCleaner removes, which makes every clean slower but leaves less behind.
Free space can also be wiped automatically during a normal clean, through the Wipe Free Space box under Custom Clean's Windows tab combined with the drive selection in Options > Advanced. Leave it off. Turning it on stretches a routine cleanup from seconds into a long wait, which is why it ships disabled. You can read the reference for advanced settings in CCleaner lists the rest of the toggles in that panel.
Scheduling a drive clean (CCleaner Professional)
Scheduled cleaning is a Professional feature, so a recurring clean of your Include paths needs the paid tier. CCleaner Professional lists at $44.95 per year for one device, though the list price is discounted often and varies by region, so the figure at checkout may be lower. Purchases from the official store carry a 30-day money-back guarantee. The CCleaner for Windows settings reference covers where the schedule lives once you have the licence, and the intervals on offer are worth checking against the current build before you rely on one.
When we set up drive-specific cleaning, we keep the schedule off until we have run the same Include rules manually two or three times and read the Analyze list each time. A scheduled clean repeats whatever mistake is in your configuration, quietly, on a timer.
The limit: CCleaner only cleans the drive it is running from
Here is the boundary no setting removes. CCleaner cleans only the drive the running Windows installation lives on. It will not clean a second Windows install's files or registry hives, because hives that are not loaded cannot be read. Booting into that second installation still leaves the first drive's registry untouched, for the same reason in reverse.
You can push past part of this by hand. Adding entries to WinApp2.ini and CCleaner.ini points the program at specific program and folder paths on other drives. What you lose is the automatic detection of installed programs and their paths that you get when running under that OS, so it is a lot of manual work for a partial result. The official CCleaner forum thread on running CCleaner across multiple internal drives is where the vendor community works through the details.
For most people the practical answer is simpler. Use Include rules for the folders you know about on the second drive, and accept that its registry and per-app detection stay out of scope.
Mistakes that cost people files
A few patterns account for nearly every bad outcome we hear about.
- Adding a drive root such as D:\ to the Include list instead of a specific folder inside it. Everything below that root becomes fair game.
- Clicking Run Cleaner before Analyze. The Analyze list is the only preview you get.
- Selecting Entire Drive in Drive Wiper when you meant Free Space Only.
- Running Drive Wiper on an SSD, which costs write cycles and still cannot reach remapped blocks.
- Turning on Wipe Free Space during every clean, then assuming the program has frozen when a routine clean runs for hours.
- Leaving a Professional schedule running against Include rules you have never verified.
One more habit is worth keeping. The 2017 supply-chain incident, in which malware was injected into an official CCleaner installer, is still the reason to download only from the vendor site and to stay on a current version.
FAQ
Can CCleaner clean a drive other than C:?
Does CCleaner work on external and USB drives?
Is it safe to run CCleaner on drive C:?
Will CCleaner delete my personal files?
Can CCleaner clean a drive from another Windows installation?
What is the safest way to free up space on a second drive?
Bottom line
CCleaner can clean a specific disk drive, just not through a drive picker. Custom Clean plus an Include rule handles targeted file cleanup on any volume, Drive Wiper handles free space on any drive letter except the one Windows is running from, and Health Check stays on the system drive. Add narrow Include paths rather than drive roots, press Analyze before Run Cleaner every time, and keep Drive Wiper away from your SSDs. Set up that way, the manual configuration gives you more control over what gets deleted than a one-click picker ever would.