A virtual private network, or VPN, is a service that routes your internet traffic through an encrypted tunnel to a remote server. Activating a VPN simply means turning that tunnel on so your device connects through the server instead of straight to the sites you visit. Once it is active, your real IP address is hidden, your traffic is encrypted, and your connection looks like it comes from the server's location rather than your home or office.
That single switch does a lot of work. It keeps your browsing private on public Wi-Fi, stops your internet provider from logging every site you open, and lets you reach content tied to another region. The goal of this guide is to get you from installed to active on whatever device you own, and to help you confirm the connection is actually working.
We tested activation across Windows, macOS, iPhone, iPad, and Android, using both provider apps and the built-in settings each system ships with. In our testing the fastest route was always the same, and the slowest one tripped up more people than any other step. We will show you both, plus how to set up a router, verify the connection, and fix it when it will not turn on.
If you just want the quickest path: install your provider's app, sign in, and tap Connect. That single button handles the server, the protocol, and the encryption for you. Everything else in this guide is for people who need manual control or whole-home coverage.
What Does Activating a VPN Mean (and Why It Matters)
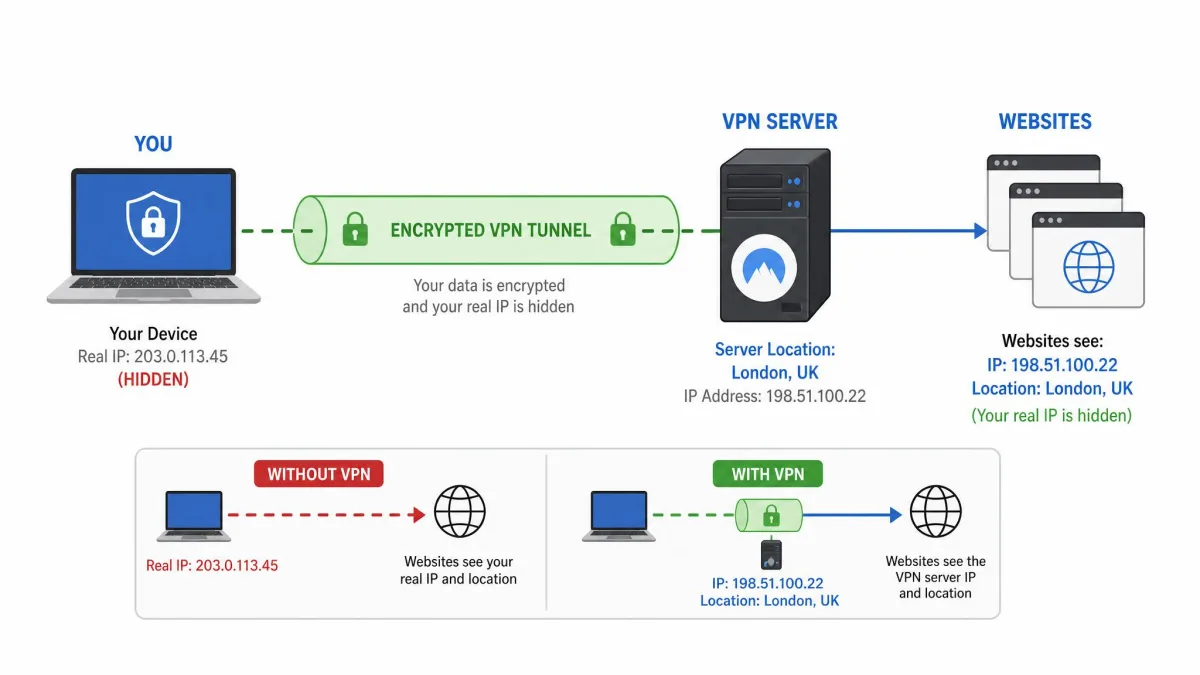
Activating a VPN turns on the encrypted connection between your device and a VPN server. Before you connect, your traffic travels openly across your network and through your internet provider. After you connect, that traffic runs inside a private tunnel, and anyone watching the network sees only scrambled data heading to a single server.
Two things change the moment the VPN is active. First, your public IP address is replaced by the server's address, so websites and apps see the server's location instead of yours. Second, the data itself is encrypted, which matters most on shared networks where other people could otherwise snoop on what you send.
This is why activation is worth doing even when you are just reading email at a coffee shop. Public Wi-Fi is convenient and rarely secure, and a live VPN closes that gap without you thinking about it. If you want a plain-language primer on the technology behind it, Wirecutter's explainer on what a VPN is is a good starting point.
Before You Start: What You Need to Activate a VPN
You need three things before you can turn a VPN on. You need a VPN account with a provider, a device with an internet connection, and either the provider's app or the login details for a manual setup. Most people should start with the app, because it removes almost every decision you would otherwise have to make by hand.
Choose a provider before anything else. A paid service gives you more servers, faster speeds, and features like a kill switch that a free plan usually leaves out. Once you have an account, you will have a username, a password, and access to download the app for each platform you want to protect.
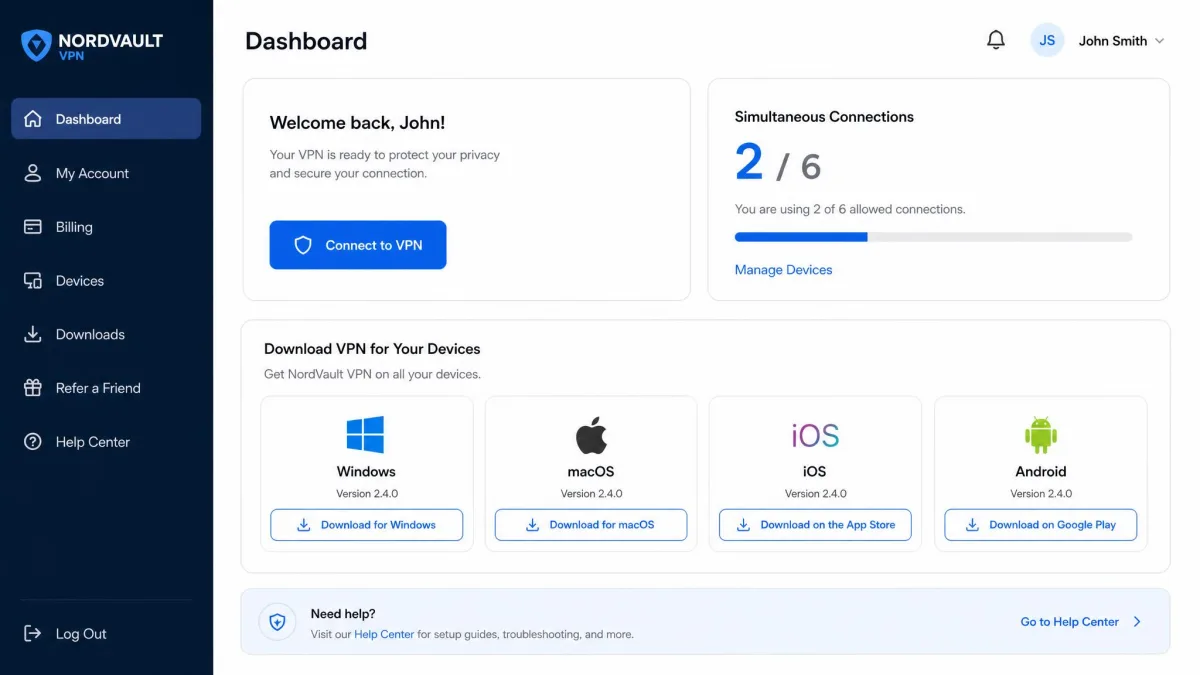
Keep your login details handy. The provider app needs them once at sign-in, and a manual setup needs the server address and credentials for every profile you add. If you plan to activate the VPN on several devices, check how many simultaneous connections your plan allows so you do not get locked out mid-setup.
How to Activate a VPN Using a Provider App
The provider app is the method we recommend for almost everyone. In our testing the app route was far smoother than manual setup: you download it, sign in, tap Connect, and the VPN is active in under a minute. The app picks a fast nearby server, chooses a modern protocol, and turns on the encryption without asking you to configure anything.
Provider apps also cover the widest range of hardware. A single account typically spans Windows, macOS, Linux, iOS and iPadOS, and Android, plus streaming platforms like Android TV, Fire TV, and Apple TV, along with browser extensions and even router firmware. Install the app on each device you want to protect and sign in with the same account.
The steps below are nearly identical on every system, so we will note only what differs per platform.
On Windows
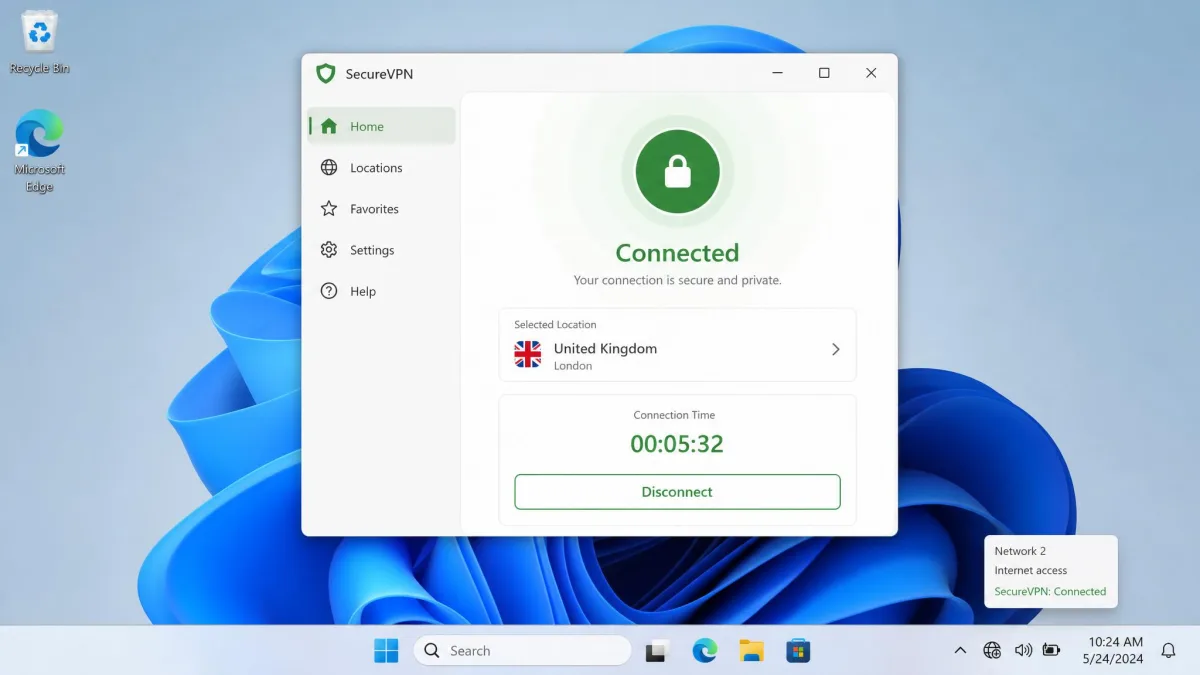
Download the app from your provider's official site or the Microsoft Store, then install and open it. Sign in with your account, and on first launch grant it permission to add a VPN configuration when Windows asks. Click Connect, or Quick Connect, to reach the fastest server, or open the server list to choose a specific country. When the connection is live you will see a status change inside the app and a small shield on the taskbar network icon.
On macOS
Download the app from the provider's site or the Mac App Store and open it. Sign in, then approve the VPN configuration prompt that macOS shows the first time. Click Connect to activate the nearest server, or select a location from the list. macOS marks an active VPN with a status indicator in the menu bar, and the app itself will show the session as connected.
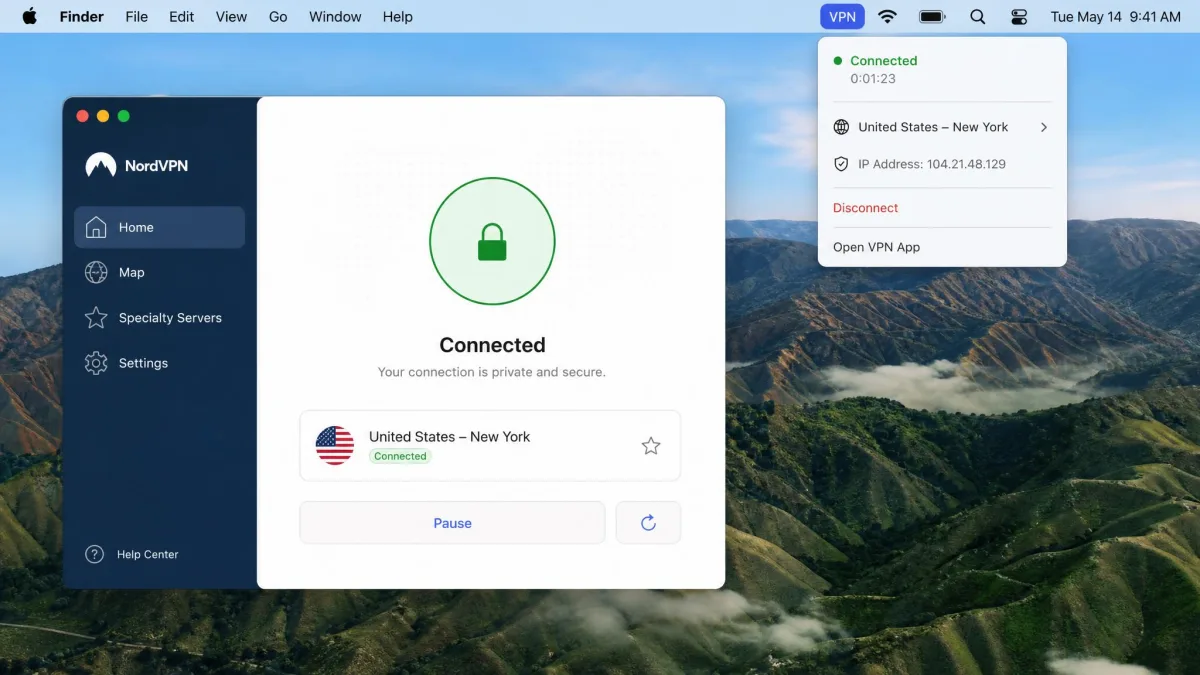
On iPhone and iPad (iOS)
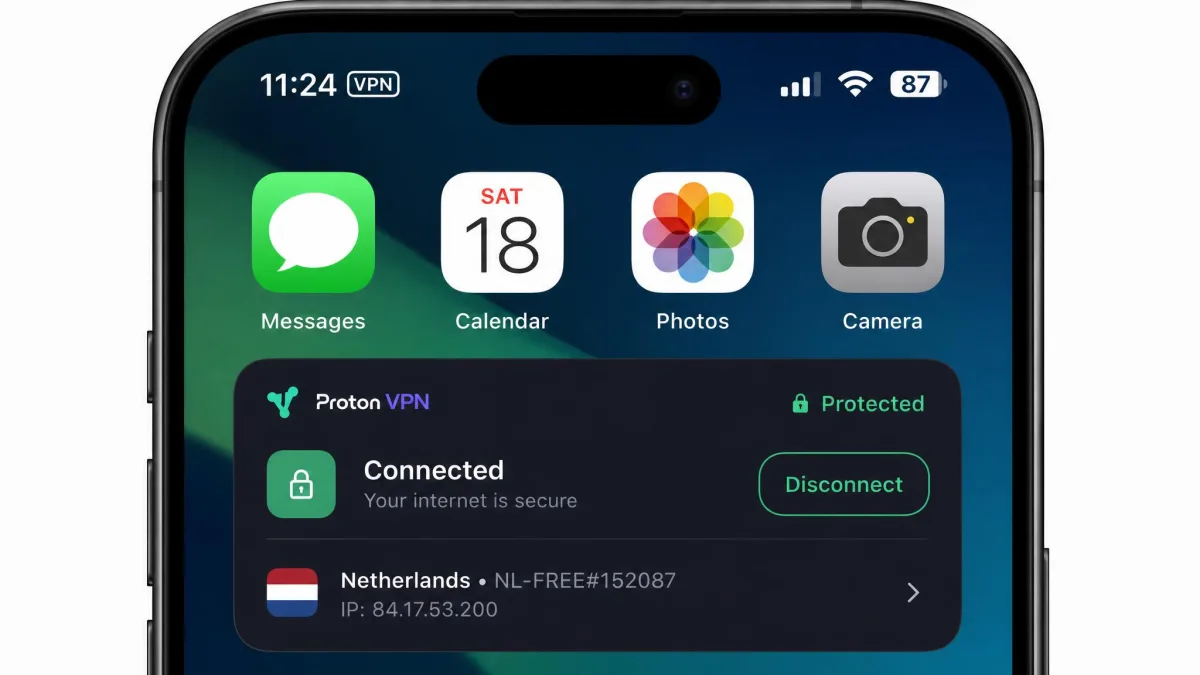
Install the provider app from the App Store and open it. Sign in with your account, then allow the app to add a VPN configuration when iOS prompts you, confirming with Face ID, Touch ID, or your passcode. Tap Connect to activate. When the tunnel is live, a small VPN badge appears in the status bar at the top of the screen, which is the quickest way to confirm it is on.
On Android
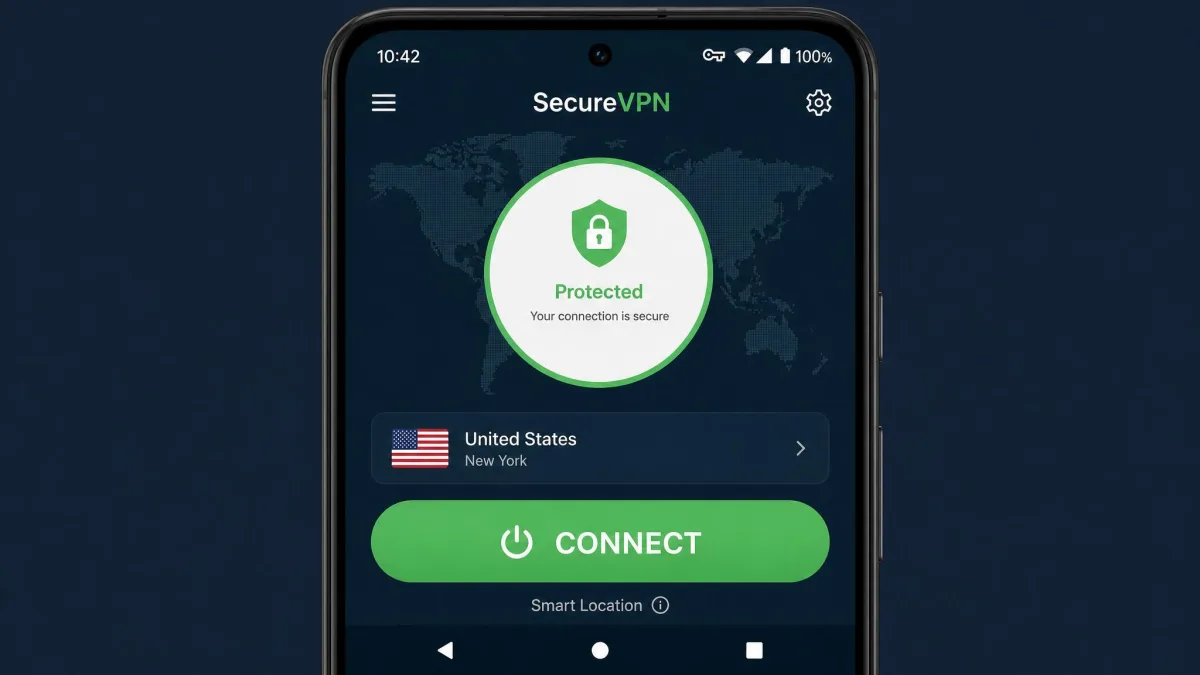
Download the app from the Google Play Store or the provider's site, open it, and sign in. Approve the connection request Android displays the first time, then tap Connect. A key icon appears in the status bar while the VPN is active. If you want the tunnel to stay on permanently, you can pair the app with Android's Always-on VPN setting, which we cover in the manual section below.
How to Activate a VPN Manually (Built-In Settings)
Every major operating system includes a built-in VPN client, and you can activate a VPN without any app at all. This path is worth knowing, but treat it as a fallback rather than the default. Built-in clients expect protocols like IKEv2, IPsec, or L2TP, and most consumer VPN providers no longer publish the manual credentials those protocols need. In practice, that means the manual route often fails for a typical subscription service, so use it only when your provider explicitly supplies manual config details or when you connect to a work or self-hosted server.
The built-in VPN client is best suited to corporate or self-hosted connections where an administrator gives you the server address and credentials. If you subscribe to a consumer VPN, check whether it even offers manual details before you start, because many now support only their own app.
Windows 11 built-in VPN
The built-in client is available in Windows 11, though not in Windows 11 SE. To create a profile, open Settings, then Network & internet, then VPN, and choose Add VPN. Set the VPN provider to Windows (built-in), enter a connection name, the server address, the VPN type, and your sign-in info, then Save.
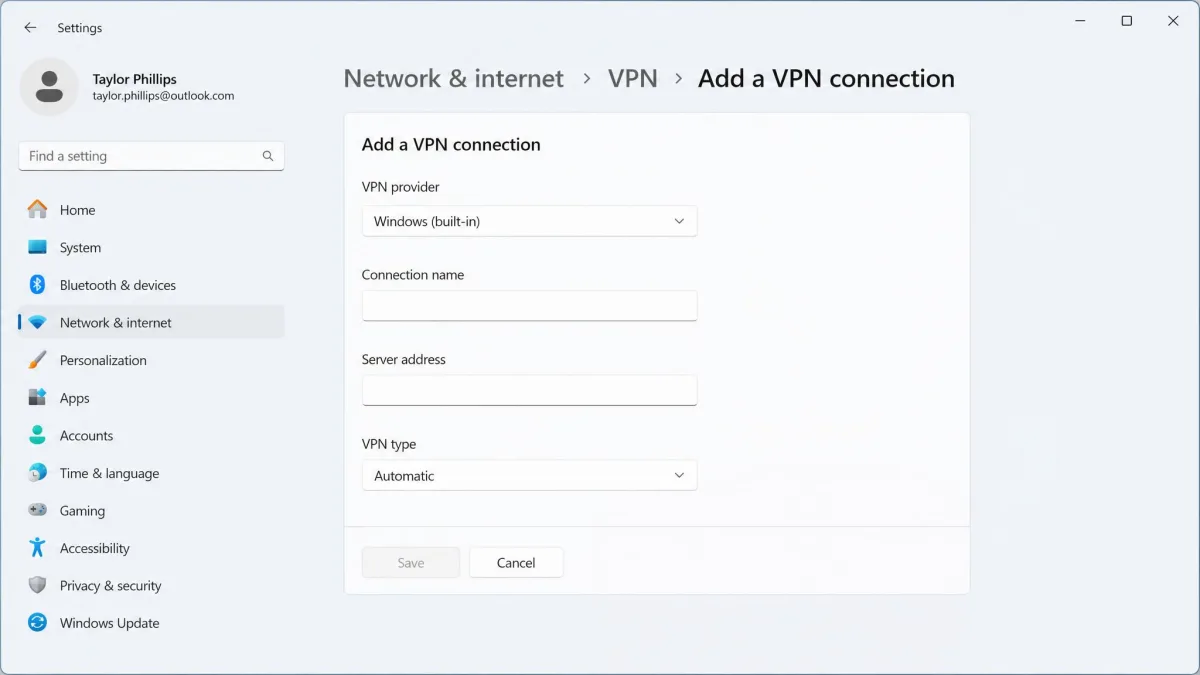
To turn it on, open the taskbar network flyout, select the VPN, and toggle it on, or go back to Settings, Network & internet, VPN and select Connect. Microsoft's own walkthrough on how to connect to a VPN in Windows covers the same fields if you get stuck.
macOS built-in VPN
Open System Settings, then Network, click the Action pop-up menu, and choose Add VPN Configuration. Select the protocol you need, which can be L2TP over IPSec, IKEv2, or IPSec. Enter a display name, the server address, and your credentials, then click Create. The new configuration appears in the network list, and you activate it by turning its toggle on.
iOS / iPadOS built-in VPN
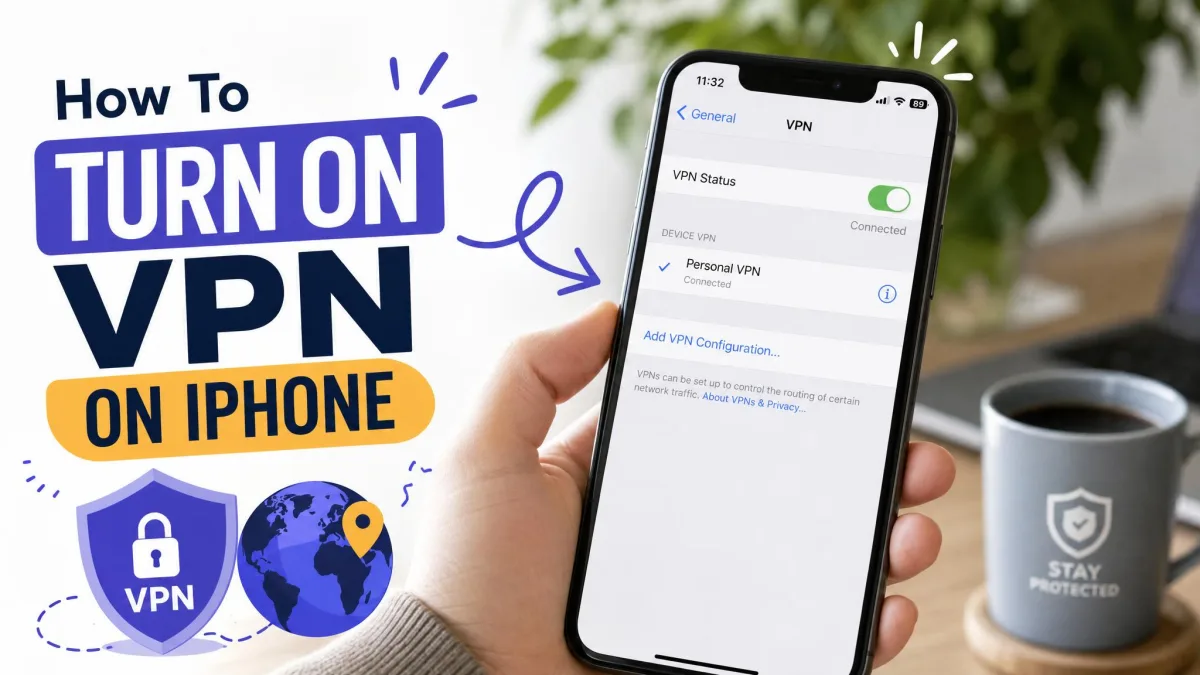
On an iPhone or iPad, open Settings, then General, then VPN & Device Management, then VPN, and choose Add VPN Configuration. Pick the Type, which can be IKEv2, IPsec, or L2TP, and enter the description, server, remote ID, and your username and password. Save the profile, then flip the VPN switch at the top of the VPN screen to activate it.
Android built-in VPN
Open Settings, then Network & internet, then VPN. On Samsung phones the path is Connections, then More connection settings, then VPN. Tap the plus or Add icon, enter a name, choose the type such as IKEv2/IPsec MSCHAPv2, and add the server address and credentials, then Save. Tap the profile to connect. Android also offers Always-on VPN plus a Block connections without VPN lockdown toggle, reached through the gear icon next to a saved profile, which keeps the tunnel running full time. In our testing this manual path on Android often failed, because very few consumer providers publish the config details it needs, so the app is almost always the better choice here.
How to Activate a VPN on a Router (Whole-Home Protection)
Activating a VPN on your router protects every device on the network at once, from smart speakers to game consoles that cannot run a VPN app of their own. Instead of installing software on each device, you set the tunnel up once on the router, and everything connected through it is covered automatically.
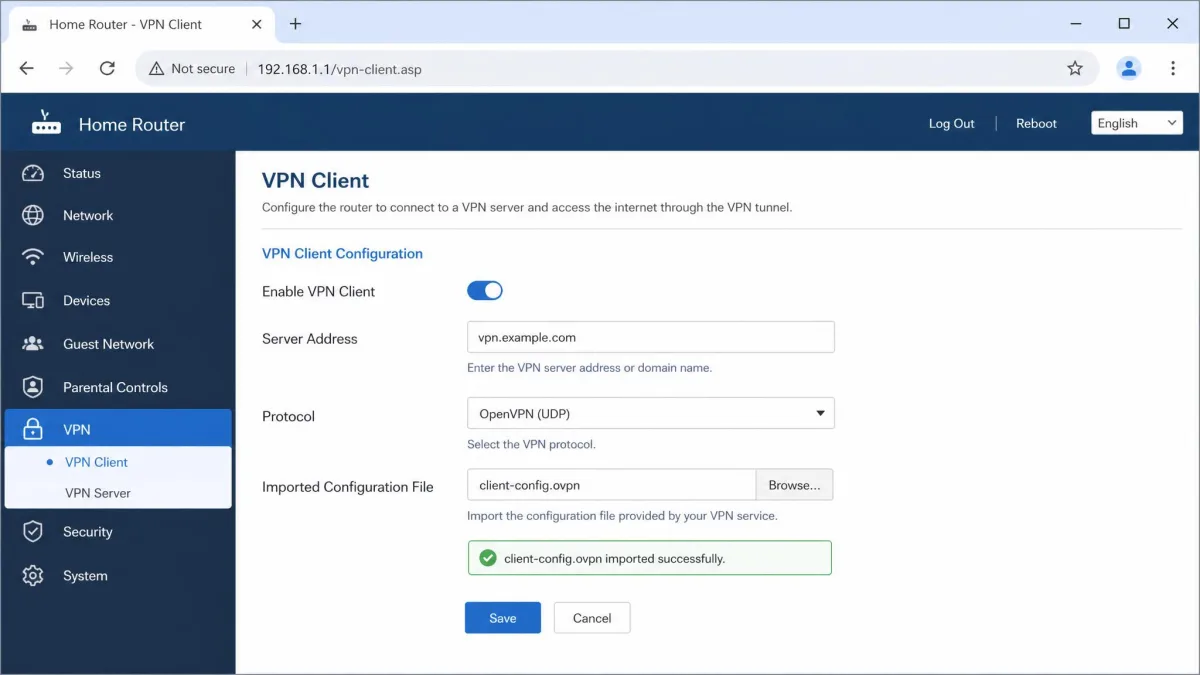
The exact steps depend heavily on your router. Some models run VPN-ready firmware out of the box, while others need custom firmware such as OpenWRT, DD-WRT, or ASUSWRT, and a few people buy a pre-configured router to skip the flashing entirely. The general flow is the same across most hardware, though. You log in to the router's admin panel in a browser at its gateway address, such as 192.168.1.1, open the VPN Client section under the advanced settings, and add a new profile. Then you import the OpenVPN (.ovpn) or WireGuard config file your provider supplies, along with any certificates, keys, or username and password it includes, save, and enable the entry to connect. An OpenVPN profile is usually a single .ovpn file with the certificates embedded, while a WireGuard profile is a config holding a private key, the peer's public key, and endpoint details that you paste into the router's WireGuard interface.
The menu paths differ enough between firmwares that we always check the provider's own router guide first. Stock ASUSWRT, TP-Link, and Netgear firmware expose a VPN Client page in the GUI, whereas OpenWrt makes you install the WireGuard package and build an interface by hand under Network, then Interfaces. One quirk caught us out more than once: some routers reject a WireGuard config until you hand-edit it, and TP-Link's client in particular refuses files that still carry IPv6 addresses or MTU values. Remember too that a single WireGuard config only connects on one client at a time, so reusing the same file on a second device knocks the first one offline.
Whole-home coverage has a trade-off. A router tunnel is convenient, but it can be slower than a per-device app because the router hardware handles all the encryption for the entire household. If speed on a single device matters more than covering everything, the app on that device is usually faster.
How to Activate a VPN on a Smart TV or Streaming Device
Streaming devices are a common reason people want a VPN, and there are a few ways to activate one. Android TV and Google TV, Amazon Fire TV, and Apple TV can all install a native VPN app straight from their built-in app store, and that is the simplest route: download it, sign in, and tap Connect just as you would on a phone. Apple TV needs tvOS 17 or later to run those apps, so update the box first if it is on an older release. One caveat we ran into is that even on a platform that supports VPN apps, only a handful of providers publish a dedicated TV app, so your choice of provider on the device is narrower than it is on a phone or laptop.
Roku, including both the sticks and Roku TVs, has no native VPN app, and most smart-TV operating systems (Tizen, webOS, SmartCast, VIDAA, and Saphi among them) are in the same boat. On those devices you have two options. You can activate the VPN at the router level so the TV is covered through the network, which is the practical route we reach for since the set itself cannot run a VPN app, or you can use a Smart DNS feature some providers include for streaming hardware. The router route protects the device fully, while Smart DNS reroutes only certain traffic and does not encrypt the connection, so choose based on whether privacy or simple region access is your goal.
How to Check That Your VPN Is Active and Working
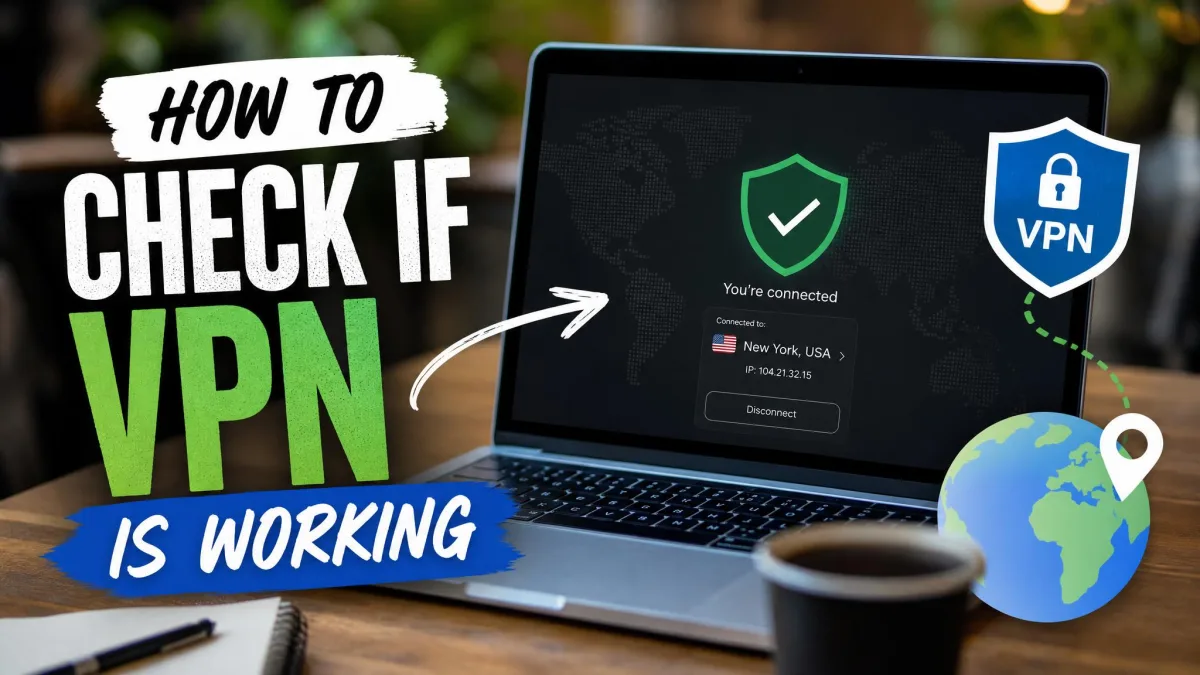
Turning a VPN on and confirming it works are two different steps. The easiest confirmation is visual: look for a blue shield on the Windows taskbar icon or a VPN badge in the iPhone status bar. If the indicator is there and the app shows a connected status, the tunnel is up.
For a stronger check, verify your IP address changed. Note your public IP before you connect, then recheck it after connecting. A changed IP that matches your chosen server's location means the VPN is routing your traffic correctly. If the address is the same as before, the connection is not active even if the app claims otherwise.
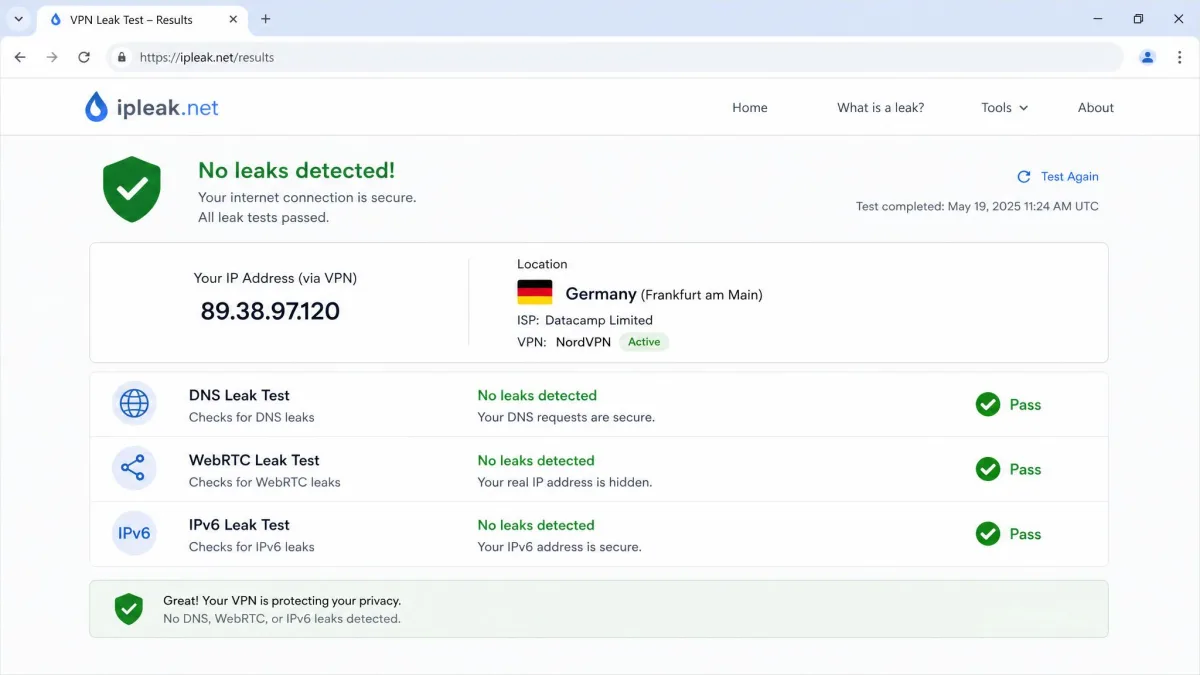
A complete check goes further and runs IP, DNS, WebRTC, and IPv6 leak tests to confirm nothing is escaping outside the tunnel. These tests catch the subtle failures a quick IP check misses, such as DNS requests slipping out to your internet provider while everything else looks fine.
Troubleshooting: When Your VPN Won't Activate
When a VPN refuses to connect, the cause is usually one of a handful of common problems. Working through them in order clears most failures within a few minutes.
Start with the server. Overloaded, down, or network-blocked servers are a frequent reason a tunnel will not establish, and switching to a different server or location often clears it instantly.
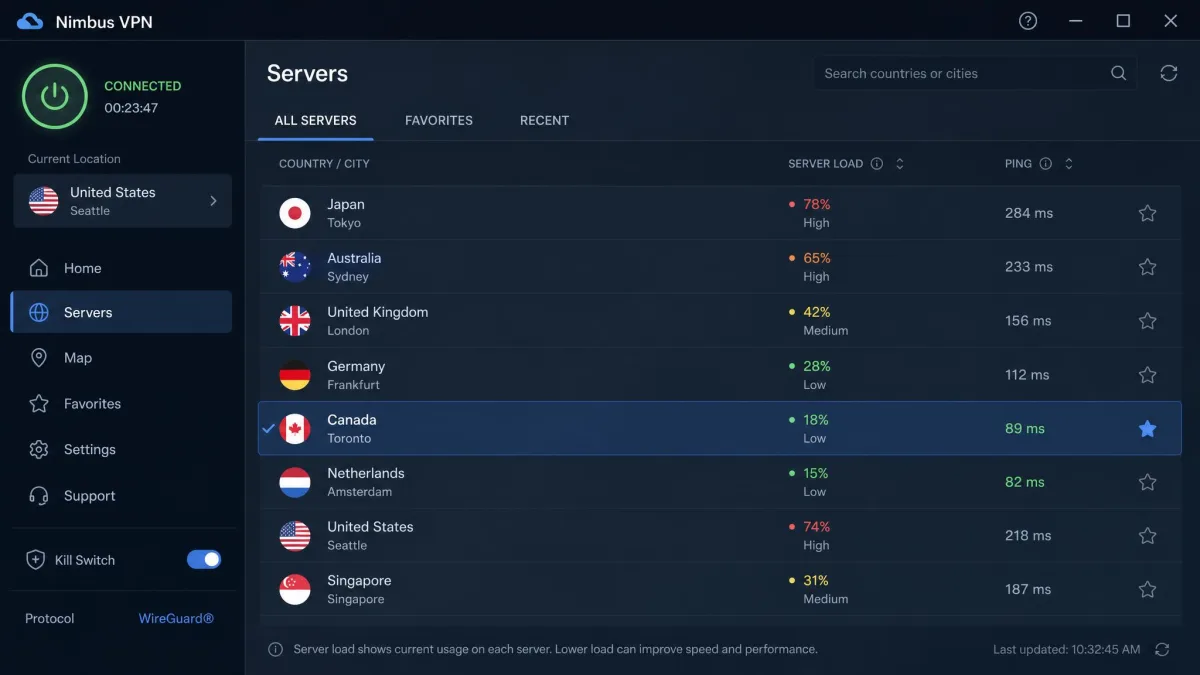
Next, look at the kill switch. A misconfigured kill switch can block all traffic even while the VPN is still trying to connect, which makes it look like the VPN itself is broken. The kill switch also behaves differently by app: some restore your internet the moment you disconnect, while others, including NordVPN's Windows app, keep you offline until the VPN reconnects.
Local software is the next suspect. Firewalls and antivirus tools commonly interfere with a VPN by blocking the ports it uses or blacklisting its server IP ranges, so temporarily disabling them tells you fast whether they are the culprit. DNS is another frequent offender. Switching to a public DNS resolver such as Google at 8.8.8.8 or Cloudflare at 1.1.1.1 can fix connection failures caused by your internet provider's own DNS.
Connections drop most often when a device switches networks, such as a laptop moving from Wi-Fi to ethernet or a phone bouncing between cellular and Wi-Fi. If your VPN keeps dropping in daily use, enabling the app's auto-connect and kill switch together keeps the tunnel from silently failing during those hand-offs.
If none of that helps, reinstall the app or update it, since a stale build can carry bugs that block activation. We have seen kill-switch crashes reported specifically on Linux and macOS builds, so an update alone sometimes fixes an app that will not connect.
Can You Activate a Free VPN? Pros and Cons
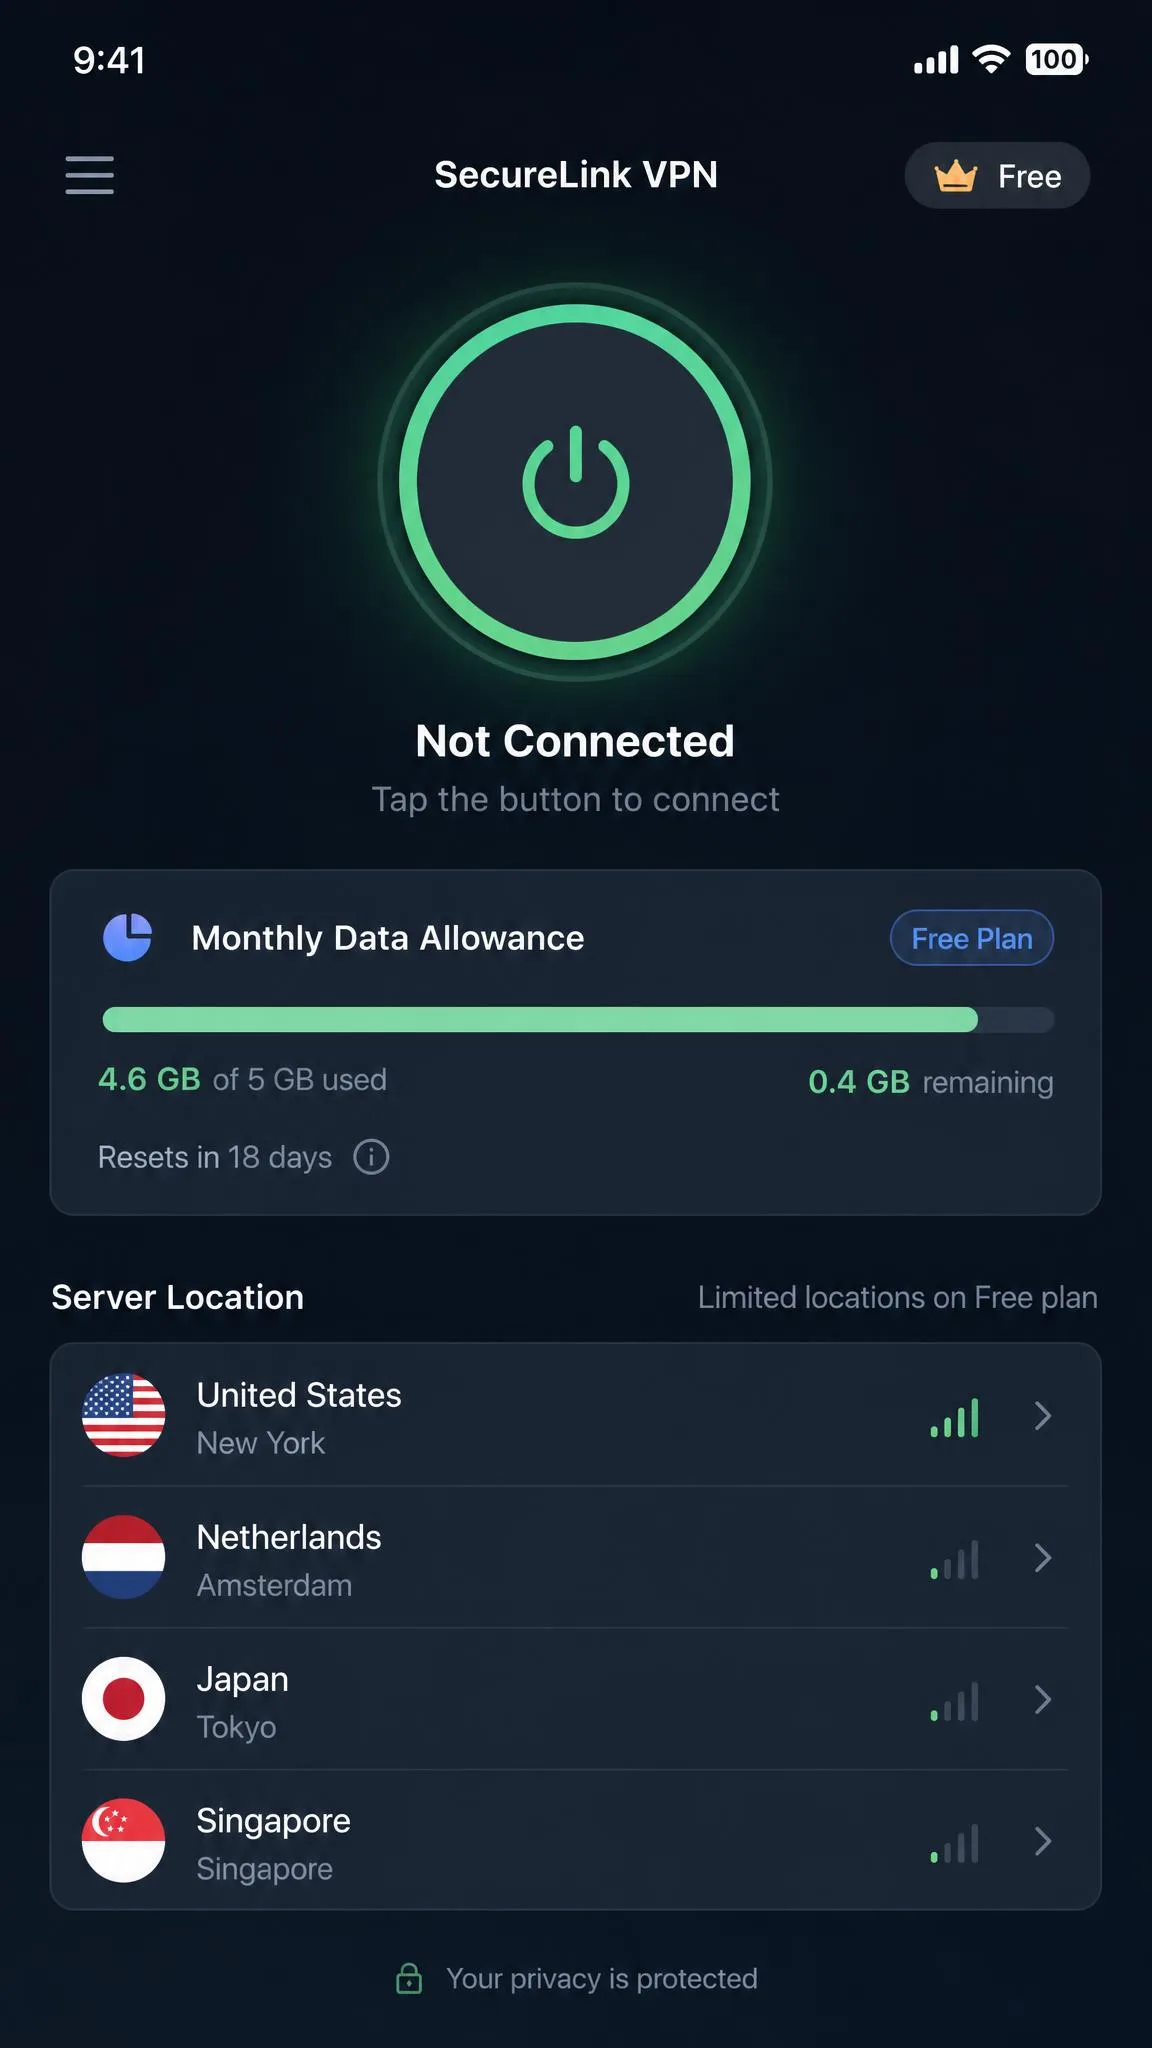
You can activate a free VPN, and reputable providers such as Proton VPN offer a free tier across multiple platforms. A free plan is a fair way to try the activation process and cover light, occasional use. It is not a full substitute for a paid service, though, and the limits show up quickly once you rely on it.
Pros
- No cost to try the setup and see how activation works
- Reputable providers offer a genuinely private free tier
- Fine for occasional use on public Wi-Fi
Cons
- Fewer servers and slower speeds than paid plans
- Data caps and limited locations on most free tiers
- Many free apps lack a kill switch and other safety extras
- Some free VPNs monetize by logging or selling your data
The biggest risk is not the honest free tiers but the low-quality free apps that fund themselves by harvesting user data. If privacy is the reason you are activating a VPN in the first place, a free app that logs your traffic defeats the point. Stick to a free tier from a provider with a clear no-logs policy, and treat it as a trial rather than a permanent setup.
How to Choose the Right VPN Provider (Quick Comparison)
The right provider depends on what you are protecting and how. A good service gives you enough servers to find a fast connection, modern protocols, an audited no-logs policy, and a kill switch. Server location matters too: pick a provider with servers in the regions you actually need, since a nearby server is almost always faster than a distant one. As an example, Proton VPN advertises servers in 140 or more countries, though vendor counts like that change often as networks grow.
The other decision is which activation method fits your situation. The table below compares the three main ways to turn a VPN on, so you can match the method to your priorities before you subscribe.
| Method | Provider app | Manual (built-in settings) | Router |
|---|---|---|---|
| Ease of activation | Easiest: install, sign in, one-tap Connect | Fiddly: enter server, protocol, credentials by hand | Hardest: firmware and config per model |
| Security | Full-device tunnel plus kill switch and extras | Full-device tunnel, fewer safety extras | Whole-home, every connected device |
| Device coverage | Per-device app install | Per-device manual profile | All devices on the network at once |
| Speed | Optimized server picking | Depends on chosen protocol and server | Can be slower, limited by router hardware |
For most people the provider app wins on every row that matters day to day.
Security Tips Once Your VPN Is Active
Activating the VPN is the start, not the finish. A few habits keep the protection meaningful once the tunnel is live.
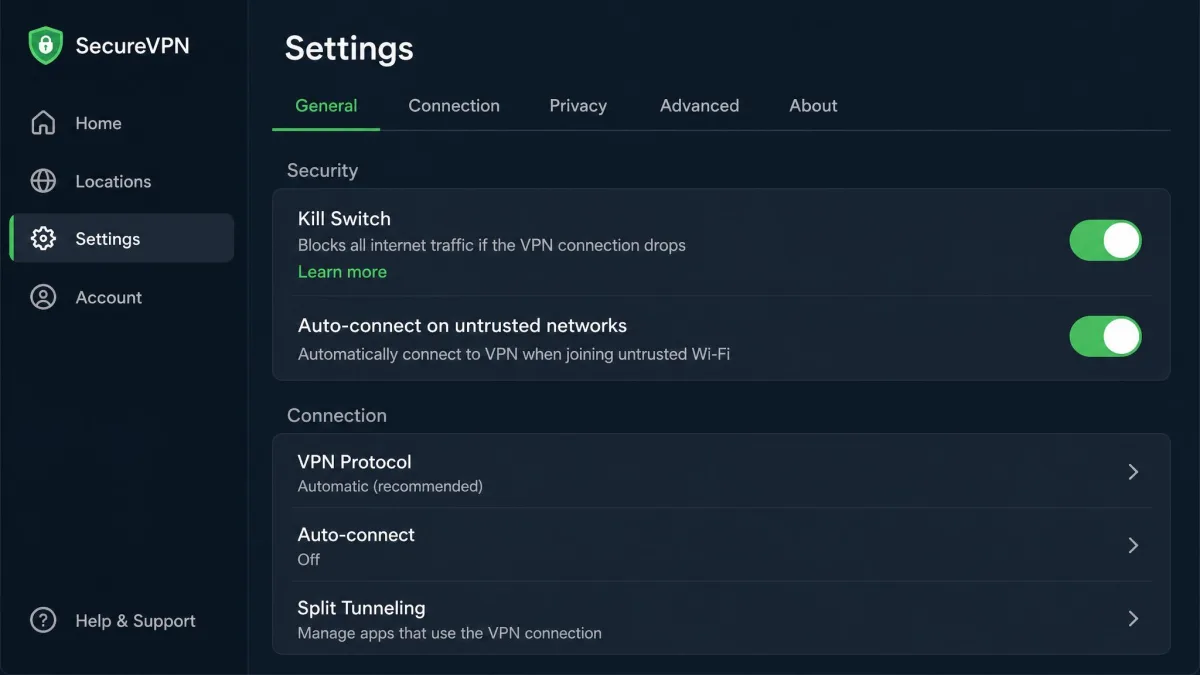
Turn on the kill switch so your traffic never leaks if the connection drops unexpectedly. Enable auto-connect on untrusted networks so the VPN activates itself the moment you join public Wi-Fi, rather than relying on you to remember. Keep the app updated, since protocol and security fixes arrive through those updates.
A browser-extension VPN only protects traffic inside that browser, so the rest of your device stays exposed. If you install an extension for convenience, keep the full app running as well when you need whole-device coverage.
Finally, confirm your setup once in a while with the leak tests from the verification section above. A VPN that was working last month can develop a leak after an update or a network change, and a two-minute check is the only way to know the tunnel is still doing its job.
Frequently Asked Questions
Why should I use a VPN?
Can I use a free VPN?
Do I have to set up a VPN manually?
Does a VPN make me anonymous?
How do I know my VPN is active?
Conclusion
Activating a VPN comes down to one reliable path and a few useful alternatives. Install your provider's app, sign in, and tap Connect, and the tunnel is live in under a minute on any device you own. The built-in manual settings are there as a fallback for work connections and self-hosted servers, and a router setup covers your whole home when you need it.
Whichever route you take, finish by confirming the connection actually works. Check for the on-screen indicator, verify your IP address changed, and run a quick leak test now and then. With the VPN active and verified, your connection stays private on public Wi-Fi and out of your internet provider's logs, which is the whole reason to turn it on.