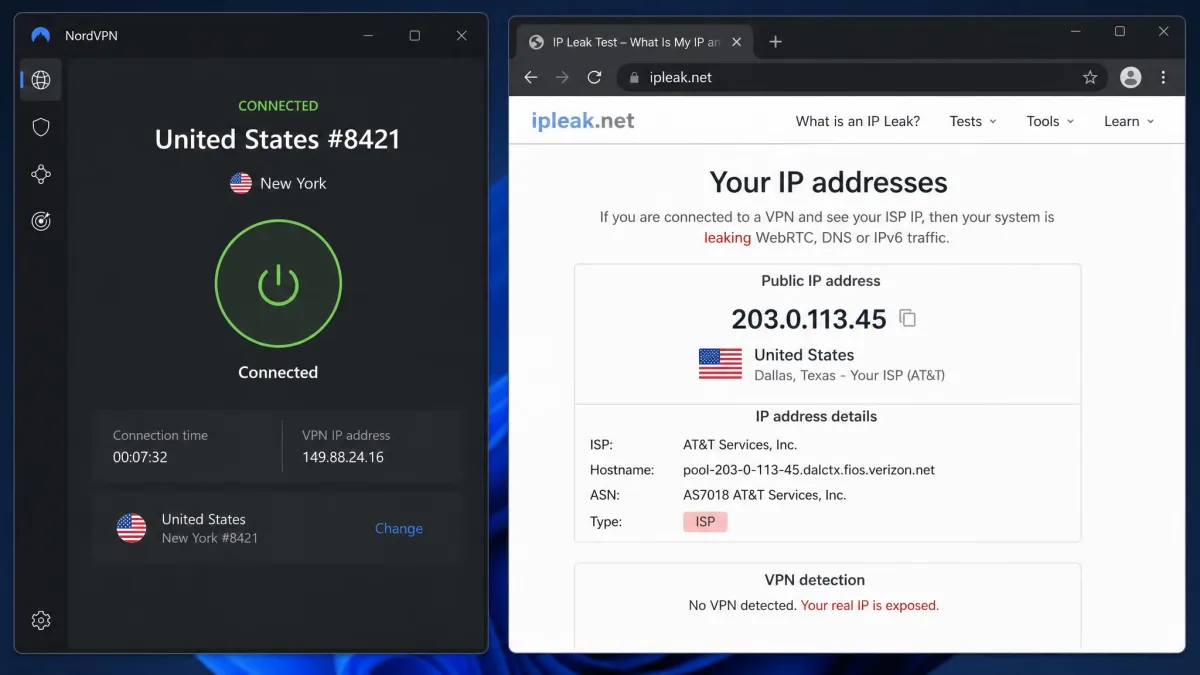
Your VPN app says "Connected." That status alone does not prove it is hiding your real IP address. A VPN can show a green lock while your DNS requests, your browser, or your IPv6 traffic quietly slip outside the tunnel. In our testing, we have watched a connection look perfectly healthy in the app while a leak test still pointed straight back to the real location.
The good news is that you do not have to guess. A short set of tests tells you exactly what your VPN is protecting and what it is leaking. Each test takes seconds. Most of them run in a browser. Together they give you a clear yes or no on whether your privacy is actually covered.
We ran every test in this guide ourselves across Windows, macOS, Android, and iPhone. We used free leak-test websites and a handful of popular VPN providers. Nothing here needs technical skill. If you can open a website and read two numbers, you can confirm your VPN is working.
How to tell at a glance if your VPN is connected
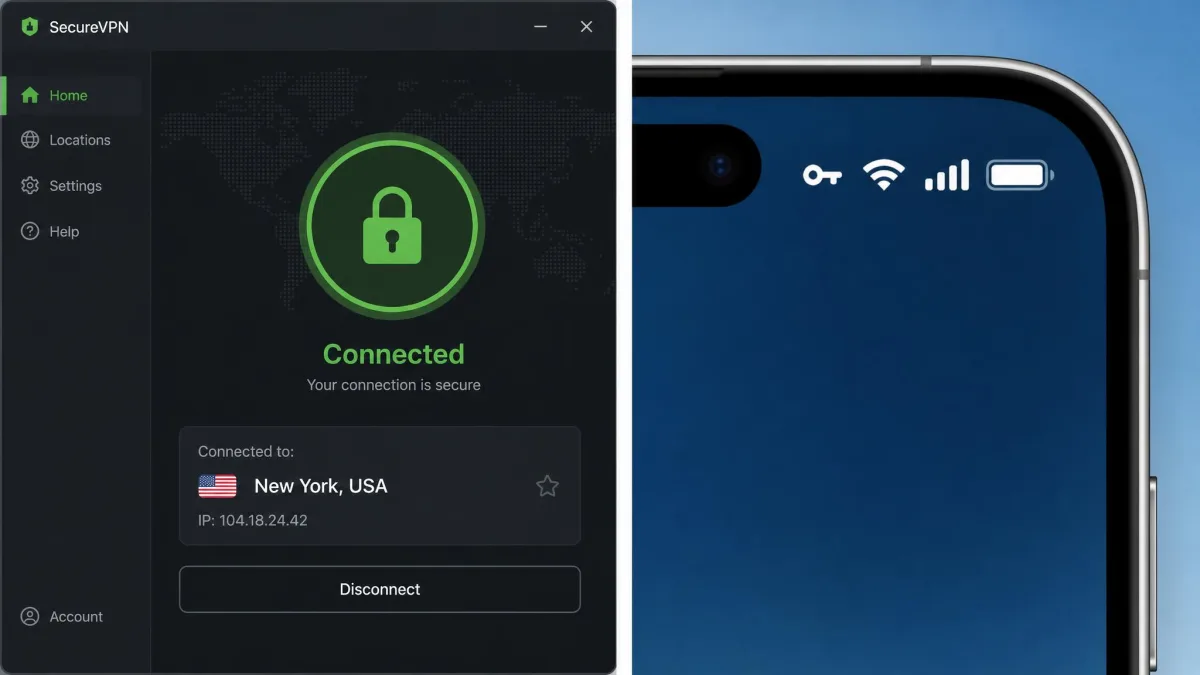
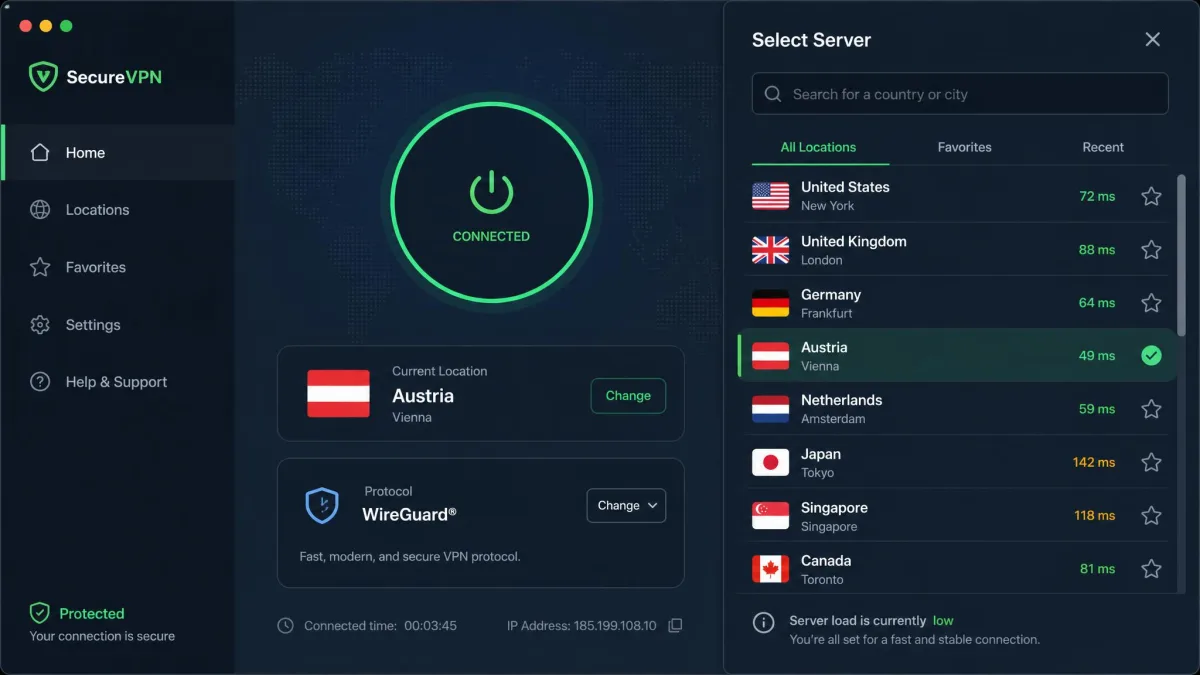
The fastest test is the app itself. Open your VPN client and look for a "Connected" status, a green indicator, or a closed padlock next to the server name. On a phone, a small VPN or key icon appears in the status bar next to the Wi-Fi or cellular signal when the connection is active. If that icon is missing, the VPN is not running, and nothing below it is being protected.
That indicator is a useful first signal. It is not proof. A VPN can report "Connected" while still leaking your IP, DNS, or WebRTC data, so the status light alone does not confirm your privacy. We treat it as a starting point, not a verdict.
The real answer comes from the tests below. They see what the outside world actually sees when you visit a website, which is the only information that matters for your privacy. Think of the app status as the doorbell and the leak tests as walking outside to confirm the door is locked.
How to know if your VPN is working (the tests)
Run these seven tests in order. The first two confirm your IP and location are masked. The next three look for the common leaks that bypass the tunnel. The sixth looks at your safety net, and the last one confirms the connection holds up over time. You can complete the core IP, DNS, and WebRTC tests in a few minutes. A quick spot-check of any single test takes under a minute.
Before you start, it helps to know what each leak type exposes and how you confirm it. Here is the short version we keep open while testing.
| Leak type | What it exposes | How to test | Sign of a leak | Common fix |
|---|---|---|---|---|
| IP leak | Your real public IP and location | Compare your IP before and after connecting | IP unchanged after connecting | Reconnect or switch server |
| DNS leak | The websites you visit, via your ISP's DNS | DNSLeakTest standard or extended test | Your ISP's DNS servers appear | Enable DNS leak protection |
| WebRTC leak | Your real IP through the browser | BrowserLeaks WebRTC test | Your real IP shows in results | Disable WebRTC in the browser |
| IPv6 leak | Your real IPv6 address | An IPv6 leak test while connected | Your real IPv6 address appears | Disable IPv6 or use an IPv6-ready VPN |
Test 1: Compare your IP address
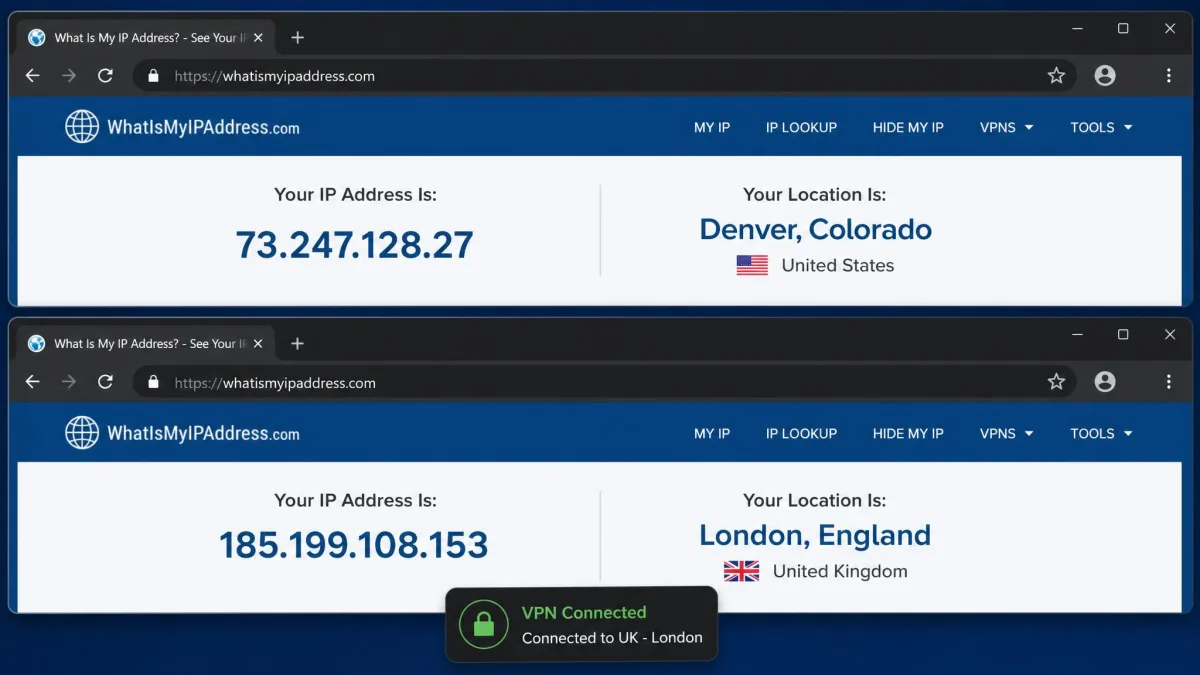
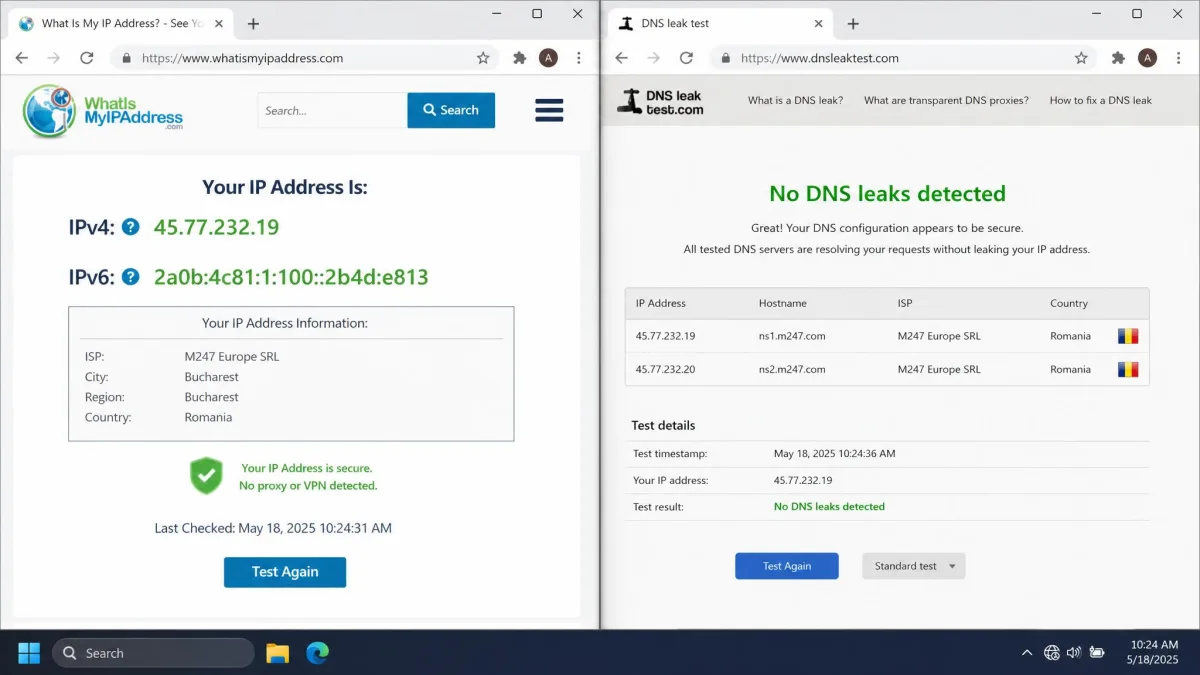
This is the single most important test. It is the one we always run first. Before you connect to the VPN, open a tool that shows your public IP address. Write down the number and the city it reports. The simplest way is to find your IP address on a site that displays both your public IP and its approximate location.
Now connect to your VPN and wait for the "Connected" status. Refresh the same page. If the VPN is working, the IP address changes to the server's address and the location shifts to wherever you connected. If the number is the same as before, your real IP is still exposed. The VPN is not masking your connection. When that happens, disconnect, reconnect, and try a different server before you trust it.
Test 2: Confirm websites see the VPN location
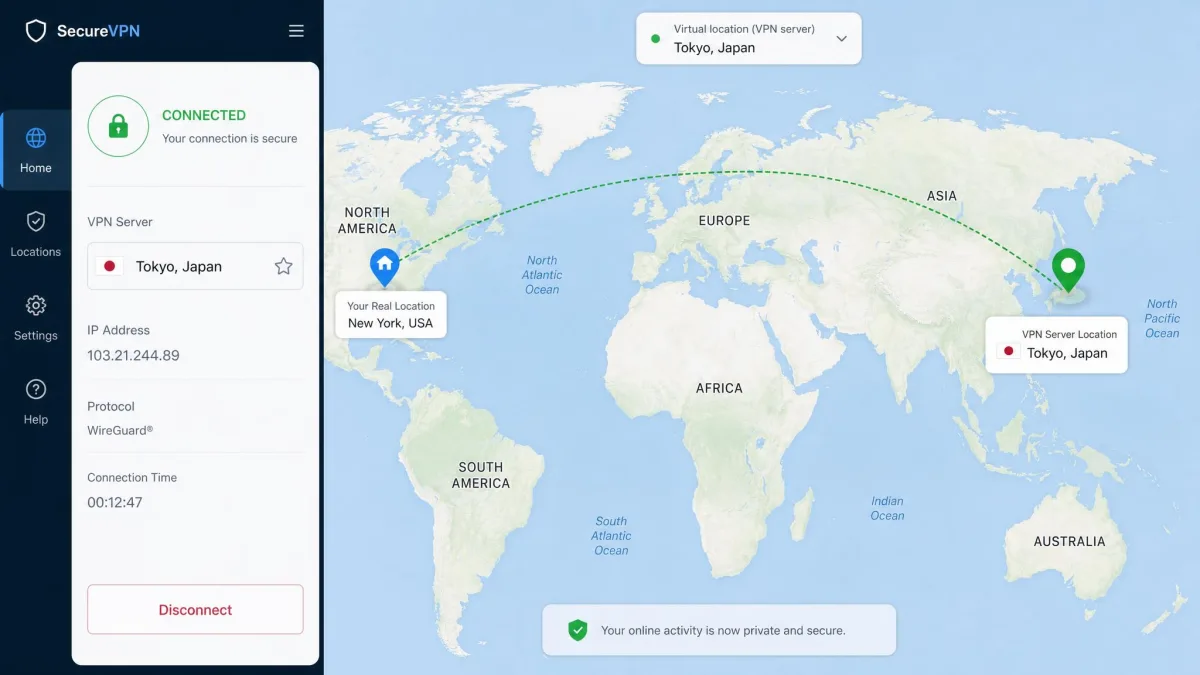
An IP that changes is a great sign. It is worth confirming that websites actually believe the new location. Connect to a server in another city or country, then search for "what is my location" or open a map site. The results should place you at the VPN server location instead of your real one.
This matters because your real protection depends on what each website sees, not on what the app claims. If the map still shows your home city while the VPN says "Connected," something is leaking. Move on to the DNS and WebRTC tests to find out what. When the location lines up with your chosen server, your basic IP masking is working.
Test 3: Run a DNS leak test
A DNS leak is sneaky because the IP test can look perfect while it is happening. DNS is the system that turns a website name into an address. Those requests are supposed to travel inside the encrypted tunnel. When they leak, they go through your ISP instead. That means your provider can still see every website you visit even though your IP looks hidden.
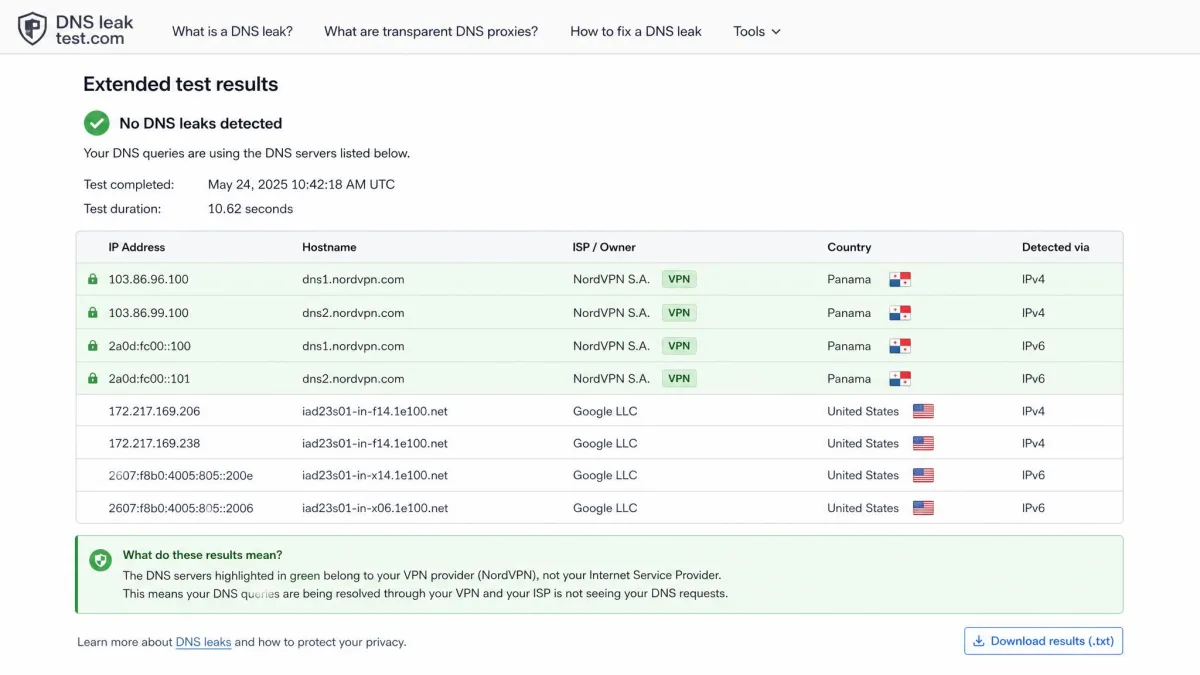
To test this, run a DNS leak test while connected and use the extended test for a thorough look. The results list the DNS servers that answered your queries. If you see your VPN provider's servers, you are protected. If you see servers that belong to your ISP, you have a DNS leak. The fix is usually to turn on DNS leak protection in your VPN settings. Run the test again to confirm the leak is gone.
Run the DNS leak test twice: once right after connecting and once after you have browsed for a few minutes. Leaks can appear after a connection has been running for a while, which a single quick look would miss.
Test 4: Run a WebRTC leak test
WebRTC is a browser feature that powers video and voice calls. It can expose your real IP even when the VPN appears active. The browser reaches out directly to establish a real-time connection, and that request can slip around the tunnel without you noticing. WebRTC leaks are common, and they only show up in the browser.
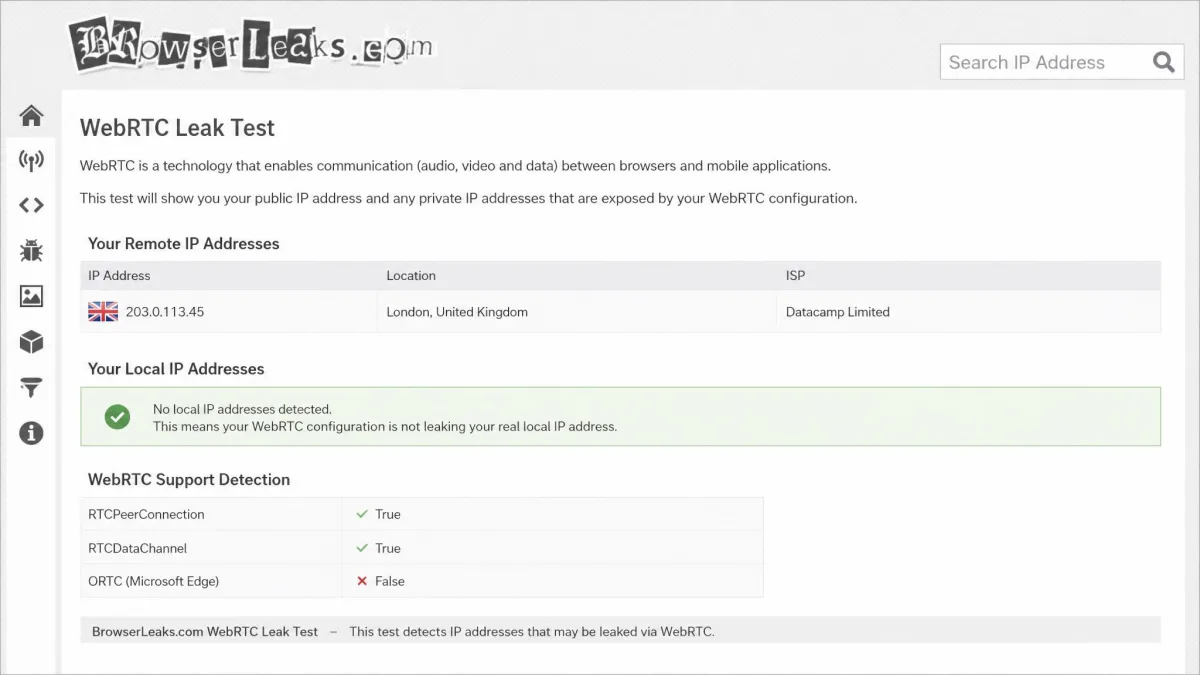
Open a WebRTC leak test while connected and look at the IP addresses it reports. If the only public address shown matches your VPN server, you are safe. If your real IP appears anywhere in the results, you have a WebRTC leak. Many good VPNs block this automatically. If yours does not, you can disable WebRTC in your browser settings or use a browser extension that blocks it. After changing the setting, reload the test page to confirm the WebRTC leak is closed.
Test 5: Run an IPv6 leak test
Many VPNs protect your IPv4 traffic but handle IPv6 poorly, and that gap causes an IPv6 leak. If your network uses IPv6 and the VPN only covers IPv4, your real IPv6 address can leak out while everything else looks fine. Not every connection uses IPv6. This test may simply show nothing to worry about, which is also a pass.
Run an IPv6 leak test while connected to the VPN. If it reports no IPv6 address or shows only the VPN's address, you are covered. If your real IPv6 address appears, you have a few options. Turn on IPv6 leak protection in the app, disable IPv6 on your device, or switch to a provider that handles IPv6 properly. This is the one leak test people skip most often, and it is worth the extra thirty seconds.
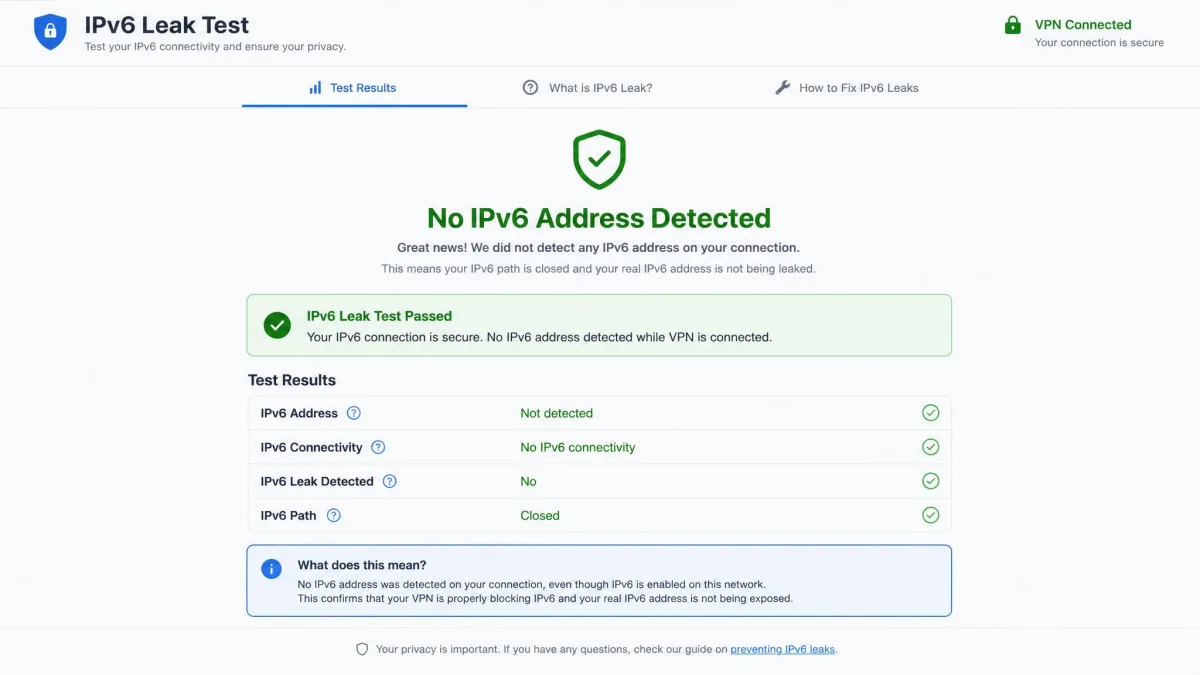
Some VPNs deliberately disable IPv6 on your device while connected. That is normal and safe. It simply removes the path a leak could take, so seeing no IPv6 result is the outcome you want.
Test 6: Test your VPN kill switch
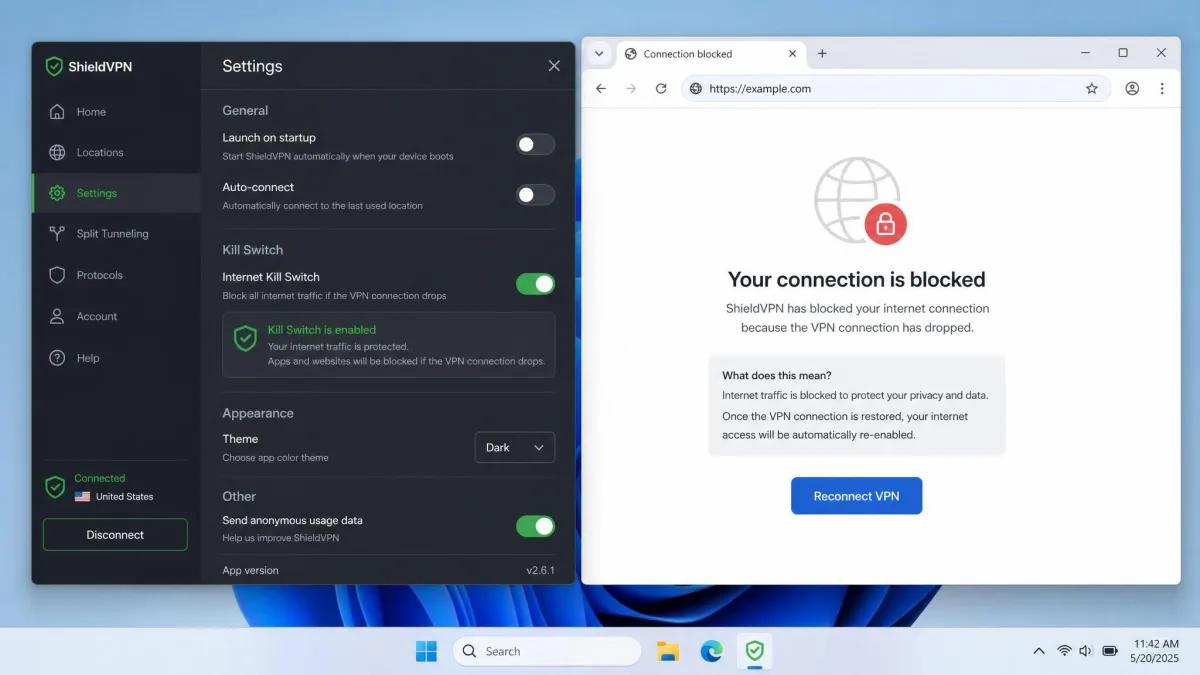
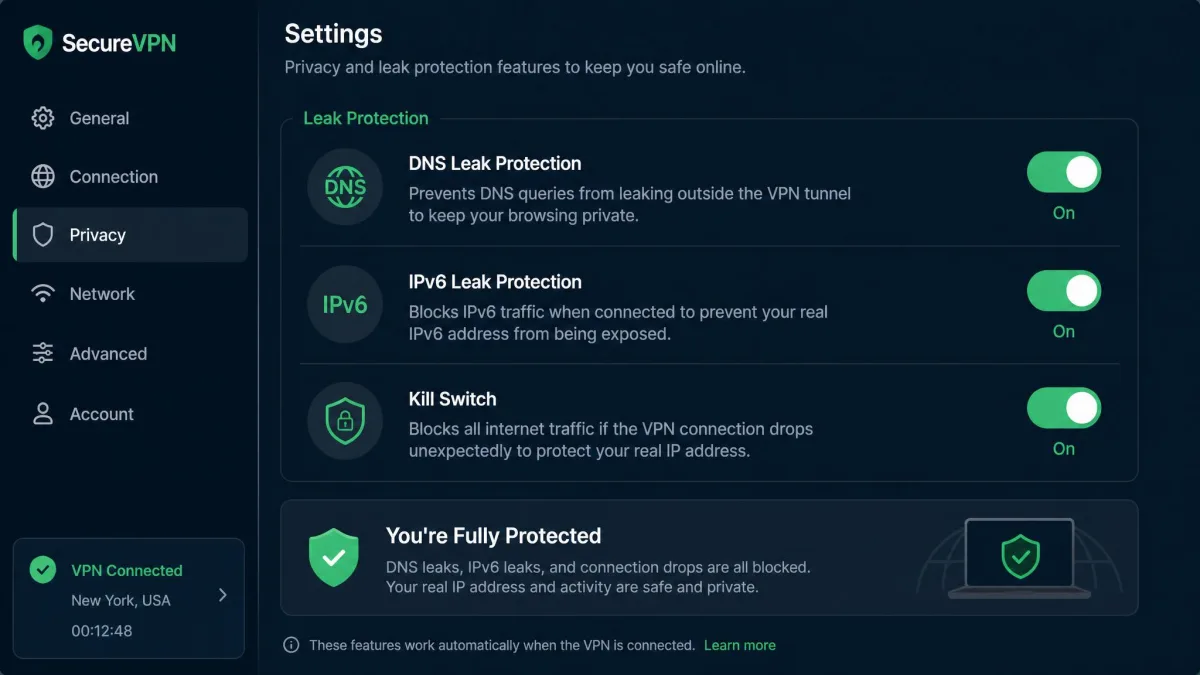
A kill switch is your safety net for the moment the VPN connection drops. Connections fail silently and without any warning. That brief gap is exactly when your real IP and traffic get exposed. A working kill switch blocks all internet traffic the instant the tunnel drops, so nothing leaks while the app reconnects.
To test it, turn on the kill switch in your VPN settings. Then force a drop by switching servers or quitting the VPN connection while a download or video is running. If the kill switch works, your internet traffic halts completely until the VPN reconnects. If pages keep loading during the gap, the kill switch is not doing its job. Be sure that the feature is enabled, or choose a provider with a reliable one.
Test 7: Re-run the tests after reconnecting
A VPN that passes every test once can still leak later. That is why the final step is to repeat the tests. Disconnect, reconnect, and then run the IP, DNS, WebRTC, and IPv6 tests again. Repeating the leak tests after reconnecting catches instability that a single one-time test misses, and it is the step that gives us real confidence in a connection.
We also like to re-run the tests after switching to a different server or after the computer wakes from sleep. Those are common moments for a leak to appear. If the results stay clean across reconnections, your VPN is genuinely protecting you and not just on its first connection of the day.
Why is my VPN not working?
If a test fails or the connection will not establish at all, the cause is usually one of a handful of common issues. The most frequent is a dropped connection that the app never warned you about, which leaves you unprotected until you notice. Outdated VPN software, the wrong settings, or a missing leak-protection toggle can all cause leaks even when the app says "Connected."
Network problems are the next likely culprit. Public-building and workplace networks sometimes block VPN traffic, which makes the connection fail to establish at all. An overloaded server or unstable Wi-Fi can also drop the tunnel repeatedly. On the device side, an OS bug or a leaky browser extension can open a path around the VPN even when the core connection is fine.
One case that looks like a failure but is not: streaming. A VPN server IP can be blocked by a streaming service because of licensing, so the stream fails even though the VPN is working perfectly. Switching to a different server usually clears it. Likewise, some noticeable slowdown after connecting is normal and not a sign that the VPN is broken.
A normal VPN speed reduction is roughly 10% to 30%, depending on server distance, protocol, and your baseline connection. If a speed test shows a loss in that range, your VPN is behaving as expected, not failing.
How to fix a VPN that isn't working
Most VPN issues clear up with a few quick steps, so work through them in order before you assume the software is broken. Start simple:
- Disconnect and reconnect, then connect to a different server.
- Restart the VPN app, and restart your device if that does not help.
- Update the VPN to the latest version to clear out known bugs.
- Turn on leak protection and the kill switch in the settings.
- Switch the connection protocol or port, which often gets past a network that blocks VPN traffic.
If the connection still fails, temporarily disable a conflicting firewall or antivirus to see whether it is blocking the tunnel. Turn it back on once you know. You can also reset your login or reinstall the app if settings have become corrupted. When nothing works, contact your provider's support team. A specific server or your account may be the problem rather than your setup. After any fix, run the tests again to confirm the leak is actually closed.
How to choose a VPN that stays leak-free
The best way to avoid leaks is to start with a provider that is built to prevent them. When we test VPNs, the ones we trust share a few traits. They have built-in DNS and IPv6 leak protection that is on by default, a reliable kill switch, and their own private DNS servers so requests never touch your ISP. These features are what keep the tunnel intact when a connection wobbles.
Be cautious with free VPNs. Many lack proper leak protection, some log your activity, and a few have been caught leaking the very data they promise to hide. A free tool can be fine for a quick, low-stakes task. For real privacy, we recommend a reputable paid provider that publishes independent audits of its security. Whatever you choose, the tests in this guide are how you verify the provider's promises hold up on your own connection.

Common mistakes
The biggest mistake is trusting the "Connected" status and stopping there. That indicator tells you the app is running, not that your IP, DNS, and WebRTC traffic are all inside the tunnel. Another common slip is testing only once. A connection that passes at first can leak after a drop, so the re-run in Test 7 is not optional.
People also forget the browser. You can have a flawless IP and DNS result while WebRTC quietly exposes your real address. Never skip the WebRTC leak test if you care about privacy during calls or in the browser. Finally, do not panic over slower speeds or a blocked stream. Both are normal, and neither means your VPN has stopped protecting you.