
How to Free Up Disk Space on Mac: 10 Proven Ways to Reclaim Storage
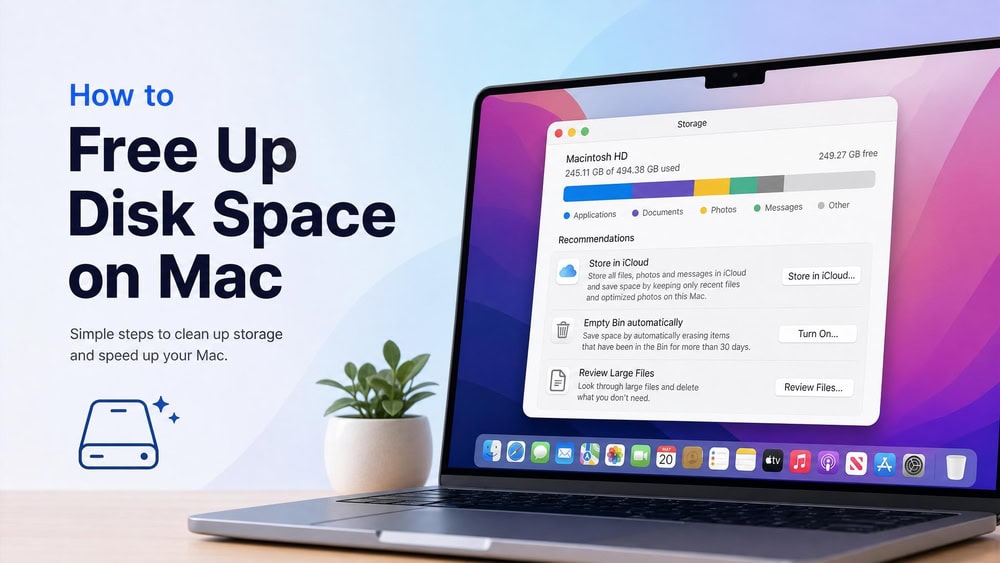
If your Mac is running low on space and a "Your disk is almost full" warning keeps appearing, you can usually fix it in minutes. Most of the space taken up on a full Mac is recoverable with tools built into macOS, plus a few free utilities for the stubborn cases. Below are 10 proven ways to free up disk space, starting with a quick storage check so you know where your gigabytes went before you delete anything.
- How to check available storage on your Mac
- 1. Empty the Trash (and set it to auto-empty)
- 2. Find and delete large and unused files
- 3. Clear the Downloads folder and desktop clutter
- 4. Uninstall apps you no longer use
- 5. Clear system, app, and browser caches
- 6. Reduce "System Data" / system storage
- 7. Delete old iPhone and iPad backups
- 8. Remove old Time Machine local snapshots
- 9. Offload files and photos to iCloud or the cloud
- 10. Remove duplicate photos and manage your media library
- How to keep your Mac storage clean (ongoing maintenance)
How to check available storage on your Mac
Before you clear anything, find out what is using your space. macOS breaks your drive down by category, so you can target the biggest offenders first instead of guessing.
View storage in System Settings
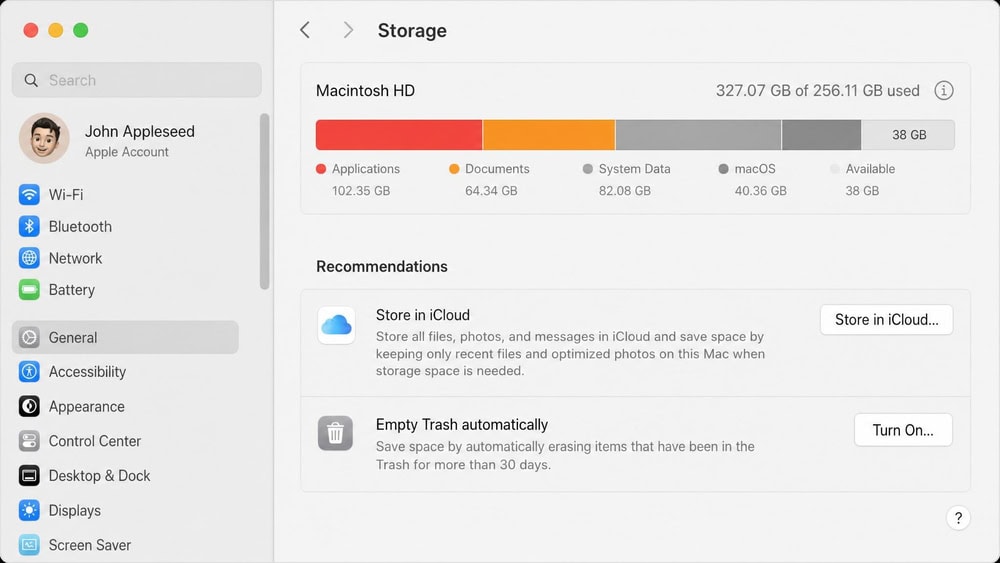
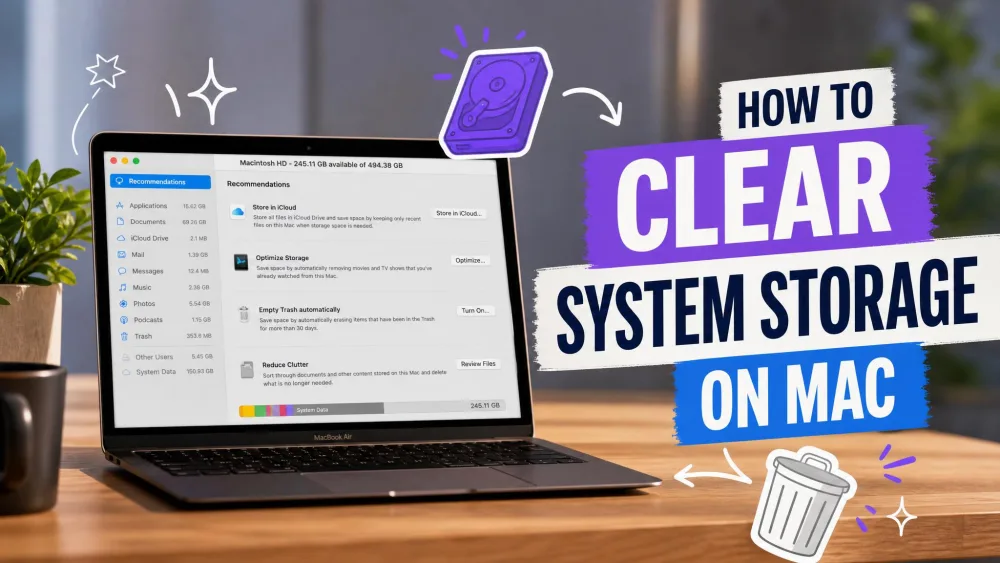
On macOS Ventura 13 or later, open System Settings, click General, then click Storage. A colored bar splits your drive into Applications, Documents, System Data, and more. The available space sits above it. Hover over each segment to read its size, and scroll down for an expandable per-category list.
On versions before Ventura, open the Apple menu, choose About This Mac, then click the Storage tab for the same breakdown. Apple's official storage guidance covers both layouts if your menus look different.
Use macOS Storage Recommendations (Optimize Storage)
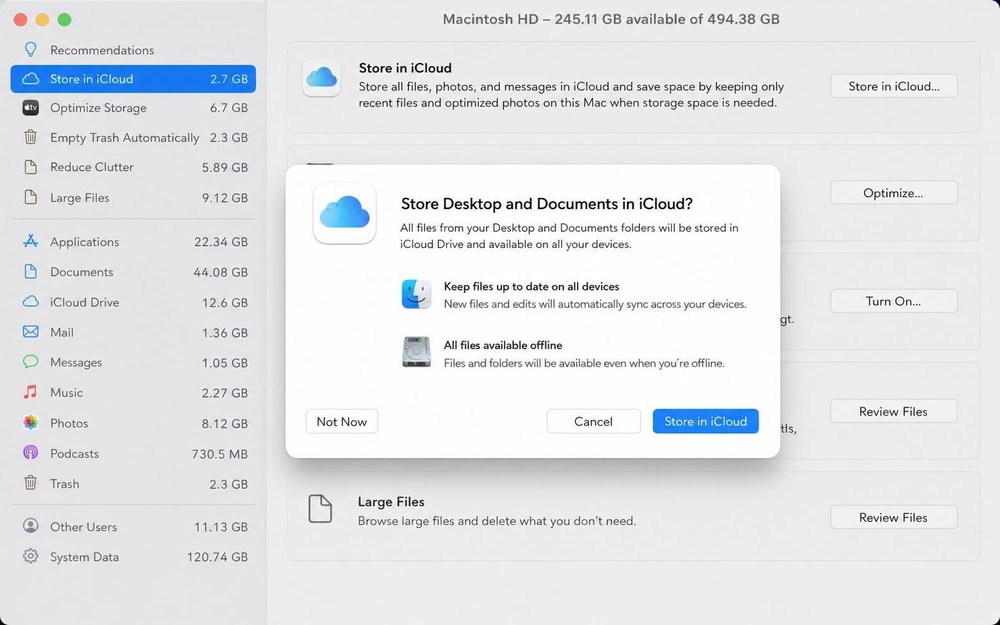
The same Storage panel includes Apple's built-in recommendations. There are three. Store in iCloud moves Desktop, Documents, Photos, and Messages to iCloud. Optimize Storage removes Apple TV titles you have already watched and keeps only recent Mail attachments. Empty Trash Automatically clears old deleted files. We recommend turning these on as your baseline, then working through the methods below for anything they miss.
1. Empty the Trash (and set it to auto-empty)
Deleting a file only moves it to the Trash, where it still counts against your storage until the Trash is emptied. Right-click the Trash icon in the Dock and choose Empty Trash.
To stop the Trash from quietly refilling, turn on Empty Trash Automatically in the Storage panel. This permanently erases any item that has been in the Trash for more than 30 days, so you reclaim space without thinking about it. Emptied files are gone for good, so glance through the Trash first.
2. Find and delete large and unused files
Big files are where the fast wins live. A few old video exports, disk images, or forgotten downloads can account for tens of gigabytes, and removing them is the quickest route to free up disk space.
Find large files with built-in Storage tools
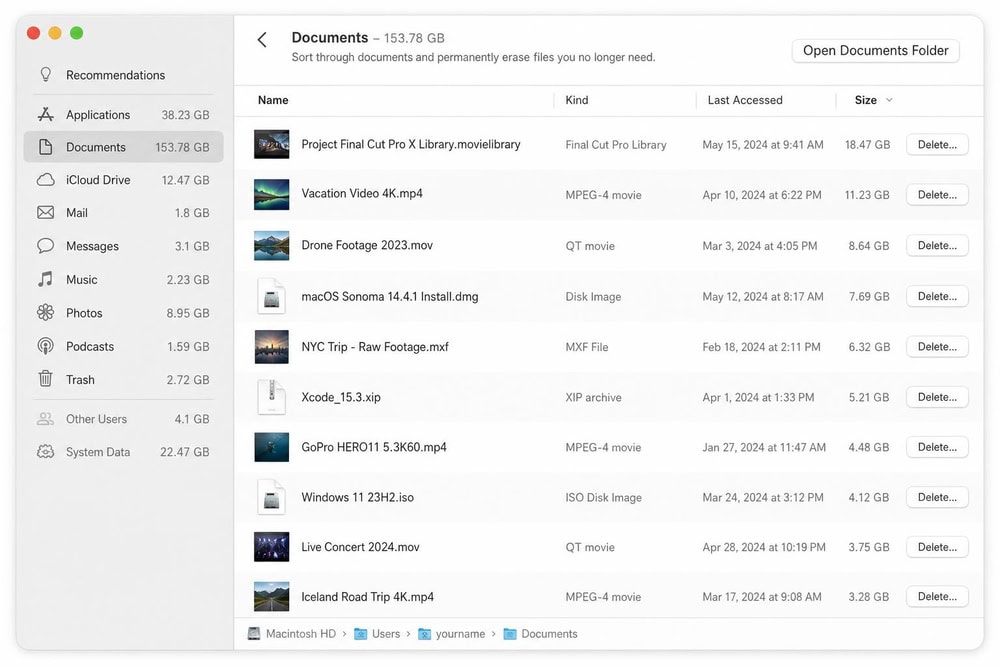
In the Storage panel, click the information icon next to Documents to open a sortable list of your largest files. Sort by size, review the top, and delete anything you no longer need. The Downloads and Unsupported Apps views in the same panel are worth a look too, since they collect installers and stragglers.
Use a disk-space analyzer (DaisyDisk, OmniDiskSweeper)
When the built-in list is not enough, a dedicated analyzer maps every folder so nothing hides. We recommend DaisyDisk, which draws your drive as a visual sunburst map. You can drag large files straight to a delete tray. It is a one-time purchase of around $9.99 when bought direct, with a 30-day money-back guarantee, and runs on macOS 10.13 or newer. The direct download is free to scan and paid to unlock full deletion. The Mac App Store edition is a paid purchase.
If you would rather not pay, OmniDiskSweeper from The Omni Group is free. It lists every file and folder sorted largest-first and flags system files so you avoid deleting something macOS needs. It is plainer than DaisyDisk, but it gets the job done.
3. Clear the Downloads folder and desktop clutter
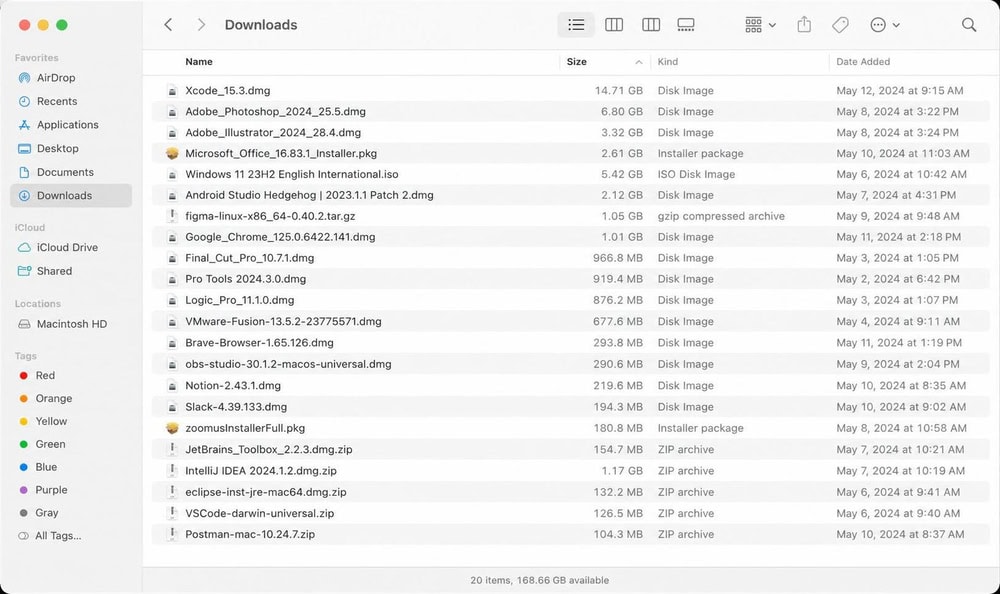
The Downloads folder is a magnet for installers, PDFs, ZIP archives, and duplicate images you saved once and forgot. Open Downloads in Finder, switch to List view, and sort by size or date to clear out the heaviest and oldest items.
Your desktop deserves the same treatment, since every file there is stored on your drive and rendered as a thumbnail. Move what you want to keep into a folder and delete the rest. If it is overflowing, turn on Store in iCloud so your Desktop and Documents folders sync to the cloud.
4. Uninstall apps you no longer use
Dragging an app to the Trash is the obvious first step, and it works. Open the Applications folder in Finder, then drag any app you no longer use to the Trash and empty it. The Storage panel also has an Applications view that sorts apps by size and shows when you last opened each one, making unused space easy to spot.
Remove app leftovers and orphaned files
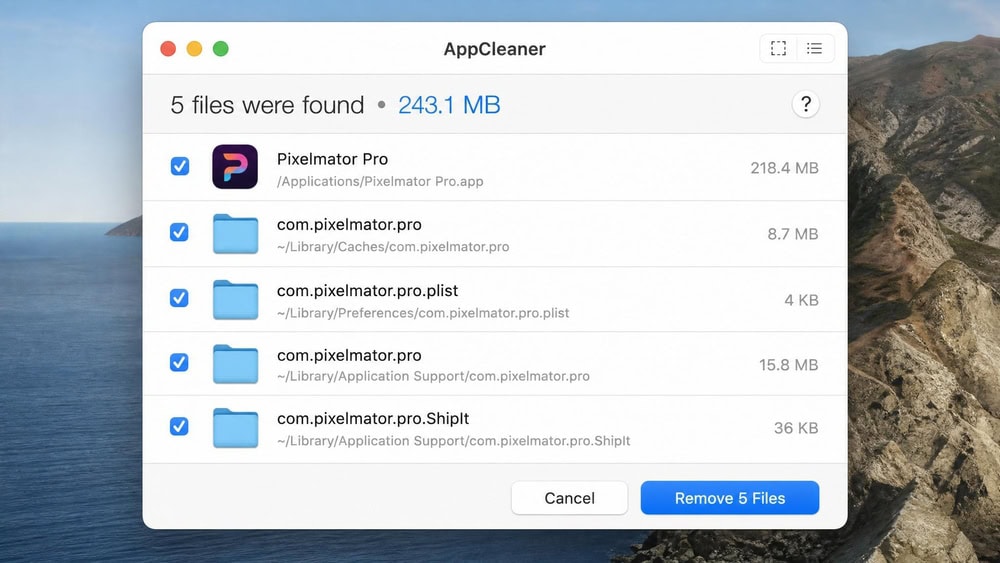
The catch is that this often leaves behind caches, preference files, and support folders scattered through your Library. To remove an app cleanly, we recommend AppCleaner, a free tool from FreeMacSoft. Drag an app into its window and it finds the related support files, caches, and preferences so the uninstall leaves nothing behind. The current version supports macOS Mojave through Tahoe.
5. Clear system, app, and browser caches
Caches are temporary files apps create to load faster. They grow over time, though, and can swell System Data into the tens of gigabytes, which makes clearing them one of the highest-impact steps on this list.
Clear browser cache (Safari, Chrome, Firefox)
Browser caches are the safest to clear and often the largest. In Safari, enable the Develop menu in Settings, then choose Develop, followed by Empty Caches. In Chrome, open the menu, go to More Tools, then Clear Browsing Data, and select Cached images and files. In Firefox, open Settings, go to Privacy & Security, then click Clear Data. Your saved passwords and bookmarks stay put.
Clear user and system caches safely
App and system caches live in your Library folders. In Finder, choose Go, then Go to Folder, and enter ~/Library/Caches. You can delete the contents of individual app subfolders to reclaim space.
6. Reduce "System Data" / system storage
System Data, shown as "Other" on older versions of macOS, is the category that confuses people most. It holds the files that do not fit other categories: caches, logs, fonts, plug-ins, app support, disk images, and Time Machine snapshots. A bloated figure is usually just accumulated caches and snapshots.
Here is the important part: macOS gives you no one-click "delete System Data" button. The figure shrinks indirectly as you clear caches, remove old backups, and let snapshots expire. That is exactly what the earlier methods do. Work through Trash, large files, caches, and the backup steps below, and System Data falls on its own. For more, see our guide on how to clear System Data storage on Mac. Resist the urge to dig into system folders to force the number down. Much of that data is active or purgeable and will simply rebuild.
7. Delete old iPhone and iPad backups
If you have ever backed up an iPhone or iPad to your Mac, those backups can each run many gigabytes and they pile up over time. Nothing surfaces them in daily use, so they are easy to forget.
In the Finder sidebar, select your connected device, click Manage Backups, then select an outdated backup and click Delete Backup. On older macOS versions the same list lives in iTunes preferences under Devices. Delete backups for devices you no longer own or have moved to iCloud, and keep only your most recent one.
8. Remove old Time Machine local snapshots
Even when your Time Machine drive is not connected, macOS keeps local snapshots of your startup disk. Time Machine saves one snapshot approximately every hour and keeps it for about 24 hours before thinning it automatically.
The reassuring news is that this space is purgeable. macOS counts it as available and reclaims it automatically as snapshots age or when you need the room, so manual deletion is usually unnecessary. To force a purge anyway, open Time Machine settings, turn off Back Up Automatically, wait a few minutes, then turn it back on. Treat this as an occasional reset, not a routine chore.
9. Offload files and photos to iCloud or the cloud
Moving files off your drive frees up local space without deleting anything. Turning on Store in iCloud in the Storage panel keeps your Desktop, Documents, Photos, and Messages in iCloud and downloads them on demand, so older items stop taking up local space.
Every Apple Account includes 5 GB of iCloud storage for free, which fills quickly. Paid iCloud+ plans in the US start at $0.99 per month for 50 GB, then $2.99 for 200 GB and $9.99 for 2 TB. Larger 6 TB and 12 TB tiers are available too. If you would rather not pay Apple, Google Drive, Dropbox, or an external SSD do the same job for files you rarely touch.
10. Remove duplicate photos and manage your media library
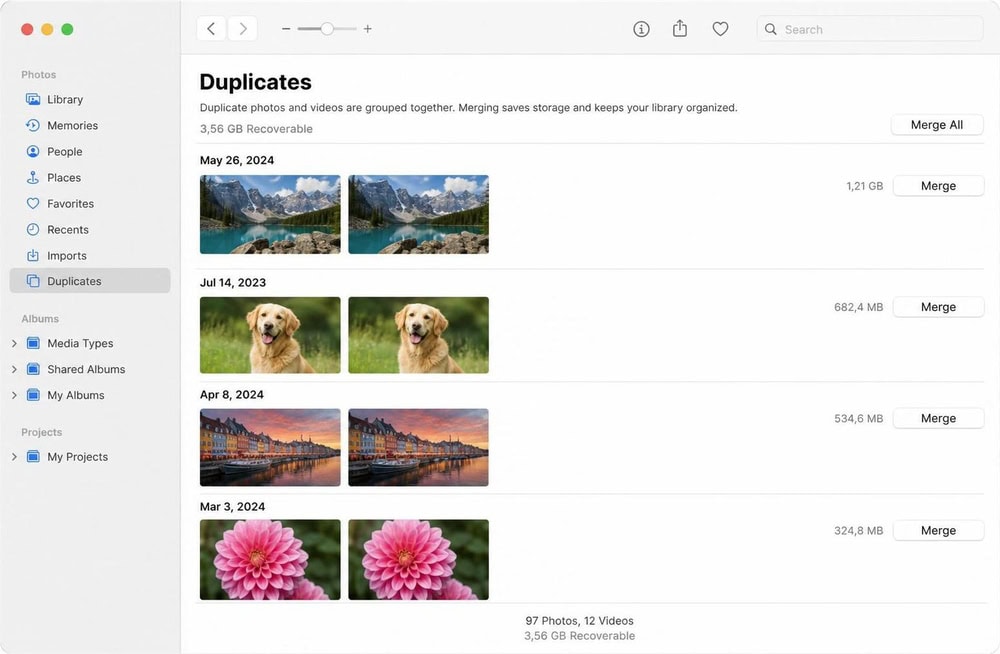
Photos and videos are often the single largest category on a Mac, and duplicates quietly double the cost. The Photos app can find them for you: open Photos, then click Duplicates in the sidebar to review and merge identical or near-identical shots. Merging keeps the highest-quality version and frees the rest.
How to keep your Mac storage clean (ongoing maintenance)
The fastest way to avoid the next "disk almost full" warning is a little upkeep. Leave Empty Trash Automatically and Optimize Storage switched on so macOS handles routine cleanup. Once a month, check the Storage panel, clear your Downloads folder, and empty the Trash.
A few smaller habits help too. You can compress large folders you rarely open by right-clicking and choosing Compress to shrink them into a ZIP archive. Advanced users can remove unused language files or trim caches from the command line in Terminal, though that rarely returns enough space to justify the risk. Clearing junk mail and large attachments in the Mail app is another easy win for heavy email users.
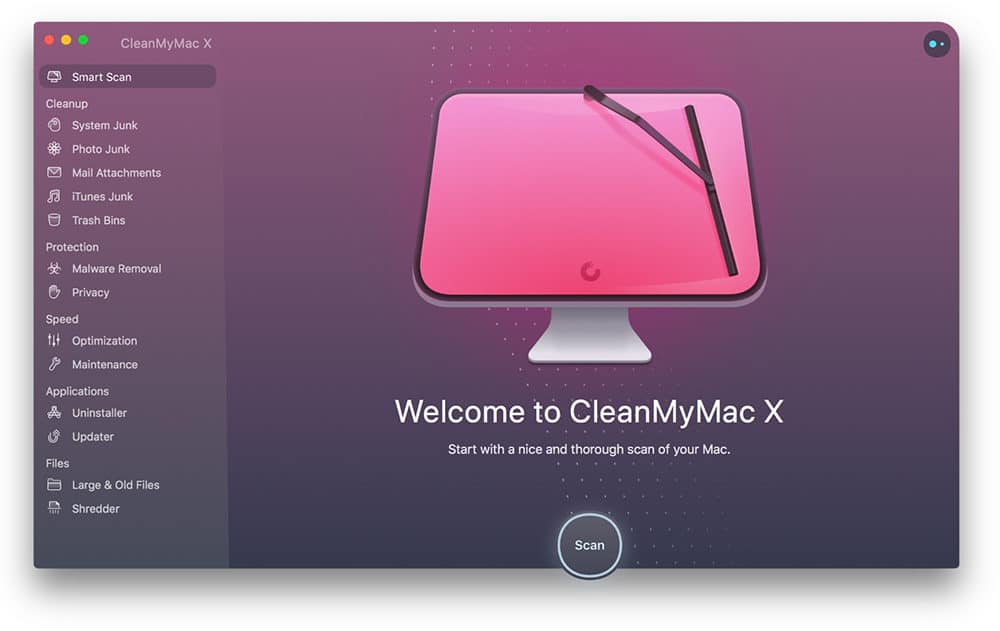
If you would rather automate all of this, an all-in-one cleaner can run the whole routine on a schedule. CleanMyMac bundles one-click junk and cache removal, a large-file finder, and an app uninstaller into one app. It requires macOS 11 (Big Sur) or newer. It runs around $39.95 per year, roughly $3.33 per month, after a limited free trial. We see it as a convenience layer on top of the native tools, not a replacement. For more routines, see our guide on how to clean up your Mac, or what to do when your Mac startup disk is full if you are already out of room.
What is the fastest way to free up space on a Mac?
Empty the Trash, clear your Downloads folder, and clear your browser and app caches. Those three steps take a few minutes and usually return the most space, since caches and forgotten downloads are where the largest recoverable files hide.
Is it safe to delete System Data on a Mac?
There is no safe one-click way to delete System Data directly, and macOS does not offer one. It shrinks on its own as you clear caches, remove old device backups, and let Time Machine snapshots expire. Avoid manually deleting system folders, since much of that data is active or automatically regenerated.
Can I free up space without deleting my files?
Yes. Turn on Store in iCloud to offload Desktop, Documents, and Photos while keeping them accessible, clear caches that macOS rebuilds anyway, and use a clone-based tool like Hyperspace to deduplicate identical files. None of these remove documents you actually need.
Why is my Mac storage full when I deleted files?
Deleted files sit in the Trash until you empty it, so they still count against your storage. System Data, local Time Machine snapshots, and app caches can also keep the number high. Empty the Trash, clear caches, and let snapshots expire, and the available figure recovers.

 Clean Up Mac
 Mac Startup Disk Full
 What Is Other Mac Storage
 Clear System Storage on Mac
 Clear Scratch Disk on Mac
 Best Mac Cleaner Software
 Free Up Disk Space
 CleanMyMac Review