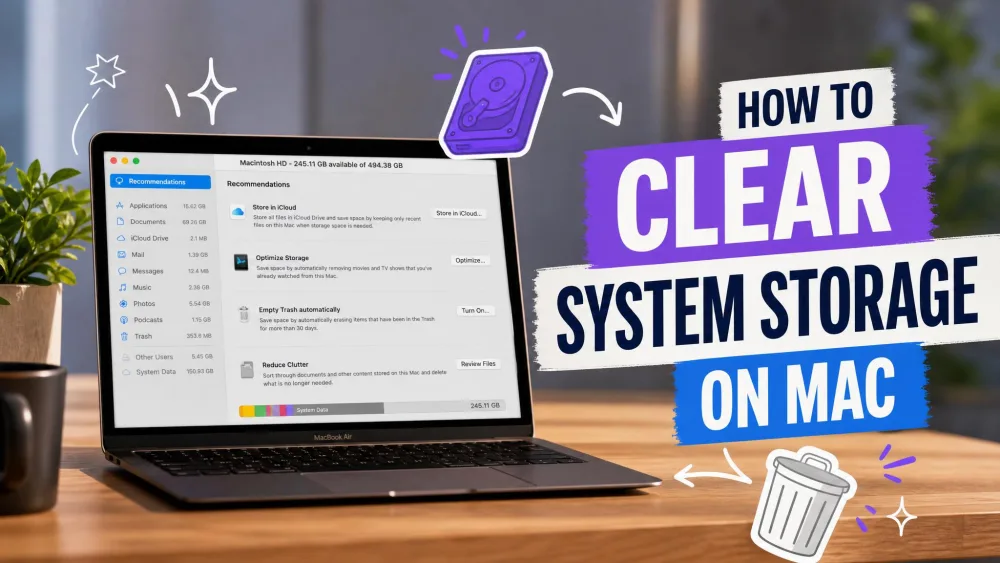
You open the Storage bar to see where your space went, and a fat gray band labeled "System Data" is eating tens of gigabytes you cannot explain. It will not budge when you click it, and your startup disk keeps inching toward full. We have hit this on our own test machines many times, and the good news is that most of that band is clutter you can safely clear. This guide walks through eight methods we use to free up space, from the safest one-click wins to the deeper cleanup that reclaims the most.
What is System Data (System storage) on Mac?
Why "System storage" shows up as "System Data" in the Storage bar
When people ask how to clear "System storage" on a Mac, they are almost always looking at the gray "System Data" segment in the Storage bar. The two names describe the same thing. Apple used to label this catch-all category "System" or "Other" in older versions of macOS, and on Ventura and later it appears as "System Data." So if a guide says one and your Mac says the other, do not worry, you are in the right place.
System Data is the bucket macOS uses for everything that does not fit a category like Photos, Apps, or Documents. It holds caches, logs, temporary files, APFS local snapshots, swap files, Spotlight indexes, disk images, browser extensions, app support files, and installer leftovers. That long list is exactly why the band grows so large and feels so mysterious.
Why System storage grows so large
The short answer is that macOS is doing its job. Every app writes cache and log files, Time Machine stashes local snapshots so you can roll back, and updates leave installer remnants behind. None of these sit in a single tidy folder, so they accumulate out of sight. When your disk fills up, some of these files balloon rather than shrink, which makes System Data look out of control.
How much System Data is normal
There is no single correct number, but a useful baseline is that 12-30 GB of System Data is normal on a healthy Mac. Anything under roughly 100 GB is usually not worth worrying about, and above 100 GB is when we start investigating. In real-world cases we have seen it run far past normal, with everyday machines topping 100 GB and one runaway Spotlight index reaching over 400 GB. Treat 12-30 GB as a starting point, not a hard ceiling.
How to check System storage on your Mac (System Settings > Storage)
Before you clear anything, see what you are working with. Open the Apple menu, choose System Settings, click General, then click Storage. This opens the Storage pane on macOS Ventura and later. Give the bar a moment to calculate, then hover over the gray segment to confirm how much space System Data is taking up.
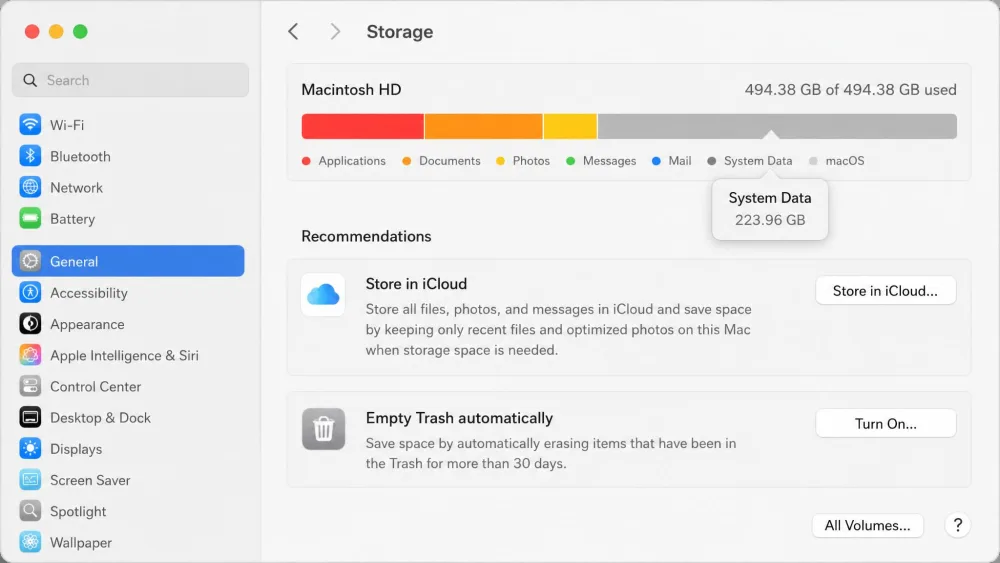
Note your starting figure so you can measure progress. Apple recommends keeping at least 10% of your total storage free for the system to run smoothly, so aim to end up above that line. Apple also publishes clear steps to free up storage space on Mac that mirror this pane.
Is it safe to delete System storage / System Data?
Mostly yes, as long as you clear the right things the right way. You cannot delete System Data directly from Storage Settings anyway, because macOS blocks removal of protected system files. What you can safely clear is the clutter inside it: cache contents, old logs, expired snapshots, and backups you no longer need.
The rule we follow is simple. Work inside your own user Library folder at ~/Library, and never touch the protected /System folder or anything you do not recognize. Deleting the contents of a cache folder is fine because apps rebuild what they need. Deleting the folders themselves, or system files, is how you break things.
Never drag the /System folder or system files to the Trash, and do not use sudo rm on paths you are unsure about. Stick to clearing the contents of ~/Library/Caches and ~/Library/Logs, and use the built-in Storage tools for anything protected. When in doubt, leave it in place.
How to clear System storage on Mac: 8 methods
Here are the eight methods we reach for, ordered from the quickest safe wins to the deeper cleanup. Work through them in order and recheck the Storage bar as you go.
1. Empty the Trash / Bin
Deleted files still count against your storage until you empty the Trash. Control-click the Trash icon in the Dock and choose Empty Trash. Remember that many apps keep their own trash too, so empty the bins inside Photos, Mail, and any editors you use.
One thing we have learned to expect: after you empty the Trash, System Data often ticks up briefly before it drops. That is macOS reconciling the change. Wait a few minutes and the number falls into place. You can also let macOS handle this going forward, because turning on Empty Trash automatically erases items that have been in the Trash for more than 30 days.
2. Clear system and app caches (~/Library/Caches)
Caches are the biggest chunk of everyday System Data. In Finder, click the Go menu, hold Option, and choose Library, then open the Caches folder. You can also use Go > Go to Folder and enter ~/Library/Caches. Open each app's cache folder and delete the contents, not the folders themselves, because apps recreate them automatically.
Clearing caches only frees space if you also empty the Trash afterward and quit the background apps first. If an app is still running, it immediately rebuilds the cache files you just deleted, and your reclaimed space vanishes. Quit, clear, then empty.
3. Remove old Time Machine local snapshots
This is the one that surprises people. The single biggest silent System Data hog is usually Time Machine local snapshots, which do not show clearly in Finder and balloon when the disk gets tight. macOS normally purges these APFS snapshots automatically after 24 hours when backups run on a regular schedule, but on machines where backups are paused they can persist and grow.
To clear them, open Terminal from Applications > Utilities and use tmutil deletelocalsnapshots /, or run sudo tmutil thinlocalsnapshots / to thin them out. If you would rather avoid Terminal, simply plugging in your backup drive and letting a full Time Machine backup finish will often trigger macOS to release the local copies on its own.
4. Delete old iOS / iPadOS backups
If you have ever backed up an iPhone or iPad to your Mac, those archives can quietly consume many gigabytes inside System Data. The easiest safe route is Finder: connect the device, select it in the sidebar, click Manage Backups, then remove the ones you no longer need. You can also reach them from the Storage pane in System Settings.
The underlying files live at ~/Library/Application Support/MobileSync/Backup if you prefer to browse them directly. Delete only the dated backup folders you recognize as old, and keep your most recent one unless you are certain you have a current backup elsewhere.
5. Clear application logs and support files
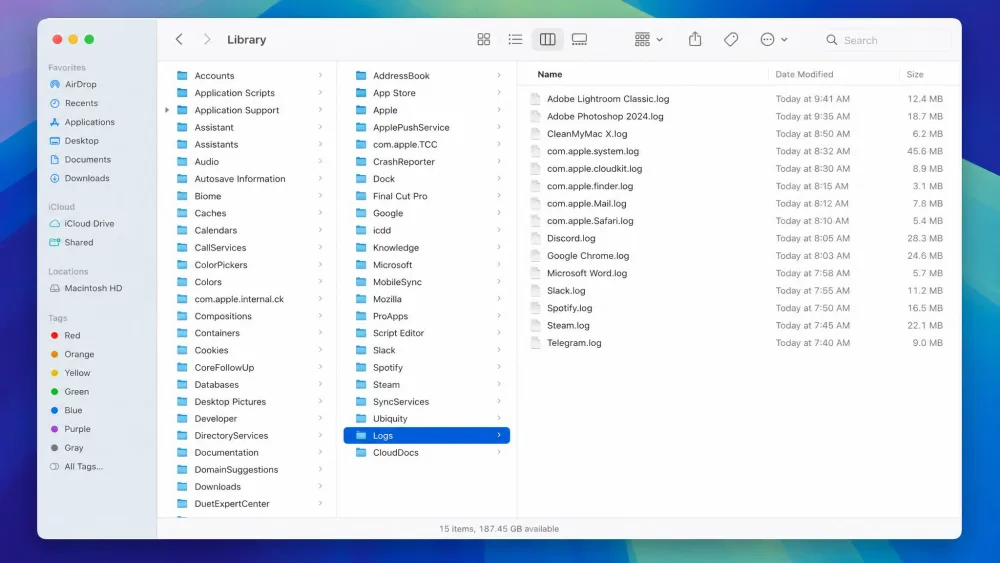
Apps write logs and support files that pile up over months of use. You will find them at ~/Library/Logs and ~/Library/Application Support. Use Go > Go to Folder to jump to each path, then clear out logs you do not need. Be more careful in Application Support, because some folders hold real app data and preferences, so remove only folders belonging to apps you have already uninstalled.
6. Clean out Downloads and remove large or duplicate files
The Downloads folder is where installers, disk images, and one-off attachments pile up. Open it in Finder, switch to List view, and sort by Size to find the heaviest offenders taking up space. Disk images (.dmg files) are safe to delete once you have installed the app inside them.
To hunt down large files across the whole disk, open the Storage pane, click the info button next to Applications or Documents, and use the built-in list to spot big items. Deleting a handful of large forgotten files is often the fastest way to free up real space.
7. Uninstall unused apps and their leftover files
Dragging an app to the Trash removes the app, but it often leaves caches, preferences, and support files behind, and those leftovers keep counting toward System Data. Open the Storage pane, click Applications, and sort by size or last-accessed date to find apps you no longer open.
After you remove an app, check ~/Library/Application Support, ~/Library/Caches, and ~/Library/Preferences for folders bearing that app's name and clear them out. This is exactly the kind of tedious follow-up that a good cleaner app automates, which we come back to below.
8. Turn on Optimize Storage and remove unused languages
macOS has built-in helpers that do steady cleanup for you. In the Storage pane you will find recommendations to Store in iCloud (which offloads Desktop, Documents, Photos, and Messages), Optimize Storage (which removes Apple TV movies and shows you have already watched and keeps only recent mail attachments), and Empty Trash automatically. Turn on the ones that fit how you work.
Apple's own optimize storage on Mac guidance covers each toggle in detail. Removing unused language files that ship with apps can also reclaim space, and this is one area where a cleaner app is genuinely faster than doing it by hand.
Best apps to clear System storage on Mac (optional automated cleanup)
We always recommend trying the manual methods first, because they are free and they teach you where your space goes. But if you would rather not spend an afternoon in Terminal and Finder, a trusted cleaner app does the same work in a few clicks. The best-known option is CleanMyMac, which bundles Cleanup, Large & Old Files, an uninstaller, malware Protection, and cache and language-file removal into one guided interface, with a free trial.
In MacPaw's own testing, a CleanMyMac scan runs in about 6 seconds and surfaces roughly 15 GB of safe-to-delete junk on a typical machine. It requires macOS 11 and later. Pricing sits at around $39.95 per year or about $119.95 one-time for one Mac, though MacPaw varies prices by region and runs frequent promotions, so treat those figures as approximate. The real advantage is that it steers you away from the protected files you should not touch, which lowers the risk compared with manual Library edits.
Why System storage won't go down (troubleshooting)
If you have cleared everything and System Data still refuses to shrink, do not assume you did something wrong. On small 256 GB SSDs in particular, macOS deliberately holds space in System Data to stay stable, so it can refuse to drop no matter how much you clean. That is expected behavior, not a fault.
Two things usually break the logjam. First, give it time, because System Data reconciles in the background and the number often falls an hour or two after your cleanup. Second, when snapshot cleanup makes no dent, installing the latest macOS update frequently clears old system files and refreshes System Data on its own. A simple restart before and after helps macOS recalculate the bar accurately.
Frequently asked questions
What is System Data on Mac?
Is it safe to delete System Data?
~/Library folder and leave /System alone.How much System Data is normal on a Mac?
Why won't my System Data decrease after I clear it?
How do I check how much System Data my Mac is using?
Can I reduce System Data without a third-party app?
Conclusion
Clearing System storage on a Mac is far less mysterious once you know that "System Data" is just a bucket of caches, logs, snapshots, and old backups. Start with the free wins, empty the Trash, clear your caches, and purge Time Machine snapshots, then work down to old iOS backups and unused apps. In our experience the first three reclaim the most, and turning on Optimize Storage keeps things clutter-free. Keep at least 10% of your disk free and your Mac will stay fast and stable.