Disk Drill Review
Despite the fact that Macs are generally regarded as being very stable, users are still susceptible to data loss. There are numerous Mac recovery tools available for restoring deleted files, but selecting the right app can be challenging due to each tool’s unique set of advantages and disadvantages.
In this article, we examine Disk Drill 4 for Mac, one of the most common recovery tools for Mac users, taking a close look at its features, efficiency, and value. Disk Drill is a popular data recovery app that aims to alleviate the stress associated with data loss by combining professional data recovery capabilities with an easy-to-use interface.
How It Works
Disk Drill will restore data from unintentionally formatted disks, emptied Recycle Bins, and corrupted SD cards, among other data loss scenarios. It scans your computer for data that can be recovered and can locate your deleted music, images, videos, and documents using sophisticated algorithms.
Scans can be stopped, restored, and resumed, giving the user more options for data recovery. The files found during a scan can be viewed as a virtual disk, enabling files to be moved just like any other folder. This makes it very simple to securely relocate your files once they’ve been retrieved. You may choose to use only one scanning tool or have them all run in the best possible order for a more comprehensive data recovery session.
Interface
Disk Drill has a simple user interface that allows users to quickly access all of the program’s impressive features. The main window provides options for data recovery, backup, and security, as well as a list of recently completed scans that can be loaded.
Disks can be displayed in a comprehensive or tree format using menu bar options. You can choose whether to scan physical disks or logical volumes. The scan’s results appear in the app’s main window, where they can be stopped or restarted easily.
Choosing Data Protection shows the current Recovery Vault setup, allowing you to make any improvements you want. Disk Drill walks you through the steps of creating a byte-level backup, which will help you recover from a failed disk.
Usage
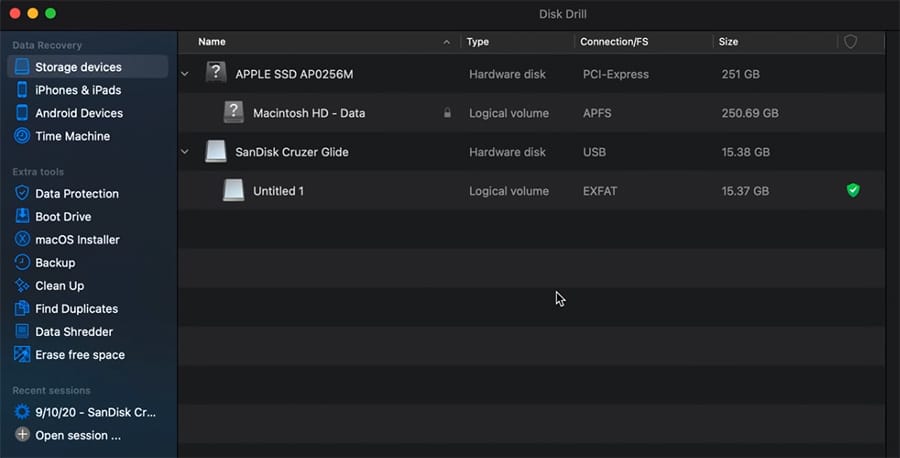
The main screen of Disk Drill displays a list of connected devices. All internal storage, as well as any connected devices like USB drives and SD cards, will be visible. There’s also the ability to mount a disk file, which is helpful if you need to access an old disk image of a drive with important documents on it.
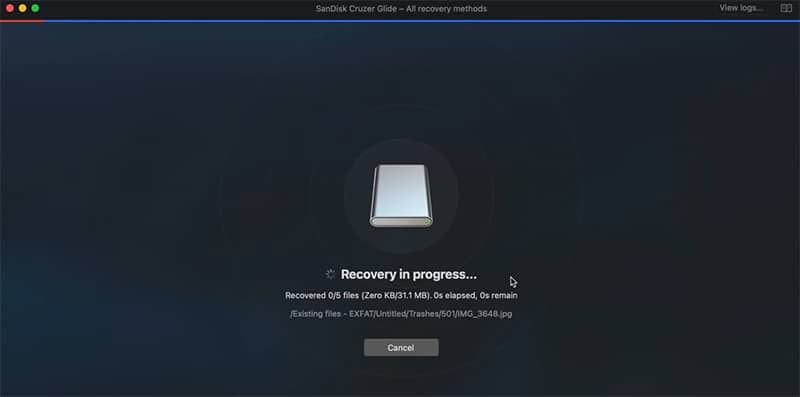
Disk Drill’s recovery process is extremely quick. Select the partition or hard drive you would like to recover, then click the right-hand recovery type drop-down menu, select the recovery type, and then select Search for Lost Data.
Disk Drill provides the option of performing individual recovery methods or all methods at once. A quick scan is obviously quicker than choosing a deep scan, but regardless of which you choose, it will display a screen that shows the current status. After that, all you have to do is pick the files you want to recover (using the left pane’s filter to find various file types), press Recover, and then choose where they will be saved.
Recovering Wasted Space on Your Mac
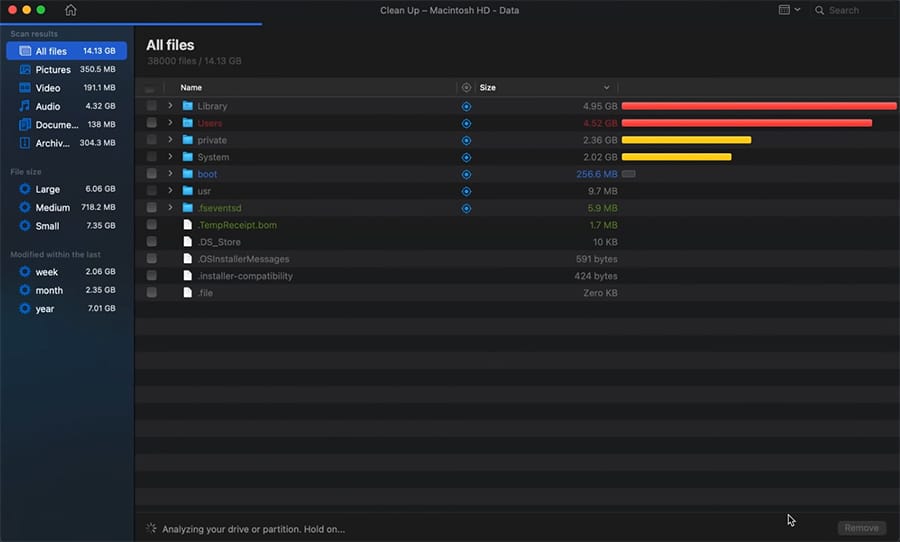
Disk Drill can find huge and unused files on your Mac disk, allowing you to clean it up. These aren’t files that should be removed outright, but they do have the ability to reduce your available storage space. Therefore, exercise caution before deleting.
One quick way to free up hard drive space is to delete the largest files that are no longer needed. Disk Drill can find massive files that aren’t used much. You must determine whether or not you can safely remove them.
Read more about Mac cleaners here.
Pricing
In comparison to other similar choices, DiskDrill Basic performs admirably. Basic also helps you make back-ups of failing disks and restore secure data in addition to verifying recoverable data.
The Pro edition, which I reviewed, is less expensive than rivals, which range from $99 to $119. CleverFiles also provides college, non-profit, and government employees a 20% discount, as well as lifetime upgrades for a reasonable $29.
Limitations
Disk Drill, on the other hand, has one flaw: it will not display the health of the file you’re trying to recover. Some competing programs will tell you about the file’s quality so you don’t waste time restoring files that have been partially overwritten by other files and are of no use. However, this program, which is identical, allows you to preview files.
Also, the fact that you can only recover files up to 500 MB is a major drawback if you need to restore more data, such as videos or a large number of smaller files. However, if all you want to do is restore images or documents, 500 MB is a lot of space and Disk Drill is appropriate in these situations.
During my testing of Disk Drill, I was able to restore multiple files without any problems. At other times, I attempted to open files that had too much corruption to open, but we were not informed of this until I recovered them and attempted to use them.
Additionally, it’s worth noting that Disk Drill can not be run from a removable drive and must be installed to the hard drive before use. This could result in the files you need to recover being overwritten.
Conclusion
While we hope you never need data recover software, Disk Drill is unquestionably the best option for recovering valuable files on a Mac.
Since there is a free trial of Disk Drill, I recommend that you try it out first. Test Disk Drill by removing any files from a SD memory card and see if it can restore them. Carry out the same procedure on your computer’s hard drive.
Once you’ve established that the software works for what you need, it will make sense to upgrade to the PRO version.